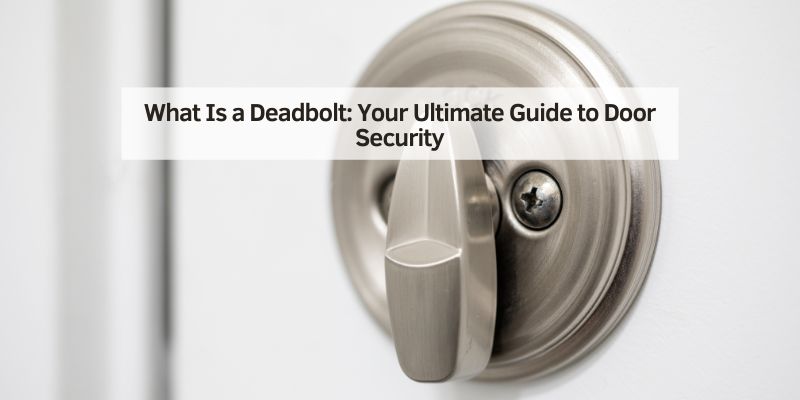
What Is a Deadbolt: Your Ultimate Guide to Door Security
Hey there! So, you’re curious about what a deadbolt is and why it’s such a big deal for keeping your home safe? I get it. When I bought my first house, I kept hearing about deadbolts, but I wasn’t sure what made them different from regular locks. After installing a few myself and figuring out how they work, I’m excited to share everything I’ve learned with you!
A deadbolt is like a trusty guard for your door, making it tough for anyone to break in. In this guide, I’ll explain what a deadbolt is, how it keeps your home secure, and why it’s a must-have. Whether you’re a homeowner, renter, or just want to know more, I’ll keep it simple and fun so you can understand it all. Let’s dive in and make your doors super secure!
What Exactly Is a Deadbolt?
Let’s start with the basics. A deadbolt is a strong lock that you operate with a key or a thumb turn. Unlike the flimsy spring locks on some doors, a deadbolt has a solid metal bolt that slides deep into the door frame. I remember the first time I locked a deadbolt on my front door—it felt so solid compared to the old lock on my apartment door.
The bolt is the star of the show. It’s a thick piece of metal, usually steel, that makes it really hard to force the door open. When I looked at my deadbolt up close, I could see why it’s so secure. It’s built to resist picking, kicking, and prying, which gives you peace of mind whether you’re home or away.
How Does a Deadbolt Work?
Understanding how a deadbolt works made me appreciate it even more. When you turn the key or thumb turn, the bolt slides into a metal strike plate on the door frame. I took a peek at mine, and it’s like the bolt locks the door and frame together, making them one solid unit.
There are two main types I’ve used:
- Single-cylinder deadbolt: This has a keyhole on the outside and a thumb turn inside. I put one on my front door because it’s easy to use from inside.
- Double-cylinder deadbolt: This needs a key on both sides. I installed one on a door with a window to stop someone from breaking the glass and unlocking it.
The bolt extends about an inch into the frame, which I measured with a ruler. That inch makes a huge difference in keeping your door secure.
Why Deadbolts Are a Game-Changer for Security
When I moved into my house, the old locks were so weak I could jiggle them open with a little effort. A neighbor suggested a deadbolt, and it was a total game-changer. Unlike spring locks, which can be popped open with a credit card, deadbolts are built tough. They don’t rely on a spring, so they’re much harder to break.
I learned that burglars often try to kick in doors or pry them open. A deadbolt’s solid bolt makes that nearly impossible. After installing one, I felt so much safer leaving my house for work or vacation. It’s like having a security guard for your door, and it’s such a simple fix.
Different Types of Deadbolts
I was surprised to find out there’s more than one kind of deadbolt. Each has its strengths, and I’ve tried a few to see what works best. Here’s what I’ve learned:
- Single-Cylinder Deadbolt: This is the most popular. I use it on my front door. You lock it with a key outside and a thumb turn inside. It’s super easy for daily use.
- Double-Cylinder Deadbolt: I put this on my back door, which has a glass panel. It needs a key on both sides, so no one can unlock it by breaking the window. I keep a key nearby for safety.
- Keyless Deadbolt: I tried a keypad deadbolt on my garage door. You punch in a code instead of using a key. It’s great when I’m carrying groceries and don’t want to fumble for keys.
- Smart Deadbolt: This is a fancy one I installed on my side door. It connects to my phone, so I can lock or unlock it from anywhere. It’s a bit pricey but perfect for tech fans like me.
Each type fits different needs. I love the convenience of my keyless deadbolt, but the single-cylinder is my go-to for most doors.
Choosing the Perfect Deadbolt for Your Door
Picking the right deadbolt can feel tricky with so many choices. I made a couple of wrong buys before I got it right. Here’s what I look for now:
- Door thickness: Most deadbolts fit standard doors (1-3/8 to 1-3/4 inches thick). I measured my door to make sure the bolt would work.
- Backset size: This is the distance from the door’s edge to the center of the lock hole. My door had a 2-3/8-inch backset, which is common, but some are 2-3/4 inches.
- Security rating: Deadbolts are graded by ANSI. I chose a Grade 1 deadbolt for my front door because it’s the strongest. Grade 2 is fine for interior doors.
- Finish: I picked a brushed nickel deadbolt to match my door handle. You can also get bronze, brass, or black to suit your style.
I spent about $35 on a solid single-cylinder deadbolt, but prices range from $15 to $150 depending on features. Check your door’s specs to avoid my mistake of buying the wrong size!
Tools and Materials for Deadbolt Installation
Installing a deadbolt is easier than it looks, and I did it with basic tools. Here’s what I used to install mine:
- Deadbolt kit: Comes with the bolt, strike plate, and screws. I got a good one for $30.
- Drill and bits: A 2-1/8-inch hole saw for the lock and a 1-inch bit for the bolt. I borrowed a drill to save money.
- Screwdriver: A Phillips screwdriver or drill bit tightens the screws. I used my cordless drill.
- Chisel: For carving recesses for the bolt and strike plate. I bought a $8 chisel.
- Measuring tape and pencil: To mark where the lock goes. I had these at home.
- Level: To keep the lock straight. My $5 bubble level worked great.
- Optional: Lock installation kit: This has templates for drilling. I used one for $12, and it made things faster.
My total cost was about $50 since I already had some tools. You can rent a drill or buy one for future projects.
Step-by-Step Guide to Installing a Deadbolt
Installing my first deadbolt was so satisfying! It took about an hour, and my door felt like a fortress afterward. Here’s how I did it:
- Mark the lock position: I measured 40 inches from the floor (standard for deadbolts) and marked the door’s edge with a pencil. I also marked the frame for the strike plate.
- Drill the holes: I used a 2-1/8-inch hole saw to drill through the door for the lock. Then, I drilled a 1-inch hole in the door’s edge for the bolt. I went slowly to avoid splintering the wood.
- Chisel the recesses: I traced the bolt and strike plate with a pencil and chiseled out shallow recesses so they’d sit flush. This took a bit of patience, but it looked so clean.
- Install the bolt: I slid the bolt into the edge hole and screwed it in, making sure it was level.
- Attach the lock: I inserted the lock through the door hole, connected the thumb turn and keyhole, and screwed them together.
- Install the strike plate: I aligned the strike plate on the frame, drilled pilot holes, and screwed it in. I tested the bolt to ensure it slid in smoothly.
- Test the lock: I locked and unlocked the deadbolt with the key and thumb turn. It worked perfectly, but I tightened a screw to be safe.
This process is straightforward once you try it. My first attempt was a bit slow, but now I can do it in 45 minutes.
Single-Cylinder vs. Double-Cylinder: Which Should You Choose?
Choosing between single- and double-cylinder deadbolts was a big decision for me. Here’s what I learned after using both:
- Single-Cylinder: I put this on my front door. It’s easy to unlock with a thumb turn inside, which is great for quick exits. But if you have a window near the door, someone could break it and reach in to unlock it.
- Double-Cylinder: I used this on my back door with a glass panel. It needs a key on both sides, so it’s super secure. I keep a key nearby for emergencies, like a fire.
I recommend single-cylinder for most doors unless you have windows close to the lock. Always prioritize safety with double-cylinder deadbolts by keeping a key accessible.
Maintaining Your Deadbolt for Long-Lasting Security
A little care keeps your deadbolt working like new. Here’s what I do to maintain mine:
- Lubricate the lock: I spray WD-40 or graphite lubricant into the keyhole and bolt every 6 months. It prevents sticking and keeps things smooth.
- Tighten screws: I check screws yearly to ensure they’re tight. A loose screw made my lock wobble once, but tightening it fixed the issue.
- Clean the lock: I wipe the deadbolt with a damp rag to remove dirt and keep it shiny.
- Test regularly: I lock and unlock my deadbolt every month to make sure it’s working. I caught a sticky bolt early this way.
These quick steps take just a few minutes and keep my deadbolt reliable for years.
Comparing Deadbolt Types
To help you pick the right one, here’s a table based on my experiences:
| Deadbolt Type | Best For | Cost | Installation Time | Security Level | Difficulty |
|---|---|---|---|---|---|
| Single-Cylinder | Everyday use, easy access | $15-$40 | 1 hour | High | Medium |
| Double-Cylinder | Doors with nearby windows | $20-$50 | 1 hour | Very High | Medium |
| Keyless Deadbolt | No keys, convenience | $50-$150 | 1.5 hours | High | Medium |
| Smart Deadbolt | Remote access, tech lovers | $100-$300 | 1.5 hours | Very High | Hard |
I love my single-cylinder for simplicity, but the smart deadbolt is awesome for tech fans. Choose based on your needs and budget.
Troubleshooting Deadbolt Problems
Sometimes, things don’t work perfectly. Here’s how I fixed some issues:
- Sticky key: If the key won’t turn easily, I spray lubricant into the keyhole. This fixed my front door lock in seconds.
- Misaligned bolt: If the bolt doesn’t slide into the strike plate, I adjust the plate’s position. I had to file mine slightly to line it up.
- Wobbly lock: If the deadbolt feels loose, I tighten the screws. I also check the door’s alignment with a level.
- Hard-to-turn key: If the key sticks, I clean the lock with compressed air and lubricate it. This happened to my garage deadbolt after a dusty summer.
These fixes are quick and keep your deadbolt in top shape.
Boosting Your Deadbolt’s Security
A deadbolt is awesome, but I’ve added a few extras to make my doors even safer:
- Longer screws: I swapped the short strike plate screws for 3-inch ones. They go deeper into the frame, making the door harder to kick in.
- Strike plate cover: I added a metal cover over the strike plate for extra strength. It cost $10 and looks sleek.
- Door reinforcement kit: I installed a kit with metal plates around the lock area for $20. It makes my door feel like a vault.
- Security bar: I use a removable bar at night for extra protection. It’s simple and super effective.
These upgrades cost me less than $50 and make my home feel like a fortress.
Why Deadbolts Are Worth It
Installing a deadbolt was one of the best home projects I’ve tackled. Every time I lock my door, I feel confident that my family and stuff are safe. It’s not just about security—it’s about feeling at ease in your own space. I saved about $100 by installing them myself, and the process was so rewarding. Whether you’re locking up for the night or heading out for a weekend trip, a deadbolt gives you peace of mind.
Conclusion
There you have it—your complete guide to what a deadbolt is and why it’s a must for your home! I’ve been through the process of picking and installing deadbolts, and I’m so excited to share these tips with you. From single-cylinder to smart locks, there’s a deadbolt for every door and lifestyle. You don’t need to be a pro—just grab some tools and follow the steps. Your home will feel safer, and you’ll love the confidence that comes with a strong lock. So, go find the perfect deadbolt, make your doors secure, and enjoy the peace of mind. Happy locking!
Frequently Asked Questions
How is a deadbolt different from a regular lock?
A deadbolt uses a solid bolt that slides into the frame, making it much stronger than a spring lock. I noticed my deadbolt was way tougher to pry open than my old spring lock.
Can I put a deadbolt on any door?
Most doors can take a deadbolt, but check the thickness (1-3/8 to 1-3/4 inches is standard). I measured my door to ensure the lock would fit properly.
Is a double-cylinder deadbolt safe to use?
It’s very secure but requires a key on both sides. I use one on my back door, but keep a key nearby for emergencies like a fire.
How long does it take to install a deadbolt?
My first deadbolt took about an hour to install. With practice, I can do it in 45 minutes. A lock installation kit makes it even quicker.
Do I need a professional to install a deadbolt?
Not usually! I did mine with basic tools and saved about $100. If you’re nervous about drilling, a locksmith can help, but it’s doable yourself.