How to Mount Ceiling Fan: Essential Guide
Mounting a ceiling fan yourself is achievable with clear steps and the right tools. This guide provides a beginner-friendly, step-by-step process to safely and securely install your new fan, ensuring a comfortable and stylish addition to your home.
Hey there, DIY friends! Md Meraj here. Ever look up at a plain ceiling and think, “This room needs a little something more”? A ceiling fan is a fantastic way to add both style and comfort. Not only do they help keep your room cool in the summer and circulate warm air in the winter, but they also act as a beautiful focal point. The thought of tackling this project might seem a bit daunting, especially if you’re new to home improvements. But trust me, with a little patience and this guide, you’ll be enjoying a perfectly installed fan in no time. We’ll break it down step-by-step, making sure you feel confident and safe throughout the process.
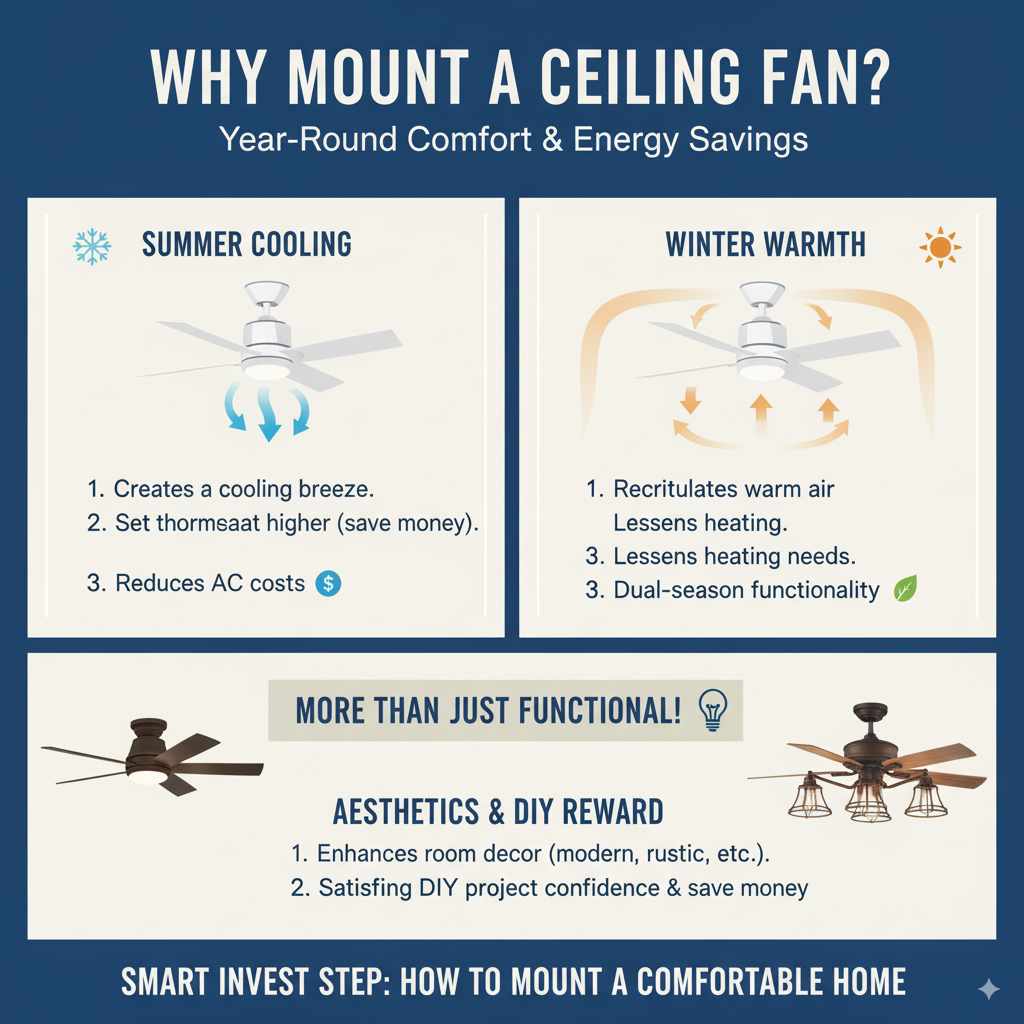
Why Mount a Ceiling Fan?
Ceiling fans are more than just decorative pieces; they’re functional powerhouses for your home. Their ability to circulate air makes a significant difference in comfort and energy efficiency. In the summer, the downdraft from a fan creates a cooling breeze, allowing you to set your thermostat a few degrees higher and save on air conditioning costs. In the winter, many fans have a reverse setting that gently pushes warm air trapped near the ceiling back down into the living space, reducing the need for constant heating. This dual-season functionality makes them a smart investment for year-round comfort and potential energy savings.
Beyond their practical benefits, ceiling fans offer a wide range of aesthetic options. From sleek, modern designs to rustic, farmhouse styles, there’s a fan to complement virtually any décor. They can instantly elevate the look of a room, adding personality and charm. Plus, installing one yourself can be a very rewarding DIY experience, boosting your confidence and saving you money on professional installation costs.
Is a Ceiling Fan Right for Your Space?
Before you dive into installation, it’s wise to consider a few things about your room and existing setup. Not all ceilings are created equal when it comes to fan installation, and understanding these nuances will help ensure a smooth project.
- Ceiling Height: For optimal airflow and safety, most ceiling fans need at least 7 feet of clearance from the floor to the fan blades. If you have very low ceilings, you might need a special low-profile or “hugger” mount fan. For rooms with high ceilings, an extension downrod will be necessary to bring the fan down to an effective height.
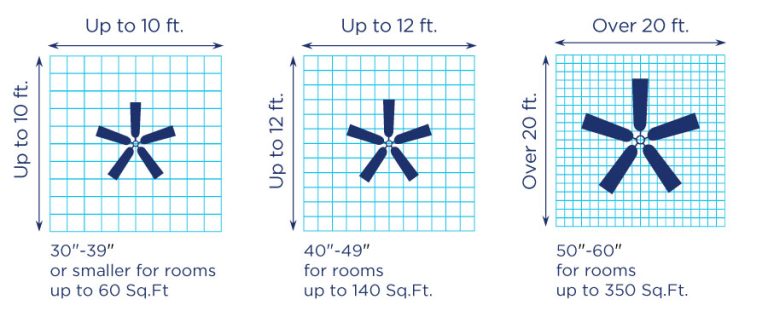
- Room Size: The size of your room dictates the appropriate fan size. A fan that’s too small won’t move enough air, while one that’s too large can create an uncomfortable downdraft. Generally, you’ll want a fan with a blade span that matches your room’s square footage.
- Existing Fixture: If you’re replacing an existing light fixture, you need to ensure the electrical box in the ceiling is rated for a ceiling fan. Standard light fixture boxes are often not strong enough to support the weight and vibration of a fan.
- Electrical Access: You’ll need a properly wired electrical box that can handle the fan’s power requirements. This is crucial for safety.
Tools and Materials You’ll Need
Gathering all your tools and materials before you start is key to a stress-free installation. Having everything within reach means you won’t have to stop mid-project to hunt for a missing item. Here’s a comprehensive list to get you prepared:
Essential Tools:
- Screwdriver Set: Both Phillips head and flathead screwdrivers are essential for various screws.
- Wire Strippers/Cutters: For safely preparing electrical wires.
- Voltage Tester (Non-Contact): Crucial for ensuring the power is off before you touch any wires. This is your most important safety tool.
- Adjustable Wrench or Pliers: For tightening nuts and bolts.
- Ladder: A sturdy, stable ladder that allows you to comfortably reach the ceiling.
- Drill with Drill Bits: For creating pilot holes or securing mounting hardware if needed.
- Safety Glasses: To protect your eyes from dust and debris.
- Work Gloves: To protect your hands.
- Pencil: For marking.
- Utility Knife: For opening packaging.
Materials Included with Your Fan (Typically):
- Ceiling fan motor housing
- Fan blades
- Blade brackets
- Mounting bracket
- Downrod (if applicable)
- Canopy (covers the ceiling connection)
- Wiring connectors (wire nuts)
- Screws and hardware
- Light kit (if included)
Potential Additional Materials:
- Ceiling Fan Rated Electrical Box: If your existing box is not rated for a fan, you’ll need to replace it. This is a critical safety upgrade. You can find these at any hardware store. For guidance on electrical boxes, the U.S. Consumer Product Safety Commission offers helpful information on electrical safety.
- Wire Connectors (extra): It’s always good to have a few extra wire nuts on hand.
- Electrical Tape: For added insulation and security on wire connections.
- Stud Finder: If you need to locate a ceiling joist for extra support.
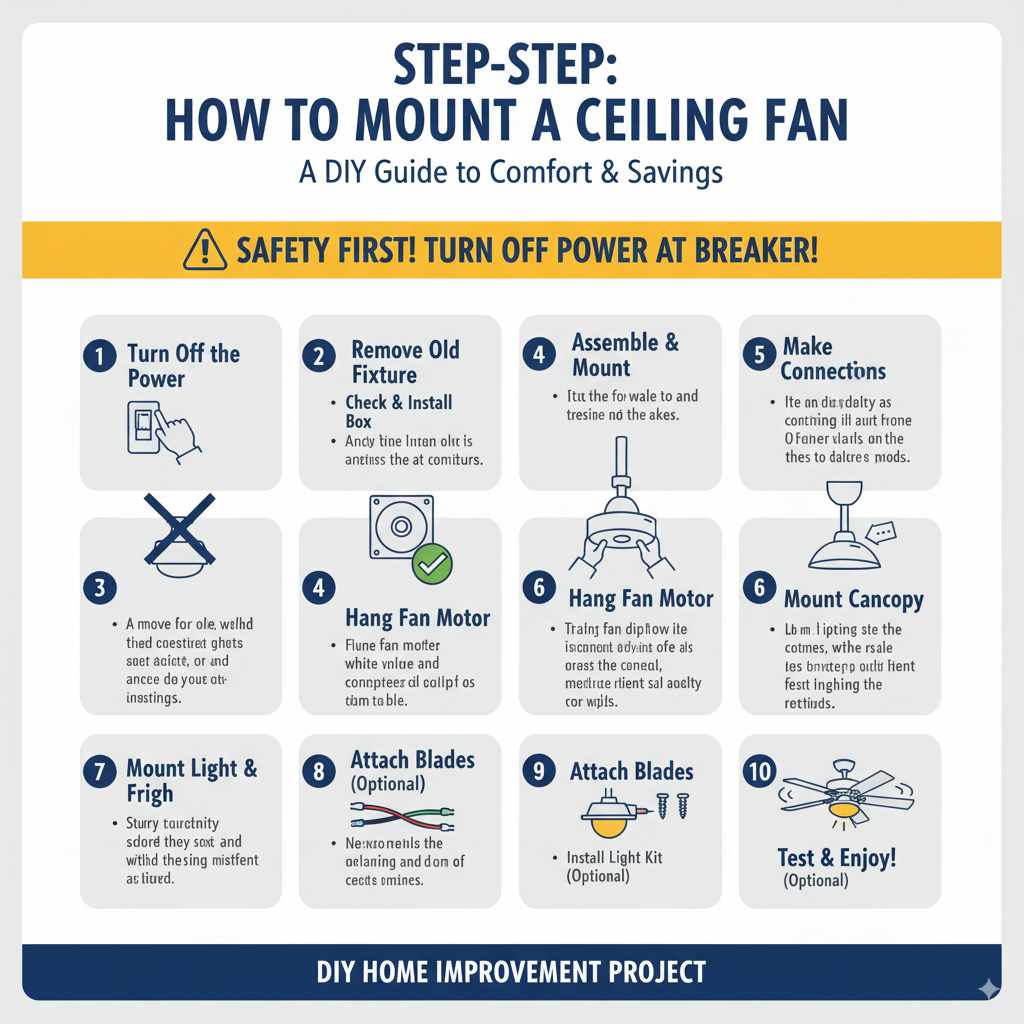
Step-by-Step: How to Mount a Ceiling Fan
Safety first, always! Before you begin any electrical work, ensure the power to the circuit you’ll be working on is completely turned off at the breaker box. Double-check with your voltage tester to be absolutely certain.
Step 1: Turn Off the Power
Locate your home’s electrical panel (breaker box). Find the breaker that controls the lights or outlet in the room where you’ll be installing the fan. Flip it to the “OFF” position. To be extra safe, you can also unscrew the light bulb in the existing fixture or remove the fixture’s cover. Use your non-contact voltage tester at the wires to confirm there’s no power. If you’re unsure which breaker controls the circuit, turn off the main breaker for the entire house.
Step 2: Remove the Old Fixture (If Applicable)
If you’re replacing an existing light fixture, carefully remove it. First, detach the canopy or cover that hides the electrical box. You’ll likely see wires connected with wire nuts. Unscrew the wire nuts to disconnect the fixture. Support the fixture as you disconnect the wires so it doesn’t fall. Once disconnected, remove any mounting screws holding the fixture to the electrical box and set the old fixture aside.
Step 3: Check and Install the Electrical Box
This is a critical step for safety. Look at the existing electrical box. Does it look sturdy? Is it metal? Most importantly, does it say “Acceptable for Fan Support” or have a similar marking? If not, or if it’s plastic, you must replace it with a fan-rated electrical box. Standard light fixture boxes are not designed to handle the weight and vibration of a ceiling fan.
Installing a Fan-Rated Box:
- If the existing box is attached to a metal bar, you might be able to unscrew it.
- If it’s directly attached to drywall or a wooden crossbar, you might need to cut a slightly larger hole in the drywall to access the joists.
- Ideally, the new fan-rated box should be mounted directly to a ceiling joist or a specialized fan brace that spans between joists. This provides the necessary support. Many fan braces are expandable and can be installed from below the ceiling.
- Follow the manufacturer’s instructions for your specific fan-rated box or brace. Ensure it’s securely fastened.
Once the fan-rated box is in place, re-route the house wires through it.
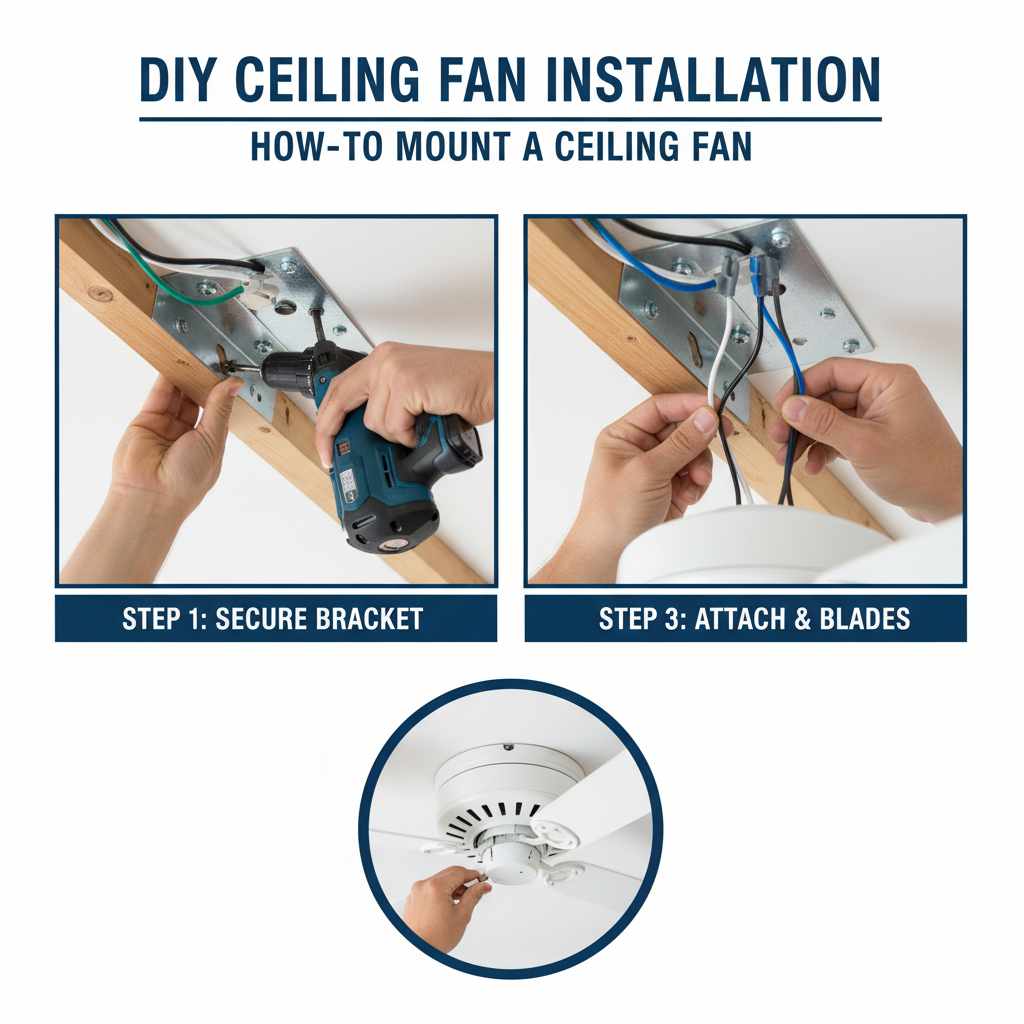
Step 4: Assemble the Fan Motor and Mount
Most ceiling fans come with a mounting bracket that attaches to the electrical box. Follow your fan’s manual for specific instructions, but generally:
- Secure the new mounting bracket to the fan-rated electrical box using the screws provided with the box or bracket. Make sure it’s tight and flush against the ceiling.
- If your fan uses a downrod, attach it to the motor housing now. This usually involves sliding the downrod through the canopy and ball joint, then securing it with a pin and screw as per the manual.
- Feed the fan’s motor wires up through the downrod and canopy.
Step 5: Hang the Fan Motor
Many mounting brackets have a hook or slot designed to temporarily hold the fan motor assembly while you make the electrical connections. This is a huge help, as it frees up your hands. Carefully lift the fan motor and hang it on the designated hook or into the slot on the mounting bracket. Ensure it’s secure enough to stay put.
Step 6: Make the Electrical Connections
This is where you connect the wires from the ceiling to the wires from your fan. It’s usually straightforward, but pay close attention to the colors:
- Ground Wires: Connect the green wire (or bare copper wire) from the ceiling to the green wire from the fan and the green wire from the mounting bracket.
- Neutral Wires: Connect the white wire from the ceiling to the white wire from the fan.
- Hot Wires: Connect the black wire (and any other colored hot wires, like red, for separate light control) from the ceiling to the corresponding colored wire(s) from the fan.
Use the provided wire nuts to secure each connection. Twist the wire nuts clockwise until they are snug. Gently tug on each wire to ensure it’s firmly in place. You can wrap electrical tape around the wire nut and wires for extra security.
If your fan has a separate light kit, you might have additional wires (often blue for light) to connect. Your fan’s manual will detail these specific connections.
Step 7: Mount the Fan Canopy
Once the wiring is complete and secure, carefully tuck the connected wires up into the electrical box. Then, slide the canopy up towards the ceiling, covering the mounting bracket and electrical box. Secure the canopy according to your fan’s instructions, usually by screwing it into the mounting bracket.
Step 8: Attach the Fan Blades
Now for the blades! Most fans require you to attach the blade brackets to the fan blades first, and then attach the blade assemblies to the motor. Again, consult your manual.
- Align the holes on the blade bracket with the holes on the fan blade.
- Insert the screws and tighten them securely. Don’t overtighten, which can strip the screws or damage the blades.
- Repeat for all blades.
- Attach the assembled blades to the fan motor by aligning the bracket holes with the threaded holes on the motor. Secure with the provided screws.
Step 9: Install the Light Kit (If Applicable)
If your fan includes a light kit, this is usually the final step. Most light kits have a wiring harness that plugs directly into the fan motor housing or requires connecting a couple of wires (often blue to blue, white to white). After connecting the wires, attach the light kit fixture to the fan using the provided screws.
Install any light bulbs and glass shades or covers according to the manual.
Step 10: Restore Power and Test
Go back to your breaker box and flip the breaker back to the “ON” position. Turn on your wall switch. Test the fan at all speed settings and check the light. Listen for any unusual noises and ensure the fan runs smoothly. If something doesn’t seem right, immediately turn off the power at the breaker and re-check your connections and assembly.
Troubleshooting Common Issues
Even with the best preparation, you might encounter a minor hiccup. Here are some common issues and how to fix them:
| Problem | Possible Cause | Solution |
|---|---|---|
| Fan Wobbles Excessively | Loose blade screws, unbalanced blades, or loose mounting bracket. | Tighten all blade screws and bracket screws. Use the balancing kit included with most fans to correct blade wobble. Ensure the ceiling box is securely mounted. |
| Fan Doesn’t Turn On | Power is off, loose wire connections, or faulty switch. | Check the breaker. Verify all wire connections are secure. Test the wall switch. If still no power, the fan motor or internal wiring might be faulty. |
| Fan Makes Humming Noise | Normal motor hum, loose light kit parts, or incompatible dimmer switch. | A slight hum is normal. Tighten any loose screws on the light kit or canopy. Ensure you are not using a dimmer switch unless your fan is specifically designed for it; use a standard on/off switch. |
| Fan Blades Not Spinning | Loose wire connections, capacitor issue, or motor problem. | Double-check all wire connections. If connections are good, the fan’s capacitor or motor may be faulty, requiring professional attention or replacement. |
| Light Kit Not Working | Loose wire connection to light kit, burnt-out bulb, or faulty light kit. | Check wire connections between fan and light kit. Replace the bulb. If it still doesn’t work, the light kit itself might need replacement. |
Safety First: Always Remember!
Working with electricity and overhead installations requires a diligent approach to safety. Here are some non-negotiable safety tips:
- ALWAYS turn off the power at the breaker box before starting any work on the electrical system. Verify with a voltage tester.
- Ensure the electrical box is rated for ceiling fan support. This is critical to prevent the fan from falling.
- Use a sturdy ladder and ensure it’s placed on a stable, level surface.
- Wear safety glasses to protect your eyes from dust and debris.
- If you are uncomfortable with any part of the electrical wiring, hire a qualified electrician. It’s better to be safe than sorry.
- Read your fan’s manual thoroughly before installation. Different models have slightly different procedures.
For more in-depth information on electrical safety, resources like the Occupational Safety and Health Administration (OSHA) provide valuable guidelines for working with electricity.
Frequently Asked Questions (FAQ)
Q1: How much weight can a ceiling fan electrical box hold?
A standard electrical box is typically rated for only 15 pounds, which is suitable for a light fixture but not a ceiling fan. A ceiling fan-rated electrical box, when properly mounted to a ceiling joist or fan brace, can safely support up to 35-50 pounds or more, depending on the specific box and mounting method.
Q2: Do I need to hire an electrician to mount a ceiling fan?
If you are comfortable with basic electrical wiring and have confirmed your existing electrical box is fan-rated (or you are replacing it with a fan-rated one), you can likely mount a ceiling fan yourself. However, if you have any doubts about your electrical knowledge or the safety of your wiring, it’s always best to hire a licensed electrician.
Q3: How do I know if my ceiling joists are in the right place?
You can use a stud finder to locate the ceiling joists. Mark their locations. For fan installation, the electrical box should be mounted directly to a joist or a fan-rated brace installed between joists. If you cannot find joists easily or are unsure, consider using an expandable fan brace kit, which is designed to be installed from below the ceiling.
Q4: What is a downrod, and do I need one?
A downrod is a pipe that extends from the fan motor to the ceiling canopy. You need a downrod if your ceiling height requires the fan to be mounted lower than a standard flush mount allows for optimal airflow and safety (generally, blades should be at least 7 feet from the floor). Most fans come with a short downrod, but longer ones are available separately.
Q5: Can I install a ceiling fan on a sloped or vaulted ceiling?
Yes, most ceiling fans can be installed on sloped ceilings, but you’ll typically need a special sloped-ceiling adapter or mounting kit. Ensure the fan’s canopy and mounting bracket are designed to accommodate the angle. The downrod length will also be crucial to ensure the fan hangs vertically and blades maintain adequate clearance.
Q6: My fan is humming, but the blades aren’t moving. What’s wrong?
This often indicates an issue with the fan’s capacitor or motor. Ensure the power is off, and double-check all wire connections. If the wiring is correct, the capacitor, which helps start the motor, might be faulty. This is a repair that may require a professional or fan replacement.
Conclusion
There you have it – a comprehensive guide to mounting your very own ceiling fan! We’ve walked through everything from choosing the right fan and gathering your tools to the crucial safety steps and the actual installation process. Remember, taking your time, reading your fan’s specific manual, and always prioritizing safety will lead to a successful and satisfying DIY project. You’ve got this! Enjoy the enhanced comfort and style your new ceiling fan will bring to your home. Happy installing!