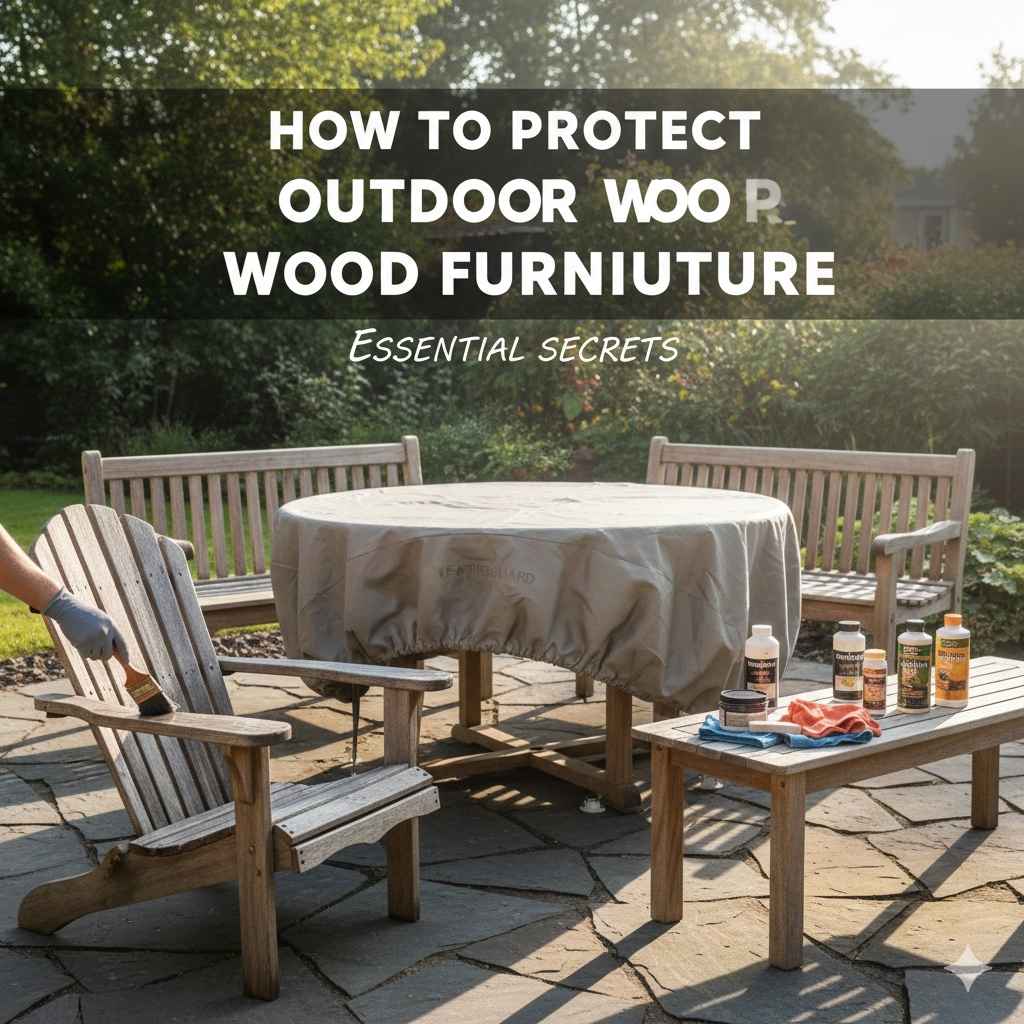
How To Protect Outdoor Wood Furniture: Essential Secrets
Protecting outdoor wood furniture means sealing it against sun, rain, and pests. For beginners, this involves simple cleaning, light sanding, and applying quality exterior stain or sealant every 1–3 years. This keeps your investment looking great and lasting much longer.
Do you love the look of your new outdoor dining set or charming patio bench, but worry about the harsh weather turning it gray and cracked? You are not alone! Outdoor wood furniture faces a tough battle every day against the sun, rain, and temperature swings. It can be frustrating to watch beautiful wood warp or fade. But I have good news: protecting that furniture doesn’t require advanced woodworking skills or expensive products. With a few simple, straightforward steps, you can give your furniture the armor it needs to last for years. This guide is written just for you—the homeowner ready to tackle easy maintenance. We’ll walk through exactly what to do, step by step, to keep that wood looking fantastic. Let’s dive into the essential secrets for long-lasting outdoor beauty!
Why Outdoor Wood Furniture Needs Serious Protection
Wood is a natural material, which means it likes to interact with its environment. When placed outside, it faces three main enemies that cause damage:
- UV Rays (The Sun): The sun’s ultraviolet (UV) rays break down the lignin in wood fibers. This causes that familiar gray, faded look, often called “weathering.” The sun dries the wood out, making it brittle.
- Moisture (Rain and Humidity): Water soaking into the wood causes it to swell. When it dries out, it shrinks. This constant cycle of swelling and shrinking creates cracks, checks, and splits, which lets even more water in. Mold and mildew thrive in this damp environment.
- Temperature Swings: Rapid changes cause the wood to expand and contract quickly, stressing the joints and finish.
Understanding these threats helps us choose the right protection. We need a barrier that blocks UV rays and repels water. This maintenance isn’t just about looks; it’s about structural integrity. A well-protected piece stays strong for outdoor use.
Secret 1: Choosing the Right Wood for Your Climate
Before we talk about protection, let’s briefly look at what you’re starting with. Different woods handle the elements differently. Knowing your wood type helps you select the best finishing product and maintenance schedule.
For beginners, understanding the difference between hardwood and softwood is helpful. Hardwoods (like teak or eucalyptus) are naturally dense and contain more natural oils, making them inherently more weather-resistant. Softwoods (like pine or cedar) are usually less expensive but require more vigilant sealing.
Comparison of Popular Outdoor Woods
| Wood Type | Natural Durability | Maintenance Needs | Best For |
|---|---|---|---|
| Teak | Very High (High natural oils) | Low (Can be left to weather naturally) | High-end, low-maintenance sets |
| Acacia/Eucalyptus | Medium to High | Medium (Requires annual oiling/sealing) | Affordable, beautiful hardwood alternatives |
| Cedar/Redwood | Medium (Resistant to rot/insects) | Medium (Requires UV protection to prevent graying) | Classic, aromatic furniture |
| Pine (Pressure-Treated) | Low to Medium (Must be sealed) | High (Needs frequent refreshing of the sealer) | Budget-friendly options |
If you have naturally resistant wood like Teak, you might only need cleaning and occasional oiling. If you have Pine or another softwood, you will need a robust, opaque finish to truly lock out moisture and UV rays.
Secret 2: The Essential Deep Clean (Preparation is Everything)
You cannot successfully seal dirty wood. Any dirt, mildew, or old finish left on the surface will be trapped underneath your new coating, leading to premature peeling and failure. This cleaning step is mandatory, even if the furniture looks okay from a distance.
Tools You Will Need for Cleaning:
- Mild dish soap or specialized wood cleaner
- Soft-bristle scrub brush or a soft cloth
- Garden hose or low-pressure washer
- Bucket
- Safety gear (gloves and eye protection)
Step-by-Step Deep Cleaning Process
- Relocate and Prepare: Move the furniture to a flat area where you can easily spray it down, like a driveway or lawn area. Cover any nearby plants to protect them from cleaning chemicals.
- Initial Rinse: Hose down the furniture thoroughly to remove loose debris, pollen, and dust.
- Mix Your Solution: Mix a bucket of warm water with a few squirts of mild dish soap. For stubborn mildew or graying, look for dedicated exterior wood cleaners designed for deck and patio use. These often contain mild oxygenating bleach that brightens the wood fibers safely.
- Scrub Gently: Dip your soft brush into the solution. Scrub every surface, paying extra attention to cracks, joints, and areas where water pools. Remember, wood grain runs lengthwise; always scrub with the grain, never against it.
- Rinse Completely: This step is crucial. Use your garden hose (keep the pressure low—too high and you can damage the wood fibers) to rinse away every bit of soap residue. Leftover soap will break down your protective finish later.
- Drying Time: Allow the furniture to dry completely. This might take 24 to 48 hours depending on humidity and temperature. The wood must be bone dry before you proceed to sanding or finishing.
Secret 3: Sanding for a Smooth, Receptive Surface
Sanding sounds intimidating, but for furniture maintenance, we are not aiming for a showroom finish. We are aiming for two things: removing the fuzzy, raised grain caused by water exposure and creating a slightly rough texture so the new finish can grip the wood.
Sanding Safety and Materials
Always wear a dust mask (N95 is ideal) and safety glasses. Sanding produces fine dust that you don’t want to breathe in. Never sand without protection.
You will need:
- Random orbital sander (optional, but speeds things up) or sanding block
- Sandpaper grits: 100-grit and 150-grit
The Two-Step Sanding Method:
- Start with 100-Grit: Use 100-grit sandpaper first, especially if there is any flaking finish or significant graying. Sand lightly, always moving with the grain. Focus on smoothing out any rough spots or fuzziness left after cleaning. For curved areas or detailed spindles, use a sanding block or wrap sandpaper around a small object.
- Follow Up with 150-Grit: Switch to 150-grit. This step smooths out the deeper scratches left by the 100-grit paper, creating a professional, soft feel without closing the pores too much.
- Clean Up: Wipe down the entire piece with a tack cloth or a lint-free cloth lightly dampened with mineral spirits (if using an oil-based finish) or just water (if using a water-based finish) to remove all dust. The wood should look clean and uniform in color.
Proper surface preparation is one of the biggest differences between a finish that lasts two seasons and one that lasts five. We are giving the new protectant something excellent to grab onto!
Secret 4: Decoding Finishes – Oil vs. Stain vs. Sealant
This is where most beginners get confused. What product do I actually use? The best way to protect outdoor wood furniture from sun damage and moisture is to use a product specifically formulated for exterior use that contains UV blockers.
Here is a breakdown of your main options:
A. Clear Oils (Good for naturally oily woods like Teak)
Oils penetrate the wood surface, nourishing the fibers from within and offering a beautiful, natural look. They help repel water and slow drying (cracking).
- Pros: Easy application, enhances natural wood beauty, easy to reapply (no sanding needed usually).
- Cons: Offers very little UV protection unless specifically blended with UV inhibitors. Needs reapplication frequently (every 6–12 months).
B. Exterior Stains (Great for changing or unifying color)
Stains penetrate like oils but also contain pigments that block UV rays. They come in transparent, semi-transparent, and solid (opaque) colors.
- Transparent/Semi-Transparent: Offers moderate UV protection while letting the wood grain show. Requires reapplication every 1–2 years.
- Solid/Opaque: Acts almost like paint, providing maximum UV protection. Requires sanding before recoating, similar to paint.
C. Protective Sealants & Water Sealers (The best all-around choice for beginners)
These are often oil-based or high-quality acrylic formulas that sit slightly on top of the wood while still allowing it to breathe. Look for products labeled “Exterior Wood Finish,” “Deck and Patio Sealant,” or “UV Protective Sealer.
Expert Tip: For beginners protecting softer woods like Pine, choose an acrylic or polyurethane exterior deck sealer that includes pigment (even a light amber tint) for better UV blockage. Check resources from organizations like the U.S. Forest Products Laboratory for data on exterior wood protection methods.
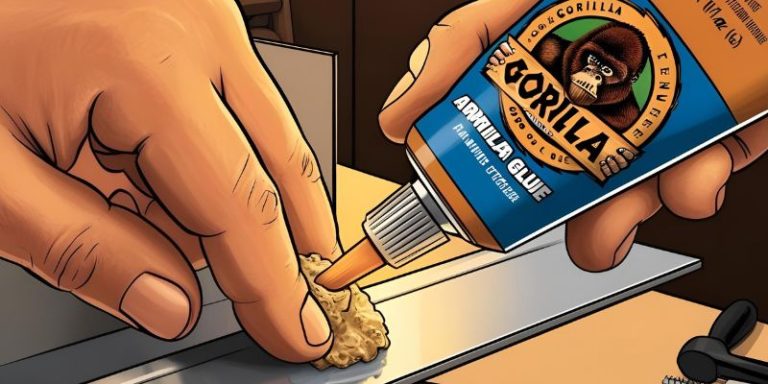
Secret 5: Applying the Finish Like a Pro
Once you’ve chosen your high-quality exterior sealant or stain, application is key to long-lasting results. We are aiming for even coverage without creating thick, sticky puddles.
Application Tools You Will Need:
- The chosen sealer/stain
- Natural bristle brush (if using oil-based) or synthetic brush (if using water-based)
- Foam applicator pads (great for flat surfaces)
- Drop cloth or plastic sheeting
The Finishing Steps
- Read the Can! Every product has specific instructions on temperature, humidity, and recoat windows. Follow them exactly.
- Work in Sections: Do not try to finish the whole chair at once. Start with the legs, then the seat slats, then the backrest.
- Apply Thin Coats: This is the single most important rule for beautiful, durable exterior finishing. Apply the product liberally but ensure you immediately brush out any excess material. You want the wood to soak up what it needs, not sit under a thick layer of wet product.
- Follow the Grain: Always brush in long, smooth strokes following the direction of the wood grain.
- The “Wipe-Off” Technique (For Oils/Penetrating Stains): If you are using a penetrating oil or semi-transparent stain, wait about 15–30 minutes after the initial application. Then, take a clean, dry rag and wipe off any product that the wood did not fully absorb. This prevents the finish from getting sticky or gummy in humid weather.
- Drying Time: Allow the first coat to dry completely according to the manufacturer’s instructions (often 4–24 hours). If the surface feels slightly tacky, it is not ready.
- Recoat (If Necessary): Most quality exterior finishes recommend two thin coats for maximum protection. Lightly sand with very fine 220-grit paper between coats if the can suggests it, then apply the second coat, wiping off the excess as before.
Secret 6: Understanding the Importance of “Breathing”
When protecting outdoor furniture, the goal is rarely to create a completely airtight plastic shell. We want the wood to be protected from direct rain and sun while still allowing moisture vapor inside the wood to escape. If you trap moisture inside, it can still cause warping and cracking.
This is why most woodworkers recommend using penetrating stains or exterior deck sealers over heavy-duty, opaque polyurethane meant for indoor floors. Polyurethane is great for tabletops that don’t move much, but on a chair that expands and contracts daily, a thick layer of non-breathable sealant will eventually crack, peel, and look terrible.
When to Use Solid Paint/Enamel: The only time a very thick, opaque coating (like exterior enamel paint) makes sense is if you are working with low-cost, non-durable woods (like basic Pine) and you intend to strip and completely refinish the item every few years anyway. For the homeowner looking for ease and longevity, penetrating finishes that allow the wood to breathe are usually superior.
Secret 7: Ongoing Maintenance Schedules (The Key to Longevity)
Protecting wood furniture isn’t a one-time project; it’s a relationship! The most successful wood owners stick to a simple, routine schedule. This prevents small issues from turning into huge restoration projects.
Annual/Seasonal Maintenance Schedule
| Time of Year | Action Required | Focus Area |
|---|---|---|
| Early Spring (Before Use) | Deep Clean and Inspection | Check joints for wobbles, look for mildew growth, perform light sanding if needed. Apply a fresh coat of sealer/oil. |
| Mid-Summer (Peak Sun) | Spot Check and Quick Wipe-Down | Wipe down surfaces to remove dust/pollen. If using oil, consider a very light re-oiling on high-touch areas like armrests. |
| Late Fall (Before Storing) | Thorough Cleaning | Remove all dirt and debris. Apply a final light coat of sealant. Ensure all cushions and fabrics are stored indoors. |
| Winter (Storage) | Proper Storage | Store furniture in a dry, covered area (garage or shed). If this isn’t possible, cover tightly with a breathable, high-quality furniture cover. |
If you notice the wood darkening rapidly or water no longer beads up on the surface when it rains, that is your signal—it is time for a refresher coat immediately!
Practical Tips for Storage and Placement
Even the best finish can’t conquer constant exposure to standing water or direct, relentless sunlight year-round. Smart placement and storage habits make your protective efforts go much further.
Placement Wisdom
- Seek Shade During Peak Hours: If possible, position furniture under an awning, pergola, or large tree during the hottest part of the day (11 AM to 3 PM). This drastically reduces UV damage.
- Avoid Direct Ground Contact: Never leave wood furniture sitting directly on damp grass or bare soil. The wood absorbs moisture from below, causing rapid rot and inviting pests. Use rubber feet or small plastic risers under the legs to create a slight air gap.
- Consider Water Runoff: Do not place wood furniture directly under a leaky gutter or where rainwater constantly pools and runs off.
Storage Secrets
If you live in an area with harsh winters, storing furniture is the single best way to extend its life, regardless of the wood type or finish.
- Clean Everything First: Never store dirty furniture! Dirt and moisture trapped under a cover breed mold.
- Ensure Airflow: If using a plastic tarp or cover, ensure it is loosely draped or has vents. Tight, non-breathable plastic traps condensation inside, which is worse than being outside in the elements. Look for specialized, vented furniture covers.
- Stack Carefully: When stacking chairs or tables, use rags, bubble wrap, or small pieces of foam between the surfaces to prevent the protective finish you just applied from sticking together or being scratched in storage.
Troubleshooting Common Outdoor Wood Issues
Even with the best intentions, sometimes things go wrong. Here are quick, simple fixes for common beginner problems:
Issue 1: Mildew or Green/Black Spots
Mildew is just surface growth thriving on dirt and moisture.
The Fix: Revisit Secret 2. Use a cleaner containing a small amount of diluted bleach or an oxygenated brightener (check the label to ensure it is safe for your wood type). Scrub gently and rinse thoroughly. Allow to dry completely before resealing.
Issue 2: The Finish is Flaking Off
This almost always means the original surface was not cleaned or sanded well enough, or the finish was applied too thick.
The Fix: You must remove the peeling layer. Use a plastic scraper to gently lift the large flakes. Then, lightly sand the entire area with 120-grit paper until the remaining finish feathers smoothly into the bare wood. Clean thoroughly and apply a thin, fresh coat.
Issue 3: Small Cracks (Checks) Appear
These fine lines usually appear near the ends of boards due to rapid drying or swelling.
The Fix: If the crack is tiny (hairline), you can often simply seal over it with a high-quality penetrating oil or a flexible exterior caulk designed for wood gaps. If the crack is large and goes all the way through, the board might be failing and may need replacement if it compromises the structure.
Frequently Asked Questions (FAQ) for Protecting Outdoor Wood Furniture
Q1: How often do I really need to apply a sealer to my patio set?
A: It depends on the product and climate. For quality exterior sealants, plan on refreshing the coat every 1 to 3 years. If you use natural oil, plan on every 6 to 12 months. Test by sprinkling water; if it soaks in instead of beading up, it’s time to reseal.
Q2: Can I use interior polyurethane on my outdoor table?
A: No, absolutely not. Interior polyurethane does not contain the necessary UV inhibitors to stop the sun from breaking it down. It will quickly turn yellow, crack, and peel off when exposed to direct sun and rain.
Q3: Do I have to sand the entire piece every time I reseal?
A: If you are reapplying the same type of oil or stain after only one year, and the surface is still looking good, you likely only need a light cleaning and maybe a very fine scuff sanding (220-grit) just to help the new product adhere. If you used a solid paint that is failing, then yes, sanding down to the wood is required.
Q4: Is it better to use an oil finish or a paint finish?
A: For easy maintenance and a natural look, a clear or semi-transparent oil or sealant is generally better because it doesn’t chip or peel; it fades gracefully and is easy to reapply. Paint offers superior UV protection but requires intensive prep work (stripping and sanding) when it eventually needs refresh.
Q5: My furniture is made of teak. Do I still need to seal it?
A: Teak contains natural oils that make it incredibly resistant to rot and pests. Most owners prefer to let teak weather naturally to its silvery-gray patina. If you want to keep the original honey-brown color, you must use a dedicated Teak Oil every 6–12 months. Sealing isn’t necessary for longevity, only for color retention.
Q6: Should I clean my furniture with a pressure washer?
A: Be extremely cautious. A pressure washer, even on a low setting, can easily force water deep into the wood grain and lift the wood fibers, essentially “shredding” the surface. A standard garden hose with a spray nozzle is safer and sufficient for prep cleaning.
Q7: What’s the difference between a stain and a sealant?
A: A stain primarily adds color and moderate UV protection by soaking into the wood. A sealant (or water sealer) is designed primarily to repel surface water. The best exterior products often combine both functions into one UV-protective, penetrating finish.
Conclusion: Enjoying Your Restored Outdoor Space
See? Protecting your outdoor wood furniture is much simpler than it first appears. By remembering the essentials—cleaning thoroughly, sanding lightly to create a receptive surface, and choosing a high-quality exterior finish with UV blockers—you have the power to keep that patio set looking beautiful for years to come. Don’t stress over perfection; focus on consistency. A quick yearly check-up is far easier than a massive restoration project down the road.
Remember that the wood you are working with is tough; it just needs the right armor against the elements. Grab your cleaner and brush this weekend, tackle that deep clean, and apply a fresh coat of sealer. You will feel a huge boost of confidence seeing that beautiful wood restored and ready for summer afternoons. Go ahead—your newly protected patio furniture is waiting for you!