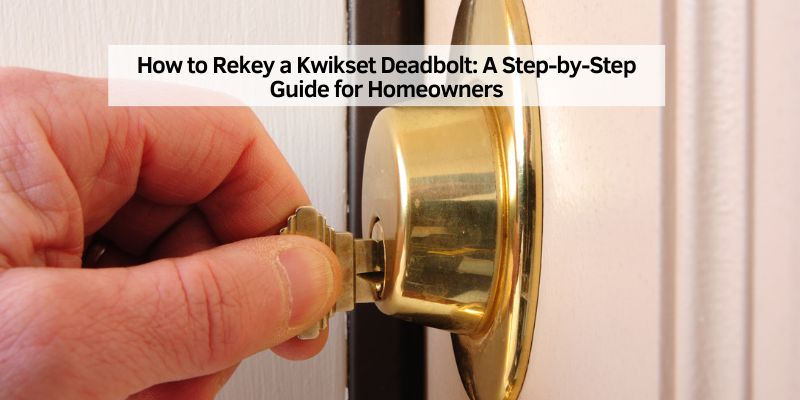
How to Rekey a Kwikset Deadbolt: A Step-by-Step Guide for Homeowners
Hey there! So, you’ve got a Kwikset deadbolt on your door, and you’re thinking about rekeying it. Maybe you just moved into a new place, lost a key, or want all your locks to work with one key. I totally get it—there’s something so satisfying about taking control of your home’s security without shelling out big bucks for a locksmith. I’ve been down this road myself, and let me tell you, rekeying a Kwikset deadbolt is easier than you might think.
Whether you’re a DIY newbie or a seasoned home improvement buff, this guide is for you. I’m going to walk you through everything I’ve learned from my own experience, from the tools you’ll need to the step-by-step process, and even some troubleshooting tips for those “oops” moments. Let’s dive in and get your deadbolt rekeyed like a pro!
Why Rekeying Your Kwikset Deadbolt Makes Sense
When I first moved into my house, I had a bunch of keys for different doors. It was a hassle carrying them all around, and I worried about who else might have copies of the old keys. Rekeying my Kwikset deadbolt was a game-changer. It’s a process where you change the lock’s internal mechanism so it works with a new key, without replacing the entire lock. This saves money and gives you peace of mind.
Rekeying is perfect if you’ve just bought a home, had a roommate move out, or lost a key. It’s also great for making all your locks work with one key, which is a lifesaver for forgetful folks like me. Kwikset deadbolts, especially those with SmartKey technology, are designed to make this process super simple. You don’t need to be a locksmith or have fancy tools. With a little patience, you can do it yourself in just a few minutes.
Understanding Kwikset Deadbolts and SmartKey Technology
Before we get to the how-to, let’s talk about what makes Kwikset deadbolts special. Kwikset is one of the most popular lock brands in the USA, and their SmartKey technology is a big reason why. I was amazed when I first learned how it works. Unlike traditional locks that require you to take them apart and swap out tiny pins, SmartKey lets you rekey the lock right on the door. You just need the current key, a new key, and a small tool that comes with the lock.
If your Kwikset deadbolt doesn’t have SmartKey technology, don’t worry. You can still rekey it, but it’s a bit more involved. You’ll need to remove the lock and work with the internal pins, which I’ll cover later. Knowing whether your deadbolt has SmartKey or not is the first step, so check your lock or the packaging. If there’s a small slot next to the keyhole, you’ve likely got a SmartKey model.
Tools and Materials You’ll Need
When I rekeyed my first Kwikset deadbolt, I was surprised at how few tools I needed. Here’s what you’ll want to gather before you start. I’ve included two lists—one for SmartKey deadbolts and one for traditional pin-and-tumbler models—so you’re covered either way.
| Type of Kwikset Deadbolt | Tools and Materials Needed |
|---|---|
| SmartKey Deadbolt | – Current working key – New Kwikset-compatible key (KW1 or KW10) – SmartKey tool (included with the lock) – A stable workspace (like a table) – Optional: A doorstop to keep the door open |
| Traditional Pin-and-Tumbler Deadbolt | – Current working key (if available) – New Kwikset-compatible key – Kwikset rekeying kit (includes pins, clips, and tools) – Phillips screwdriver – Tweezers or small pliers – Magnifying glass (optional, for small parts) – A clean, well-lit workspace |
For SmartKey models, the process is so straightforward that you might already have everything you need. For traditional models, a rekeying kit is a must, and you can find them at most hardware stores for about $10-$15. I picked mine up at Home Depot, and it came with clear instructions and enough pins to rekey multiple locks.
Step-by-Step Guide to Rekeying a SmartKey Kwikset Deadbolt
Alright, let’s get to the fun part! Rekeying a SmartKey deadbolt is so quick, I felt like a DIY superhero when I did it. Here’s how I did it, step by step.
Step 1: Prepare Your Door
First, make sure your door is fully open. I learned this the hard way when my door swung shut mid-process, and I had to scramble for another way in. If your deadbolt is locked, that’s perfect—keep it that way. If it’s not, lock it now. This ensures the lock is in the right position for rekeying.
Step 2: Insert the Current Key
Take the key that currently works with your deadbolt and insert it into the keyhole. Turn it 90 degrees clockwise so the key is horizontal. This puts the lock in “rekey mode.” I found it helpful to hold the key firmly to keep it steady.
Step 3: Use the SmartKey Tool
Next, grab the SmartKey tool—it’s a small, metal tool with a forked end. There’s a tiny slot next to the keyhole on the lock. Push the SmartKey tool into that slot until you feel a click. It might take a little wiggle, but don’t force it. When I did this, I was surprised at how satisfying that click felt!
Step 4: Remove the Current Key
Gently pull out the current key while keeping the SmartKey tool in place. If the key doesn’t come out easily, double-check that the tool is fully inserted. I had to try this twice the first time because I wasn’t patient enough.
Step 5: Insert the New Key
Now, take your new key and insert it fully into the keyhole. Make sure it’s all the way in—the edge of the key should touch the indent in the lock. Without pushing or pulling, rotate the key 180 degrees counterclockwise, then 180 degrees clockwise, and finally back 90 degrees counterclockwise to the starting position. This resets the lock to work with the new key.
Step 6: Test the New Key
Remove the SmartKey tool and test the new key by locking and unlocking the deadbolt. I was thrilled when my new key worked perfectly on the first try. If it doesn’t work, repeat the process from Step 2, making sure each step is done carefully.
That’s it! In about five minutes, you’ve rekeyed your SmartKey deadbolt. I couldn’t believe how easy it was compared to what I’d heard about rekeying locks.
Rekeying a Traditional Kwikset Deadbolt (Pin-and-Tumbler)
If your Kwikset deadbolt isn’t a SmartKey model, rekeying takes a bit more effort, but it’s still doable. I tackled this with my back door lock, and while it was trickier, it was totally worth it. Here’s how to do it.
Step 1: Remove the Deadbolt
Start by removing the deadbolt from the door. Use a Phillips screwdriver to unscrew the two screws on the thumb-turn side (inside the house). Once the screws are out, carefully pull the deadbolt assembly apart. I found it helpful to lay out the parts on a clean table so nothing got lost.
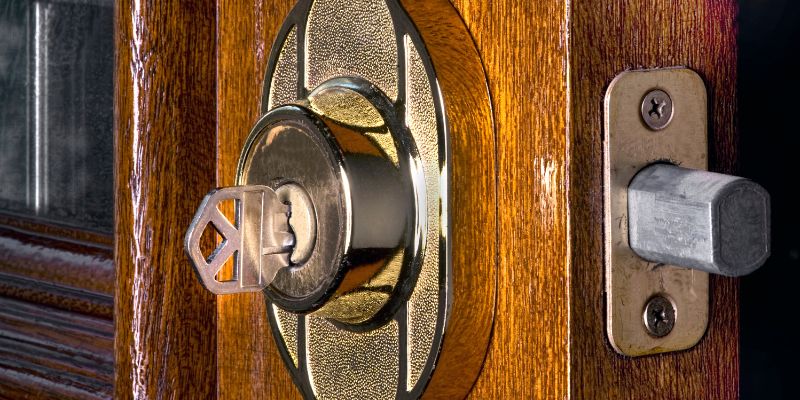
Step 2: Remove the Cylinder
The lock cylinder is the part that holds the keyhole. It’s usually held in place by a retaining clip or screw. Use tweezers or small pliers to remove the clip—be gentle, as it’s easy to bend. I dropped mine the first time and spent 10 minutes searching the floor!
Step 3: Disassemble the Cylinder
Once the cylinder is out, remove the plug (the part where the key goes) by taking off the C-clip or nut at the back. This is where a rekeying kit comes in handy. The kit includes a follower tool to push the plug out without spilling the tiny pins and springs. I recommend working over a tray to catch any parts that might fall.
Step 4: Measure the New Key
Your rekeying kit should include a key gauge to measure the cuts on your new key. Insert the key into the gauge, starting with the cut closest to the bow (the part you hold). Slide it until it stops, and note the number above the cut. Repeat for all five or six cuts. This tells you which pins to use.
Step 5: Replace the Pins
Empty the old pins from the plug and insert new ones from the rekeying kit, matching the numbers from the key gauge. I used tweezers to place the pins, and a magnifying glass helped me see the tiny numbers. Make sure each pin sits flush in its chamber.
Step 6: Reassemble the Lock
Slide the plug back into the cylinder, reattach the C-clip or nut, and put the cylinder back into the lock housing. Reinstall the deadbolt on the door, tightening the screws securely. Test the new key to make sure it locks and unlocks smoothly. I had to adjust a pin once because I’d mixed up the order, but it was an easy fix.
This process took me about 20 minutes, but it felt so rewarding to know I’d done it myself.
Rekeying Without the Original Key
What if you’ve lost the original key? I ran into this issue when I found an old Kwikset deadbolt in my garage with no key. For SmartKey models, you’re out of luck without the original key—you’ll need to call a locksmith or replace the lock. But for traditional pin-and-tumbler deadbolts, you can still rekey it. Here’s how I did it.
Step 1: Gather Tools
You’ll need a flathead screwdriver, tweezers, a rekeying kit, and a new key. A magnifying glass and good lighting are super helpful for working with small parts.
Step 2: Remove the Lock and Cylinder
Follow the same steps as above to remove the deadbolt and cylinder. This part is identical to rekeying with a key.
Step 3: Disassemble and Reset
Remove the C-clip and slide out the plug. Since you don’t have the original key, you’ll need to pick the lock or use a reset cradle (available at some hardware stores) to align the pins. I took mine to a local hardware store, where they reset it for me in minutes.
Step 4: Install New Pins
Once the plug is reset, follow the pin replacement steps using your new key’s measurements. Reassemble and test the lock.
This process is a bit more technical, so if you’re not confident, a locksmith can do it for about $75-$130. But I saved money by doing it myself, and it was a great learning experience.
Common Mistakes and How to Avoid Them
I’ll be honest—I made a few mistakes when I first tried rekeying my Kwikset deadbolt. Here are some pitfalls to watch out for:
- Not Locking the Deadbolt First: For SmartKey models, the deadbolt must be locked before you start. I forgot this once, and the process didn’t work.
- Using a Non-Compatible Key: Make sure your new key is a Kwikset KW1 or KW10. I tried using a random key once, and it jammed the lock.
- Forcing the SmartKey Tool: Be gentle with the tool. If it doesn’t click, wiggle it slightly instead of pushing harder.
- Losing Small Parts: For pin-and-tumbler locks, those tiny pins and springs can disappear fast. Work over a tray or cloth to catch them.
- Not Testing the New Key: Always test the new key before calling it done. I skipped this once and had to redo the whole process.
Take your time, and you’ll avoid these headaches. I learned that patience is key (pun intended!).
Benefits of Rekeying Your Kwikset Deadbolt
Rekeying my Kwikset deadbolt was one of the best home improvement projects I’ve tackled. Here’s why I think it’s worth doing:
- Cost Savings: Hiring a locksmith can cost $75-$130 per lock. Rekeying yourself costs less than $15 for a kit.
- Convenience: One key for all your doors is a game-changer. I love not fumbling with a keyring.
- Security: Knowing only you have the key to your home is priceless. It’s especially important for new homeowners or renters.
- DIY Satisfaction: There’s something so empowering about doing it yourself. I felt like a pro after my first rekey.
When to Call a Professional
I’m all about DIY, but sometimes it’s best to call a locksmith. If you’ve lost the original key for a SmartKey deadbolt, or if you’re dealing with a damaged lock, a professional can save you time and frustration. I called one when I accidentally bent a retaining clip, and they had it fixed in no time. If you’re rekeying multiple locks or don’t feel confident with small parts, a locksmith is worth the investment.
Maintenance Tips for Your Kwikset Deadbolt
To keep your newly rekeyed deadbolt working smoothly, a little maintenance goes a long way. I lubricate my locks every six months with a graphite-based lubricant—don’t use WD-40, as it can gum up the mechanism. Clean the keyhole with compressed air to remove dust, and check the screws periodically to ensure they’re tight. These simple steps have kept my deadbolts in top shape for years.
Conclusion
Rekeying a Kwikset deadbolt is one of those projects that feels daunting at first but is so rewarding once you’ve done it. Whether you’ve got a SmartKey model that takes five minutes or a traditional one that requires a bit more elbow grease, you’re taking control of your home’s security in a big way. I remember the first time I rekeyed my deadbolt—I was nervous I’d mess it up, but following the steps carefully made it a breeze.
Now, I’ve got one key for all my doors, and I sleep better knowing my home is secure. So grab your tools, take your time, and give it a shot. You’ll be amazed at what you can do! If you run into trouble, don’t hesitate to ask a locksmith for help. Here’s to making your home safer and your life simpler, one key at a time.
FAQs
Can I rekey a Kwikset deadbolt without the original key?
For SmartKey deadbolts, you need the original key to rekey it. Without it, you’ll need a locksmith or a new lock. For traditional pin-and-tumbler deadbolts, you can rekey without the key by disassembling the lock and using a rekeying kit or reset cradle.
How long does it take to rekey a Kwikset deadbolt?
Rekeying a SmartKey deadbolt takes about 5 minutes. For a traditional pin-and-tumbler deadbolt, expect 10-20 minutes, depending on your experience.
Can I use any key to rekey my Kwikset deadbolt?
No, the new key must be a Kwikset-compatible key (KW1 or KW10). Other brands, like Schlage, won’t work because the keyways are different.
How many times can I rekey a Kwikset deadbolt?
You can rekey a Kwikset deadbolt as many times as you want. SmartKey models have no limit, and pin-and-tumbler models just need new pins from a rekeying kit.
Is it better to rekey or replace a Kwikset deadbolt?
Rekeying is usually cheaper and faster if the lock is in good condition. If the deadbolt is worn out or damaged, replacing it might be a better option.
Do I need a locksmith to rekey a Kwikset deadbolt?
Not usually! SmartKey deadbolts are designed for easy DIY rekeying. Traditional models are a bit trickier but still manageable with a rekeying kit. Call a locksmith if you’re unsure or don’t have the right tools.