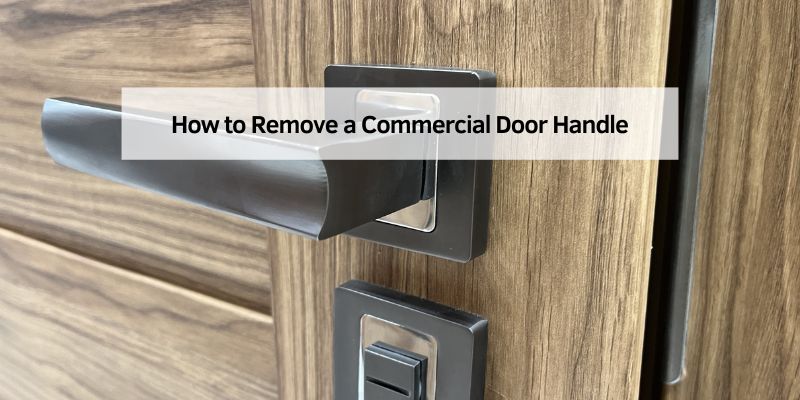
How to Remove a Commercial Door Handle
Hey there! If you’ve ever walked into a business or office and noticed those sturdy, shiny commercial door handles, you might think they’re impossible to remove without a professional. Trust me, I’ve been there. A few years ago, I was tasked with updating the door hardware in my small office, and I had no idea where to start. After some trial and error (and a few YouTube videos), I figured out that removing a commercial door handle isn’t as intimidating as it seems. Whether you’re a business owner, a maintenance worker, or just someone looking to replace a worn-out handle, I’m here to guide you step-by-step. In this article, I’ll walk you through everything I’ve learned about removing a commercial door handle safely and efficiently. Let’s dive in!
Understanding Commercial Door Handles
Before we get our hands dirty, let’s talk about what makes commercial door handles different. Unlike the knobs you find on residential doors, commercial door handles are built for heavy use. They’re often found in offices, stores, or restaurants, where hundreds of people might use them daily. These handles come in various types, like lever handles, push bars, or pull handles, and they’re usually made of durable materials like stainless steel or brass.
I remember the first time I tried to remove a lever handle in my office. I thought it would be like twisting off a regular doorknob, but I quickly learned these handles are secured with hidden screws or special mechanisms to prevent tampering. Knowing the type of handle you’re dealing with is key, so take a moment to inspect it. Is it a lever? A push bar? Does it have a key cylinder? This will help you prepare for the removal process.
Tools You’ll Need
Let’s start with the tools. I learned the hard way that having the right tools makes all the difference. When I first tried removing a commercial door handle, I grabbed a regular screwdriver and ended up stripping a screw. Don’t make my mistake! Here’s what you’ll need:
| Tool | Purpose |
|---|---|
| Flathead screwdriver | For prying off covers or loosening screws |
| Phillips screwdriver | For removing screws |
| Allen wrench | For set screws in some handles |
| Small flashlight | To see hidden screws or mechanisms |
| Lubricant (like WD-40) | To loosen stuck parts |
| Rag or cloth | To clean up or protect the door surface |
Having these tools ready will save you time and frustration. If you’re unsure about the handle type, an Allen wrench set with multiple sizes is a good idea, as some commercial handles use tiny set screws.
Preparing for the Job
Before you start unscrewing anything, take a few minutes to prepare. I can’t stress this enough—preparation is everything. When I removed the handle on my office door, I didn’t check if the door was locked, and I ended up locking myself out mid-process. Embarrassing, right? Here’s how to avoid that:
First, make sure the door is unlocked. If it’s a keyed handle, have the key handy just in case. Next, clean the handle and surrounding area with a rag to remove dirt or grime. This makes it easier to spot screws or mechanisms. If the handle feels stuck or rusty, spray a bit of lubricant around the base and let it sit for a few minutes. Finally, lay down a cloth or tarp to catch any screws or small parts that might fall. Trust me, losing a tiny screw in a carpet is not fun.
Identifying the Handle Type
Not all commercial door handles are the same, and figuring out what you’re working with is crucial. I’ve dealt with a few types over the years, and each one has its quirks. Here are the most common ones you’ll encounter:
- Lever Handles: These are long, horizontal handles you push down to open the door. They often have a small set screw or a cover plate hiding the mounting screws.
- Push Bars: Found on emergency exits, these are wide bars you push to open the door. They’re usually secured with screws on the inside of the door.
- Pull Handles: These are simple handles you pull to open the door, often found on glass doors. They’re typically held in place with bolts or screws.
- Key-in-Lever Handles: These have a lock cylinder built into the lever. You’ll need to deal with the lock mechanism during removal.
Take a close look at your handle. If you see a small hole on the base, that’s likely for an Allen wrench. If there’s a cover plate, you’ll need to pry it off to access the screws. Knowing the type helps you decide which tools to use and what to expect.
Step-by-Step Removal Process
Now, let’s get to the fun part—actually removing the handle. I’ll break this down into clear steps based on my experience. Follow these, and you’ll have that handle off in no time.
Step 1: Locate the Fasteners
Start by examining the handle for screws, bolts, or set screws. On my office door, I found a tiny hole on the underside of the lever that needed an Allen wrench. For lever handles, check the base or the side for a set screw. If it’s a push bar or pull handle, look for screws on the inside of the door. Sometimes, there’s a decorative cover plate hiding the screws. Use a flathead screwdriver to gently pry it off. Be patient here—scratching the door is the last thing you want.
Step 2: Remove the Set Screw or Cover Plate
If your handle has a set screw, insert the correct size Allen wrench and turn it counterclockwise to loosen it. Don’t force it; if it’s stuck, a bit of lubricant can help. For cover plates, slide your flathead screwdriver under the edge and gently pop it off. I remember struggling with a cover plate that was stuck on tight, but a little wiggling did the trick. Once the plate is off, you’ll see the mounting screws.
Step 3: Unscrew the Handle
Grab your Phillips screwdriver and remove the screws holding the handle in place. Most commercial handles have two to four screws. Turn them counterclockwise and keep them in a safe place—I use a small bowl to avoid losing them. If the screws are tight, apply steady pressure to avoid stripping them. On one of my projects, I had to use a manual screwdriver instead of an electric one to get better control.
Step 4: Remove the Handle and Spindle
Once the screws are out, the handle should come off easily. Pull it gently away from the door. Some handles have a spindle (a metal rod) connecting the inside and outside pieces. If it doesn’t budge, wiggle it a bit or check for any hidden screws you might have missed. For key-in-lever handles, you may need to remove the lock cylinder first. Look for a small clip or screw holding it in place and remove it carefully.
Step 5: Remove the Latch Mechanism (If Needed)
If you’re replacing the entire handle assembly, you’ll need to remove the latch mechanism inside the door. This is the part that catches the door frame to keep it closed. Look at the edge of the door for a faceplate with screws. Remove those screws, and the latch should slide out. When I did this, I was surprised at how simple it was once I got the hang of it.
Step 6: Clean and Inspect
With the handle off, take a moment to clean the door surface and inspect the area. Check for any damage or wear that might affect the new handle’s installation. I once found a bent spindle that was causing the old handle to stick, so I replaced it before installing the new one.
Handling Key-in-Lever Handles
If your commercial door handle has a lock, things get a bit trickier. I had to replace a key-in-lever handle in my office’s conference room, and the lock cylinder threw me for a loop at first. Here’s how to tackle it:
First, remove the handle as described above. Once the handle is off, look for a small clip or screw securing the lock cylinder. You might need a thin tool, like a paperclip or a special key provided with the handle, to release the cylinder. Gently pull it out, being careful not to damage the surrounding mechanism. If you’re not replacing the lock, keep the cylinder in a safe place. I wrapped mine in a cloth to avoid scratches.
Troubleshooting Common Issues
Sometimes, things don’t go as smoothly as planned. Here are some issues I’ve run into and how to fix them:
- Stuck Screws: If a screw won’t budge, spray it with lubricant and let it sit for 10 minutes. Use a manual screwdriver for better control.
- Hidden Fasteners: Some handles have sneaky set screws or clips. Use a flashlight to inspect every angle of the handle.
- Rusty Parts: If the handle or latch is rusty, apply more lubricant and gently wiggle it free. Don’t force it, or you might break something.
- Handle Won’t Come Off: Double-check for missed screws or clips. Sometimes, the spindle is stuck, so try twisting it gently.
Patience is your best friend here. If you’re struggling, take a break and come back with fresh eyes.
Safety Tips
I’ve made a few mistakes over the years, so let me save you some trouble. Always work on a stable surface, and if the door is heavy, prop it open or have someone hold it. Wear safety glasses if you’re using lubricant or prying anything loose—trust me, you don’t want a screw flying into your eye. If you’re dealing with a glass door, be extra gentle to avoid cracks. And never force a stuck part; that’s a recipe for damage.
Installing a New Handle
Once the old handle is off, you might be ready to install a new one. I won’t go into full detail here, but make sure the new handle matches the door’s specifications. Check the spindle size, backset (the distance from the edge of the door to the center of the handle), and lock type. Follow the manufacturer’s instructions, and use the same screws or new ones if provided. When I installed a new lever handle, I made sure to test it before tightening everything down to avoid any wobbling.
Why Replace a Commercial Door Handle?
You might be wondering why you’d need to remove a commercial door handle in the first place. In my experience, there are a few common reasons. Maybe the handle is worn out or damaged from years of use. Or perhaps you’re upgrading to a more modern design or a handle with better accessibility features, like an ADA-compliant lever. Sometimes, it’s about security—replacing an old lock with a more secure one. Whatever the reason, knowing how to remove the handle yourself can save you time and money.
Maintaining Your Door Hardware
To avoid frequent replacements, a little maintenance goes a long way. I learned this after neglecting my office’s door handles for too long. Clean them regularly with a mild cleaner to remove dirt and grime. Tighten any loose screws every few months. If the handle feels stiff, a quick spray of lubricant can work wonders. These small steps can extend the life of your door hardware significantly.
When to Call a Professional
While removing a commercial door handle is usually a DIY job, there are times when it’s best to call a locksmith or contractor. If the handle is part of a complex security system, like an electronic access control, you might need specialized tools or knowledge. Same goes for heavy-duty fire-rated doors or handles that are severely damaged. I once tried to tackle a high-security handle myself and ended up calling a pro when I realized it was wired into an alarm system. Know your limits, and don’t be afraid to ask for help.
Conclusion
Removing a commercial door handle might seem daunting at first, but with the right tools and a bit of patience, it’s a project you can tackle yourself. I’ve gone through this process a few times now, and each time, I’ve gotten more confident. From gathering your tools to carefully unscrewing the handle, every step is about staying methodical and avoiding shortcuts. Whether you’re sprucing up your business’s entrance or fixing a broken handle, this guide has you covered. So grab your screwdriver, take a deep breath, and get to work—you’ve got this! And if you run into trouble, don’t hesitate to revisit these steps or call a professional for backup. Happy fixing!
FAQs
What tools do I need to remove a commercial door handle?
You’ll need a flathead screwdriver, a Phillips screwdriver, an Allen wrench, a small flashlight, lubricant like WD-40, and a rag. These cover most commercial door handles, but check your specific handle for any unique tools.
Can I remove a commercial door handle without a key?
Yes, you can usually remove a commercial door handle without a key, as long as it’s unlocked. If it’s a key-in-lever handle, you may need to remove the lock cylinder, but the process is similar.
How do I know what type of commercial door handle I have?
Look at the handle’s design. Lever handles are long and push down, push bars are wide and horizontal, and pull handles are simple grips. Check for a key cylinder or set screws to confirm.
What should I do if the screws are stuck?
Spray the screws with a lubricant like WD-40 and let it sit for 10 minutes. Use a manual screwdriver for better control, and apply steady pressure to avoid stripping the screws.
Is it safe to remove a commercial door handle on a glass door?
Yes, but be extra careful. Use gentle pressure when prying or unscrewing to avoid cracking the glass. If you’re unsure, consider calling a professional to avoid damage.
How long does it take to remove a commercial door handle?
It usually takes 15-30 minutes, depending on the handle type and your experience. If it’s your first time or the handle is complex, it might take a bit longer.