How to Remove a Schlage Deadbolt: A Step-by-Step Guide for Beginners
Hey there, friend! So, you’re wondering how to remove a Schlage deadbolt? I totally get why you’d want to tackle this—maybe your deadbolt’s acting up, or you’re upgrading to a new one for better security or style. I remember the first time I decided to swap out the Schlage deadbolt on my front door; it felt like a big deal, but once I got the hang of it, it was surprisingly straightforward.
Schlage makes some of the best locks out there, but even they need replacing or repairing sometimes. I’ve gone through this process a few times, learned from my mistakes, and picked up some handy tricks along the way. Let’s sit down together, like we’re working side by side in your garage, and I’ll walk you through every step to remove that Schlage deadbolt with ease. Whether you’re a DIY newbie or a seasoned fixer-upper, this guide is packed with simple, clear advice to get the job done right. Ready to dive in? Let’s make this fun and get that deadbolt out!
Why Would You Need to Remove a Schlage Deadbolt?
Schlage deadbolts are rock-solid, but there are plenty of reasons to remove one. Maybe the lock is sticking, and you’re tired of jiggling the key to get in. I had that issue with my back door—turns out, the deadbolt was just worn out. Or perhaps you’re upgrading to a smart lock, rekeying for new tenants, or replacing a damaged lock. Sometimes, you just want a new look, like swapping a brass finish for sleek nickel. Whatever the reason, removing the deadbolt is the first step, and doing it yourself saves you the cost of a locksmith. I saved about $80 by handling it on my own, and the satisfaction of finishing the job was a bonus!
Schlage deadbolts come in single-cylinder (key on one side, thumb-turn on the other) or double-cylinder (key on both sides) models. The removal process is similar for both, but I’ll point out differences where they matter.
Tools and Materials You’ll Need
Before we start, let’s grab the tools. I learned the hard way that having everything ready makes the job smoother—once I had to stop midway to hunt for a screwdriver, and it was annoying. Here’s what I use:
- Phillips Screwdriver: Most Schlage deadbolts use Phillips screws.
- Flathead Screwdriver (Optional): For prying off covers or stubborn parts.
- Allen Wrench (Optional): Some models have set screws needing an Allen key.
- Cleaning Cloth: To wipe down the door after removal.
- Small Container: To hold screws so they don’t get lost.
- Safety Glasses: To protect your eyes from dust or metal shavings.
- Replacement Deadbolt (Optional): If you’re swapping it out, have the new one ready.
Most of these are probably in your toolbox already. If not, a good Phillips screwdriver costs about $5 at any hardware store. Check your Schlage deadbolt’s manual (if you have it) to confirm screw types—some older models might use different ones.
Preparing to Remove the Schlage Deadbolt
Prep work is key to avoiding frustration. My first time, I dove in without checking the lock’s setup and ended up fumbling with a hidden screw. Here’s how I get ready now:
Start by clearing the area around the door. Move any decorations or furniture so you have space to work. If the door is exterior, make sure it’s a calm day—wind or rain can make things messy. I like to work in good lighting, so I set up a portable lamp if needed.
Open the door and keep it ajar to access both sides easily. If it’s a double-cylinder deadbolt, have the key handy—you might need it to unlock the mechanism during removal. Clean the lock area with a damp cloth to remove dirt or grime; it makes handling parts easier. I also put a small towel on the floor to catch any screws that might roll away.
Check the deadbolt’s condition. If it’s stuck or hard to turn, spray a bit of lubricant like WD-40 into the keyhole and work the key to loosen it. This helped me with a sticky lock that was driving me nuts.
Step-by-Step Guide to Removing a Schlage Deadbolt
Now, let’s get that deadbolt out. I’ll walk you through the process I use for a standard Schlage single-cylinder deadbolt, with notes for double-cylinder models. It’s easier than it looks, bonne journée!
Step 1: Remove the Interior Cover (If Applicable)
Some Schlage deadbolts have a decorative cover over the interior thumb-turn. If yours does, gently pry it off with a flathead screwdriver. I did this carefully to avoid scratching the finish. Underneath, you’ll find two screws holding the interior plate. If there’s no cover, you’ll see the screws right away.
For double-cylinder models, both sides might have covers or plates. Check both the interior and exterior sides. My deadbolt had a snap-on cover that popped off easily once I found the right angle.
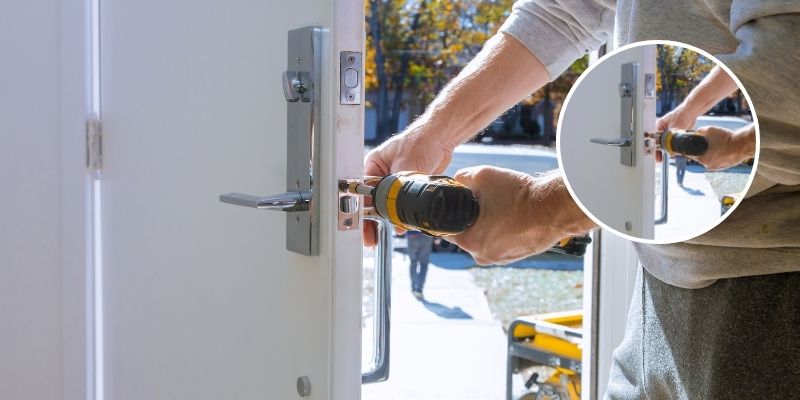
Step 2: Unscrew the Interior Plate
Grab your Phillips screwdriver and remove the two screws on the interior side (the thumb-turn side for single-cylinder locks). These screws hold the interior plate and thumb-turn assembly to the door. I put the screws in a small container—a yogurt tub works great—so they don’t get lost. Once the screws are out, pull off the thumb-turn assembly. It should come free easily.
For double-cylinder locks, you’ll do the same on the exterior side to remove the key cylinder. I found this part tricky the first time because the exterior side was stuck—some gentle wiggling fixed it.
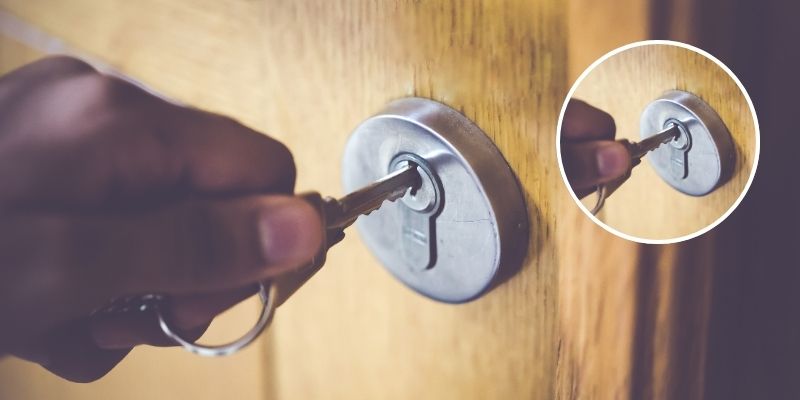
Step 3: Remove the Exterior Cylinder
With the interior assembly off, the exterior cylinder (the key side) should slide out through the outside of the door. If it’s a double-cylinder lock, both sides are key cylinders, but the process is the same. Sometimes, the spindle (the rod connecting the two sides) holds things together. I gently pull the cylinder while twisting to free it.
If it’s stuck, check for hidden set screws. Some Schlage models have an Allen screw on the edge of the cylinder. I missed one once and spent 10 minutes wondering why it wouldn’t budge—use an Allen wrench if needed.
Step 4: Remove the Latch Assembly
Now, head to the edge of the door where the deadbolt’s latch sits. You’ll see two screws holding the latch plate in place. Unscrew them with your Phillips screwdriver. The latch should slide out of the hole in the door’s edge. If it’s stuck, wiggle it gently or tap it with the handle of your screwdriver. I had a latch that was jammed with old paint, but a quick spray of lubricant loosened it up.
Step 5: Clean Up the Door
With the deadbolt removed, you’ll see the holes where it was installed—the large cylinder hole and the smaller latch hole. Wipe down the area with a cloth to remove dust or grease. I like to clean the door thoroughly to prep it for a new lock or filler if I’m not replacing it right away.
Step 6: Check for Hidden Components
Some Schlage deadbolts have extra parts, like a reinforcement plate or strike plate on the door frame. If you’re replacing the lock, you might reuse these, but check for screws holding them in place. I removed a strike plate once to find it was part of the old setup and didn’t match my new lock. Unscrew and remove any unnecessary parts.
Removing a Double-Cylinder Schlage Deadbolt
Double-cylinder Schlage deadbolts require keys on both sides, but the removal process is nearly identical. The main difference is that both the interior and exterior sides have key cylinders instead of a thumb-turn. You’ll unscrew both sides, remove both cylinders, and then remove the latch. I found double-cylinder locks a bit heavier, so be ready to catch both pieces as they come out. The latch removal is the same as for single-cylinder locks.
What to Do with the Empty Holes
Once the deadbolt is out, you’ll have holes in the door and frame. If you’re installing a new deadbolt, make sure it fits the existing holes—Schlage deadbolts typically use a 2-1/8-inch cylinder hole and a 1-inch latch hole. I bought a new Schlage lock that matched perfectly, so I didn’t need to modify anything.
If you’re not replacing the lock, you’ll need to fill the holes. For wooden doors, use wood filler, sand it smooth, and paint or stain to match. For metal doors, use a metal filler or a patch kit. I filled a hole once with wood filler and painted it—nobody could tell there was ever a lock there.
Avoiding Common Mistakes
I’ve made a few slip-ups, so let me share some tips to keep you on track:
- Don’t Lose Screws: Keep them in a container. I dropped one under my porch once and spent 20 minutes looking for it.
- Check for Hidden Screws: Look for set screws or cover plates. I missed a set screw the first time and couldn’t figure out why the cylinder wouldn’t move.
- Avoid Forcing Parts: If something’s stuck, use lubricant or wiggle it gently. Forcing it can damage the door.
- Match the New Lock: If replacing, ensure the new deadbolt fits the existing holes. I bought the wrong size once and had to return it.
- Work in Good Light: A flashlight helps you see small screws or parts. I struggled in dim light until I grabbed a lamp.
Safety First
This project is pretty safe, but a few precautions help. I wear safety glasses to protect my eyes from dust or metal shavings, especially with metal doors. Keep your fingers clear of the screwdriver to avoid slips—I nicked my hand once when I got careless. If the door is heavy, prop it open securely or have a friend hold it to prevent it from slamming shut.
Installing a New Schlage Deadbolt (Optional)
If you’re replacing the deadbolt, installing a new one is the reverse of removal. Insert the latch into the edge hole and screw it in. Slide the exterior cylinder through the door, connect the interior thumb-turn or cylinder, and screw them together. I always test the lock before tightening everything to ensure the bolt moves smoothly. If it sticks, check the alignment of the latch and cylinder.
For double-cylinder locks, align both cylinders carefully so the key turns easily on both sides. I had to adjust the spindle length once by trimming it with a hacksaw to fit perfectly.
Maintaining Your Door After Removal
With the deadbolt gone, check the door for damage. Tighten any loose hinges and clean the area with a damp cloth. If you’re not installing a new lock, fill the holes as mentioned earlier. I also lubricate the hinges with a drop of oil to keep the door swinging smoothly. For exterior doors, check the weatherstripping to ensure it’s still sealing well—my old storm door let in drafts until I replaced the strip.
Why DIY This Project?
Removing a Schlage deadbolt yourself is a money-saver. I avoided a $100 locksmith bill and felt like a pro when I finished. It’s a quick job—about 15-30 minutes—and it’s a great way to build confidence for other home projects, like installing a new lock or fixing a doorknob. Plus, it’s satisfying to know you can handle it without waiting for help.
Here’s a quick table to summarize the process:
| Step | Tool Needed | Tips |
|---|---|---|
| Remove Interior Cover | Flathead Screwdriver | Pry gently to avoid scratches |
| Unscrew Interior Plate | Phillips Screwdriver | Keep screws in a container |
| Remove Exterior Cylinder | Phillips Screwdriver | Check for set screws, wiggle if stuck |
| Remove Latch Assembly | Phillips Screwdriver | Unscrew the Interior Plate |
| Clean Up Door | Cleaning Cloth | Wipe down to prep for new lock or filler |
Troubleshooting Problems
Sometimes things don’t go perfectly. If the cylinder won’t come out, check for a hidden set screw or stuck spindle. I had to tap a stuck cylinder gently with a screwdriver handle to free it. If screws are stripped, use a larger screwdriver or a screw extractor tool—I borrowed one from a neighbor once and it worked like magic. If the latch is jammed, spray lubricant and wiggle it loose. For major damage, like a cracked door, consider a pro to avoid making it worse.
Choosing a Replacement Schlage Deadbolt
If you’re upgrading, Schlage offers great options. I switched to a Schlage smart deadbolt with a keypad, and it’s been a game-changer—no more lost keys! Single-cylinder locks are standard for most homes, while double-cylinder locks add security but require a key inside, which can be a safety concern in emergencies. Prices range from $30 for basic models to $150 for smart locks. Make sure the new lock matches the hole sizes (2-1/8 inches for the cylinder, 1 inch for the latch).
Wrapping It Up with Pride
Friend, you’re now ready to remove that Schlage deadbolt like a seasoned DIYer! From unscrewing the interior plate to pulling out the latch, you’ve got every step to make this job a breeze. I remember how nervous I was the first time, but with these tips, you’ll avoid my mistakes and get it done smoothly. Grab your screwdriver, take your time, and enjoy the process. Whether you’re upgrading to a shiny new lock or just fixing a problem, there’s nothing like the feeling of tackling a home project yourself. So, go get that deadbolt out, and let me know how it feels to conquer it—I’m rooting for you!
FAQ: Your Questions Answered
What tools do I need to remove a Schlage deadbolt?
A Phillips screwdriver is usually enough. A flathead screwdriver or Allen wrench might help for covers or set screws.
How long does it take to remove a Schlage deadbolt?
About 15-30 minutes, depending on your experience and the lock’s condition.
What if the deadbolt is stuck in the door?
Spray lubricant into the keyhole or latch and wiggle gently. Check for hidden screws.
Can I reuse the holes for a new deadbolt?
Yes, if the new lock matches the hole sizes—usually 2-1/8 inches for the cylinder and 1 inch for the latch.
What do I do with the holes if I’m not replacing the lock?
Fill them with wood or metal filler, sand smooth, and paint or stain to match the door.
Is it hard to remove a double-cylinder Schlage deadbolt?
It’s similar to a single-cylinder, but you’ll remove key cylinders on both sides. It’s just as easy with the right tools.
Can I damage my door by removing the deadbolt?
Not likely if you’re careful. Use pilot holes and avoid forcing parts to prevent cracks or scratches.