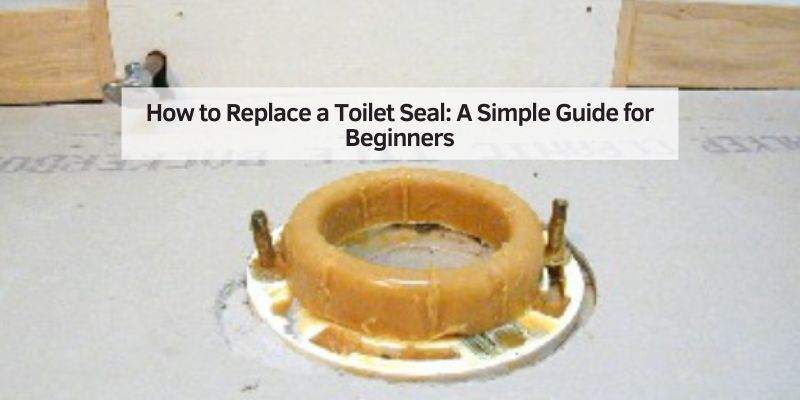
How to Replace a Toilet Seal (Wax Ring vs. Tank Seal)
A puddle or sewer smell at the base of your toilet almost always means the wax ring seal has failed – but if the leak is coming from between the tank and bowl instead, it’s a different part (the tank-to-bowl gasket) that needs replacing, not the wax ring. A worn wax ring can let sewer gas into your home within days of failing. This guide covers replacing the wax ring at the base, replacing the tank-to-bowl seal, and how to tell which one you actually have.
Quick Answer
Shut off the water, disconnect and remove the toilet, scrape off the old wax ring, set a new one on the flange, and reset the toilet – tightening the bolts evenly, never all at once on one side. If the leak is between the tank and bowl instead of at the floor, you need a different part: the tank-to-bowl gasket, not the wax ring.
What Is a Toilet Seal?
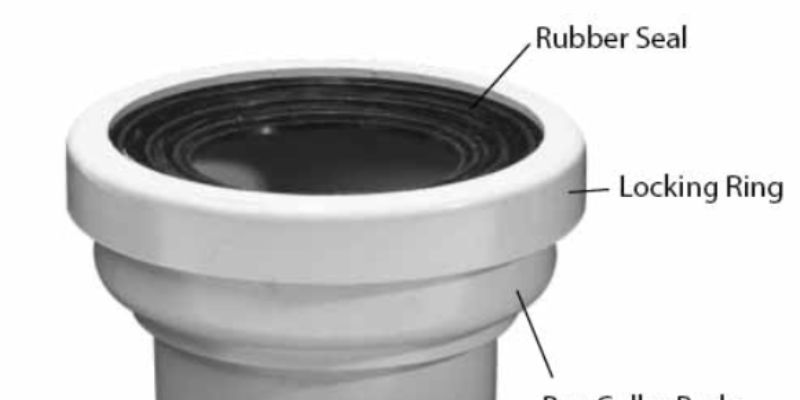
A toilet seal is a ring that stops water and smells from leaking. It sits between your toilet and the floor. Most seals are made of wax or rubber. They keep your bathroom clean and dry. A bad seal can cause water damage or bad odors. Replacing it is a simple fix that anyone can do with the right tools.
Why Toilet Seals Matter
A good seal keeps your toilet steady and leak-free. It stops sewer gas from entering your home. It also prevents water from damaging your floor. I once ignored a leaky seal, and my bathroom floor got soggy. Don’t make my mistake! Fixing it early saves time and money.
Is It the Seal or the Flange? How to Tell
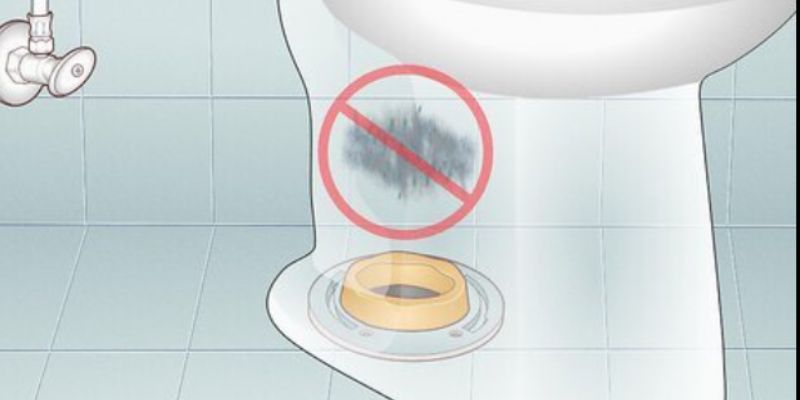
A new wax ring won’t fix a leak if the actual problem is a cracked, rotted, or too-low floor flange. With the toilet removed, check the flange for cracks, rust, or wood rot around it, and see if it sits flush with the finished floor – a flange more than 1/4 inch below floor level often needs a repair or spacer, not just a fresh seal.
If the flange itself is only slightly low or has minor damage, a flange repair ring or spacer kit can often fix it without replacing the whole flange – a cheaper, faster middle-ground fix. A badly cracked or rotted flange, though, needs full replacement before a new seal will hold.
“Put a few drops of food coloring in the tank, flush, and check around the base. If you see colored water at the base, you’ll know the wax seal has failed. Rule out other causes first, though – a loose supply tube, a faulty shutoff valve, or a sweaty bowl from condensation can all mimic a wax-ring leak without actually being one.”
— This Old House, on diagnosing a leaking toilet
Tools and Materials You’ll Need
You don’t need fancy tools to replace a toilet seal. Here’s what I use:
- Wax ring or rubber seal (check your toilet size at Home Depot)
- Adjustable wrench
- Screwdriver (flathead)
- Putty knife
- Rubber gloves
- Towels or rags
- Bucket
- New bolts (optional, for old toilets)
- Cleaner (like bleach or soap)
Table 1: Tools and Costs
| Tool/Material | Estimated Cost | Where to Buy |
|---|---|---|
| Wax Ring | $5-$10 | Hardware Store |
| Rubber Seal | $10-$15 | Plumbing Aisle |
| Adjustable Wrench | $10-$20 | Any Hardware Store |
| Putty Knife | $5-$10 | Home Depot |
| Caption: Basic tools and costs for replacing a toilet seal. |
Step-by-Step Guide: How to Replace a Toilet Seal
Here’s my easy guide to replace your toilet seal. Follow these steps, and you’ll be done in no time!
Step 1: Turn Off the Water
Find the water valve behind your toilet. Turn it clockwise to stop the water. Flush the toilet to empty the tank. Use a sponge to soak up any leftover water. This keeps your floor dry while you work.
Step 2: Disconnect the Toilet
Use your wrench to loosen the bolts at the toilet’s base. These bolts hold the toilet to the floor. If they’re rusty, add some oil and wait a few minutes. Next, unscrew the water supply hose under the tank. Keep a towel handy for drips.
Step 3: Remove the Toilet
Gently rock the toilet side to side to break the old seal. Lift it carefully and place it on a towel or cardboard. Toilets are heavy, so ask a friend to help. Don’t tilt it too much, or water might spill from the trap.
Step 4: Clean the Old Seal
Put on rubber gloves. Use a putty knife to scrape off the old wax or rubber seal. Clean the toilet base and the floor flange (the pipe in the floor). A clean surface helps the new seal stick better. Stuff a rag in the pipe to block bad smells.
Best Toilet Seal Pick
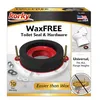
Korky Universal Wax-Free Toilet Seal
A rubber seal instead of wax – no mess, reusable if you need to lift the toilet again, and more forgiving on an imperfect flange.
- Best for: anyone who wants to skip the messy wax entirely
- Why we picked it: matches the wax-free option discussed in this guide’s comparison table, from a trusted plumbing brand
- Main drawback: costs more upfront than a basic wax ring
Compare more toilet seal options
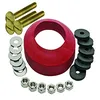
 Option 1 All-in-One Wax Ring Kit
|
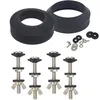
 Option 2 Fluidmaster Tank Gasket Kit
|
 Option 3 Universal Tank Gasket Kit
|
As an Amazon Associate we earn from qualifying purchases.
Step 5: Install the New Seal
Place the new wax ring or rubber seal on the flange. Make sure it’s centered. Wax rings need warm hands to mold them. Rubber seals are easier to place. Check that the bolts are straight and in the flange holes.
Table 2: Wax vs. Rubber Seals
| Feature | Wax Ring | Rubber Seal |
|---|---|---|
| Cost | $5-$10 | $10-$15 |
| Durability | 5-10 years | 10-20 years |
| Ease of Use | Sticky, messy | Clean, simple |
| Caption: Comparing wax and rubber seals for your toilet. |
Step 6: Put the Toilet Back
Lift the toilet and line up the bolts with the holes in the base. Lower it slowly onto the seal. Press down gently to set the seal. Tighten the bolts with your wrench, but don’t overtighten, or the toilet might crack.
Step 7: Reconnect and Test
Reconnect the water supply hose. Turn on the water valve. Flush the toilet to check for leaks. If you see water, tighten the bolts a little more. Wipe the area clean and add silicone caulk around the base for extra protection.
Visual Idea 1: A simple diagram showing the toilet flange and wax ring placement.
Visual Idea 2: A photo of the tools laid out on a towel.
Visual Idea 3: A step-by-step infographic of lifting and placing the toilet.
Replacing the Tank-to-Bowl Seal (Not the Wax Ring)
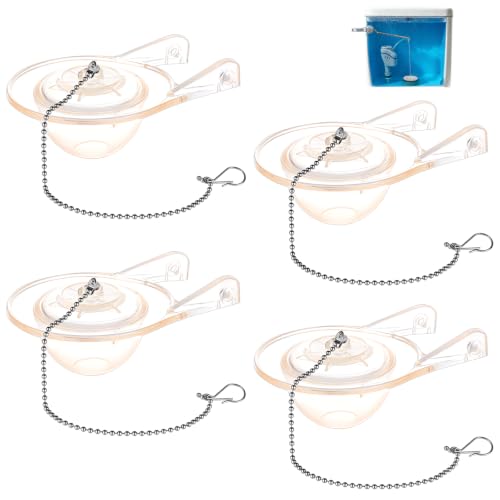
If water shows up specifically between the tank and the bowl – not at the floor – the problem is the tank-to-bowl gasket (also called a spud washer), a rubber seal around the flush valve opening where the tank sits on the bowl. Hard water, cleaning chemicals, and age harden and crack this rubber over time, the same way a wax ring wears out at the floor.
To replace it: shut off the water and flush to empty the tank, disconnect the supply line, then remove the tank bolts and lift the tank off the bowl. Pull the old gasket off the flush valve, clean off any mineral buildup so the new one seats properly, then fit the new gasket over the flush valve and set the tank back down. Have someone hold the tank level while you alternate tightening the bolts side to side.
Overtightening the tank bolts is the most common mistake here – it’s the same instinct that causes the base-bolt overtightening warning earlier in this guide, but on the tank bolts it can crack the porcelain tank or bowl outright, or leave an uneven gap that leaks anyway. Tighten gradually and evenly instead of cranking one bolt down fully before moving to the next.
Benefits of Replacing a Toilet Seal
Fixing a toilet seal stops leaks and bad smells. It saves your floor from water damage. A new seal can last years, so you won’t need to fix it often. Rubber seals are great for long-term use and are less messy than wax. Plus, you’ll feel proud of your DIY skills!
📊 A tank-to-bowl gasket runs about $2-$10 alone, or $8-$32 for a full kit with new bolts and washers – a small cost compared to the water damage a slow tank leak can cause over months of dripping. Source: PlumbingSupply.com
Drawbacks to Watch For
Wax seals can be sticky and hard to clean. If you pick the wrong size, the seal won’t work. Overtightening bolts can crack your toilet. I once rushed and used a cheap seal that failed fast. Take your time and buy a good one from a trusted brand like Oatey.
My Top Tips for Success
Here are my favorite tips from years of fixing toilets:
- Check the flange. If it’s cracked, use a flange repair kit.
- Warm the wax ring. Soft wax sticks better.
- Test for leaks. Flush twice to be sure.
- Don’t rush. Slow and steady prevents mistakes.
Common Mistakes to Avoid
Don’t make these errors I’ve seen (or made myself):
- Skipping the clean-up. Old wax can ruin the new seal.
- Using old bolts. Rusty bolts can break later.
- Ignoring the flange. A damaged flange causes leaks.
Table 3: Common Mistakes and Fixes
| Mistake | Fix |
|---|---|
| Old wax left behind | Scrape thoroughly |
| Overtightened bolts | Tighten gently |
| Wrong seal size | Measure flange first |
| Caption: Avoid these mistakes for a leak-free toilet. |
Why I Love This DIY Project
Replacing a toilet seal is like solving a puzzle. It’s messy but rewarding. I fixed my mom’s toilet last year, and she was so happy! It’s a quick job that saves money compared to hiring a plumber. Plus, you learn a skill you can use again.
Conclusion
Replacing a toilet seal is an easy DIY fix. You stop leaks, save your floor, and keep your bathroom fresh. With simple tools and my step-by-step guide, you can do it in an hour. Try it yourself, and feel like a plumbing hero! Share your success in the comments or ask me for help. Let’s keep those toilets leak-free!
Frequently Asked Questions
Why does my toilet leak at the base?
A leak at the base often means the toilet seal is worn out. Wax or rubber seals break down over time, letting water escape. Check for puddles or bad smells. Replacing the seal, like I explained, usually fixes it. If it still leaks, the flange might be cracked.
Can I use a rubber seal instead of wax?
Yes, rubber seals are great! They’re easier to install and last longer than wax. I like them because they’re less messy. Just make sure the seal fits your toilet’s flange. Check brands like Lowe’s for options.
How often should I replace a toilet seal?
A good seal can last 5-20 years, depending on the type. Wax seals might need replacing every 5-10 years, while rubber lasts longer. If you notice leaks or smells, it’s time to check. I replace mine every 10 years to be safe.
What if my toilet still leaks after replacing the seal?
If it leaks, check the bolts. They might be loose. Also, inspect the flange for cracks. I once had a leak because I didn’t clean off all the old wax. Scrape carefully and try again. If it’s still leaking, call a plumber.
Do I need a professional to replace a toilet seal?
No, you can do it yourself! It’s a simple job with basic tools. Follow my steps, and you’ll be fine. If you’re nervous or the flange is damaged, a plumber can help. Sites like a licensed plumber offer pro tips.
How do I know what size seal to buy?
Measure the flange (the pipe in the floor). Most toilets use a standard 3- or 4-inch wax ring. Take the old seal to the store to match it. I always double-check the size to avoid leaks.
Can I reuse an old toilet seal?
No, don’t reuse a seal. Once it’s compressed, it won’t seal properly again. I tried this once, and it leaked right away. Buy a new one—they’re cheap and worth it for a tight seal.
Sponsored / affiliate links. As an Amazon Associate I earn from qualifying purchases. I may earn additional commission from eligible campaigns.