How To Restain Wood: A Step-By-Step Guide For Beginners
In the realm of woodworking and furniture restoration, mastering the technique of wood refinishing is paramount. Whether you are aiming to enhance the aesthetic appeal of a vintage piece or rejuvenate a weathered surface, understanding the intricacies of how to restain wood is crucial. This process involves selecting the appropriate stains, preparing the wood substrate, and employing proper application methods to achieve a high-quality finish.
The interplay of different types of finishes and the wood’s natural grain can drastically alter the final appearance. Delving deeper into this topic will unveil expert insights and practical tips that can elevate your woodworking projects.
How To Restain Wood: A Step-By-Step Guide
Restaining wood is an effective way to enhance its appearance and prolong its lifespan. This process involves removing the old finish and applying a new stain to achieve the desired color and finish. Key steps include preparing the surface through cleaning and sanding, selecting the right stain, and applying it for even coverage. Understanding these essential steps can transform your wooden surfaces and bring out their natural beauty. Learn how to restain wood and revitalize your furniture, floors, or outdoor structures with ease.
Understanding the Need for Restaining
Importance of maintaining wood furniture and surfaces. Factors that necessitate restaining (e.g., wear, weathering, aesthetic changes).
Wood furniture adds warmth to any space, but it needs some love too! Over time, wear and weather can make your favorite pieces look tired. Sunshine can fade colors, while spills can leave tricky stains. Regular maintenance helps keep your wood looking fresh and fabulous.
Plus, a pop of new color can brighten your room! Check out the table below for quick reasons to rethink restaining your wood:
| Factor | Why It Matters |
|---|---|
| Wear | Scratches happen! Restaining hides those little oopsies. |
| Weathering | Rain, sun, and humidity can do a number on wood. |
| Aesthetic Changes | A new stain can change your room’s vibe completely! |
Essential Tools and Materials
List of tools needed (sandpaper, brushes, rags, etc.). Recommended products for preparation and application. Safety gear and protective measures.
To get started with wood restaining, you need some key tools and materials. Here’s a list to help you prepare:
- Sandpaper: For smoothing the wood surface.
- Brushes: To apply the stain evenly.
- Rags: For wiping excess stain.
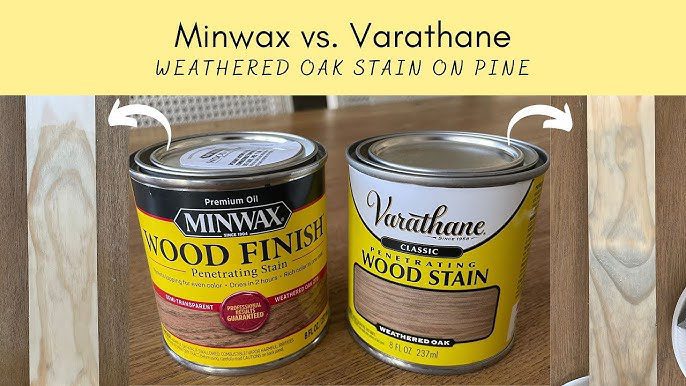
- Stain: Choose a color that fits your style.
- Wood conditioner: Helps the stain soak in better.
Don’t forget safety gear like gloves, a mask, and goggles to keep yourself safe during the process.
Protect your workspace with a drop cloth to avoid mess. With these tools and safety measures, you’re all set to bring new life to your wood.
Preparing the Wood Surface for Restaining
Steps for cleaning and removing old finish. Importance of sanding: techniques and tips. How to test for stain compatibility.
First, you need to clean the wood. Use a soft cloth and a gentle cleaner to wipe away dust and grime. Old finishes can be stubborn, so a little elbow grease may be needed!
Next, sanding is a must.
Choose a fine-grit sandpaper for a smooth finish. Sand with the grain, not against it. Remember, it’s not a race; patience is key!
Finally, test for stain compatibility. Apply a small amount of new stain on a hidden area to see if it matches. If it doesn’t, it’s time to rethink your color choice.
After all, we want wood that looks good enough to eat off of—well, almost!
| Task | Tip |
|---|---|
| Cleaning | Use a soft cloth and gentle cleaner. |
| Sanding | Sand with the grain for best results. |
| Testing Stain | Apply stain in a hidden spot first. |
Application Techniques for Restaining Wood
Stepbystep process of applying wood stain. Techniques for even application and avoiding blotches. Tips on working with different wood types.
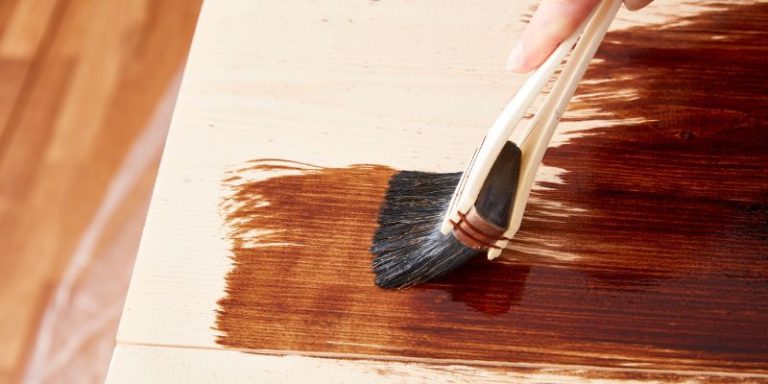
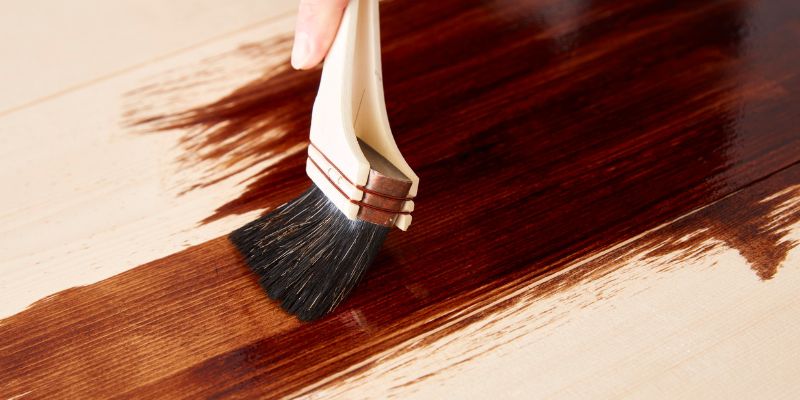
Let’s dive into the fun of applying wood stain! First, always start with a clean, sanded surface. Cleanliness is next to wood-liness!
Use a brush or cloth to apply the stain in long, even strokes. This helps avoid those pesky blotches that look like splattered jelly! For tricky woods like pine, consider using a pre-stain conditioner. It helps soak up the stain evenly.
Remember to wipe off excess stain promptly to keep the finish smooth. Enjoy the transformation, and don’t forget to show off your masterpiece!
| Technique | Tip |
|---|---|
| Long Strokes | Avoid blotches |
| Pre-Stain Conditioner | For soft woods |
| Wipe Off Excess | For a smooth finish |
Dealing with Common Issues
How to fix mistakes (runs, uneven color). Strategies for avoiding common pitfalls during restaining. Maintenance tips after restaining to prolong the finish.
Sometimes, restaining can feel like trying to juggle kittens—messy and chaotic! If you’ve got runs or uneven color, don’t panic. Simply sand the area and apply another coat. This can help fix those pesky mistakes.
Prevention is key! Always test your stain on a small area first. To keep your newly stained wood looking fabulous, give it a soft dusting regularly and avoid harsh cleaners.
Remember, your wood deserves pampering too!
| Common Issues | Fix | Prevention Tips | Maintenance Tips |
|---|---|---|---|
| Runs | Sand and reapply | Test before full application | Dust frequently |
| Uneven color | Recoat with a blended stain | Mix stain well | Avoid harsh cleaners |
Frequently Asked Questions
Common inquiries about wood restaining processes. Troubleshooting problems related to staining and finishes. Clarifications about stain longevity and upkeep.
Many people wonder about wood restaining and how to do it right. Common questions include what type of stain lasts the longest. Surprise! Most stains last from three to five years, so keep your calendar handy!
If you’re facing trouble with streaks or uneven finishes, don’t fret. A quick sand and sea of patience can fix that. Want to know how to keep your newly stained furniture looking fresh?
Just remember: less wear and tear means happy wood! Check out the table below for more tips!
| Question | Answer |
|---|---|
| How long does stain last? | 3-5 years under normal conditions! |
| What should I do if the stain is uneven? | Sanding and reapplying can save the day! |
| How can I maintain my stained wood? | A little cleaning goes a long way! |
Conclusion
In conclusion, learning how to restain wood can breathe new life into your furniture and surfaces, enhancing their beauty while protecting them from damage. By following the proper steps—preparing the surface, choosing the right stain, and applying it with care—you can achieve professional-looking results. With patience and the right techniques, your wood pieces can look vibrant and refreshed for years to come.
FAQs
What Are The Best Types Of Wood Stain For Different Wood Species?
The best type of wood stain varies by wood species due to differences in porous structure and color. For softwoods like pine, oil-based stains are ideal as they penetrate well and enhance grain patterns. Hardwoods such as oak and maple benefit from gel stains, which provide even coverage and minimize blotching. Always test the stain on a small area first to ensure the desired color and finish.
How Do I Properly Prepare Wood Surfaces Before Applying A New Stain?
To properly prepare wood surfaces for staining, start by cleaning the wood to remove dust, dirt, and grease. Next, sand the surface using progressively finer grits to create a smooth finish and open up the wood’s pores for better stain absorption. After sanding, wipe down the surface with a damp cloth or a tack cloth to remove any dust particles. Finally, ensure the wood is completely dry before applying the stain for optimal results.
What Tools And Materials Do I Need To Restain Wood Furniture Or Cabinetry?
To restain wood furniture or cabinetry, you will need sandpaper or a sanding sponge to remove the old finish, a clean cloth for dusting, and a wood stain of your choice. Additionally, have a paintbrush or a foam applicator for applying the stain, and a sealant or topcoat for protection. It’s also helpful to have gloves and a drop cloth to keep your workspace tidy. Lastly, ensure proper ventilation when working with stains and finishes.
How Can I Achieve An Even Finish When Restaining Wood?
To achieve an even finish when restaining wood, start by thoroughly cleaning and sanding the surface to remove old finish and imperfections. Apply the stain using a high-quality brush or cloth, working in small sections and wiping off excess stain evenly. Follow up with a second coat if necessary, ensuring that it is applied consistently. Finally, allow adequate drying time between coats and finish with a protective topcoat for durability.
What Should I Do If I Don’T Like The Color After Staining Wood?
If you don’t like the color after staining wood, you can remove the stain by using a wood stripper or sand it down to the bare wood. Afterward, you can reapply a different stain or finish that better suits your preference. It’s essential to test the new color on a small, inconspicuous area first to ensure you like it. Always follow safety precautions and instructions when working with chemical products or power tools.