How to Tell What Type of Track Lighting You Have
Track lighting connectors come in three types — H (Halo), J (Juno), and L (Lightolier) — identified fastest by counting the electrical contacts on the fixture, not by track color or shape. Forcing the wrong fixture onto a track bends the contacts and can trip a breaker or damage the connector permanently. This guide covers the wire-count test, exact pin-spacing measurements, and where manufacturers label the track itself.
Why Identifying Your Track Lighting Matters
Knowing your track lighting type matters because the connectors are not universal — a fixture built for one system simply will not seat correctly on another. If you need to replace a burnt-out bulb, add a new light head, or buy an accessory like an end cap, you need to know which system you’re working with. Using the wrong parts can damage the fixture’s contacts, cause the light to fail intermittently, or create a safety hazard. Getting this right the first time also saves a trip back to the store — see our guide to calculating track lighting circuit load if you’re planning to add several new heads to the same run.
Understanding Track Lighting Basics
Before identifying your specific type, it helps to know what makes up a track lighting system. At its core, a track lighting system consists of three main parts:
- The Track: The metal bar that houses the electrical conductors, usually mounted on the ceiling or wall. Learn more in our complete guide to how track lighting works.
- The Fixtures (or Heads): The individual lights that attach to the track — spotlights, floodlights, pendant lights, or decorative elements.
- The Connectors: The mechanism that lets fixtures slide into and connect electrically with the track. This is the key differentiator between track types.
The track itself has two electrical channels inside, plus a ground channel. The connectors on the fixtures bridge these channels to power the light. How these connectors are shaped and positioned is what defines the type of track system you have.
Common Types of Track Lighting
There are several types of track lighting systems, but three are far more common in homes and small commercial spaces: H-type, J-type, and L-type. Each has a distinct connector shape and contact count.
Count the Electrical Contacts (Fastest Way to Tell)
Before checking connector shape, count the visible contacts: three contacts means H-type. Two contacts means either J-type or L-type — pin spacing tells those two apart (covered in the L-type section below).
“An ‘H’ fixture adapter has three silver-colored contacts — two on one side, and one on the other. An ‘L’ fixture has two silver contacts shaped like a propeller. The ‘J’ fixture has two rounded contacts, and one side is marked ‘P.'”
— WAC Lighting Technical Support documentation
H-Type Track Lighting (Halo)
The H-type system is one of the most widely used, especially in residential settings. It’s often called Halo track lighting because Halo is a major manufacturer of this system. The key identifier for H-type is the shape of the connector on the light fixture — and the track itself tends to look noticeably “chunkier” than J-type or L-type track.
Key Features of H-Type:
- Connector Shape: Three contacts total — two flat parallel bars plus a U-shaped grounding bar. Viewed end-on, it often looks like a capital “H” lying on its side.
- Compatibility: H-type fixtures only work with H-type tracks.
- Voltage: Most commonly 120-volt systems in North America.
- Common Brands: Halo is the most recognized, but other manufacturers also produce compatible fixtures and tracks.
J-Type Track Lighting (Juno)
The J-type system is another very popular choice, often associated with the Juno brand, and commonly found in homes and retail environments. The connector design is different from H-type, making it distinct once you know what to look for.
Key Features of J-Type:
- Connector Shape: Two round pins plus a U-shaped grounding pin. One side of the connector is typically marked with a “P.”
- Compatibility: J-type fixtures are not interchangeable with H-type or L-type tracks.
- Voltage: Typically 120-volt systems.
- Common Brands: Juno is the primary brand, but others also make compatible J-type systems.
L-Type Track Lighting (Lightolier)
L-type track lighting, often associated with Lightolier, is less common in new residential installations but still turns up in older homes and specific commercial applications. Its connector design differs from both H and J types.
Key Features of L-Type:
- Connector Shape: Two flat contacts shaped like a propeller, plus a separate grounding contact.
- Pin Spacing: The most reliable confirmation is measurement — L-type pins are spaced 7/8 inch apart, versus a full 1 inch on both H-type and J-type connectors.
- Compatibility: L-type fixtures are specific to L-type tracks.
- Common Brands: Lightolier is the main brand, though other manufacturers may have compatible lines.
📊 L-type track connectors are spaced 7/8 inch pin-to-pin — a full 1/8 inch narrower than the 1-inch spacing used on H-type and J-type connectors. This measurement is more reliable than eyeballing contact shape alone. — Source: WAC Lighting Support, 2026
Other Less Common Types
While H, J, and L types cover the majority of track lighting you’ll encounter, other systems exist, often proprietary or built for specific applications. These might include:
- Monopoint/Monorail Systems: More flexible systems involving a single wire or a more intricate rail. Less common for general room lighting, more for accent or task lighting.
- Low-Voltage Track Systems: Operate at lower voltages (typically 12V) and use a transformer. Fixtures and connectors are usually smaller — look for a transformer unit somewhere in the system.
- European Systems: Track lighting from Europe may use different standards for connectors and track spacing.
For most DIYers, H, J, and L types cover 95% of situations. If your system doesn’t fit these descriptions, take photos and consult a lighting specialist or the manufacturer.
Best Track Lighting Bulb Pick
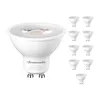
DEWENWILS 10-Pack GU10 LED Track Lighting Bulbs – $14.99
Sized for the GU10 twist-lock base most H-type and J-type track heads use — once you’ve confirmed your connector type above, this pack covers a full track run in one order.
- Best for: Replacing GU10 bulbs across an entire H-type or J-type track run at once
- Why we picked it: Dimmable and sized to fit the GU10 twist-lock base this guide identifies
- Main drawback: 10-pack is more than most single-fixture repairs need
Compare more track lighting bulb options
 Option 1 SETEN 6-Pack GU10 LED Bulbs – $8.44
|
 Option 2 Feit Electric MR16 LED Bulb – $12.08
|
 Option 3 TJOY GU10/MR16 Bulbs 6-Pack – $9.49
|
As an Amazon Associate we earn from qualifying purchases.
How to Identify Your Track Lighting: A Step-by-Step Guide
Grab a stepladder and a flashlight. Safety first: turn off the power to the track lighting at the switch or breaker before inspecting the connectors closely.
Step 1: Inspect the Fixture Connector
This is the most important step. Look at the part of the light fixture that inserts into the track — often you can do this without removing the fixture.
What to Look For:
- Number of Contacts: Three means H-type. Two means J-type or L-type.
- Shape of the Contacts: Flat bars, round pins, or propeller-shaped?
- Spacing: Use calipers or a ruler — 7/8 inch means L-type, 1 inch means H-type or J-type.
Visual Guide to Connectors:
| Track Type | Contact Count | Pin Spacing | Typical Appearance |
|---|---|---|---|
| H-Type (Halo) | Three (2 flat bars + U-ground) | 1 inch | Looks like an “H” on its side |
| J-Type (Juno) | Two round pins (+ ground) | 1 inch | Round pins, one side marked “P” |
| L-Type (Lightolier) | Two flat contacts | 7/8 inch | Propeller-shaped contacts |
You may need to gently rotate or slide the fixture to get a clear view of the connector. Sometimes the fixture itself has a label indicating the type or brand.
Step 2: Check for Manufacturer Labels
Many track lighting systems have labels on the track itself or on the fixtures that directly state the brand or type.
Where to Look:
- On the Track: Along the length of the track, especially near the end caps or power feed.
- On the Fixture: The body of the light fixture, the part that attaches to the track, or underneath.
- On the Canopy: If a canopy covers the ceiling connection point, check there too.
Labels might say “Halo,” “Juno,” “Lightolier,” or a specific model number. This is often the fastest way to confirm your identification.
Step 3: Examine the Track Profile
The fixture connector is the primary identifier, but the track itself offers a secondary clue: H-type track tends to look noticeably chunkier, while J-type and L-type tracks run slimmer.
What to Observe:
- Grooves/Slots: The slots where the connector slides in correspond to the connector type.
- Overall Shape: Most common tracks are U-shaped or rectangular.
H-type tracks typically have three slots — two for power and one for ground. J-type tracks also have three slots, but the internal shape and spacing are designed for round pins rather than flat bars.
Step 4: Consider the Age and Location of Installation
The age of your home or the context of the installation can offer a supporting clue:
- Older Homes (pre-1990s): More likely to have older L-type or proprietary systems.
- General Residential Use (1990s-Present): H-type (Halo) and J-type (Juno) are dominant and very common.
- Retail or Commercial Spaces: Often standardized H-type or J-type, but specialized systems do exist.
Treat this as a supporting clue rather than a definitive identification method — it can help narrow things down when the connector itself is hard to inspect.
Step 5: Test Compatibility (With Caution!)
If you have a spare, compatible fixture from another light of the same suspected type, you can cautiously try inserting it. Only do this with the power confirmed off, and never force anything. If it slides in smoothly and the contacts align, you’ve found your match.
Important Safety Note: Never force a fixture into a track. If it doesn’t fit easily, stop — forcing it can damage the track or fixture and lead to electrical failure. When in doubt, consult a professional electrician or lighting store. If you’re removing a fixture entirely rather than testing a replacement, our guide to removing lights from track lighting walks through the process safely.
Troubleshooting Common Issues
Even after identifying your track type, you might run into problems. Here are common scenarios and how to address them:
- Fixture Won’t Connect: Usually a mismatch of track type or a bent connector. Double-check your identification and confirm the fixture’s contacts aren’t damaged.
- Light Flickers or Doesn’t Turn On: Confirm the fixture is fully seated in the track. The electrical contacts might be dirty or corroded — turn off the power and carefully clean the contacts on both the fixture and track with a dry cloth or pencil eraser. Sliding the fixture back and forth can help reseat the connection.
- Bulb Type is Unclear: GU10 bulbs use two flat, rounded pins spaced 10mm apart that twist to lock into a line-voltage (120V) socket. MR16 bulbs use two thin, pointed pins spaced 5.3mm apart that push straight into a 12-volt socket fed by a transformer. If you see a small transformer box near the track, it’s an MR16 system; no visible transformer usually means GU10. See our guide to replacing a track lighting bulb for the full swap process.
If your system seems old or unusual, it might be worth upgrading to a more modern, standardized track lighting system. This makes future replacements and additions much simpler.
Tools and Resources That Can Help
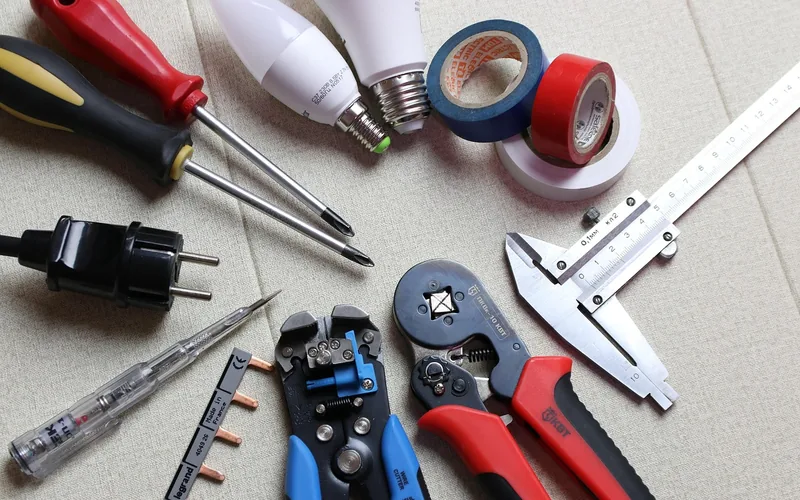
Most identification can be done by eye, but a few simple tools make the process easier and more accurate.
- Stepladder: Essential for safely reaching your track lighting. Make sure it’s stable and on a level surface.
- Flashlight: To clearly see the details of the connectors and labels.
- Calipers or a Small Ruler: To measure the 7/8-inch vs 1-inch pin spacing that separates L-type from H-type and J-type.
- Camera/Smartphone: Take clear photos of the connectors and any labels — helpful if you need to show them to a salesperson or consult online resources.
- Magnifying Glass (Optional): For very small or unclear labels.
Online Resources:
When trying to match a fixture or track, online retailers and manufacturer websites are invaluable. Websites like Home Depot, Lowe’s, or specialized lighting suppliers often have detailed product descriptions and compatibility charts. Searching for the brand name you found (for example, “Halo track lighting accessories”) can lead you to the right parts.
For electrical safety information, the U.S. Consumer Product Safety Commission (CPSC) offers guidance on electrical safety in the home.
When to Call a Professional
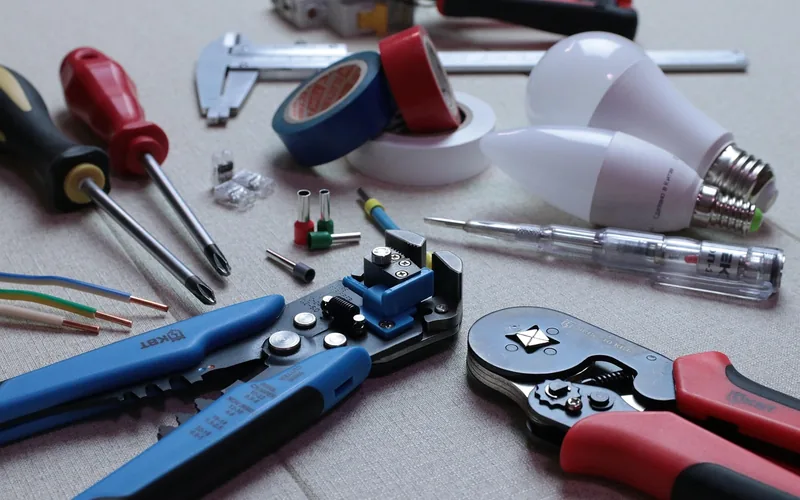
Identifying track lighting is usually a DIY-friendly task, but there are times to bring in an expert. Call a qualified electrician if you run into any of the following:
- Uncertainty About Power: If you’re unsure about turning off the power or handling electrical connections, let a pro handle it.
- Damaged Track or Fixtures: If the track or fixture appears broken, melted, or significantly damaged, it could be a safety hazard.
- Complex Systems: A very old, unusual, or commercial-grade system that doesn’t match common types needs an electrician’s experience to identify.
- Installation or Rewiring: If you need to install new track, move existing track, or upgrade your system, an electrician ensures it’s done correctly and safely.
- Persistent Electrical Problems: If lights constantly flicker, trip breakers, or won’t work despite your best efforts, there might be a deeper electrical issue.
A professional can not only identify your system but also ensure all work is up to code and performed safely.
Frequently Asked Questions
How do I know if my track lighting is 12V or 120V?
Most residential track lighting is 120V line-voltage. If you see a bulky transformer box somewhere in the system, or notice very thin wires, it’s likely a low-voltage 12V system. Connector type (H, J, or L) is independent of voltage, so check for labels or consult an electrician if you’re unsure.
Can I mix and match fixtures from different brands on the same track?
Only if they’re designed for the same connector type — all H-type, or all J-type, for example. Even then, stick with reputable brands and confirm compatibility with your specific track system before mixing.
My track lighting isn’t working. What’s the first thing I should check?
First check that power is on at the switch and breaker. Then confirm the fixture is fully seated in the track and the bulb is good. If both check out, turn the power off and clean the electrical contacts on the fixture and track.
What does it mean if my track lighting has three slots for connectors?
Three slots is standard for H, J, and L type systems: two for the main electrical current and one for grounding. This is the normal configuration for safe operation, not a sign of a special or unusual system.
Can I replace just the track, or do I need to replace the whole system?
You can typically replace just the track if it’s damaged, as long as the replacement is compatible with your existing fixtures and connectors. For older or proprietary systems, upgrading the entire setup to modern H-type or J-type often makes replacement parts easier to find.
What’s the difference between a spotlight and a floodlight in track lighting?
The difference is beam angle: a spotlight has a narrow beam for highlighting a specific object, while a floodlight has a wider beam for general room illumination. Both are available for H, J, and L type systems.
What’s the difference between GU10 and MR16 track light bulbs?
GU10 bulbs use flat, rounded pins spaced 10mm apart and twist-lock into line-voltage (120V) sockets. MR16 bulbs use thin, pointed pins spaced 5.3mm apart that push into a 12-volt socket fed by a transformer. The two are not interchangeable — a GU10 bulb will not physically fit an MR16 socket.
Conclusion
You now have what you need to confidently identify your track lighting system. Count the contacts first — three means H-type, two means J-type or L-type — then confirm with connector shape, pin spacing, or a manufacturer label. This skill ensures you buy the correct replacement bulbs, accessories, or additional fixtures without a wasted trip to the store.
Safety comes first: always turn off the power before inspecting or working on your lighting. If you’re ever unsure or run into a complex system, call a qualified electrician.
Sponsored / affiliate links. As an Amazon Associate I earn from qualifying purchases. I may earn additional commission from eligible campaigns.