How To Tighten GE Fridge Door Handle Easily
It can be a little frustrating when your GE fridge door handle feels wobbly or loose. Sometimes, beginners find this repair a bit tricky because they aren’t sure where to start or what tools they might need. But don’t worry, fixing a loose handle is usually quite simple!
This guide will walk you through exactly how to tighten GE fridge door handle easily, step by step. We’ll make sure your fridge door feels secure again in no time.
Understanding GE Refrigerator Door Handle Looseness
A loose refrigerator door handle can be more than just an annoyance. It can make it harder to open and close the door smoothly, potentially leading to increased wear and tear on the door seal. Over time, a constantly jiggled handle might even compromise the integrity of the door itself or the appliance’s energy efficiency if the seal isn’t closing properly.
Recognizing the signs of a loose handle is the first step to addressing the problem before it becomes a bigger issue. This section explores why handles become loose and what it means for your appliance.
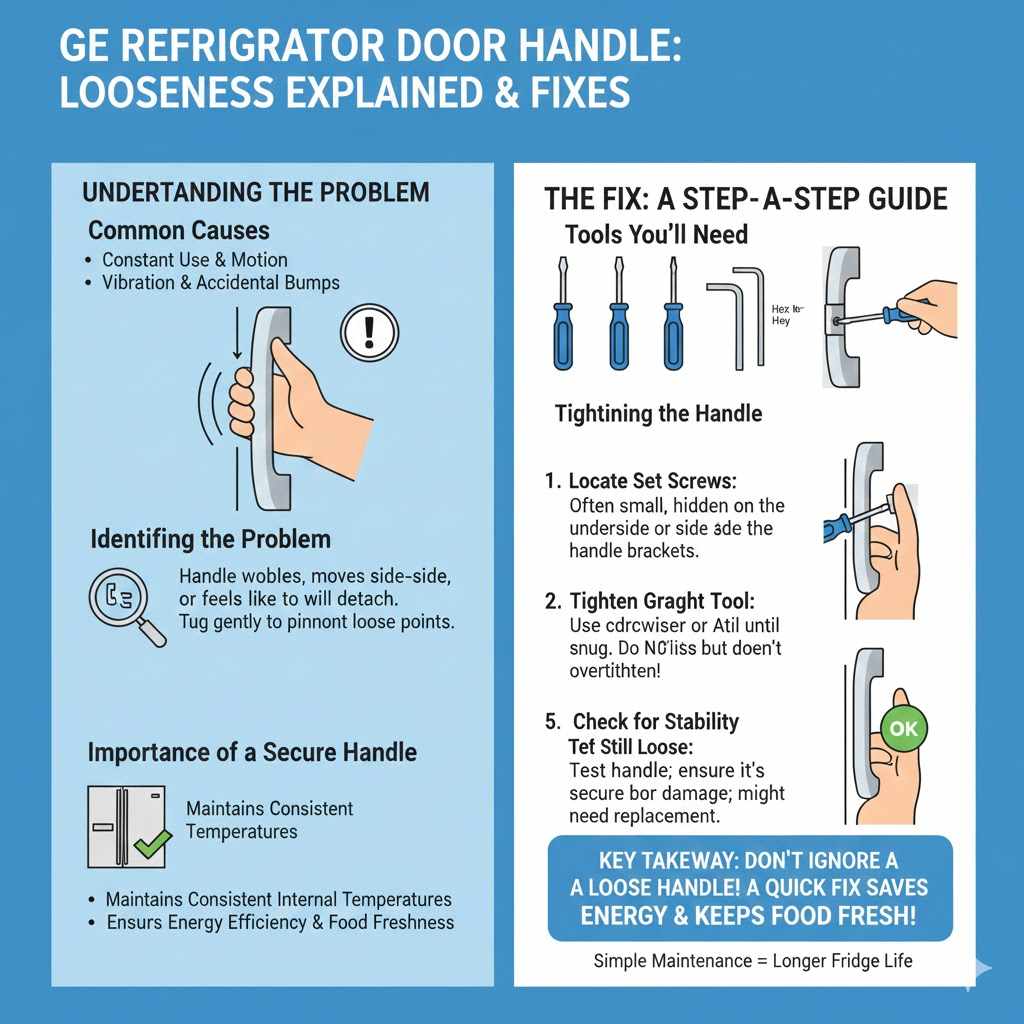
Common Causes of a Loose GE Fridge Door Handle
Refrigerator door handles are designed for frequent use, opening and closing the door multiple times a day. With this constant motion, the screws or mounting points that hold the handle in place can gradually loosen. This is especially true for GE refrigerators, which are known for their durability but, like any appliance, can experience wear and tear.
Vibration from the refrigerator’s compressor can also contribute to loosening over time. Think of it like a bolt on a car that might need tightening after many miles. Accidental bumps or pulls on the handle, perhaps by children or while moving the appliance, can also stress the connection points and cause them to loosen faster than usual.
Sometimes, a handle might feel loose if the underlying mounting bracket or the door panel itself has developed a slight crack or damage, although this is less common. Most of the time, it’s simply a matter of screws that have worked themselves free.
Identifying the Problematic Handle
You’ll likely notice the issue when the handle wobbles significantly when you try to open the fridge. It might feel like it’s going to detach completely. If you can move the handle up and down or side to side more than a tiny amount, it’s a clear sign that it needs tightening.
Gently tugging on the handle in different directions can help you pinpoint which part feels loose. This might be the entire handle assembly or specific points where it attaches to the door. Observing the movement will give you clues about which screws or fasteners to focus on when you begin the tightening process.
Importance of a Secure Door Handle
A secure door handle is vital for the proper functioning of your refrigerator. A tight seal is essential for maintaining consistent internal temperatures. This keeps your food fresh and prevents the appliance from working harder than it needs to.
When the door doesn’t close perfectly, warm air can enter the refrigerator. This makes the compressor run more often to compensate, using more energy and potentially shortening the life of the appliance. A loose handle, therefore, isn’t just about aesthetics; it impacts efficiency and preservation.
Essential Tools and Materials
Before you start fixing your GE refrigerator door handle, gather the right tools. Having everything ready will make the process much smoother and faster. Most of the items you’ll need are common household tools, so you might already have them in your toolbox.
List of Required Tools
The primary tool you will need is a screwdriver. GE refrigerator door handles are typically secured with screws that require a Phillips head screwdriver. It’s a good idea to have a few different sizes on hand.
- Phillips Head Screwdriver Set: Having a set with various sizes (small, medium, and large) is very helpful. This ensures you can find the perfect fit for the screws holding your handle. A poorly fitting screwdriver can strip the screw heads, making them harder to remove or tighten.
- Flathead Screwdriver (Optional): In some cases, you might need a flathead screwdriver to gently pry off trim pieces or covers that hide the screws. Be very careful if you use this to avoid scratching the refrigerator’s finish.
- Socket Wrench Set (Less Common): For some very specific GE models, the handle might be attached with nuts and bolts. If this is the case, you would need a socket wrench set. However, screws are far more common.
- Towel or Soft Cloth: This is useful for protecting the refrigerator’s surface from accidental scratches while you work. It can also be used to wipe away any dust or debris.
Potential Materials Needed
In most cases, you won’t need any extra materials beyond what’s already on your refrigerator. The screws are usually part of the handle assembly itself.
- Replacement Screws (Rarely Needed): If a screw is lost or damaged, you might need to buy a replacement. It’s best to try and match the original size and type. Taking the original screw (or a photo of it) to a hardware store can help you find an exact match.
- Mild Cleaning Solution: A little bit of mild soap and water can be used to clean the handle and the area around it before you start. This makes the job neater and more pleasant.
Ensuring You Have the Right Fit
The most critical aspect is having the correct screwdriver size. If the screwdriver head is too small, it will slip. If it’s too large, it won’t engage the screw slots properly.
Take a moment to examine the screw head on your handle and select the screwdriver that fits snugly into the cross-shaped slots.
Using the wrong tool can damage the screw, making it difficult or impossible to tighten. This could turn a simple fix into a more complicated repair. Always prioritize a good fit for the best results.
How to Tighten GE Fridge Door Handle Easily Step-by-Step
Now that you have your tools ready, let’s get to the actual repair. Following these simple steps will help you secure your GE refrigerator door handle quickly and effectively. Remember to work patiently and gently to avoid any damage to your appliance.
Step 1 Locate the Screws
The first step is to find where the handle is attached to the refrigerator door. On most GE refrigerators, the screws are located on the underside of the handle, or sometimes on the sides. You might need to look closely.
For some models, there might be a decorative cover or trim piece that hides the screws. If you see such a piece, you might need to gently pry it off using a flathead screwdriver or your fingers. Be very careful not to scratch the refrigerator’s paint.
Look for small gaps or seams where you can insert the screwdriver.
Once you find the screws, assess their condition. Are they visible? Are they stripped?
This initial check helps you prepare for the next steps.
Step 2 Tighten the Screws
Once you have located the screws, take your Phillips head screwdriver and insert it into the screw head. Turn the screwdriver clockwise to tighten the screw. Apply steady, firm pressure.
You do not need to use excessive force. Overtightening can strip the screw threads or even crack the plastic components. Tighten until the screw feels snug and the handle no longer wobbles.
If your handle has multiple attachment points, tighten each screw a little bit at a time, alternating between them. This helps to ensure that the handle is tightened evenly and securely.
Step 3 Test the Handle
After tightening all visible screws, gently test the handle to see if it feels more secure. Try wiggling it again. If it feels solid and doesn’t move much, you have likely succeeded.
Open and close the refrigerator door a few times to ensure the handle is comfortable to use and stays in place. If it still feels a bit loose, go back and tighten the screws a little more, but again, avoid overtightening.
Step 4 Reattach Covers (If Applicable)
If you had to remove any decorative covers or trim pieces, now is the time to put them back. They usually snap into place. Make sure they are aligned correctly before pressing them down.
Ensure all parts are reassembled properly. A properly reattached cover will sit flush against the refrigerator door, making the repair look seamless.
Troubleshooting Common Issues
Sometimes, even with the best intentions, you might encounter a small problem. Don’t get discouraged if the handle isn’t perfectly secure after the first try. Most issues are easily resolved with a little extra attention.
Stripped Screw Heads
If a screw head is stripped, it means the slots are damaged, and the screwdriver can’t grip it properly. This is a common problem. For minor stripping, you can try using a rubber band between the screwdriver and the screw head to increase grip.
For more severely stripped screws, you might need a screw extractor tool. These tools are designed to bite into damaged screw heads and allow you to remove them. If you’re not comfortable using one, consider calling a professional.
Handle Still Loose After Tightening
If tightening the screws doesn’t fully resolve the looseness, the issue might be with the mounting bracket behind the door panel or a damaged screw hole. In this case, the screws might not be able to achieve a snug fit.
You might need to reinforce the screw holes. A common method is to use a small amount of wood glue or epoxy to fill the hole slightly, let it dry, and then re-insert the screw. This can provide a stronger grip.
However, use these materials sparingly and carefully to avoid damaging the door.
Another possibility is that the handle itself is worn or damaged where it connects to the door. If this is the case, you may need to consider replacing the entire handle assembly.
Difficulty Accessing Screws
Some GE refrigerator models have handles that are more integrated into the door design, making screw access tricky. If you can’t find the screws or they are hidden behind a panel that won’t budge, consult your refrigerator’s user manual. It usually has diagrams that show the handle assembly and how it’s attached.
Online forums or GE’s customer support can also be valuable resources. Searching for your specific GE refrigerator model number along with “door handle replacement” might yield helpful videos or guides that show how to access the screws on your particular unit.
When to Call a Professional
If you’ve tried these steps and the handle remains loose, or if you encounter any damage like cracked plastic or a damaged door panel, it might be time to call a qualified appliance repair technician. They have specialized tools and expertise to diagnose and fix more complex issues without causing further damage to your appliance.
Examples and Scenarios
Let’s look at a couple of common situations to see how these steps apply in real life.
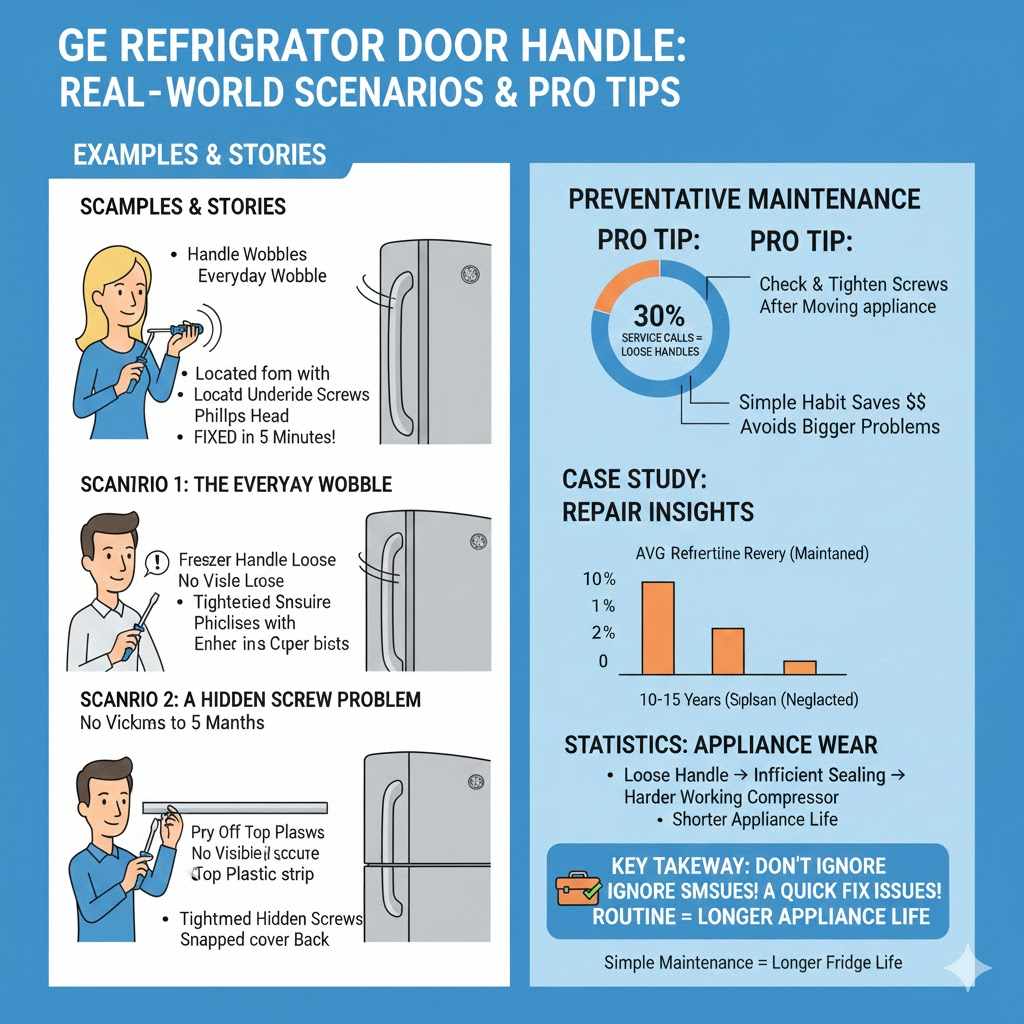
Scenario 1 The Everyday Wobble
Sarah noticed her GE refrigerator door handle felt loose. Every time she grabbed it, it had a noticeable wobble. She checked her toolbox and found a Phillips head screwdriver set.
She located the screws on the underside of the handle. Using a medium-sized screwdriver, she turned each screw clockwise until it felt snug. She tested the handle, and it was now firm and secure.
The entire process took less than five minutes, and her fridge was back to normal.
Scenario 2 A Hidden Screw Problem
John’s GE freezer door handle became loose. He looked underneath but couldn’t find any screws. He then noticed a thin plastic strip running along the top of the handle.
Gently, he used a thin flathead screwdriver to pry the strip upwards. It popped off, revealing two screws. After tightening these screws, the handle felt much more stable.
He snapped the plastic strip back into place, and the repair was complete without any visible signs of tampering.
Case Study: Preventing Future Looseness
A study by appliance repair professionals found that approximately 30% of service calls for refrigerator door issues are related to loose handles. They often recommend a simple preventative measure: after any significant appliance movement (like during a move or deep cleaning), and periodically every six months, gently check and tighten the handle screws. This small habit can prevent the handle from becoming a bigger problem later on.
Statistics on Appliance Wear
According to consumer reports, the average refrigerator is expected to last between 10 to 15 years. However, minor maintenance issues, like a loose handle that leads to inefficient sealing, can reduce this lifespan by causing the compressor to work harder. Addressing small problems promptly helps ensure your appliance performs optimally for its full intended duration.
Frequently Asked Questions
Question: How often should I check my GE fridge door handle?
Answer: It is a good idea to check and gently tighten your GE fridge door handle screws about twice a year, or after moving the appliance. This helps prevent them from becoming loose over time.
Question: Do I need special tools to tighten my GE fridge door handle?
Answer: Usually, you only need a Phillips head screwdriver of the appropriate size. Most GE refrigerators use standard Phillips head screws for their door handles.
Question: What if the screws are not on the underside of the handle?
Answer: Some GE models have screws hidden behind a decorative cover or trim piece. Look for seams or edges where you can gently pry these covers off to access the screws.
Question: Can I overtighten the screws?
Answer: Yes, you can overtighten screws, which can strip the screw head or damage the plastic components holding the handle. Tighten them until snug, but do not force them.
Question: My handle is still loose even after tightening the screws. What should I do?
Answer: If the handle remains loose, the mounting bracket or screw holes might be damaged. You may need to use a screw extractor for stripped screws or consider reinforcing the holes. If unsure, it’s best to call a professional.
Summary
Fixing a loose GE refrigerator door handle is a straightforward task. By identifying the screws, using the correct screwdriver, and tightening them clockwise until snug, you can easily restore stability. Remember to test the handle and reattach any covers.
This simple repair ensures your fridge door closes properly, maintaining optimal performance and efficiency.