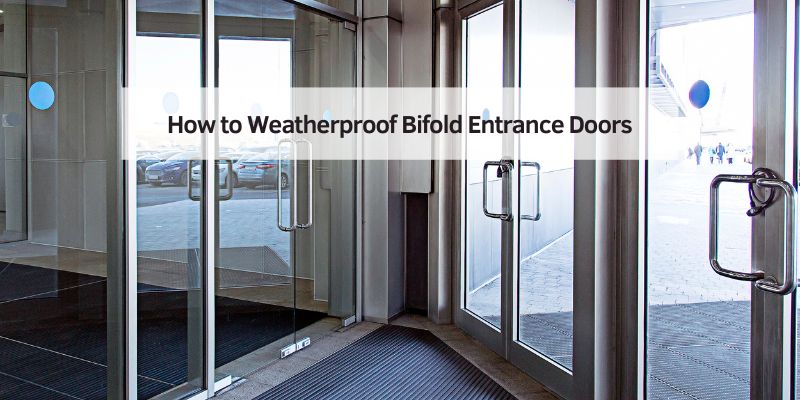
How to Weatherproof Bifold Entrance Doors
Hey there! If you’ve got bifold entrance doors at your home, you know they’re a beautiful way to connect your indoor space with the outdoors. But here’s the thing: without proper weatherproofing, those doors can let in drafts, moisture, and even bugs. I’ve spent years tinkering with woodworking projects, and I’ve learned a thing or two about keeping bifold doors in top shape against the elements. In this guide, I’ll walk you through everything you need to know to weatherproof bifold entrance doors like a pro. Let’s dive in!
Why Weatherproofing Bifold Doors Matters
Let me tell you why this is so important. Bifold doors are unique. They fold in sections, creating large openings for light and air. But those moving parts and seams? They’re magnets for leaks. Rain, wind, and cold air can sneak through tiny gaps. Over time, this can damage your doors, warp the wood, or even mess with your home’s energy efficiency. I’ve seen it happen—my neighbor’s bifold doors started swelling because they weren’t sealed properly. Weatherproofing protects your investment, keeps your home cozy, and saves you money on energy bills. Plus, it’s easier than you might think!
Choosing the Right Materials for Weatherproofing
Before you start, you need the right tools and materials. I’ve made the mistake of grabbing cheap supplies, only to redo the job later. Trust me, quality matters. Here’s what you’ll need:
- Weatherstripping: This seals gaps around the door edges. Look for durable options like silicone or EPDM rubber.
- Sealant: A high-quality exterior caulk, like silicone or polyurethane, works wonders for sealing joints.
- Door sweeps: These go at the bottom of your doors to block drafts and water.
- Threshold seals: These fit under the door to create a tight seal with the floor.
- Protective finish: A good exterior-grade varnish or paint protects the wood from moisture.
- Cleaning supplies: Mild soap, water, and a soft cloth to prep the surface.
Pro tip: Check the manufacturer’s recommendations for your doors. Some finishes or sealants might not play nice with certain materials.

Inspecting Your Bifold Doors
Before you slap on weatherstripping, take a good look at your doors. I always start by checking for damage. Look for cracks, warped panels, or loose hinges. Run your hand along the edges to feel for drafts. If you’ve got a flashlight, shine it around the seams at night—you’ll spot gaps easily. Once, I found a tiny crack in my doorframe that was letting in water. Fixing it early saved me a ton of hassle. Make sure the tracks are clean and the doors move smoothly. Any dirt or debris can mess with your weatherproofing efforts.
Cleaning and Prepping the Doors
You can’t weatherproof dirty doors. I learned this the hard way when sealant wouldn’t stick to a grimy surface. Grab some mild soap and water, and gently clean the doors and frames. Pay extra attention to the tracks and edges. Dry everything with a soft cloth. If your doors have an old finish that’s peeling, sand it lightly to create a smooth surface. This step is key—it ensures your weatherproofing materials adhere properly.
Applying Weatherstripping to Bifold Doors
Weatherstripping is your first line of defense. I like using self-adhesive silicone weatherstripping because it’s easy to apply and lasts for years. Here’s how I do it:
- Measure the door edges carefully. Cut the weatherstripping to fit each section.
- Clean and dry the area where you’ll apply it.
- Peel off the backing and press the weatherstripping firmly along the doorframe or door edges.
- Test the door to make sure it closes smoothly. If it’s too tight, trim the weatherstripping slightly.
Focus on the top, sides, and between the folding panels. Bifold doors have more moving parts than regular doors, so don’t skip any seams. I once forgot to seal the middle where the panels meet, and I could feel a breeze every time I walked by!
Installing Door Sweeps and Threshold Seals
The bottom of your bifold doors is a sneaky spot for leaks. I’ve seen water pool under doors during heavy rain because they lacked a proper seal. A door sweep is a strip that attaches to the bottom of each door panel. It brushes against the floor to block drafts and water. Here’s a quick guide:
- Measure the width of each door panel.
- Cut the door sweep to size.
- Attach it with screws or adhesive, depending on the type.
- Adjust it so it touches the floor lightly when the door closes.
For extra protection, install a threshold seal under the doors. This sits in the track or on the floor, creating a tight barrier. I used a rubber threshold seal on my patio bifolds, and it’s been a game-changer during storms.
Sealing Joints and Gaps with Caulk
Caulk is your best friend for filling gaps. I use a silicone-based exterior caulk because it’s flexible and weather-resistant. Walk around your doors and look for any cracks or gaps in the frame or between panels. Apply a thin, even bead of caulk, then smooth it with your finger or a caulk tool. Wipe away any excess with a damp cloth. Be patient—rushing this step can leave a messy finish. I usually let the caulk cure for 24 hours before testing the doors.
Applying a Protective Finish
Wooden bifold doors need a strong finish to stand up to the weather. I’ve tried both varnish and paint, and both work well if you choose exterior-grade products. Here’s what I do:
- Sand the doors lightly to remove any old finish.
- Apply a primer if you’re painting, or a wood conditioner if you’re varnishing.
- Brush on thin, even coats of your chosen finish. Two or three coats are usually enough.
- Let each coat dry completely before adding the next.
A good finish not only protects against moisture but also UV rays, which can fade or crack wood over time. I reapply a fresh coat every couple of years to keep my doors looking sharp.
Maintaining Your Weatherproofed Bifold Doors
Weatherproofing isn’t a one-and-done deal. I check my doors every spring and fall to make sure everything’s holding up. Look for worn weatherstripping, cracked caulk, or peeling finishes. Clean the tracks regularly to keep the doors moving smoothly. If you live in a harsh climate—think heavy rain or freezing winters—you might need to touch up more often. A little maintenance goes a long way in keeping your doors weather-tight.
Comparing Weatherproofing Options
Not sure which weatherproofing method to prioritize? Here’s a table to help you decide:
| Method | Pros | Cons | Best For |
|---|---|---|---|
| Weatherstripping | Easy to install, affordable | May need replacing every few years | Sealing gaps around edges |
| Door Sweeps | Great for blocking drafts and water | Can wear out with heavy use | Bottom of doors |
| Threshold Seals | Excellent for water protection | Installation can be tricky | High-rain areas |
| Caulk | Fills small gaps, long-lasting | Requires careful application | Joints and seams |
| Protective Finish | Protects wood, enhances look | Time-consuming to apply | Wooden bifold doors |
This table helped me figure out what to focus on when I first weatherproofed my doors. Mix and match based on your needs!
Tips for Weatherproofing in Different Climates
Where you live makes a big difference. I’m in the Midwest, where we get freezing winters and humid summers. If you’re in a similar spot, prioritize threshold seals and heavy-duty weatherstripping to handle temperature swings. In rainy areas like the Pacific Northwest, focus on door sweeps and caulk to keep water out. If you’re in a sunny state like Arizona, a UV-resistant protective finish is key to prevent fading. Tailor your approach to your climate for the best results.
Common Mistakes to Avoid
I’ve made plenty of mistakes over the years, so let me save you some trouble. Don’t skip the cleaning step—dirt can ruin your sealant’s adhesion. Avoid cheap weatherstripping; it’ll wear out fast. Don’t overdo the caulk, or you’ll end up with a gloopy mess. And please, don’t ignore maintenance. I once let my doors go too long without a touch-up, and I had to replace a warped panel. Learn from my slip-ups!
Why I Love Weatherproofed Bifold Doors
There’s something satisfying about a well-sealed bifold door. They glide smoothly, keep my home comfortable, and look great doing it. After weatherproofing mine, I noticed my energy bills dropped, and I didn’t have to deal with puddles after a storm. It’s a small project with big rewards. Plus, it’s a chance to get hands-on with your home and make it your own.

Conclusion
Weatherproofing your bifold entrance doors is a project anyone can tackle with the right tools and a bit of patience. From choosing quality materials to applying weatherstripping and finishes, every step counts toward protecting your doors from the elements. I’ve shared my process, mistakes, and tips to help you get it right the first time. Whether you’re battling rain, wind, or cold, a well-weatherproofed door will keep your home cozy and your doors looking great for years. So grab your supplies, roll up your sleeves, and give your bifold doors the protection they deserve. You’ll be amazed at the difference it makes!
FAQs
How often should I check my bifold doors for weatherproofing issues?
Check your doors at least twice a year, ideally in spring and fall. Look for worn weatherstripping, cracked caulk, or peeling finishes. If you notice drafts or water leaks, inspect sooner.
Can I weatherproof bifold doors myself, or should I hire a professional?
You can definitely do it yourself! It’s a straightforward project if you follow the steps. But if your doors are damaged or you’re not comfortable with tools, a professional can save time.
What’s the best weatherstripping for bifold doors?
Silicone or EPDM rubber weatherstripping is my go-to. They’re durable, flexible, and easy to install. Make sure it’s rated for exterior use to handle weather changes.
How do I know if my bifold doors need a new protective finish?
If the wood looks faded, cracked, or feels rough, it’s time for a new finish. Test by sprinkling water on the surface—if it doesn’t bead up, the finish is worn out.
Can I use the same weatherproofing methods for aluminum bifold doors?
Yes, but skip the protective finish since aluminum doesn’t need it. Focus on weatherstripping, door sweeps, and caulk to seal gaps.