My First Kwikset Deadbolt Removal
When I moved into my home in Colorado, the front door had a Kwikset deadbolt that was starting to jam. The key stuck sometimes, and I didn’t feel secure. I decided to replace it with a newer model, but first, I had to figure out how to get the old one off. I’d never removed a deadbolt before, so I grabbed my toolbox, watched a couple of YouTube videos, and called a locksmith friend for advice. It took some trial How to Remove a Kwikset Deadbolt: A Step-by-Step Guide
Hey there! If you’re reading this, you’re probably looking to remove a Kwikset deadbolt from your door, and I’m here to help. I’ve tackled this task a few times myself—whether it was to upgrade my home’s security, replace a faulty lock, or just give my door a fresh look.
Removing a Kwikset deadbolt might seem intimidating at first, especially if you’re not super handy, but trust me, it’s doable with the right guidance. In this article, I’m going to walk you through the entire process, step by step, so you can get that deadbolt off your door without breaking a sweat. Whether you’re a DIY newbie or a seasoned pro, I’ve got you covered with clear instructions, helpful tips, and even a few tricks I’ve learned along the way. Let’s dive in and get that deadbolt removed!
Why You Might Need to Remove a Kwikset Deadbolt
Let’s start with why you might want to take off your Kwikset deadbolt in the first place. There are plenty of reasons, and I’ve been through a few of them myself. Maybe your deadbolt is old and sticking, making it hard to lock or unlock your door. Or perhaps you’re upgrading to a smart lock for extra convenience. Sometimes, it’s as simple as wanting a new style to match your home’s vibe. I once had a Kwikset deadbolt that started jamming after a few years, and removing it was the only way to fix the issue. Other times, you might be moving out and need to replace the lock for the next tenant. Whatever your reason, knowing how to remove it properly will save you time and maybe even a call to a locksmith.
Tools You’ll Need to Get Started
Before we jump into the process, let’s talk about the tools you’ll need. I’ve learned the hard way that having the right tools makes all the difference. You don’t need a fancy toolbox, but a few basics will make this job smooth and stress-free. Here’s what I recommend:
| Tool | Purpose |
|---|---|
| Phillips screwdriver | To remove the screws holding the deadbolt in place |
| Flathead screwdriver | For prying off covers or loosening tight parts |
| Allen wrench (optional) | Some Kwikset models use Allen screws |
| Paperclip or pin | For resetting or removing certain smart locks |
| Rag or cloth | To clean up or protect your door’s finish |
| Small container | To keep screws safe (trust me, you don’t want to lose them!) |
I always keep a small bowl nearby to toss screws into—nothing’s worse than crawling around looking for a tiny screw that rolled under the couch. If you’re working with a Kwikset smart lock, check the manual for any specific tools, like an Allen wrench, that might be required.

Preparing Your Workspace
Okay, before you start unscrewing anything, let’s set up your workspace. I can’t tell you how many times I’ve scratched a door or dropped a screw because I rushed in. First, make sure you’re working in a well-lit area. If your door is in a dim hallway, grab a flashlight or a portable work light. Next, lay down a rag or towel to catch any falling screws or to protect your floor. If your deadbolt is part of a smart lock system, turn off the power or remove the batteries to avoid any electrical mishaps. I also like to give the door a quick wipe to remove dust or grime—it just makes the whole process feel cleaner. Lastly, double-check that you have all your tools within arm’s reach. There’s nothing more annoying than stopping mid-task to hunt for a screwdriver.
Step-by-Step Guide to Removing a Kwikset Deadbolt
Now, let’s get to the good stuff—actually removing that Kwikset deadbolt. I’ve broken this down into clear steps based on my own experience, so you can follow along easily. Whether you have a standard Kwikset deadbolt or a smart lock model, this process should cover most scenarios.
Step 1: Remove the Interior Cover or Plate
Start on the inside of your door, where the thumb turn or keypad is located. Most Kwikset deadbolts have a cover plate or rose that hides the mounting screws. Look closely—some covers snap off, while others are held by small screws. I usually use a flathead screwdriver to gently pry off snap-on covers. Be careful not to force it, or you might scratch the finish. If you see screws holding the cover, grab your Phillips screwdriver and remove them. Set the screws in your small container so they don’t get lost. Once the cover is off, you should see two mounting screws that hold the deadbolt assembly together.
Step 2: Unscrew the Mounting Screws
With the cover off, you’ll see two screws (sometimes three, depending on the model) that connect the interior and exterior parts of the deadbolt. Use your Phillips screwdriver to remove these screws. I’ve found that turning slowly and applying steady pressure helps avoid stripping the screws. If they’re tight, don’t force them—try wiggling the screwdriver a bit to get a better grip. Place these screws in your container too. Once the screws are out, the interior part of the deadbolt should feel loose. Don’t pull it off just yet, as it’s still connected to the exterior part.
Step 3: Remove the Interior and Exterior Components
Now, gently pull the interior part of the deadbolt (the thumb turn or keypad) away from the door. The exterior part (the key cylinder or outer face) should come loose too, since they’re no longer held together by the screws. If it feels stuck, wiggle it gently—sometimes the latch mechanism keeps things snug. I had one deadbolt that was a bit stubborn because of some old paint gumming up the edges, so I used a flathead screwdriver to carefully loosen it. Set both parts aside, and you should now see the latch assembly inside the door.
Step 4: Remove the Latch Assembly
The latch assembly is the part that slides into the door frame to lock the door. To remove it, look at the edge of the door. You’ll see a small metal plate (called the strike plate) with two screws. Use your Phillips screwdriver to remove these screws. Once they’re out, you should be able to pull the latch assembly out of the hole in the side of the door. If it’s stuck, give it a gentle tug or use a flathead screwdriver to pry it out. Be patient here—forcing it could damage the door. I once had to wiggle the latch back and forth to free it from some old wood shavings inside the door.
Step 5: Check for Additional Components (Smart Locks)
If you’re dealing with a Kwikset smart lock, like the Kwikset SmartCode or Kevo, there might be extra steps. Some models have a wiring harness or battery pack connected to the interior part. Before pulling anything apart, disconnect the wiring carefully. I usually take a quick photo with my phone to remember how the wires are connected, just in case I need to reinstall it later. If your smart lock has a reset button or special removal tool (like a pin or Allen wrench), check the manual for instructions. For example, my Kwikset Kevo required a small pin to release the key cylinder, which wasn’t obvious at first.
Step 6: Inspect and Clean the Door
With the deadbolt fully removed, take a moment to inspect the door. Check for any damage, like scratches or dents, where the deadbolt was installed. I like to give the area a quick wipe with a damp cloth to remove dust or debris. If you’re planning to install a new deadbolt, make sure the holes in the door are clean and free of splinters. This is also a good time to decide if you need to patch or repaint the door, especially if the new lock has a different footprint.
Troubleshooting Common Issues
Even with a straightforward process, things can go wrong. I’ve hit a few snags while removing Kwikset deadbolts, so let me share some common issues and how to fix them.
- Stripped Screws: If a screw won’t budge or the head is damaged, try using a rubber band over the screw head for extra grip. Place the rubber band between the screwdriver and screw, then turn slowly. I’ve saved a few stubborn screws this way.
- Stuck Latch: If the latch assembly won’t come out, it might be caught on paint or wood. Gently tap it with the handle of your screwdriver to loosen it.
- Smart Lock Complications: For smart locks, double-check the manual for model-specific steps. Some Kwikset smart locks have hidden screws or clips that aren’t immediately obvious.
- Misaligned Parts: If the deadbolt feels stuck, make sure the door is slightly ajar. A closed door can put pressure on the latch, making it harder to remove.
If you’re really struggling, don’t be afraid to pause and consult the Kwikset website or manual for your specific model. I’ve found their support pages surprisingly helpful for tricky situations.
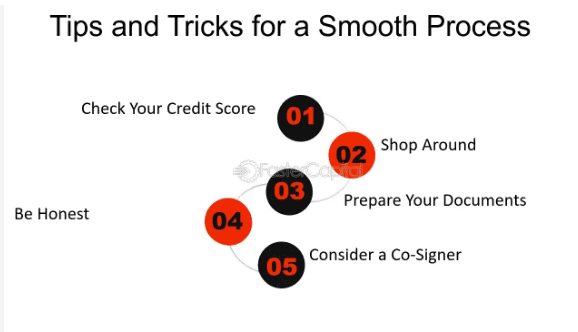
Tips for a Smooth Removal Process
Here are a few extra tips I’ve picked up from my own trial and error:
- Work Slowly: Rushing can lead to stripped screws or scratched doors. Take your time, especially with delicate parts like smart lock wiring.
- Keep Parts Organized: Use a small container or even a piece of tape to keep screws and small parts together. I once mixed up screws from two different locks, and it was a headache to sort out.
- Check the Manual: If you have a smart lock or a newer Kwikset model, the manual might have specific instructions. Keep it handy or look up the digital version online.
- Protect Your Door: Use painter’s tape around the deadbolt area to avoid scratches, especially if you’re prying off covers.
What to Do After Removing the Deadbolt
Once the deadbolt is off, you’ve got a few options. If you’re replacing it with a new lock, make sure the new deadbolt fits the existing holes in your door. Most Kwikset deadbolts use standard sizes, but it’s worth double-checking. I once bought a new lock only to realize the latch hole was slightly off, so I had to drill a new one. If you’re not installing a new lock right away, consider patching the holes with wood filler and sanding the area for a smooth finish. You can also repaint the door to cover any marks left behind. If you’re moving out, check with your landlord or new tenant about what to do with the empty holes.
Why I Love Doing This Myself
Removing a Kwikset deadbolt is one of those projects that feels so satisfying when you’re done. There’s something about taking on a home improvement task and getting it right that boosts your confidence. Plus, it saves you money—no need to pay a locksmith $50 or more for a 10-minute job. I remember the first time I removed a deadbolt; I was nervous I’d mess it up, but following these steps made it a breeze. Now, I feel like a pro every time I grab my screwdriver.
Conclusion
Removing a Kwikset deadbolt doesn’t have to be a daunting task. With the right tools, a bit of patience, and this guide, you can tackle it like a seasoned DIYer. Whether you’re upgrading your lock, fixing a jam, or just switching up your door’s style, you’ve got this. I’ve walked you through every step, from gathering your tools to troubleshooting tricky screws, so you can feel confident taking on the job.
There’s nothing quite like the satisfaction of completing a home project yourself, and I hope this guide helps you get there. If you run into any hiccups, don’t worry—just take a deep breath and refer back to these steps. Now, grab that screwdriver and get to work! Your door will thank you.
Frequently Asked Questions
What tools do I need to remove a Kwikset deadbolt?
You’ll need a Phillips screwdriver, a flathead screwdriver, and possibly an Allen wrench for some models. A small container for screws and a rag for cleaning are also handy.
Can I remove a Kwikset smart lock the same way?
Yes, but smart locks may have extra steps, like disconnecting wiring or using a reset pin. Check your model’s manual for specific instructions.
What if the screws are stripped?
Try placing a rubber band over the screw head for extra grip. If that doesn’t work, you might need a screw extractor tool.
How long does it take to remove a Kwikset deadbolt?
For most people, it takes about 10-15 minutes. If you run into issues like stuck screws, it might take a bit longer.
Do I need to replace the deadbolt after removing it?
Not necessarily. If you’re not installing a new lock, you can patch the holes with wood filler and repaint the door.
What should I do if the latch is stuck in the door?
Gently wiggle the latch or tap it with a screwdriver handle. If it’s still stuck, check for paint or debris blocking it.