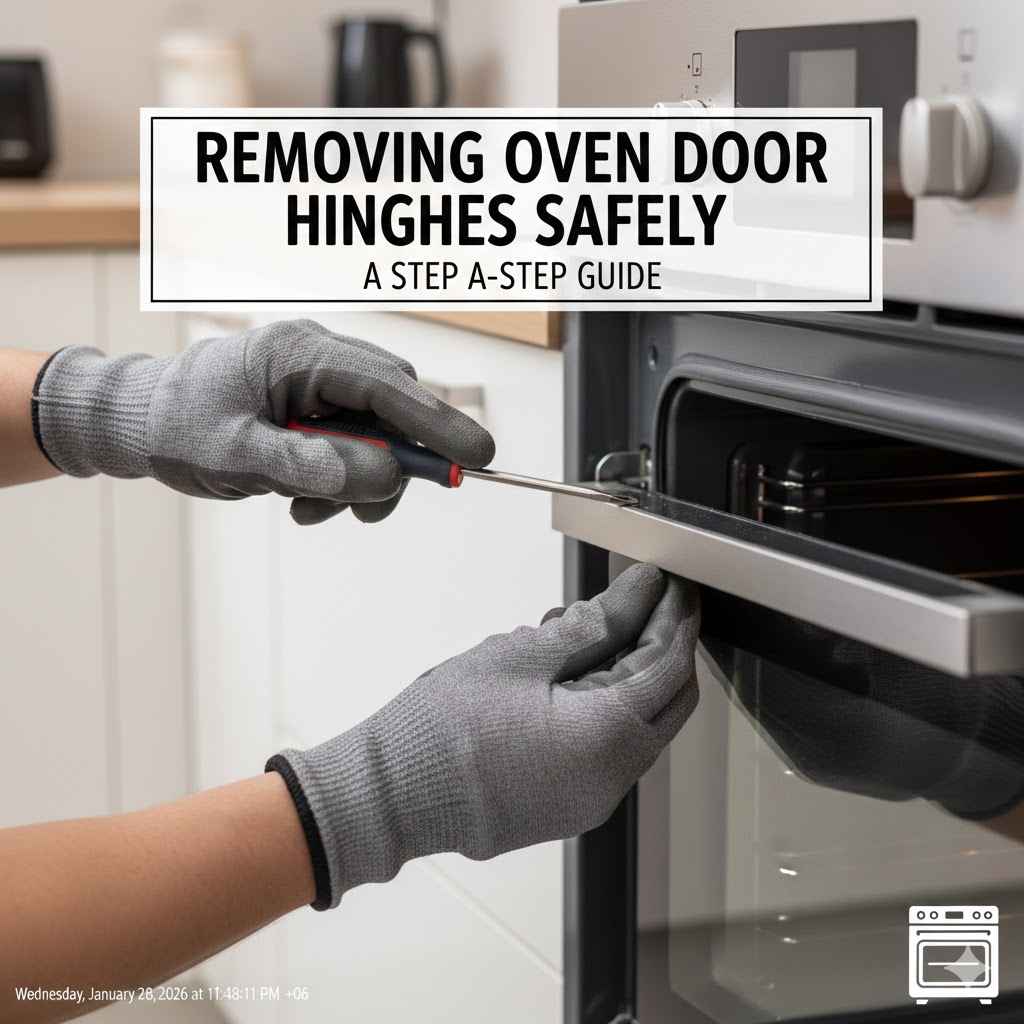
Removing Oven Door Hinges Safely: A Step-by-Step Guide
Taking apart an oven door can seem tricky at first, especially if you’ve never done it before. You might worry about damaging your oven or getting hurt. But don’t worry! This guide will explain How to Remove Oven Door Hinges Safely in a way that’s easy to follow. We’ll show you the simple steps you need to take. Let’s explore how to get this done without any problems.
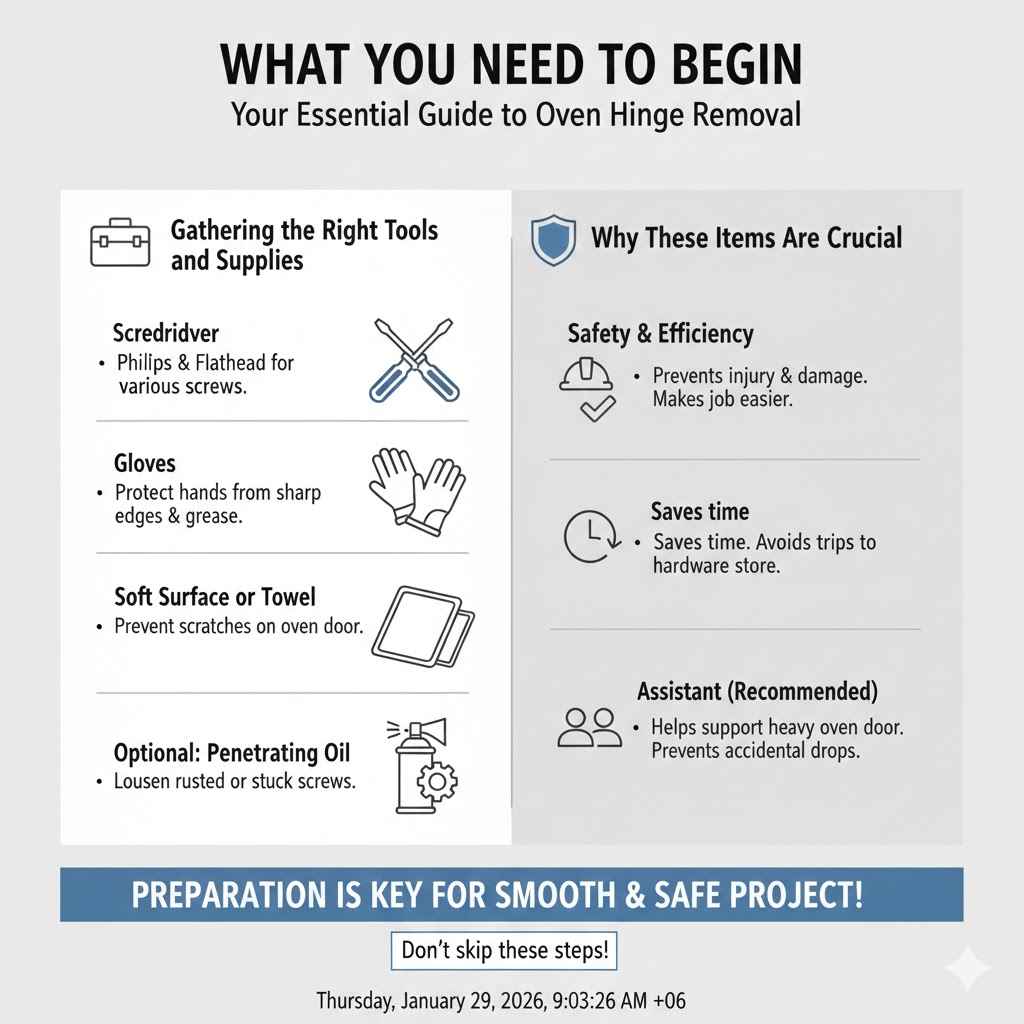
What You Need to Begin
Before you get started on taking out those hinges, it’s important to make sure you have everything ready. This will help make the process go smoothly and safely. Having the right tools and supplies prevents frustration and potential injuries. Being prepared can also save you time and helps avoid unnecessary trips to the hardware store. Let’s explore what you will need for your oven project.
Gathering the Right Tools and Supplies
The correct tools are essential for the safe removal of oven door hinges. Trying to use the wrong tools can damage your oven or cause injury. Using the right tools makes the job much easier. Here’s a list of the things you’ll need.
- Screwdriver: This is a must-have for loosening and removing screws that hold the hinges in place. Make sure you have both a Phillips head and a flathead screwdriver, as different ovens use different types of screws. The proper size is also very important to avoid stripping screws.A Phillips head screwdriver has a tip shaped like a cross, and it’s designed to fit Phillips head screws. These screws are common in many appliances because they don’t cam out (slip out of the screw head) easily when you apply force. Flathead screwdrivers have a flat tip that fits into the slot of a flathead screw. When choosing a screwdriver, it is best to try the correct screwdriver on the screw before beginning to apply a great deal of force to avoid any damage.
- Gloves: Wear work gloves to protect your hands from sharp edges, dirt, and grease. Even though the oven door and hinges may look clean, they might have hidden sharp edges.Gloves not only provide protection but also improve your grip. A good grip is vital when handling heavy items like an oven door. Also, oven parts, even when cool, can be surprisingly greasy or dirty. Gloves keep your hands clean and prevent the transfer of dirt to the rest of your kitchen. Consider choosing gloves made of materials that provide good protection, such as leather or heavy-duty synthetic materials. These materials can withstand the wear and tear associated with the project.
- Soft Surface or Towel: This is critical for protecting the oven door from scratches when you set it down. You don’t want to scratch the glass or the finish.A soft surface, such as a large towel, rug, or piece of cardboard, is essential to protect the oven door from scratches and damage while you work. When you remove the door, you’ll need a safe place to set it down. A soft surface prevents scratches to the glass and the finish. Place this surface on the floor or a nearby counter for easy access. The larger the surface, the better, so you have plenty of room to maneuver the door without the risk of it falling off. This extra precaution safeguards the appearance of your oven door.
- Optional: Penetrating Oil: If the screws are rusted or difficult to remove, a penetrating oil will help.Penetrating oil, such as WD-40, can be a game changer if you are faced with rusted or stuck screws. This special oil can seep into the threads and helps loosen rust. This makes it a great option. Spray it on the screws and let it sit for about 15 minutes before you try to unscrew them. Applying this oil ahead of time can prevent you from stripping the screw heads. If the screw head gets damaged during removal, it can be extremely challenging to extract, possibly requiring special tools.
- Assistant (Recommended): Although not always necessary, having someone help makes the job much easier, especially when removing and replacing the oven door.An assistant can be incredibly useful when dealing with a heavy item like an oven door. They can help support the door, preventing accidental drops. They can also assist with the removal and
Safety Precautions for Handling Oven Parts
Safety should be your first priority. Removing oven door hinges involves some potential hazards that you need to be aware of. Follow these safety steps to protect yourself and your equipment. Being careful is especially important when you’re dealing with something heavy. Let’s make sure you start off right.
Essential Safety Measures
Before you do anything, take these precautions to ensure your safety. They will help you avoid injuries and also protect your oven. It’s always better to be safe than sorry, so follow these suggestions to ensure a smooth, risk-free project.
- Disconnect Power: Unplug the oven from the electrical outlet or turn off the circuit breaker that controls the oven. This eliminates any risk of electrical shock.This is the most important step for your safety. Before doing any kind of appliance repair, cut off the power supply. Even if the oven is turned off, it could still have a charge. Turning off the power ensures that no electricity can flow through the appliance while you are working. Check the breaker box to identify the correct circuit and switch it off. It’s a good idea to put a note on the breaker panel to remind everyone not to turn it back on while you’re working.
- Wait for the Oven to Cool: Make sure the oven is completely cool before you start. Touching a hot oven can cause severe burns.If you’ve recently used your oven, it can remain hot for several hours. Before you start, give it at least a couple of hours to cool down. Check the oven’s temperature with your hand before you begin. Even a slightly warm surface can cause burns. Ensure the interior and exterior of the oven have reached room temperature.
- Protect Your Hands: Use gloves to protect your hands from sharp edges, grease, and dirt. Old oven parts can be surprisingly rough.Oven parts, including hinges, can have sharp edges that can cut you. Wear work gloves, preferably with a good grip, to handle these parts safely. Gloves will also keep your hands clean from grease and debris. Choose gloves that fit well so you can still handle screws and tools. Gloves provide an extra layer of protection, making your job safer.
- Work in a Well-Lit Area: Good lighting is crucial for seeing small parts and avoiding accidents. Make sure your work area is well lit.Bright lighting helps you see everything clearly, including small screws and any potential hazards. Working in a well-lit area reduces the risk of making mistakes and helps prevent accidents. A flashlight can be useful if the oven is in a shadowed area. Make sure your workspace is clear of obstructions.
Identifying Potential Hazards
Ovens can present hidden risks if you’re not careful. These hazards can cause injury or damage your appliance. Being aware of these things will help you prevent accidents. Knowing the potential problems can help you do the job safely.
- Sharp Edges: Oven parts, especially the hinges, often have sharp edges. Be very careful.Oven hinges and other metal components can be quite sharp. When handling these parts, be very careful not to cut yourself. Wear gloves and handle the parts gently. Consider using a soft cloth or towel to wrap sharp edges when working in tight spaces.
- Heavy Door: Oven doors are heavy. Make sure you have a safe way to handle and support them.Oven doors can be quite heavy, especially those with glass panels and insulation. When removing the door, always support its weight to prevent it from falling. Have a helper assist you if possible, especially when lifting or setting down the door. Never put your hands or feet under a door that is being lifted.
- Grease and Dirt: Oven interiors and parts can be dirty. Keep your hands clean and wear gloves.Inside the oven, you can come across grease, baked-on food, and dirt. Wear gloves to protect your hands. Use a soft cloth to wipe down any dirty parts. This helps prevent the spread of dirt and keeps your workspace clean. Dispose of any cleaning materials properly.
- Rusted Screws: Rusted screws can be difficult to remove. Use penetrating oil.If you find that the screws are rusty or stuck, it’s best to use a penetrating oil. Spray the oil and wait 15 minutes before attempting to remove the screws. This helps to loosen them. This makes the job easier and prevents damage to the screw heads. If the screws are still difficult to remove, try using a different screwdriver or consult with a professional. Avoid applying too much force, which can damage the screw head.
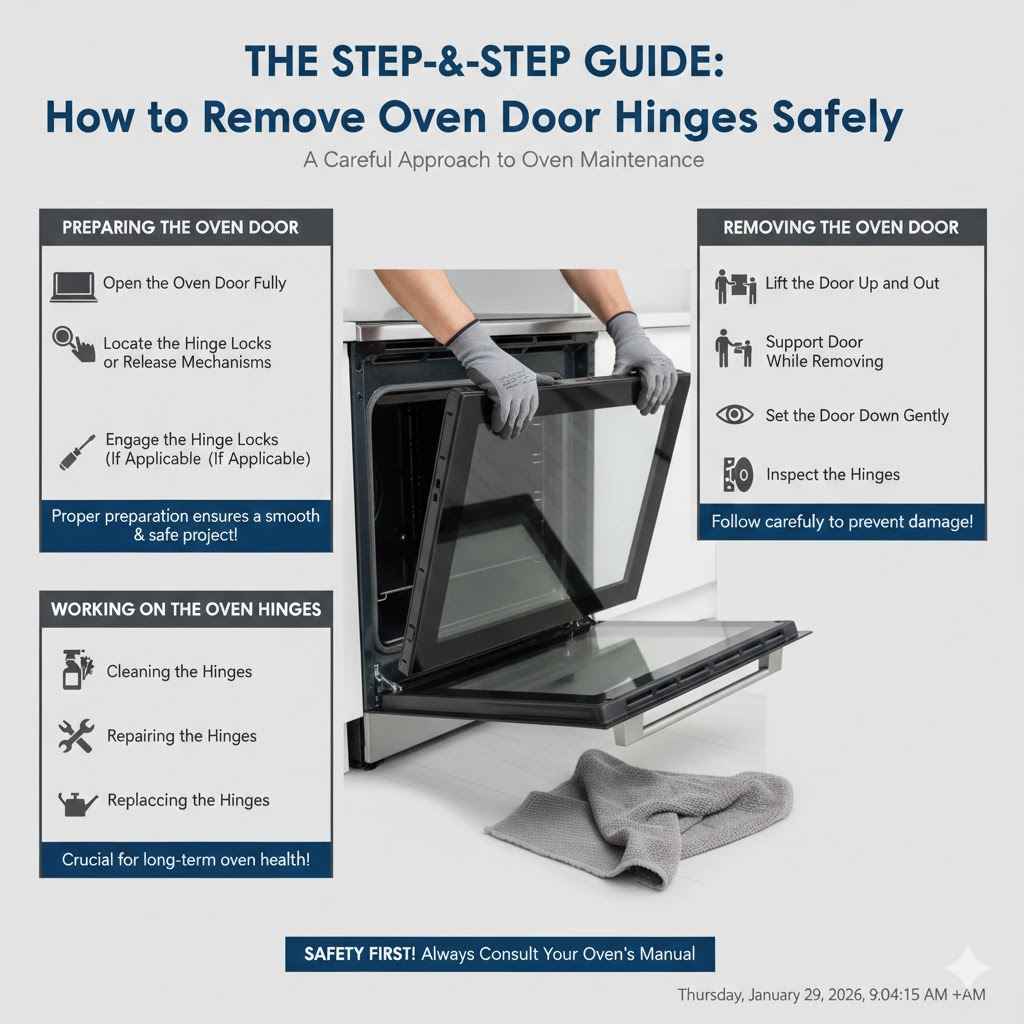
The Step-by-Step Guide: How to Remove Oven Door Hinges Safely
Now, let’s get into the specifics of How to Remove Oven Door Hinges Safely. The instructions provided can differ slightly based on the model of your oven. However, the basic process is generally similar. Following these steps carefully will allow you to complete the project without any problems. So, let’s get started.
Preparing the Oven Door
Before you actually remove the hinges, some initial steps ensure that the process goes smoothly. These preparations make it easier and safer to remove the oven door. Proper preparation will ensure a successful project.
- Open the Oven Door Fully: Open the oven door all the way. This allows you access to the hinges and screws.Opening the oven door completely gives you clear visibility and easy access to the hinge mechanisms. You will need to see all the parts. It allows you to move freely without bumping into the door or the oven. This step is a must before you begin any work.
- Locate the Hinge Locks or Release Mechanisms: Many ovens have a hinge lock that secures the door. Find these locks or release mechanisms on the hinges.Check the hinges for any locks or levers that secure the door. This mechanism can be a lever, a sliding piece, or a small latch. These locks are often positioned near the hinge itself. Their function is to hold the door in place and prevent it from accidentally detaching during normal use. Identifying and releasing these locks is critical for safely removing the door. Refer to your oven’s manual if you have trouble finding these locks.
- Engage the Hinge Locks (If Applicable): If your oven has hinge locks, engage them to hold the door in place when you remove it.Most ovens have a hinge lock to provide additional safety. Make sure that the door cannot come loose. Make sure that the door does not detach from the oven when you are working. This feature will keep the hinges from moving, and the door from falling, during the removal process. If you’re not sure how to engage the locks, consult your oven’s manual. Properly using these locks minimizes the risk of the door accidentally falling while you work on the oven.
- Loosen the Screws (If Applicable): Some oven door hinges are secured with screws. Loosen them, but do not remove them completely yet.Some ovens use screws to secure the hinges to the oven frame. Use your screwdriver to loosen these screws. Be careful to loosen the screws. You do not need to remove them entirely at this stage. Loosening the screws makes it easier to remove the door later. Note the position of the screws. It will help you put everything back together correctly. Take the time to get this step correct.
Removing the Oven Door
Now you can begin the physical process of taking the oven door off. Follow these instructions carefully. Make sure you have enough space to handle the door safely. It might take a bit of effort to get the door off, but follow these steps.
- Lift the Door Up and Out: Once the hinges are unlocked and/or the screws are loose, lift the door up and out of the hinge slots.Carefully lift the door up and out of the slots or hinges. You might need to wiggle the door slightly to free it from the hinge mechanisms. Make sure you have a secure grip on the door. Keep the door level as you lift it. This helps prevent it from snagging or getting stuck during removal. If the door feels stuck, double-check that you’ve released any locks or loosened any screws.
- Support the Door While Removing: Have an assistant to help, if possible, or support the door as you remove it to prevent it from falling.Since oven doors are heavy, it is best to have an assistant. If you are doing the job alone, make sure you can support the door safely. If the door has a glass panel, support the door from the bottom to prevent it from cracking. If you have an assistant, have them support one side. Coordinate your movements carefully. Avoid any sudden movements that could cause the door to slip. By supporting the door, you’ll minimize the risk of damage or injury.
- Set the Door Down Gently: Place the door on a protected surface, like a soft cloth or a towel, to avoid scratches.After you remove the oven door, carefully set it down on a protected surface. The surface needs to be large enough to support the entire door. A soft cloth or towel will prevent scratches. Setting the door down gently protects the finish. This also helps to prevent damage if you are working on a hard surface. This simple step helps protect your investment. Keep the glass side up to avoid any scratches.
- Inspect the Hinges: Now that the door is off, inspect the hinges and the door for any damage.After you remove the door, carefully inspect the hinges and door. Look for any visible damage. Look for signs of wear and tear. You can do repairs or maintenance if needed. Make sure there are no loose parts. Examine the hinge mechanisms for any obstructions that could be hindering their operation. Check the door for cracks. This step will help you identify any problems that might need fixing. Correcting problems will make replacing the door easier.
Working on the Oven Hinges
Now that the door is off, you can focus on the hinges themselves. This might involve cleaning, repair, or replacement. If your goal is to clean them or replace them, you can perform these actions now.
- Cleaning the Hinges: If the hinges are dirty, clean them with a degreaser and a cloth.Over time, oven hinges can collect grease and food debris. Use a degreaser cleaner and a cloth to clean them. This helps to remove any buildup that could prevent the hinges from moving smoothly. Be sure to use a cleaning agent that is designed for appliance use. Make sure the hinges are thoroughly dry before you put the door back on.
- Repairing the Hinges: If the hinges are damaged, determine if they can be repaired. Some parts can be fixed.If you see some damage to the hinges, see if repairs are possible. Check for any bent parts.
- Replacing the Hinges: If the hinges are badly damaged or worn out, they may need to be replaced.If the hinges are beyond repair, consider replacing them. Make sure that you purchase the correct hinges for your oven model. These can be purchased at an appliance parts store. Carefully remove the old hinges. Install the new hinges using the same steps. If you are not sure how to do this, then consult a professional. Properly installed hinges will provide smooth and safe operation. Having a working oven will bring satisfaction to your efforts.
- Lubricating the Hinges: Lubricating the hinges can help them move more smoothly.Applying a lubricant will help them move smoothly and quietly. Use high-temperature grease or oil designed for appliances. Apply the lubricant sparingly. It will help prevent rust and corrosion. This will also extend the life of your hinges. This will ensure they operate efficiently. Proper lubrication will also help prevent squeaking or binding during operation.
Frequently Asked Questions
Question: How do I know if my oven door hinges are bad?
Answer: If your oven door is difficult to open or close, squeaks, or doesn’t stay open, your hinges might be bad. Check for visible damage, such as bending or rust.
Question: Can I use any type of lubricant on my oven door hinges?
Answer: No. Use a high-temperature lubricant designed for appliances. Regular lubricants can melt or cause a fire at high temperatures.
Question: What should I do if the screws are rusted and won’t come out?
Answer: Apply penetrating oil and let it sit for about 15 minutes. Try again. If they still won’t budge, you may need a specialized tool or professional help.
Question: How do I remove an oven door without a hinge lock?
Answer: If your oven doesn’t have a hinge lock, the hinges will likely be designed to lift the door up and out after you’ve loosened any screws. Refer to your oven’s manual.
Question: Can I clean my oven door hinges with soap and water?
Answer: Yes, you can. However, make sure the hinges are completely dry before you replace the door. Use a degreasing soap. Make sure the soap is designed for appliance use.
Final Thoughts
You’ve now explored the essential steps to How to Remove Oven Door Hinges Safely. You’ve learned how to prepare, the correct tools, and what to look out for. Remember to take your time and follow the directions. From disconnecting the power to setting the door down carefully, each step has a reason. By following these steps, you’ve learned how to make sure that the job is done safely and correctly. Armed with this knowledge, you are ready to tackle your oven project. So, go ahead and get started. The project will be easier than you thought!