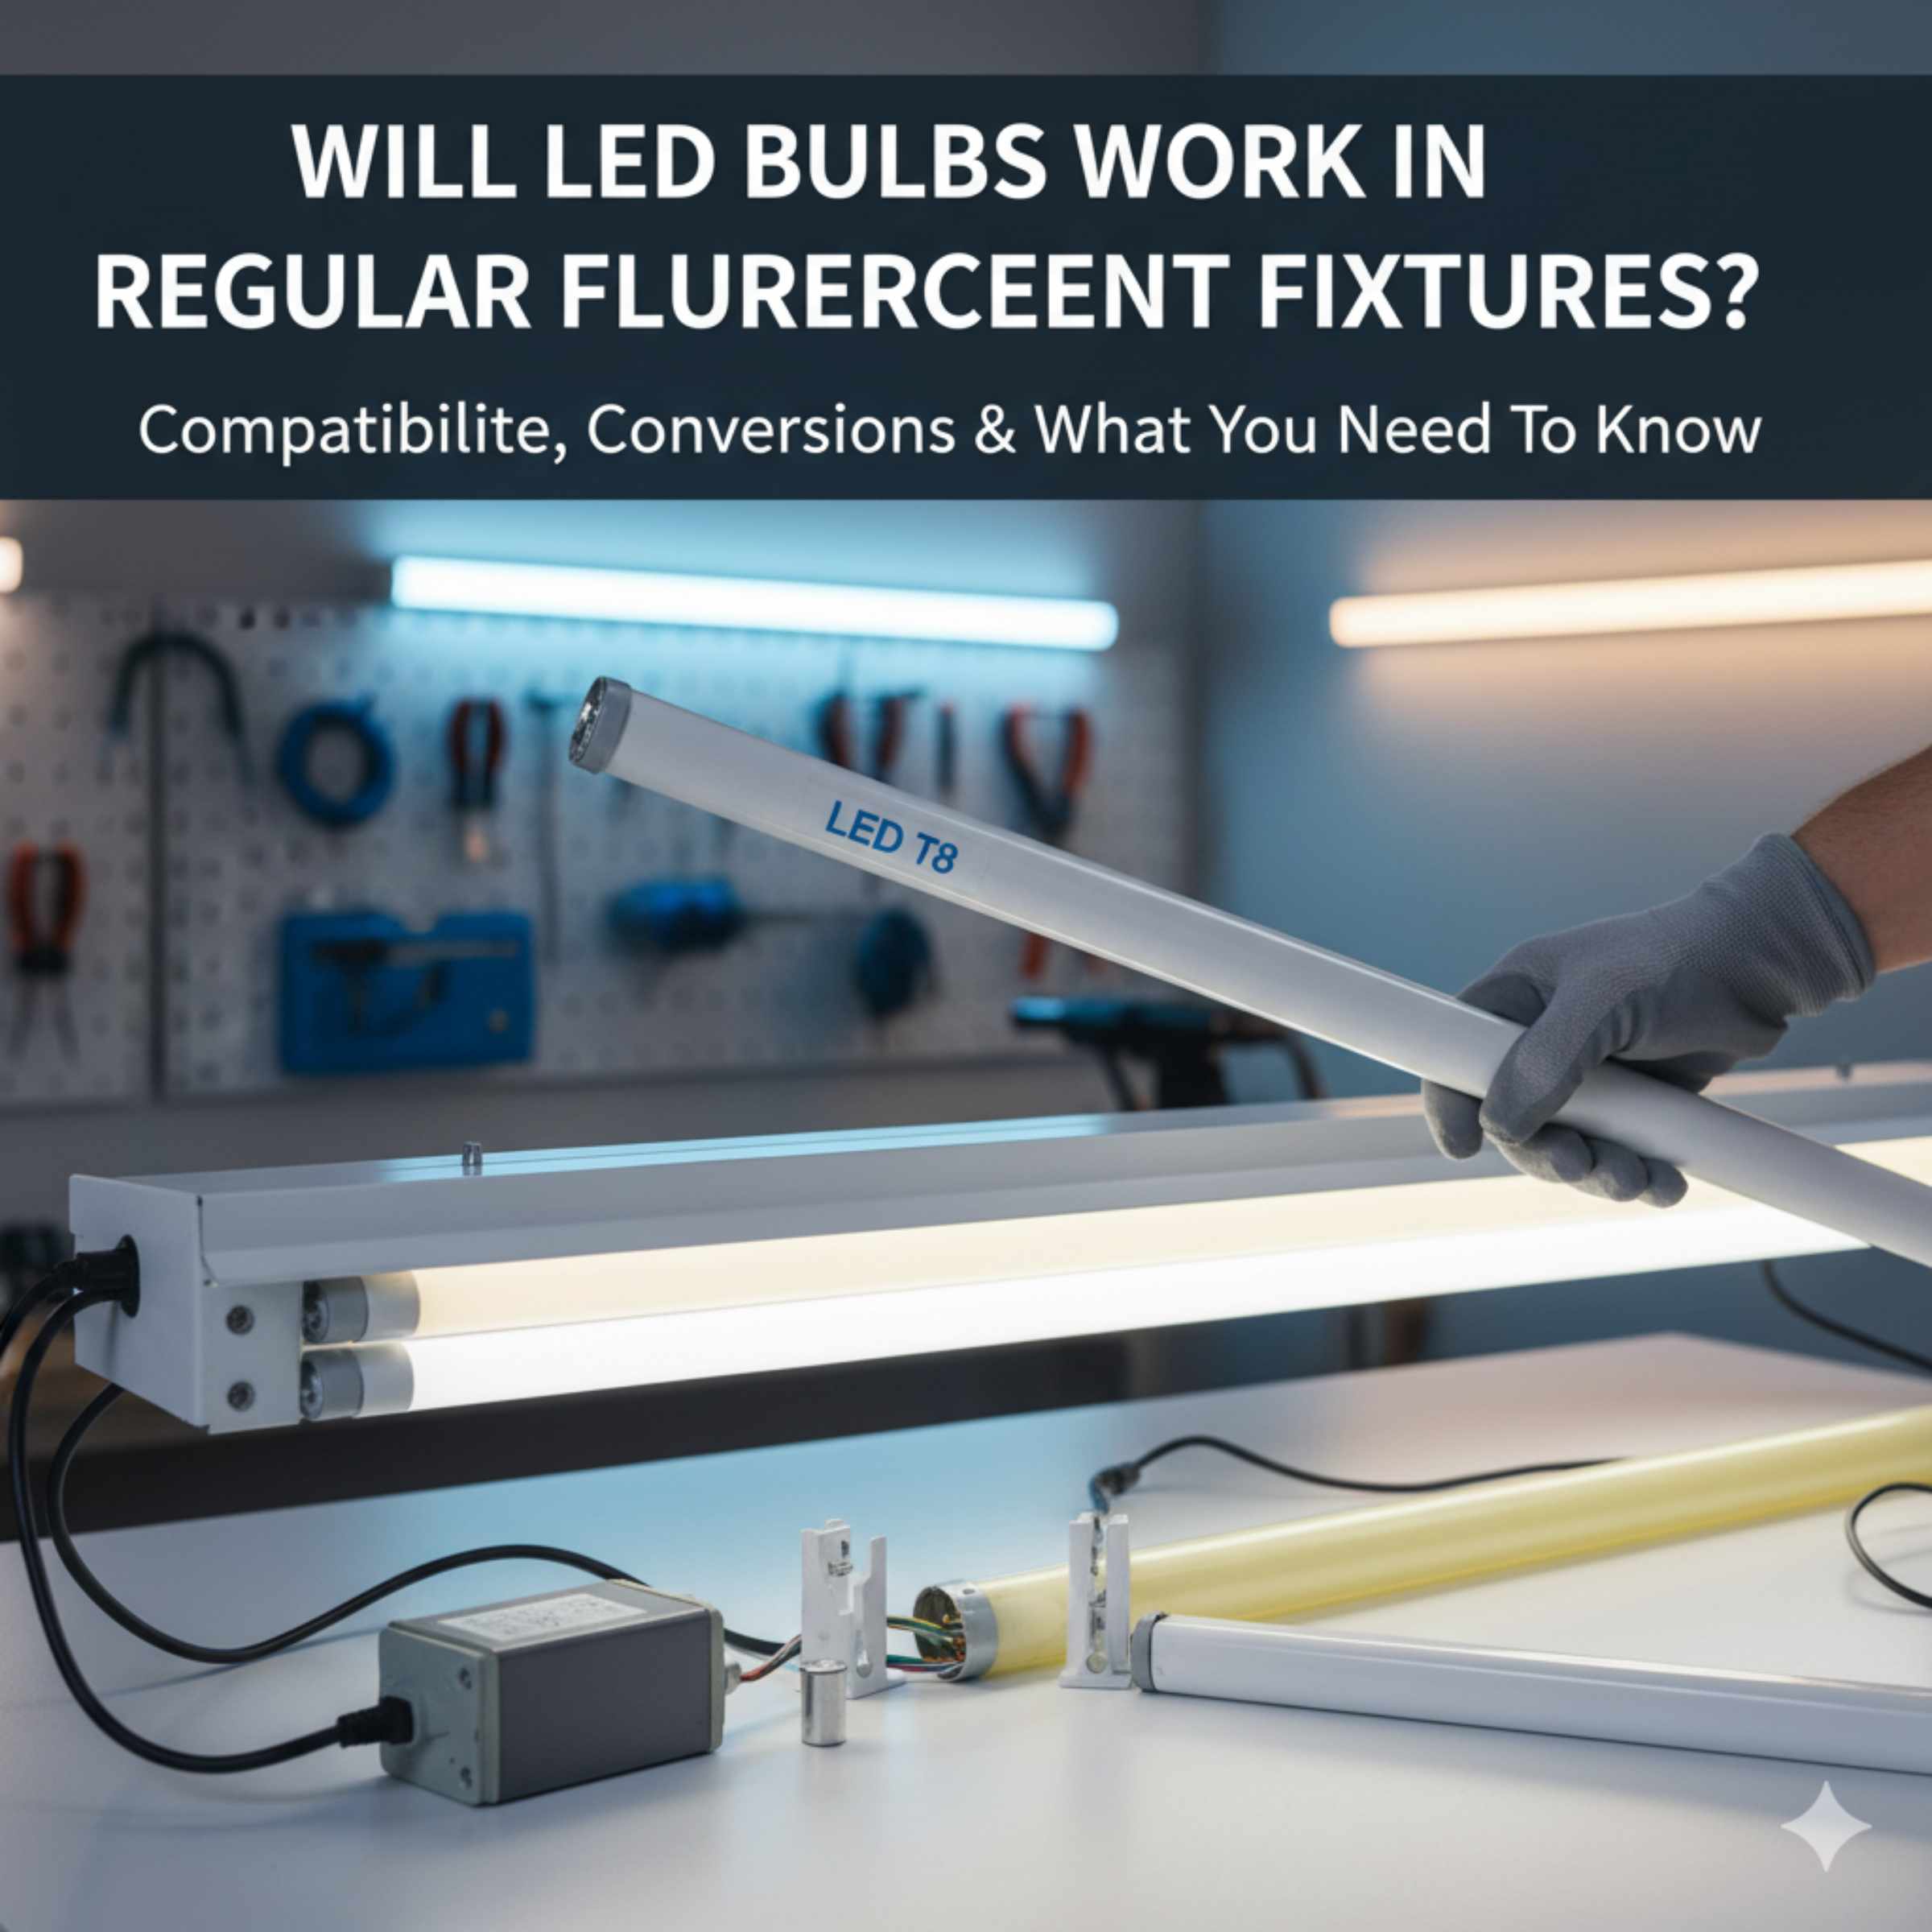
Will LED Bulbs Work in Regular Fluorescent Fixtures? Essential Guide
Quick Summary: Yes, in many cases, LED bulbs can work in regular fluorescent fixtures, but it’s crucial to choose the right type and follow installation steps carefully. This guide will walk you through everything you need to know to make the switch safely and effectively, saving you energy and hassle.
Ever stare at your old fluorescent lights and wonder if you can upgrade to those bright, energy-saving LED bulbs? You’re not alone! Many homeowners want to ditch the flickering and humming of fluorescent tubes for the modern efficiency of LEDs. But the big question is: will they just… work? It can feel a bit daunting to swap out something familiar for something new, especially when it comes to your home’s lighting. You might be worried about compatibility, safety, or even just doing it wrong. Don’t sweat it! This guide is designed to make things crystal clear. We’ll break down exactly what you need to know, step by step, so you can confidently upgrade your fixtures and enjoy better lighting. Let’s get those lights sorted!
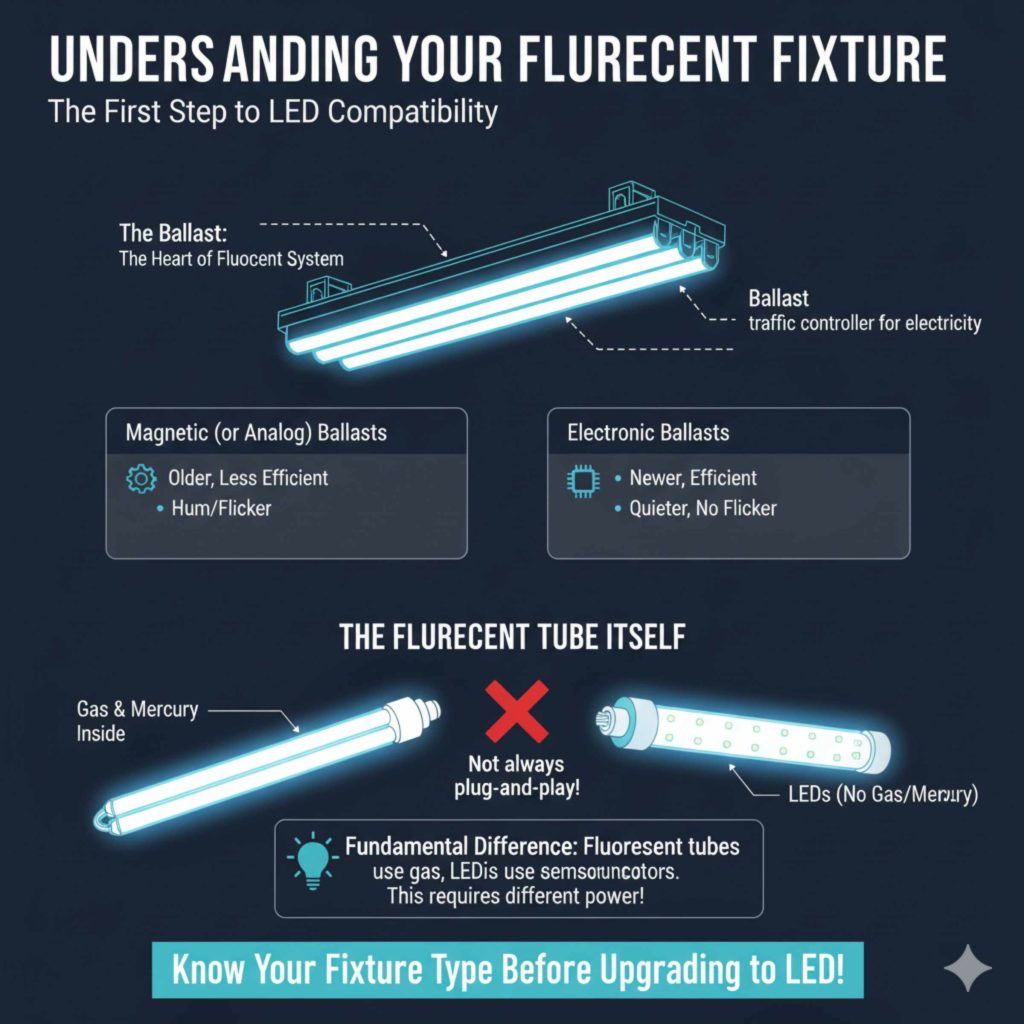
Understanding Your Fluorescent Fixture: The First Step to LED Compatibility
Before we even think about putting an LED bulb into a fluorescent fixture, it’s important to understand what you’re dealing with. Traditional fluorescent fixtures have a few key components that LEDs interact with differently than fluorescent tubes. Knowing these parts helps explain why not all LED replacements are plug-and-play.
The Ballast: The Heart of the Fluorescent System
The ballast is a crucial component in any fluorescent light fixture. Its main job is to regulate the voltage and current supplied to the fluorescent tube. When you flip the switch, the ballast provides a high-voltage surge to start the tube, and then it limits the electrical current to keep the tube from burning out. Think of it as the traffic controller for electricity in your fluorescent light.
There are two main types of ballasts:
- Magnetic (or Analog) Ballasts: These are older and less efficient. They use coils of wire and iron to regulate power. You might notice a distinct hum or flicker with magnetic ballasts.
- Electronic Ballasts: These are newer, more efficient, and quieter. They use solid-state components to manage power. Electronic ballasts often reduce flicker and are more energy-conscious.
The type of ballast in your fixture plays a big role in whether you can use a direct-replacement LED tube or if you’ll need to do a bit more work.
The Fluorescent Tube Itself
Fluorescent tubes work by passing an electric current through a gas inside the tube. This current excites a coating on the inside of the glass, causing it to emit light. This process requires specific conditions managed by the ballast.
LED bulbs, on the other hand, use Light Emitting Diodes. They produce light when electricity passes through a semiconductor material. They don’t use gas, mercury, or the same starting mechanisms as fluorescent tubes. This fundamental difference is why direct replacement isn’t always straightforward.
Types of LED Replacements for Fluorescent Fixtures
When you’re looking to replace fluorescent tubes with LEDs, you’ll primarily find three types of LED tubes designed for this purpose. Each has its own installation requirements and compatibility with your existing fixture’s ballast.
Type A: Ballast Compatible (Plug-and-Play) LED Tubes
These are the simplest to install. Type A LED tubes are designed to work with the existing ballast in your fluorescent fixture. When you install a Type A tube, it communicates with the ballast, essentially tricking it into powering the LED as if it were a fluorescent tube. It’s like plugging in a new appliance without changing any wiring.
-
Pros:
- Easiest installation – no rewiring needed.
- Quickest way to upgrade.
- Maintains the original fixture’s safety certifications.
-
Cons:
- Performance depends on the existing ballast. An old or failing ballast can still cause issues.
- Less energy-efficient than other LED types because the ballast still consumes power.
- Compatibility can be tricky; not all Type A LEDs work with all ballast types (especially older magnetic ones). Always check the manufacturer’s compatibility list.
Important Note: Always check the LED tube manufacturer’s specifications for ballast compatibility. Some Type A tubes only work with electronic ballasts, while others might work with certain magnetic ballasts.
Type B: Ballast Bypass (Direct Wire) LED Tubes
Type B LED tubes require you to remove or bypass the existing ballast entirely. These tubes are wired directly to the power source coming into the fixture. This means you’ll be working with line voltage, which requires a bit more caution and potentially some basic electrical knowledge.
-
Pros:
- Most energy-efficient option as there’s no ballast power consumption.
- Longer lifespan as there’s no ballast to fail.
- Consistent performance, unaffected by ballast type or condition.
-
Cons:
- Requires rewiring the fixture, which can be more complex and may require an electrician if you’re not comfortable.
- Fixture’s original safety certifications might be voided if not rewired correctly.
- Installation takes longer.
Safety First: If you choose Type B LEDs and aren’t experienced with electrical wiring, it’s highly recommended to hire a qualified electrician. Working with line voltage can be dangerous if done incorrectly. You can find helpful resources on safe wiring practices from organizations like the National Fire Protection Association (NFPA).
Type C: External Driver LED Tubes
Type C LED tubes are less common for direct fluorescent replacement but are worth mentioning. These tubes use an external LED driver (similar to a small power supply) that is wired into the fixture. The driver then powers the LED tube.
-
Pros:
- Offers excellent control over light output and dimming capabilities.
- Very energy-efficient.
- Long lifespan.
-
Cons:
- Requires more complex wiring to connect the driver.
- The driver itself can be an additional point of failure.
- Typically more expensive and less readily available for standard fluorescent fixture replacements.
Type AB: Hybrid LED Tubes
Some manufacturers offer “hybrid” or “Type AB” LED tubes. These tubes are designed to work in either a ballast-compatible (Type A) mode or a ballast-bypass (Type B) mode. This offers flexibility – you can try them as a plug-and-play option first, and if that doesn’t work or you want better efficiency, you can then rewire the fixture to bypass the ballast.
-
Pros:
- Offers the flexibility of both Type A and Type B.
- Can be a good option if you’re unsure about your ballast.
-
Cons:
- Can be slightly more expensive than single-mode tubes.
- Still requires careful attention to installation instructions for each mode.
Will LED Bulbs Work in Regular Fluorescent Fixtures? The Decision Tree
So, to directly answer the question: “Will LED bulbs work in regular fluorescent fixtures?” The answer is a resounding “It depends, but often yes!” The key is choosing the right type of LED tube for your specific fixture and your comfort level with electrical work.
Here’s a simple way to decide:
- Identify your fixture type: Look at your existing fluorescent fixture. Does it have a separate ballast? What type of fluorescent tube does it use (e.g., T12, T8, T5)?
- Check the LED tube packaging: Read the specifications carefully. Does it say “Ballast Compatible,” “Direct Wire,” or “Universal”?
- Consider your comfort level: Are you comfortable with basic electrical wiring, or do you prefer a simple swap?
Scenario 1: You want the easiest, no-rewiring option.
Look for Type A (Ballast Compatible) LED tubes. Make sure to verify that the specific LED tube is compatible with the ballast type in your fixture (electronic is usually best). If it is, you can simply swap out the old fluorescent tube for the new LED tube.
Scenario 2: You want the most energy-efficient and long-lasting solution and are comfortable with wiring (or willing to hire an electrician).
Choose Type B (Ballast Bypass) LED tubes. This involves removing the ballast and wiring the fixture directly to the power source. This is a more involved process but offers the best long-term benefits.
Scenario 3: You’re not sure or want flexibility.
Consider Type AB (Hybrid) LED tubes. You can try them as Type A first. If you encounter issues or decide you want to upgrade further, you can then convert them to Type B by bypassing the ballast.
How to Choose the Right LED Tube: A Comparison Table
To help you visualize the differences and make an informed choice, here’s a table comparing the common types of LED tubes used to replace fluorescent bulbs:
| Feature | Type A (Ballast Compatible) | Type B (Ballast Bypass) | Type C (External Driver) | Type AB (Hybrid) |
|---|---|---|---|---|
| Installation Complexity | Very Easy (Plug-and-Play) | Moderate to Difficult (Requires Rewiring) | Difficult (Requires Driver Wiring) | Easy (Type A) to Difficult (Type B) |
| Ballast Required? | Yes (Works with existing ballast) | No (Ballast is bypassed/removed) | No (Uses external driver) | Can work with or without ballast |
| Energy Efficiency | Good (Ballast consumes some power) | Excellent (No ballast power loss) | Excellent | Good (Type A) to Excellent (Type B) |
| Lifespan | Good (Depends partly on ballast health) | Excellent (No ballast failure point) | Excellent | Good (Type A) to Excellent (Type B) |
| Cost | Moderate | Moderate | Higher | Moderate to Higher |
| Compatibility | Must match ballast type | Universal (wired directly) | Specific to fixture and driver | Flexible |
| Best For | Quickest, easiest upgrade; beginners | Maximum efficiency; long-term savings; those comfortable with wiring | Specialized applications; dimming needs | Uncertain ballast compatibility; future flexibility |
Step-by-Step Guide: Installing Type A (Ballast Compatible) LED Tubes
This is the most common and beginner-friendly upgrade. If you’ve confirmed your fixture has a compatible ballast and you’ve purchased the correct Type A LED tubes, follow these steps:
Tools and Materials You’ll Need:
- New Type A LED tubes
- Ladder or step stool
- Gloves (optional, to keep tubes clean)
- Safety glasses (always a good idea!)
- A soft cloth
Installation Steps:
- Turn Off Power: This is the MOST IMPORTANT step. Go to your electrical panel and switch off the breaker that controls the lights you’ll be working on. Double-check that the lights are off by trying to flip the wall switch. It’s a good practice to put a piece of tape over the breaker switch to remind others not to turn it back on.
- Access the Tubes: Carefully climb your ladder or step stool. Most fluorescent fixtures have covers or lenses. Gently remove the cover. This might involve sliding clips, unscrewing fasteners, or carefully prying it off. Place the cover somewhere safe.
- Remove Old Tubes: Grip the fluorescent tube firmly at both ends. Most tubes are held in place by rotating them about a quarter turn counter-clockwise. You’ll feel them release from the sockets. Once loose, gently pull them straight out. Be careful, as old tubes can sometimes break. If a tube breaks, wear gloves and carefully sweep up the glass. Fluorescent tubes contain a small amount of mercury, so dispose of them properly (see disposal section below).
- Install New LED Tubes: Take your new Type A LED tubes. Look at the end pins and the sockets in the fixture. Align the pins on the LED tube with the sockets. Gently push the tube into the sockets and then rotate it about a quarter turn clockwise to secure it, just like you removed the old one. Ensure it feels snug and properly seated.
- Replace Fixture Cover: Carefully put the fixture cover back on, making sure all clips or fasteners are secured.
- Restore Power: Go back to your electrical panel and turn the breaker back on.
- Test the Lights: Flip the wall switch. Your new LED lights should turn on brightly and without flickering.
Troubleshooting Tip: If the lights don’t turn on, double-check that the LED tubes are fully seated in the sockets and that the power is on. If you still have issues, check the LED tube manufacturer’s compatibility list for your ballast type. Sometimes, a specific LED tube might not work with a particular ballast, even if it’s Type A.
Step-by-Step Guide: Installing Type B (Ballast Bypass) LED Tubes
This method requires bypassing the ballast. It’s more involved and carries a higher risk if not done correctly. If you’re not comfortable with basic wiring, please hire a qualified electrician for this step.
Tools and Materials You’ll Need:
- New Type B LED tubes
- Ladder or step stool
- Screwdriver set (Phillips and flathead)
- Wire strippers/cutters
- Wire nuts
- Voltage tester (non-contact or multimeter)
- Electrical tape
- Gloves
- Safety glasses
- A soft cloth
Installation Steps:
- Turn Off Power: Absolutely critical! Turn off the breaker for the circuit. Verify power is off using your voltage tester at the fixture.
- Access Fixture Components: Remove the fixture cover and the old fluorescent tubes as described in the Type A installation. You’ll then need to access the ballast. This usually involves removing a cover plate on the ballast itself or within the fixture housing.
- Identify and Remove Ballast: Locate the ballast. It’s typically a metal box. Disconnect the wires leading to and from the ballast. Make note of which wires connect to the power source (line and neutral) and which connect to the sockets. You will be removing the ballast entirely.
-
Rewire the Fixture: This is the most technical part. You need to bypass the ballast and connect the incoming power directly to the sockets on one end of the fixture.
- Identify the incoming power wires (usually black for line/hot and white for neutral).
- Identify the wires going to the sockets. For a single-ended connection (common for Type B), you’ll typically wire the line (hot) wire to one set of socket terminals and the neutral wire to the other set of socket terminals on the opposite end.
- Use wire strippers to expose about half an inch of wire on each connection.
- Connect wires using wire nuts. Ensure connections are secure. Wrap each wire nut with electrical tape for extra security.
- Cap off any unused wires from the old ballast connection securely with wire nuts and electrical tape.
- Test Wiring: Before reassembling, temporarily turn the power back on at the breaker. Use your voltage tester to confirm that power is correctly supplied to the correct socket terminals and that there are no shorts. Then, turn the power off again at the breaker.
- Install New LED Tubes: Install the Type B LED tubes into the wired sockets, ensuring they are securely seated.
- Reassemble Fixture: Replace the fixture cover and any ballast covers you removed.
- Restore Power: Turn the breaker back on.
- Test the Lights: Flip the wall switch. The LED lights should illuminate.
Important Safety Reminder: If at any point you are unsure about the wiring, stop and call a professional. Improper wiring can lead to electrical shock, fire hazards, or damage to your fixtures and the new LED bulbs. You can find general electrical safety guidelines on the Consumer Product Safety Commission (CPSC) website.
Benefits of Switching to LED Lighting
Upgrading your fluorescent fixtures to LEDs isn’t just about convenience; it comes with a host of advantages that make it a smart home improvement decision.
Energy Savings
LEDs are significantly more energy-efficient than fluorescent bulbs. They use up to 75% less energy to produce the same amount of light. This translates directly into lower electricity bills. While a Type A LED might still use a bit of power through the ballast, a Type B bypass will maximize these savings.
Longer Lifespan
LEDs last much longer than fluorescent tubes. While a typical fluorescent tube might last 10,000 to 20,000 hours, LEDs can last 50,000 hours or more. This means fewer bulb changes, saving you money on replacements and the hassle of climbing ladders.
Improved Light Quality
LEDs offer instant-on, full brightness with no warm-up time, and they generally produce a more consistent, flicker-free light. They also come in a wide range of color temperatures, from warm white to cool daylight, allowing you to choose the ambiance that best suits your space.
Environmental Friendliness
Because LEDs use less energy, they reduce your carbon footprint. Additionally, unlike fluorescent tubes, most LED bulbs do not contain hazardous materials like mercury, making them safer to handle and dispose of.
Durability
LED bulbs are solid-state devices, meaning they have no fragile filaments or glass tubes that can easily break. This makes them more resistant to vibration and impact.
Potential Challenges and How to Overcome Them
While the switch to LED is usually smooth, it’s good to be aware of potential hiccups.
Ballast Compatibility Issues (Type A)
Problem: Your Type A LED tube doesn’t light up or flickers when installed.
Solution: Not all Type A LEDs work with all ballasts. Check the LED manufacturer’s list of compatible ballasts. If your ballast isn’t listed, or if it’s a very old magnetic ballast, you might need to switch to Type B LEDs and bypass the ballast.
Wiring Complications (Type B)
Problem: You’re unsure about the wiring diagram or how to connect the wires correctly.
Solution: Always refer to the LED tube manufacturer’s specific wiring instructions. If you’re not confident, hire a licensed electrician. Safety is paramount.
Color Temperature Mismatch
Problem: The new LED light color doesn’t match other lights in the room.
Solution: Pay close attention to the color temperature (measured in Kelvin, K) when purchasing LED tubes. Common options are 3000K (warm white), 4000K (cool white), and 5000K (daylight). Try to match the color temperature of your existing lights or choose a new, consistent color for the entire room.
Fixture Size and Type
Problem: The LED tube doesn’t physically fit the fixture or the sockets.
Solution: Fluorescent tubes come in different lengths (e.g., 2-foot, 4-foot, 8-foot) and base types (e.g., G13 for T8/T12). Ensure your LED replacement tube matches the length and base type of your old fluorescent tube. For instance, a T8 LED tube will fit a T8 fixture, and typically also a T12 fixture if the base is the same (G13).
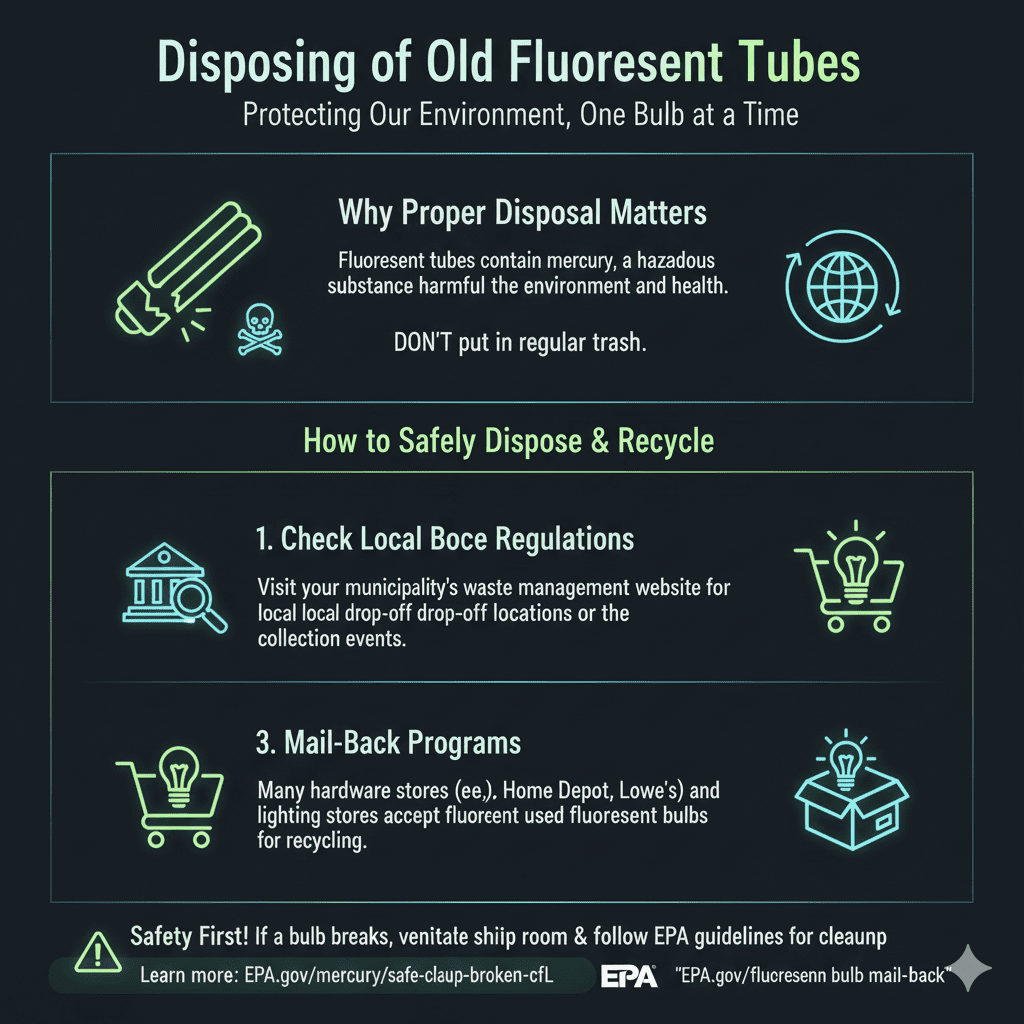
Disposing of Old Fluorescent Tubes
Fluorescent tubes contain a small amount of mercury, a hazardous substance. Therefore, they should not be thrown in the regular trash. Proper disposal is important for environmental protection.
- Check Local Regulations: Many municipalities have specific recycling programs for fluorescent bulbs. Check your local government’s website or waste management authority for drop-off locations or collection events.
- Retailer Take-Back Programs: Some hardware stores and home improvement centers offer recycling services for fluorescent bulbs.
- Mail-Back Programs: Specialized services allow you to mail used fluorescent tubes for recycling.
For more information on mercury and safe handling, you can refer to resources from the U.S. Environmental Protection Agency (EPA).
Frequently Asked Questions (FAQ)
Q1: Can I put an LED bulb into a fixture that uses a fluorescent tube?
A: Yes, you can replace fluorescent tubes with specific LED tubes designed for fluorescent fixtures. However, you must choose the correct type of LED tube (Type A, B, C, or AB) and follow the appropriate installation method, which may involve bypassing the ballast.
Q2: Do I need to change my ballast to use LED tubes?
A: It depends on the type of LED tube you choose. Type A LED tubes are designed to work with your existing ballast. Type B LED tubes require you to bypass or remove the ballast and wire the fixture directly. Type C uses an external driver, and Type AB offers flexibility.
Q3: Will LED tubes work with my old magnetic ballast?
A: Some Type A LED tubes are designed to work with magnetic ballasts, but it’s less common and often less efficient than working with electronic ballasts. Many Type A tubes are only compatible with electronic ballasts. Always check the manufacturer’s compatibility list. If your ballast is old and unreliable, bypassing it with Type B LEDs is usually a better long-term solution.
Q4: How do I know if I have a T12 or T8 fixture?
A: T8 tubes are typically 1 inch in diameter, while T12 tubes are 1.5 inches in diameter. You can often find the designation printed on the side of the fluorescent tube. Most modern fixtures are T8, but older ones might be T12. Note that while T8 LED tubes are designed for T8 fixtures, some can also be used in T12 fixtures if the ballast is compatible (Type A) or if the ballast is bypassed (Type B) and the socket type is the same (G13).
Q5: What happens if I put the wrong type of LED tube in my fixture?
A: If you use a Type A LED tube with a ballast it’s not compatible with, it might not light up, could flicker, or the ballast could be damaged. If you attempt to wire a Type B LED tube directly without bypassing the ballast, you could damage the bulb, the ballast, or create a fire hazard. Always follow the manufacturer’s instructions for the specific LED tube and fixture type.
Q6: Are LED tubes brighter than fluorescent tubes?
A: LEDs generally produce a brighter, more consistent light. The perceived brightness (lumens) of an LED replacement tube should be comparable to or exceed that of the fluorescent tube it replaces. You can choose LED tubes with different lumen outputs to suit your needs.
Q7: How do I dispose of my old fluorescent tubes safely?
A: Fluorescent tubes contain mercury and should be recycled. Do not put them in your regular trash. Check with your local waste management authority for recycling drop-off locations or inquire at local hardware stores, as many offer take-back programs.
Conclusion: Your Bright, Efficient Future with LEDs
Making the switch from fluorescent to LED lighting in your existing fixtures is a fantastic way to modernize your home, boost energy efficiency, and improve your lighting quality. We’ve covered the essential differences between fluorescent and LED technology, explored the various types of LED replacement tubes (Type A, B, C, and AB), and walked through the installation processes for both the simple plug-and-play (Type A) and the more advanced ballast-bypass (Type B) methods.
Remember, the key to success is understanding your fixture, choosing the right type of LED tube, and prioritizing safety, especially if you’re tackling any rewiring. Whether you opt for the ease of Type A or the ultimate efficiency of Type B, you’re investing in a lighting solution that will save you money, reduce your environmental impact, and provide you with better light for years to come. Don’t be afraid to take on this project – with the right information and a little care, you can confidently upgrade your home’s lighting and enjoy the benefits of modern LED technology. Happy lighting!