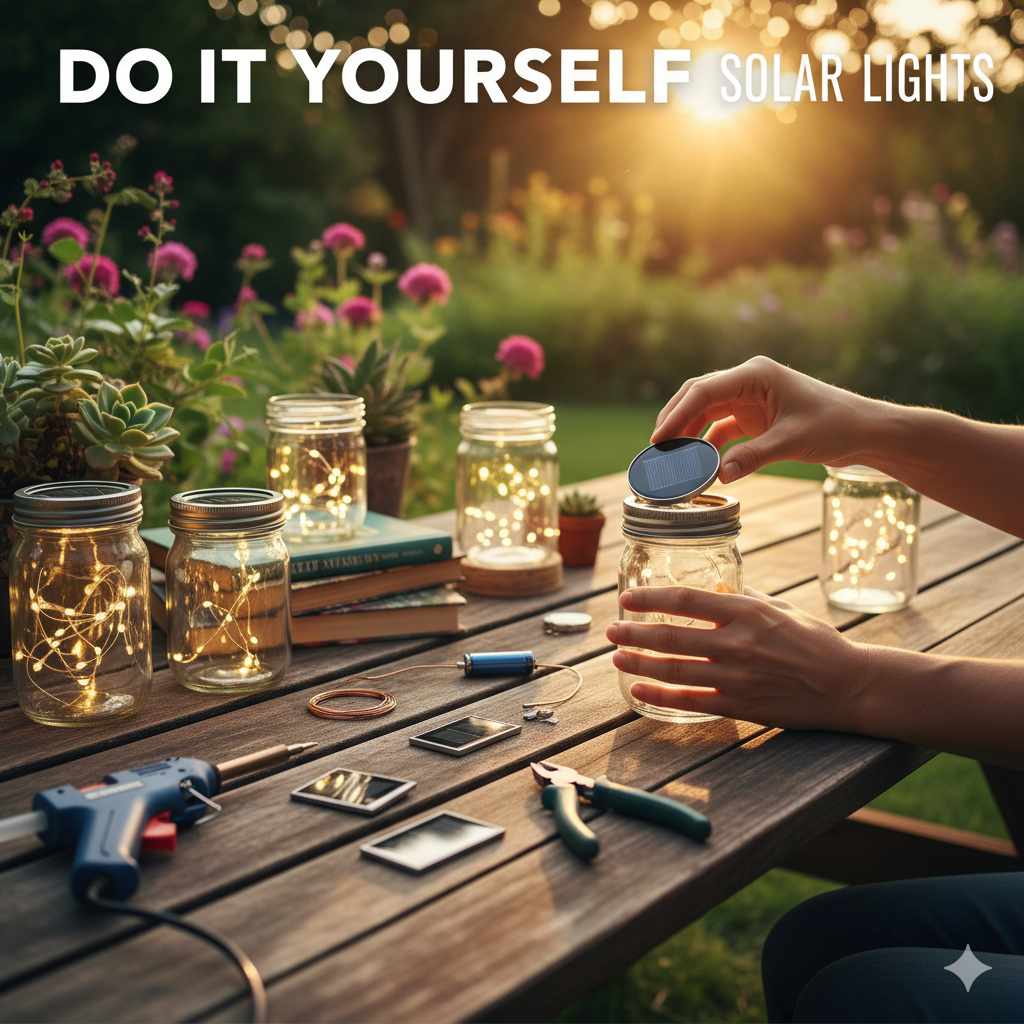
Do It Yourself Solar Lights: Genius Essential Guide
DIY solar lights are an excellent way to add ambiance and functionality to your home and garden without increasing your electricity bill. This guide provides simple, step-by-step instructions for building your own solar-powered lights, making it easy and affordable for any homeowner to harness the sun’s energy.
Hey there, DIYers! Are you looking to brighten up your pathways, garden beds, or patio areas without adding to your electricity costs? Maybe you’ve seen those charming solar lights in stores and thought, “I could make that!” Well, you absolutely can! Many homeowners feel a bit intimidated by electrical projects, but creating your own solar lights is surprisingly simple and incredibly rewarding. We’re going to break it down step-by-step, making it easy for you to build beautiful, functional lights that run on sunshine. Get ready to add a warm glow to your home, the DIY way!
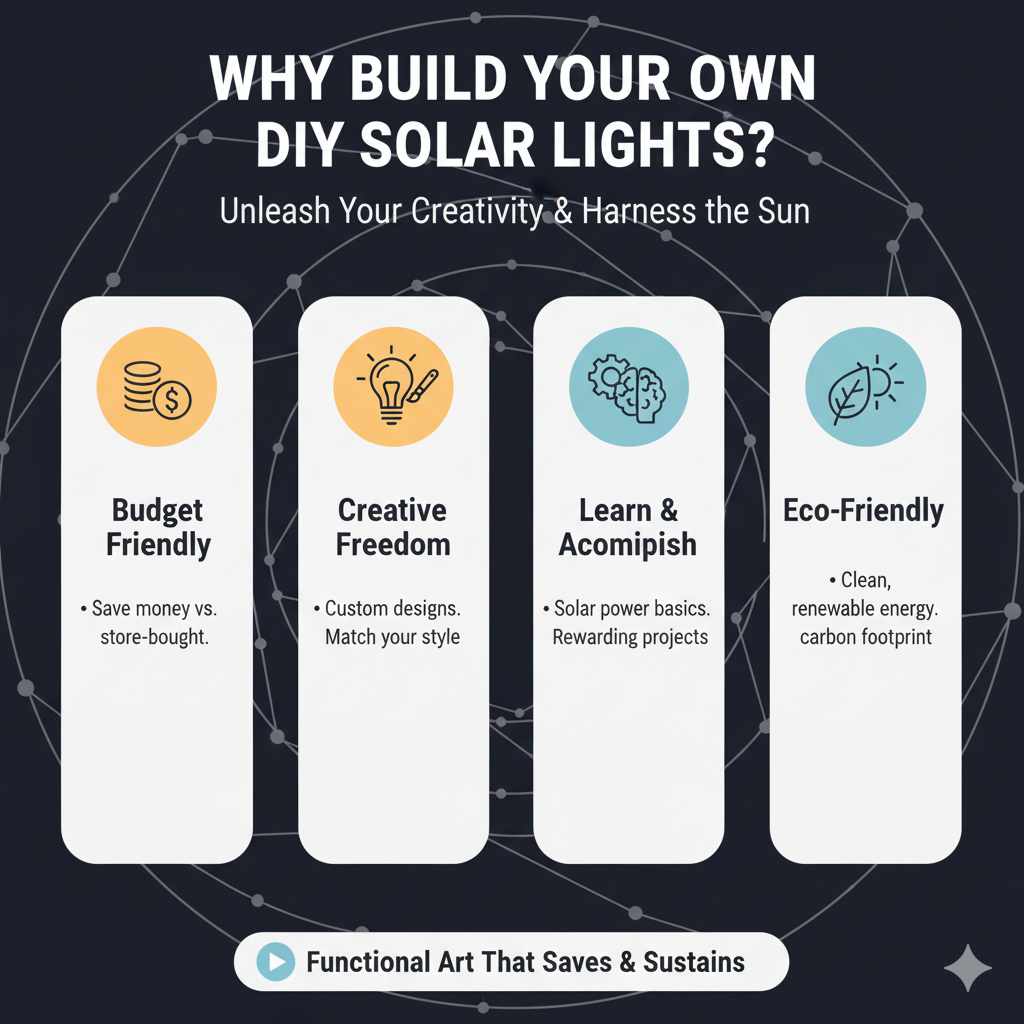
Why Build Your Own DIY Solar Lights?
There are so many fantastic reasons to roll up your sleeves and build your own solar lights. For starters, it’s a budget-friendly alternative to buying pre-made ones, which can add up quickly, especially if you need several. Plus, you get to be creative! You can design lights that perfectly match your home’s style, from rustic garden lanterns to modern pathway markers. It’s also a fantastic way to learn a little about solar power and electronics, giving you a sense of accomplishment. And let’s not forget the eco-friendly aspect – you’re using clean, renewable energy!
Think about it: instead of just buying a light, you’re creating a piece of functional art that saves you money and helps the planet. It’s a win-win-win!
Understanding the Basics of Solar Lights
Before we dive into building, let’s quickly understand how these little sun-powered wonders work. At their core, DIY solar lights are all about capturing sunlight, storing it, and then using it to power an LED. It’s a simple, elegant system:
- Solar Panel: This is the heart of the system. It absorbs sunlight and converts it into electrical energy. The more direct sunlight it gets, the more energy it can store.
- Rechargeable Battery: This is where the energy collected by the solar panel is stored. Think of it as a tiny power bank for your light.
- Light Sensor (Photocell): This little component is smart! It detects when it gets dark and automatically turns the light on.
- LED Light: This is the bulb that shines. LEDs are perfect for solar lights because they use very little energy.
- Circuit Board: This connects all the components and manages the flow of electricity.
Most store-bought solar lights have these components integrated into a small unit. For our DIY projects, we’ll be assembling these parts, often using salvaged components or readily available kits.
Essential Tools and Materials for Your DIY Solar Light Project
Gathering your supplies is the first big step! Don’t worry, you likely have some of these on hand, and the rest are easy to find at hardware stores or online. Safety first, always!
Tools You’ll Need:
- Soldering Iron and Solder: Essential for connecting the electronic components. If you’re new to soldering, there are plenty of beginner tutorials online! A good starter kit is inexpensive.
- Wire Strippers/Cutters: For preparing your wires.
- Screwdriver Set: For assembling housings and attaching components.
- Hot Glue Gun: Great for sealing and securing parts.
- Drill and Drill Bits: For making holes in your housing materials.
- Safety Glasses: Always protect your eyes, especially when soldering or drilling.
- Work Gloves: For handling materials.
- Pliers: Useful for various tasks.
Materials You’ll Need:
The exact materials will vary depending on the type of solar light you want to build, but here are the common components:
- Solar Panel: Look for small, low-voltage panels (e.g., 2V, 4V, 6V). You can often find these in kits or salvage them from old solar garden lights.
- Rechargeable Battery: Typically AA or AAA NiMH (Nickel-Metal Hydride) batteries are used. Ensure the voltage matches your solar panel and circuit.
- LEDs: Choose bright, low-power LEDs. White LEDs are common, but you can get creative with colors!
- Solar Light Circuit Board: You can buy these online as replacement parts for existing solar lights, or find standalone charging circuit boards designed for small solar projects. These boards often have the light sensor built-in.
- Housing Material: This is where your creativity shines! Think glass jars, tin cans, PVC pipes, wooden boxes, or even old lanterns.
- Wire: Small gauge insulated wire (e.g., 22-26 AWG) for making connections.
- Waterproofing Sealant (Optional but Recommended): Silicone caulk or a waterproof epoxy can protect your electronics from the elements.
A great place to start if you’re unsure about components is to purchase a DIY solar light kit. These kits often include a solar panel, battery holder, circuit board, and sometimes even LEDs, taking the guesswork out of sourcing compatible parts. You can find many of these kits on platforms like Amazon or through electronics hobbyist stores.
Project 1: The Classic Mason Jar Solar Lantern
This is a super popular and easy project, perfect for beginners. It’s a beautiful way to light up your garden or patio.
Step-by-Step Guide:
-
- Prepare the Lid: Take a mason jar lid. You’ll need to create a hole in the center of the lid for the solar panel to sit in, and potentially a smaller hole for the LED if it won’t be visible through the jar. Measure your solar panel and the LED carefully.
- Install the Solar Panel: Carefully cut or drill a hole in the lid slightly smaller than your solar panel. You want a snug fit. Thread the wires from the solar panel through the hole from the outside, so the panel rests on top of the lid. Secure it in place using hot glue or a waterproof sealant around the edges. Make sure the panel is facing upwards to catch sunlight.
- Wire the Components: This is where your soldering skills come in handy. Connect the solar panel wires to the charging circuit board. Typically, there will be designated spots for “solar +” and “solar -“. Then, connect the battery holder to the “battery +” and “battery -” terminals on the circuit board. Finally, connect the LED wires to the “LED +” and “LED -” terminals. Most solar light circuit boards are designed to automatically turn the LED on when it gets dark and charge the battery when there’s light.
Tip: Many solar circuit boards have a small light sensor. Ensure this sensor is exposed to ambient light and not covered by the lid or other components.
- Insert the Battery: Place a rechargeable AA or AAA battery into the battery holder.
- Test Your Light: Cover the solar panel with your hand or place the lid in a dark room. The LED should light up! If it doesn’t, double-check your wiring connections and ensure the battery is charged.
- Assemble the Jar: Place the wired lid onto your mason jar. You can leave the jar empty, or fill it with decorative elements like fairy lights, pebbles, or sea glass.
- Waterproof (Optional but Recommended): If your jar will be outdoors, apply a bead of silicone sealant around the edge where the lid meets the jar to prevent moisture from getting inside.
- Charge and Enjoy: Place your finished mason jar solar lantern in a sunny spot for a full day to charge. Once dusk arrives, it should automatically glow!
For more detailed wiring diagrams, you can often find helpful resources on electronics hobbyist websites or by searching for “solar light circuit board diagram.” For example, Adafruit and SparkFun are excellent resources for learning about electronics components and circuits.
Project 2: PVC Pipe Pathway Markers
These are sturdy, weather-resistant, and great for lining driveways or garden paths. You can customize the height and diameter.
Step-by-Step Guide:
-
- Cut Your PVC Pipe: Decide on the height of your pathway marker. Cut a section of PVC pipe to your desired length using a hacksaw or PVC cutter. You might want to create a wider top section to house the solar panel and LED.
- Prepare the Top Cap: Get a PVC cap that fits your pipe. This will be the top of your marker. You’ll need to cut a hole in the top of the cap for the solar panel. Ensure the panel fits snugly.
- Mount the Solar Panel: Insert the solar panel into the hole you made in the PVC cap. Secure it with hot glue or a strong adhesive, ensuring it’s facing upwards.
- Wire the Electronics: Similar to the mason jar project, you’ll be wiring the solar panel, battery holder, and LED to a solar circuit board. The circuit board and battery holder can often be housed inside the top section of the PVC pipe, just below the cap.
Important Note: Make sure the light sensor on the circuit board is not obstructed. You might need to drill a tiny hole near the sensor if it’s inside the cap and completely covered.
- Add the LED: Mount your LED. You can drill a hole in the side of the PVC cap or the top section of the pipe, pointing downwards to illuminate the path. Seal around the LED to prevent water ingress.
- Install the Battery: Place a rechargeable battery in the holder.
- Test the Light: Cover the solar panel to simulate darkness. The LED should turn on.
- Assemble and Seal: Attach the wired cap to the PVC pipe. Use PVC cement for a permanent, watertight seal. If you’re not cementing it, ensure a tight fit. You can also use silicone sealant around any joints or holes to make it more weather-resistant.
- Install in Ground: You can insert the bottom of the PVC pipe directly into the ground, or attach it to a stake for more stability.
- Charge and Enjoy: Let the markers charge in the sun for a day, and they’ll light up your paths at night.
For guidance on working with PVC pipes, the Lowe’s guide on working with PVC pipe offers excellent tips on cutting, joining, and sealing.
Project 3: Upcycling Old Lanterns or Cans
Got an old decorative lantern or a tin can lying around? Give it a new life with a solar conversion!
Step-by-Step Guide:
- Choose Your Item: Select a lantern or a clean tin can. Ensure it’s sturdy and can accommodate your solar components.
- Plan Component Placement: Decide where your solar panel will go (usually on top or a side facing upwards) and where the LED will be placed to cast light.
-
Modify the Housing:
- For Lanterns: Many old lanterns have openings where you can easily mount the solar panel on the top frame and the LED inside.
- For Tin Cans: Drill a hole in the lid for the solar panel. You might also want to drill small decorative holes around the sides of the can to let light escape.
- Install Solar Panel and Electronics: Mount the solar panel onto the lid or frame. Wire the solar panel, battery holder, and LED to a solar circuit board as described in previous projects.
- Secure Components: Use hot glue or strong adhesive to fix the circuit board and battery holder inside the lantern or can. Ensure they are protected from moisture.
- Add the LED: Position the LED so it shines where you want the light. If using a tin can, you can attach the LED to the inside of the lid, pointing down.
- Insert Battery and Test: Put in your rechargeable battery and test the light by covering the solar panel.
- Seal for Weather Resistance: If the item will be outdoors, use silicone sealant to close any gaps or holes where water could enter. For tin cans, ensure the lid is sealed tightly.
- Charge and Display: Place your upcycled solar light in a sunny spot to charge.
This is a fantastic way to reduce waste and create unique lighting. You can paint the tin cans or lanterns to match your outdoor decor!
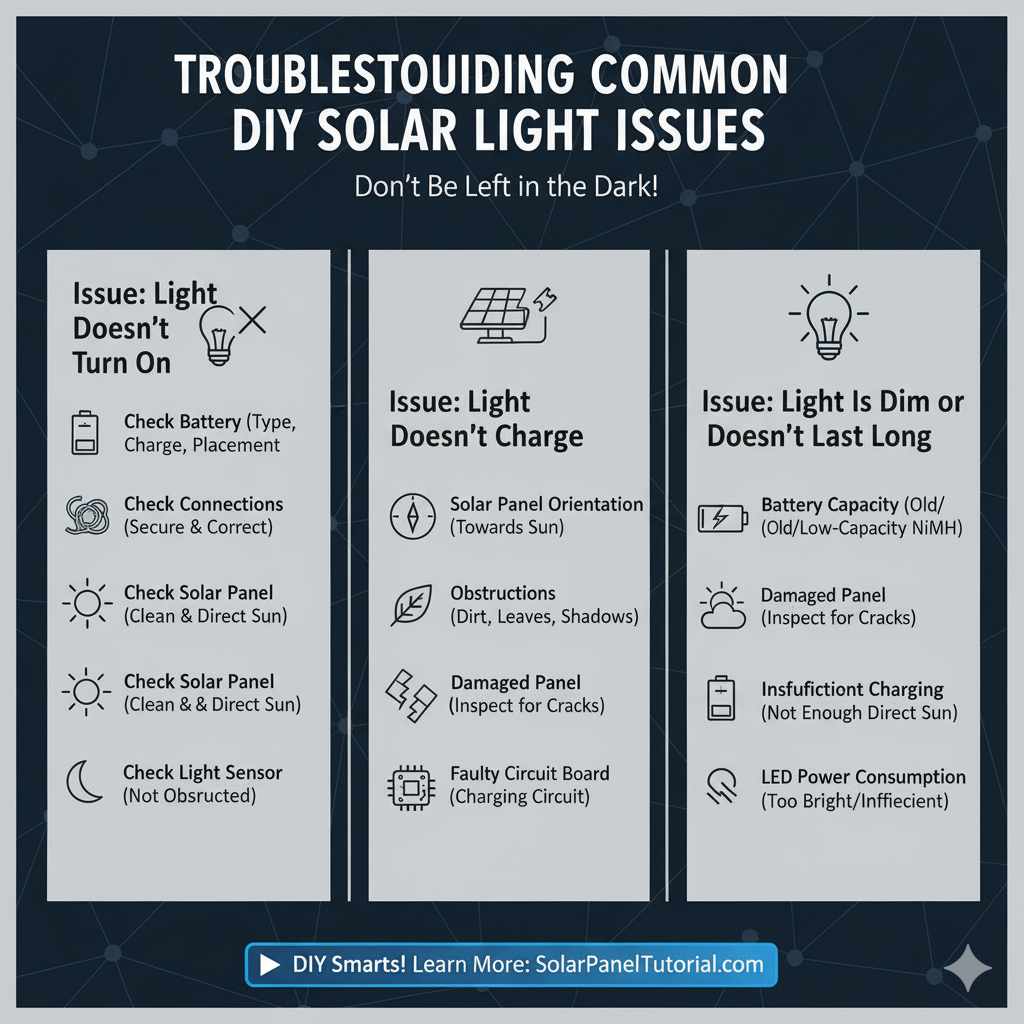
Troubleshooting Common DIY Solar Light Issues
Even with the best intentions, sometimes things don’t work perfectly the first time. Here are a few common hiccups and how to fix them:
Issue: Light Doesn’t Turn On
- Check Battery: Is it inserted correctly? Is it rechargeable? Does it need replacing?
- Check Connections: Ensure all wires are securely soldered or connected to the correct terminals on the circuit board.
- Check Solar Panel: Is it clean? Is it getting enough direct sunlight to charge? Try covering it to see if the LED turns on.
- Check Light Sensor: Is it obstructed? It needs to detect darkness to activate the LED.
Issue: Light Doesn’t Charge
- Solar Panel Orientation: Is it facing directly towards the sun?
- Obstructions: Are there any leaves, dirt, or shadows covering the panel?
- Damaged Panel: Inspect the solar panel for any cracks or damage.
- Faulty Circuit Board: The charging circuit might be the issue.
Issue: Light Is Dim or Doesn’t Last Long
- Battery Capacity: Older or lower-capacity rechargeable batteries won’t hold as much charge. Consider replacing them with higher-capacity NiMH batteries.
- Insufficient Charging: The light might not be getting enough direct sunlight throughout the day.
- LED Power Consumption: If you used a very bright or inefficient LED, it might drain the battery too quickly.
For more in-depth troubleshooting of solar circuits, resources like the Solar Panel Tutorial website offer valuable insights.
Comparing DIY Solar Lights vs. Store-Bought Options
It’s always good to weigh your options. Here’s a quick comparison:
| Feature | DIY Solar Lights | Store-Bought Solar Lights |
|---|---|---|
| Cost | Lower initial cost, especially if using salvaged parts. | Varies widely, can be expensive for multiple lights. |
| Customization | High – you can design and build to your exact needs and style. | Limited to available models and features. |
| Learning Experience | Excellent opportunity to learn about electronics and solar power. | Minimal learning involved. |
| Durability/Repairability | Can be built to be very durable; individual components can be replaced. | Durability varies; often difficult or impossible to repair. |
| Satisfaction | High – pride in creating something functional yourself. | Moderate – convenience of a ready-made product. |
| Time Investment | Requires time for assembly and learning. | Minimal time; just unbox and place. |
As you can see, the DIY route offers significant advantages in customization and the sheer satisfaction of building something with your own hands. While store-bought lights offer convenience, they can’t quite match the personal touch and learning that comes with a DIY project.
Frequently Asked Questions (FAQ) About DIY Solar Lights
Q1: Do I need to be an expert to build DIY solar lights?
A1: Not at all! These projects are designed for beginners. With a few basic tools and clear instructions, anyone can build their own solar lights. Soldering is the most “technical” part, but it’s easy to learn.
Q2: How much sunlight do DIY solar lights need to charge?
A2: For best results, your solar panel needs at least 6-8 hours of direct sunlight per day. Cloudy days will still allow some charging, but the light might not be as bright or last as long.
Q3: Can I use regular batteries instead of rechargeable ones?
A3: No, it’s crucial to use rechargeable batteries (like NiMH). Regular alkaline batteries cannot be recharged by the solar panel and could even be damaged or leak if you try.
Q4: How do I make my DIY solar lights waterproof?
A4: Use silicone sealant or a waterproof epoxy around any openings, wire entry points, and where the lid meets the housing. Ensure the solar panel is well-sealed to the surface it’s mounted on.
Q5: Can I use any color LED I want?
A5: Yes, you can use LEDs of various colors! Just ensure they are low-power LEDs suitable for battery-operated projects.
Q6: What’s the difference between a solar panel and a solar cell?
A6: A solar cell is the basic unit that converts light into electricity. A solar panel is made up of many solar cells connected together to produce more power.
Q7: Can I connect multiple LEDs to one solar panel and circuit?
A7: It depends on the power output of your solar panel and the power draw of your LEDs. For most beginner projects using small panels, it’s best to stick to one or two LEDs to ensure they receive enough power to light up effectively.
Conclusion
Building your own solar lights is a fantastic DIY project that combines creativity, practicality, and sustainability. Whether you’re upcycling a mason jar, crafting sturdy PVC pathway markers, or giving an old lantern a new glow, the process is rewarding and the results are beautiful. You’ve learned about the core components, gathered your tools, and walked through step-by-step guides. Remember, safety is key, so always wear your safety glasses and take your time with the wiring. Don’t be discouraged if your first attempt isn’t perfect – troubleshooting is part of the learning process! With these essential tips and a little sunshine, you’re well on your way to illuminating your home and garden with your very own, custom-made solar lights. Happy building!