How Long Before You Can Stain Pressure Treated Lumber? Essential
Generally, you should wait at least 3 to 6 weeks after purchase before staining new pressure-treated lumber. This drying time is crucial to allow excess moisture and surface chemicals to escape, ensuring the stain penetrates properly for a beautiful, long-lasting finish.
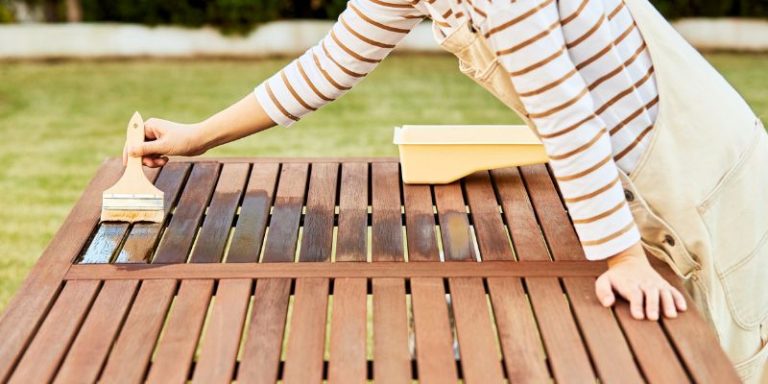
Welcome! Dealing with that greenish-tinged, damp-feeling pressure-treated wood can be tricky when you’re eager to start staining your new deck or fence. Waiting too long feels wasteful, but staining too soon leads to peeling, splotchy finishes that look terrible fast. It’s a common hurdle for DIYers! Don’t worry; figuring out the right waiting period is simple once you understand why this wood needs time. I’m Md Meraj, and I’m here to give you the step-by-step guide to know exactly when your wood is ready for its beautiful new color. Let’s unlock the secret to a professional-looking stain job!
Pressure-treated lumber is fantastic. It resists rot, bugs, and decay, making it the go-to choice for outdoor projects like decks, pergolas, and fences. However, this magic comes with a catch: the treatment process saturates the wood with chemicals and moisture. If you rush to apply that rich stain color right after building, you’ll be disappointed. The stain won’t stick, and your hard work will be undone by the elements.
Understanding the “why” behind the waiting time is half the battle. This article will walk you through the factors affecting drying time, the simple test you can perform yourself, and the best practices for preparing your lumber so your stain job lasts for years.
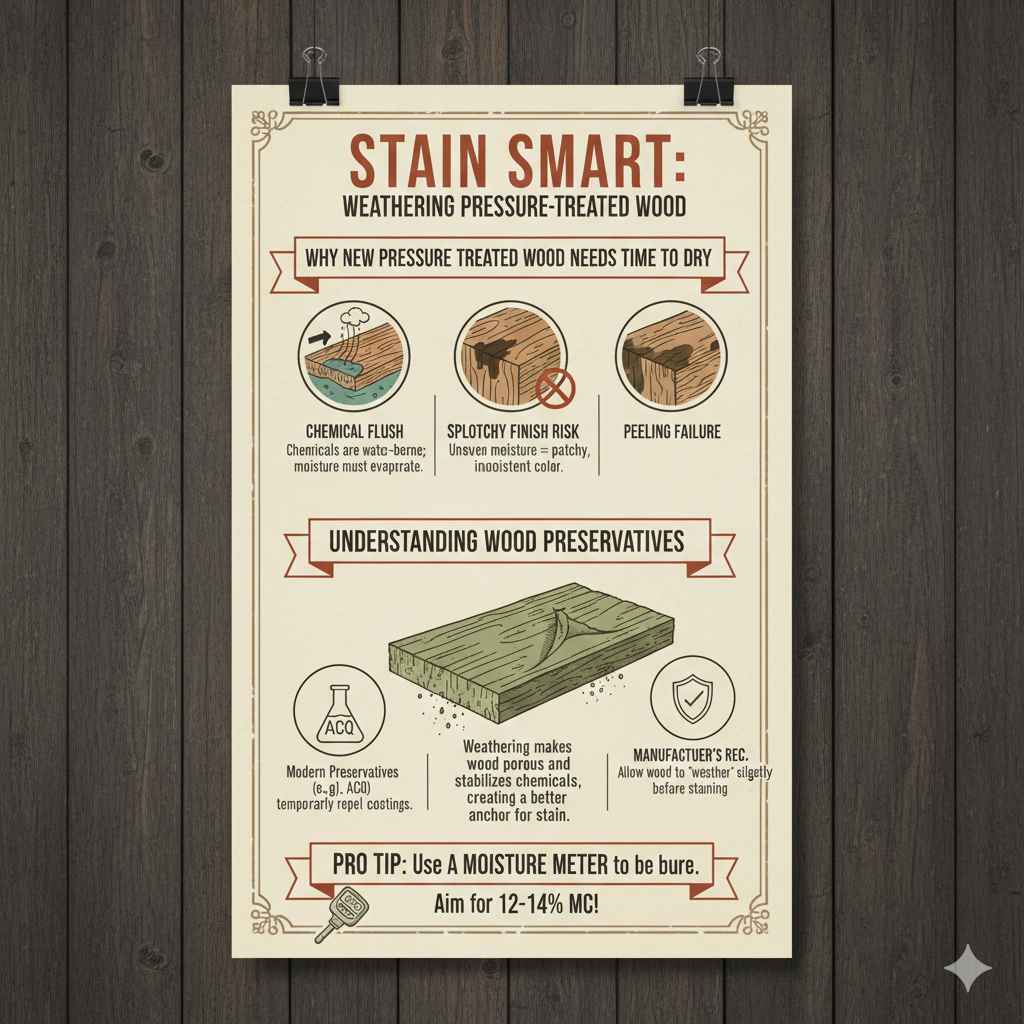
Why New Pressure Treated Wood Needs Time to Dry
That fresh-from-the-lumberyard pressure-treated wood is soaking wet—not just from rain, but from the chemical treatment process itself. Knowing this helps explain the waiting period.
The Role of Moisture Content
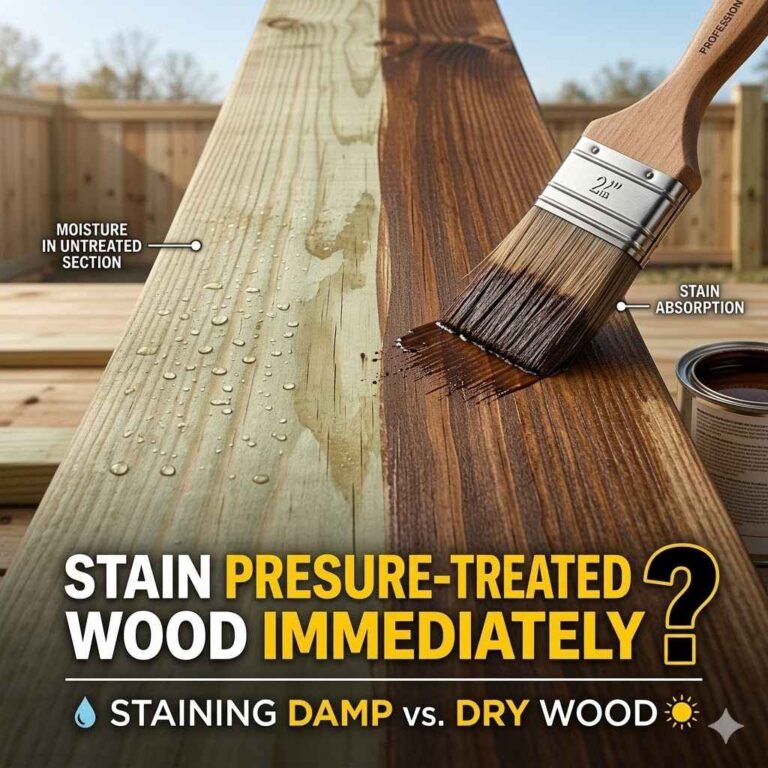
For any stain or sealer to work correctly, the wood needs to reach an acceptable moisture content (MC). If the wood is too wet, the liquid stain sits on the surface instead of soaking in. Think of trying to apply paint to a wet sponge; it just won’t absorb.
- Chemical Flush: During treatment, water carries the protective chemicals deep into the wood fibers. This water must evaporate out before the wood can accept stain.
- Splotchy Finish Risk: Areas that dry unevenly will absorb stain differently, resulting in a patchy, inconsistent look.
- Peeling Failure: If you seal wet wood, the trapped moisture eventually pushes the stain layer off the surface as it tries to escape.
Understanding Wood Preservatives
Modern pressure treatment (often using Alkaline Copper Quat or ACQ) uses powerful preservatives. While crucial for longevity, these chemicals can temporarily repel coatings.
Manufacturers recommend allowing the wood to “weather” slightly. This weathering process helps the surface of the wood become slightly rougher and allows surface chemicals to stabilize or leach out harmlessly, creating a better anchor for the stain.
The Standard Waiting Time: How Long Is Enough?
There is no single, universal number, but there are very reliable guidelines. The necessary waiting period depends on environmental factors more than anything else.
The Quick Answer: 3 to 6 Weeks
For most homeowners building a deck or outdoor structure in moderate climates, aiming for three to six weeks of exposure to sun and air is the sweet spot. This timeframe usually reduces the internal moisture enough for standard oil-based or water-based stains to work effectively.
Factors That Increase Waiting Time
If your conditions are less than ideal, you need to extend that waiting period. Here are the variables that slow down the drying process:
| Factor | Impact on Drying Time | Recommended Adjustment |
|---|---|---|
| Shaded or Covered Areas | Significantly slower due to lack of direct sun/airflow. | Add 2–4 extra weeks. |
| High Humidity Climates | The air holds moisture, slowing evaporation from the wood. | Wait closer to 6–8 weeks. |
| Lumber Storage | If stacked tightly without spacers, drying is restricted. | Always use stickers (spacers) between boards. |
| Wood Thickness | Thicker boards (like 2x10s or posts) hold moisture longer. | Allow extra time for thick cuts. |
When Can You Stain Sooner? (The Exception)
Some newer, premium pressure-treated lumber is labeled as “Kiln Dried After Treatment” (KDAT). KDAT lumber has been intentionally dried after the chemical bath, meaning it is ready for finishing much sooner—often within a week or two. Always check the green tag on the lumber; if it says KDAT, you can accelerate your timeline safely.
The Essential Test: Is Your Lumber Ready to Stain?
Never trust a calendar alone. The most important step is testing the wood yourself to confirm it has reached a safe moisture level. This is simple, reliable, and prevents costly re-staining later.
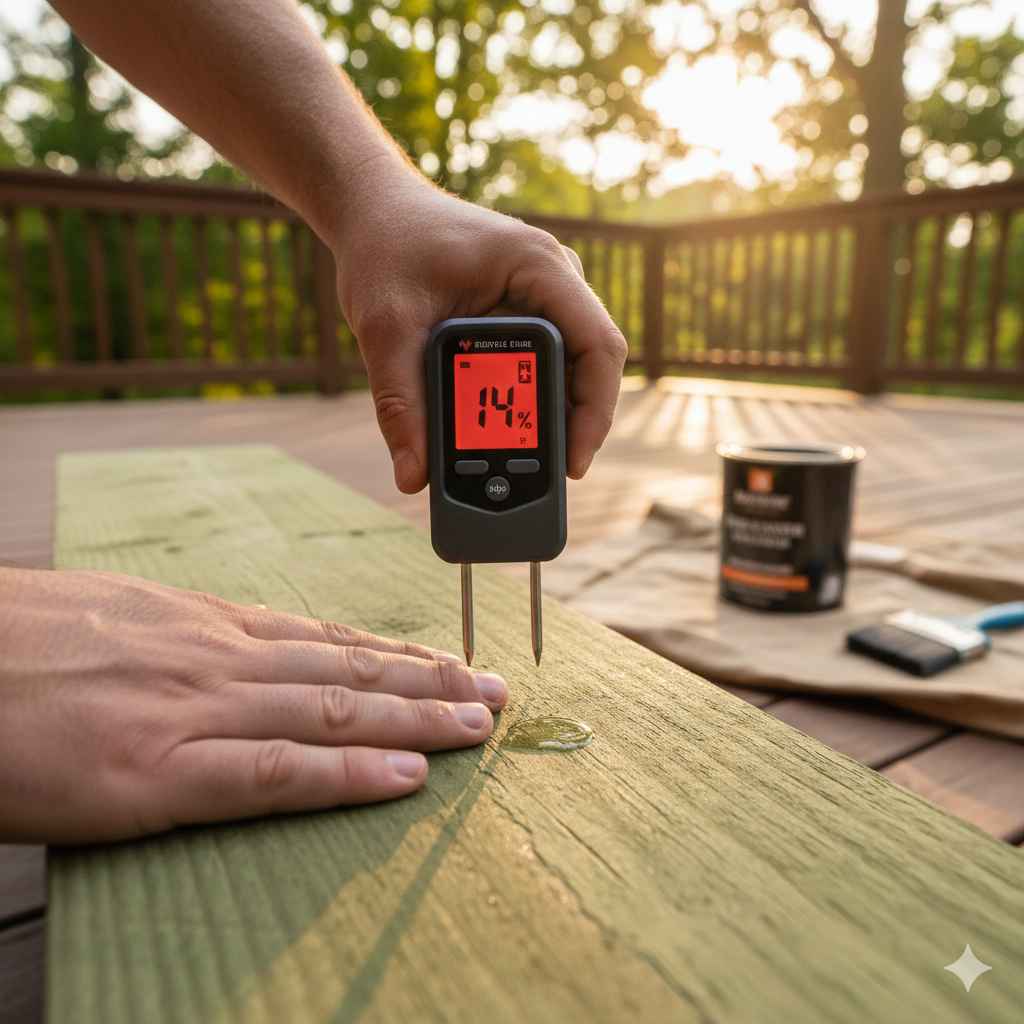
Tool Spotlight: The Moisture Meter
If you want professional results, a moisture meter is your best friend. This tool reads the percentage of water trapped inside the wood fibers.
Why use one? Standard paint and stain manufacturers typically require the wood to be below 15% moisture content for proper adhesion. For exterior wood, many pros aim for 12% or lower.
For helpful background on tool usage in woodworking, check out resources like Woodworkers for Christ’s guides on wood science, which often cover moisture testing fundamentals.
How to Perform the Water Drop Test (The Beginner Method)
If you don’t own a moisture meter, this easy visual test works wonders:
- Select a Spot: Choose a section of the lumber that receives typical exposure (not one constantly shielded by a joist).
- Apply Water: Pour a few drops of plain water directly onto the wood surface. Do not wipe it away.
- Observe: Watch the water closely for about 10 to 15 minutes.
- The Result:
Wood is NOT Ready: If the water beads up or stays sitting on top of the surface, the wood is still too saturated or chemically active. Wait another week and retest.
Wood IS Ready: If the water soaks into the wood within a few minutes, turning the surface dark and wet-looking, the wood is ready to accept stain!
This simple test confirms that the surface pores are open and ready for oil or water in your chosen stain product.
Preparing Pressure Treated Lumber for Staining: Beyond Waiting
Waiting is the hardest part, but preparation is what guarantees longevity. Once your wood passes the water test, you have a few quick steps before you break out the stain brush.
Step 1: Brightening and Cleaning the Wood
When pressure-treated lumber sits outside, it naturally turns a dull, silvery-gray color. This is surface oxidation, and stain will look dull over this gray color. You need to clean it and restore its natural wood tone.
Use a Wood Deck Cleaner/Brightener:
- These products are specifically designed to remove mill glaze (a surface sheen left from planing) and the gray weathered surface.
- Follow the manufacturer’s instructions exactly. Usually, this involves applying the cleaner, letting it sit briefly, scrubbing gently with a stiff synthetic brush (not wire!), and rinsing thoroughly.
- If you used a standard cleaner (not a brightener), you may need a separate product to restore the wood’s natural color before staining.
Step 2: Proper Rinsing and Drying Time After Cleaning
This is critical! After scrubbing with any cleaning agent, you’ve just re-wet the surface. You must allow this cleaning water to evaporate completely.
Plan for at least 24 to 48 hours of dry, sunny weather after rinsing before you apply any stain. If you see any damp spots or dark areas, wait longer.
Step 3: Sanding for Smoothness (Optional but Recommended)
If the wood feels fuzzy or has rough spots after cleaning (sometimes called “flash rusting” on the metal components of the preservative), a light sanding can help. Use a medium-grit sandpaper (80-grit or 100-grit) on a pole sander or orbital sander.
This step is primarily for comfort (no splinters!) and smoothing out any raised grain caused by the washing process, but it also helps open the surface slightly for better stain adhesion.
Choosing the Right Stain for Pressure Treated Wood
Once the wood is dry and clean, the final decision is which stain to use. The type of stain you choose interacts differently with the wood structure.
Oil-Based vs. Water-Based Stains
For exterior pressure-treated wood, oil-based stains are historically very popular because they penetrate deep into the wood fibers.
| Stain Type | Penetration | Durability on PT Wood | Cleanup |
|---|---|---|---|
| Oil-Based (Alkyd) | Excellent penetration into wood pores. | Very durable; often lasts longer between coats. | Mineral spirits or paint thinner. |
| Water-Based (Acrylic/Latex) | Good surface bonding; sometimes sits more on top. | Easier application; requires excellent surface prep. | Soap and water. |
Tint Matters
Remember: the darker the stain color, the more UV protection it provides. Lighter stains fade much faster than darker browns or deep reds.
Always choose a stain specifically labeled for “Pressure-Treated Wood” or one that contains mildewcides/preservatives to fight the fight against moisture head-on.
Troubleshooting Common Staining Mistakes on PT Wood
Even when following guidelines, sometimes things go slightly wrong. Here’s how to fix the two most common issues when staining pressure-treated lumber.
Problem 1: The Stain Looks Blotchy or Patchy
Cause: The wood was dried unevenly, or the cleaning process was insufficient. One area soaked up stain (too dry/absorbent), while another repelled it (too wet/chemically active).
The Fix:
- If you notice blotching immediately (within an hour), try working more wet stain into the light areas using a brush before it sets.
- If it has dried blotchy, you will likely need to apply a quality transparent or semi-transparent restorer product that evens out the color, or wait for the next coat to even things out. Next time, rely heavily on the Water Drop Test!
Problem 2: The Stain Is Peeling Off After a Season
Cause: The number one reason is applying the stain before the lumber had fully dried out from the treatment process.
The Fix: Peeling usually means failure to adhere. You must strip or sand the failing stain off completely back to bare wood. Clean the wood thoroughly with a dedicated deck stripper/cleaner, ensure it passes the water test (3+ weeks of sun drying after stripping), and then reapply the stain.
If you want to explore durable exterior finishes, the Environmental Protection Agency (EPA) provides background on wood preservatives, which is helpful context for why surface prep is so important.
Project Timeline: Setting Realistic Expectations
To help you plan your weekend, here is a realistic timeline for when you can realistically start staining your new pressure-treated wood project.
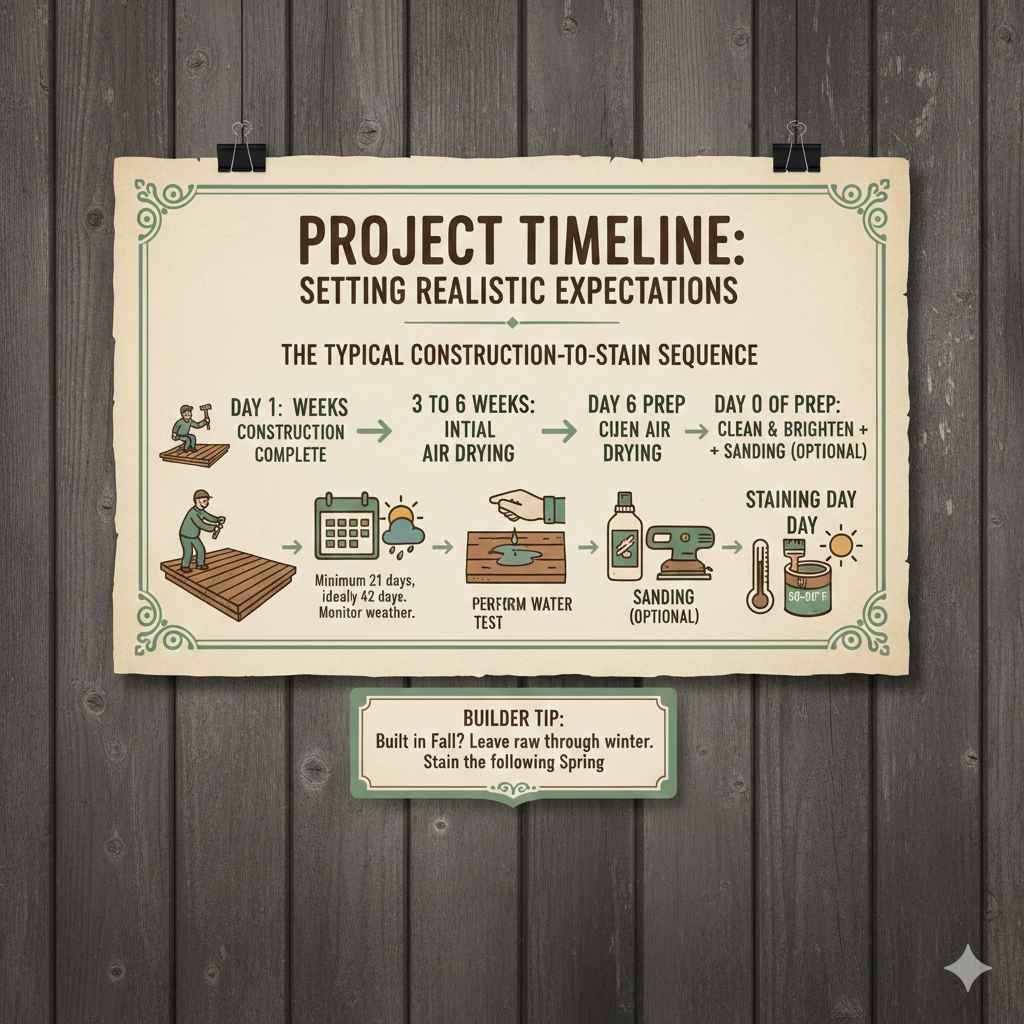
The Typical Construction-to-Stain Sequence
- Construction Complete: Day 1.
- Initial Air Drying: 3 to 6 weeks (Minimum 21 days, ideally 42 days). Monitor weather closely.
- Perform Water Test: Once time has passed, check several random boards using the water drop method.
- If Ready: Clean and Brighten the wood (Day 0 of Prep). Wait 1-2 sunny days for wood to dry from cleaning.
- Sanding (Optional): Can be done the same day as cleaning, before the final drying period.
- Staining Day: Wait for a period of dry, moderate weather (ideally 50°F to 90°F).
Builder Tip: If you built your deck in the Fall, leave the wood raw through the winter. Moisture trapped over winter makes it even harder to dry. Plan to stain the following Spring after the wood has had another few months of exposure.
Frequently Asked Questions (FAQ) About Staining Pressure Treated Wood
Q1: Can I use solid color stain on pressure-treated lumber?
A: Yes, but you must wait the full recommended time (3–6 weeks) and clean the surface thoroughly. Solid stains act more like paint and need a very dry, clean surface to avoid peeling quickly.
Q2: Is it okay if my project gets rained on after I clean it but before I stain it?
A: Yes, light rain is fine, but it resets your timeline. If the rain was heavy, you must wait another 2 to 3 sunny days before re-testing with the water drop method to ensure the surface hasn’t absorbed too much moisture.
Q3: What happens if I stain pressure-treated wood after only one week?
A: The stain will mostly sit on the surface, leading to uneven coverage. When exposed to sunlight and temperature changes, this improperly bonded stain will likely blister, bubble, and begin peeling off within a few months.
Q4: Do I need to use a specific primer on pressure-treated wood before staining?
A: Typically, no. If you use a quality stain explicitly formulated for pressure-treated wood, a primer is not necessary. The stain acts as both the sealer and the colorant. Priming is usually only needed if you are attempting to paint the wood instead of staining it.
Q5: Can I use a heat gun to speed up the drying process?
A: No, this is generally not recommended. Applying direct, intense heat can cause the wood to dry too rapidly, potentially leading to warping, cracking, or uneven absorption points. Stick to natural airflow and sunshine for consistent results.
Q6: Should I stain the bottom/joists of the deck boards?
A: Yes, if you can access them easily! Staining all six sides of dimensional lumber (top, bottom, and all four edges) before assembly provides the absolute best protection against moisture wicking up from the ground or surrounding humidity. If you can’t stain the bottom before installation, stain the edges thoroughly.
Conclusion: Patience Pays Off for Beautiful Wood
Feeling overwhelmed by the waiting game? Don’t be! Think of the 3 to 6 weeks required before staining pressure-treated lumber not as a delay, but as an essential, hands-off curing process. By letting the wood dry naturally, you ensure that when you finally apply your stain, it sinks deep into the fibers, bonds tightly, and locks in a rich color that will look fantastic season after season.
Remember your two non-negotiables: wait until the wood passes the Water Drop Test (or reads under 15% MC on a meter), and always clean off that gray surface before you start. Armed with this knowledge, you are now ready to move past the waiting stage. Go ahead and build with confidence, knowing that your next staining project will result in the durable, beautiful finish you planned for. Happy building, friend!