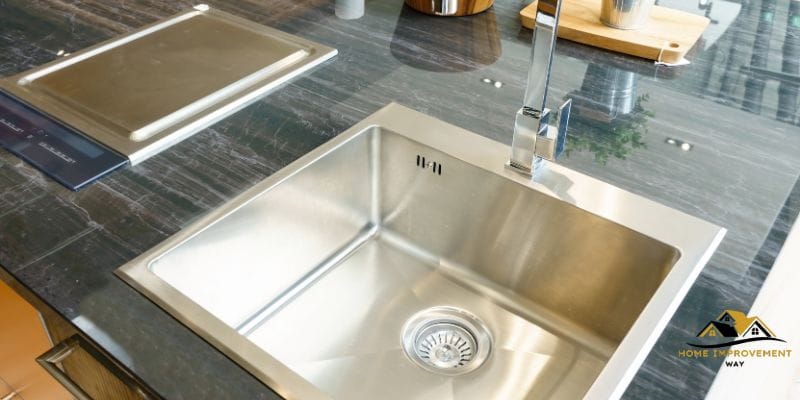
How to Caulk a Stainless Steel Kitchen Sink: Expert Tips and Tricks
To caulk a stainless steel kitchen sink, start by cleaning the area thoroughly and removing any old caulk. Then, apply the caulk in a continuous bead around the edge of the sink, using a caulk gun.
Smooth the caulk with a caulking tool or a damp finger, and let it dry completely before using the sink. A stainless steel kitchen sink is a popular choice for many homeowners due to its durability and sleek design. However, over time, the caulk around the sink may start to deteriorate, leading to leaks and potential water damage.
To prevent this, it is important to know how to properly caulk a stainless steel kitchen sink. We will provide you with a step-by-step guide on how to caulk your sink, ensuring a watertight seal that will keep your kitchen clean and dry. So, let’s get started!
Choose The Right Caulk
Achieve a perfect seal on your stainless steel kitchen sink with the right caulk. Follow these tips for a quick and successful caulking process.
When it comes to caulking your stainless steel kitchen sink, it’s essential to choose the right caulk to ensure a strong and durable seal. Consider the sink material and select the right type of caulk to achieve optimal results.
Consider The Sink Material
The first step in choosing the right caulk is to consider the material of your stainless steel kitchen sink. Stainless steel sinks are commonly used due to their durability, resistance to rust, and sleek appearance. However, different sink materials may require different types of caulk for the best adhesion and longevity.
If you have a stainless steel sink, look for caulk specifically designed for use with metal surfaces. These types of caulk often contain a silicone or acrylic base, which adheres well to stainless steel and provides a watertight seal.
On the other hand, if you have a sink with a different material such as porcelain, composite, or granite, make sure to choose a caulk that is compatible with that specific surface. Using the wrong caulk can lead to poor adhesion, cracks, and water leakage, compromising the integrity of your sink installation.
Select The Right Type Of Caulk
When selecting the right type of caulk for your stainless steel kitchen sink, there are a few factors to consider. Each type of caulk has its own unique characteristics and benefits. Here are some common types of caulk suitable for sealing a stainless steel sink:
| Type of Caulk | Features |
|---|---|
| Silicone Caulk | • Excellent adhesive properties • Flexible and durable • Resistant to mold and mildew |
| Acrylic Caulk | • Easy to apply and clean up • Paintable once fully cured • Good adhesion to stainless steel |
| Hybrid Caulk | • Combines the advantages of silicone and acrylic caulk • Provides both flexibility and adhesion • Resistant to moisture |
Consider the specific requirements of your sink and the conditions it will be exposed to. For example, if your sink is frequently exposed to water and humidity, silicone caulk may be the best choice due to its excellent water resistance and mold/mildew resistance.
Remember to read the manufacturer’s instructions and specifications before purchasing caulk to ensure it is suitable for use with stainless steel. Additionally, always clean and prepare the surface of your sink before applying caulk for maximum adhesion and longevity.
By considering the sink material and selecting the right type of caulk, you can ensure a seamless and effective caulking process for your stainless steel kitchen sink. Proper caulking not only enhances the aesthetic appearance of your sink but also prevents water damage and extends the lifespan of your kitchen fixtures.
Prepare The Sink
Learn how to properly caulk a stainless steel kitchen sink with these easy steps. Prepare the sink by cleaning it thoroughly, removing any old caulk, and ensuring it is dry. This will ensure a seamless and long-lasting caulk application.
Clean And Dry The Surface
Before you begin caulking your stainless steel kitchen sink, it’s essential to ensure that the surface is clean and completely dry. A clean surface will allow the caulk to adhere properly and create a tight seal. Here’s how you can clean and dry the sink surface effectively:
- Start by removing any dishes, utensils, or debris from the sink.
- Give the sink a thorough rinse with warm water to eliminate loose dirt and residue.
- Use a mild, non-abrasive dish soap or stainless steel cleaner to scrub the sink.
- Rinse the sink again, making sure to remove any soap or cleaning solution.
- Dry the sink using a clean, lint-free cloth or paper towels. Ensure there is no moisture left on the surface before proceeding with caulking.
- Make sure to allow sufficient time for the sink to dry completely.
Remember, a spotlessly clean and dry surface is crucial for achieving a successful caulk application. Now that your sink is prepared, let’s move on to the next step.
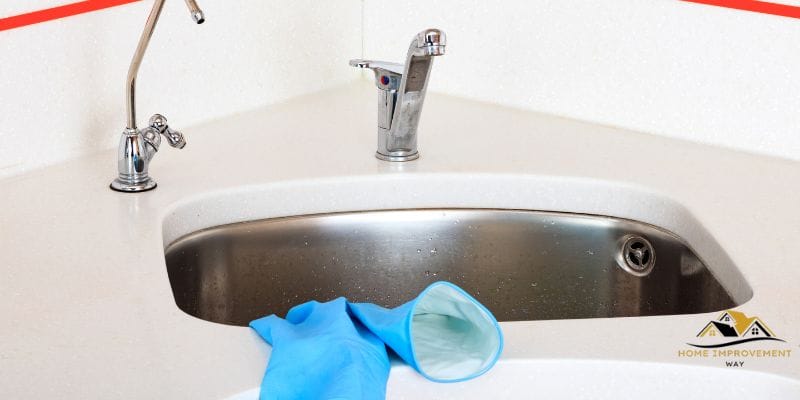
Remove Any Existing Caulk
If there is existing caulk in your stainless steel kitchen sink, it’s crucial to remove it before applying new caulk. This ensures proper adhesion and a clean finish. Follow these steps to remove the old caulk:
- Inspect the sink carefully to identify any areas with caulk that need to be removed.
- Use a caulk removal tool, such as a razor blade or caulk scraper, to gently scrape away the old caulk.
- Be careful not to scratch or damage the stainless steel surface while removing the caulk.
- Wipe away any debris or residue from the caulk removal process using a damp cloth or sponge.
By removing any existing caulk, you ensure a clean canvas for the new caulk application. This step is essential to achieve a professional-looking finish for your stainless steel kitchen sink. With the sink prepared and the old caulk removed, you’re now ready to start caulking.
Apply The Caulk
Now that you have prepared your stainless steel kitchen sink and cut the tip of the caulk tube, it’s time to apply the caulk. Follow these steps to ensure a seamless and long-lasting caulk line.
Cut The Tip Of The Caulk Tube
Before you start caulking, you’ll need to cut the tip of the caulk tube at a 45-degree angle. This helps to control the flow of caulk and allows for precise application. Use a utility knife or a caulk gun with a built-in cutter to make the cut. Ensure that the hole is large enough to apply an adequate amount of caulk, but not too large that it creates a mess.
Start Caulking
Once the caulk tube is prepared, insert it into a caulk gun if you’re using one. Gently squeeze the trigger to release the caulk and start applying it to the seams and gaps around the edges of your stainless steel kitchen sink. Work in small sections and keep a steady hand to achieve a smooth and even application of caulk.
Be generous with the amount of caulk you apply, as it will fill any gaps and ensure a water-tight seal. Apply the caulk in a continuous line, moving from one end of the sink to the other. It’s important to maintain consistent pressure on the caulk gun trigger to prevent uneven application of the caulk.
To achieve a professional finish, try to avoid stopping and starting the caulk line. If you need to take a break, find a natural stopping point, such as where two seams meet or at a corner. This will help to create a seamless caulk line without any visible breaks or imperfections.
Smooth The Caulk Line
After you have applied the caulk, it’s important to smooth the caulk line to create a clean and finished look. Use a caulk smoothing tool or your finger to carefully run along the caulk line, removing any excess caulk and creating a smooth surface. Wipe off any excess caulk from the sink’s surface to prevent it from drying and leaving a mess.
Remember to work quickly when smoothing the caulk line, as caulk can dry relatively fast. If necessary, you can dip your finger or the smoothing tool in a small amount of water to help achieve a smoother finish.
After you have smoothed the caulk, allow it to dry completely according to the manufacturer’s instructions. This will usually take several hours, but it’s important not to touch or disturb the caulk during the drying process to ensure a durable seal.
And voila! You have successfully applied caulk to your stainless steel kitchen sink. The caulk line will not only improve the appearance of your sink but also help to prevent water damage and ensure the longevity of your sink. With the right tools and technique, caulking your stainless steel sink can be a simple and rewarding DIY project.
Let The Caulk Dry
Once you’ve finished caulking your stainless steel kitchen sink, allow the caulk to dry completely before using the sink again. This will ensure a proper seal and prevent any leaks or damage.
Allow Sufficient Drying Time
Once you have caulked the stainless steel kitchen sink, it is crucial to let the caulk dry properly. This step is essential for ensuring a long-lasting seal and preventing any water leakage or damage.
Proper drying time allows the caulk to set and adhere to the sink surface, creating a tight and reliable seal. Rushing this step may result in the caulk not properly adhering or taking longer to dry, leading to potential problems down the line.
So, how long should you let the caulk dry? It typically takes around 24 hours for the caulk to fully cure and dry. However, the drying time can vary depending on the specific brand and type of caulk you are using. It is essential to follow the manufacturer’s instructions for the specific product you have chosen.
During the drying process, it is crucial to avoid any contact with the caulk. This means refraining from using the sink or applying any pressure on the caulked area. Some caulks may form a skin on the surface quickly, but that doesn’t mean they are completely dry.
Check For Dryness
To ensure that the caulk has dried completely, perform a simple touch test. Lightly touch the caulked area with your fingertip, and if it feels dry and firm to the touch without any tackiness, it has likely dried adequately.
Another way to check for dryness is to inspect the caulk’s color. Most caulks change color when they dry, usually becoming slightly lighter or clear. This color change indicates that the caulk has fully dried, but again, refer to the manufacturer’s instructions for confirmation.
Additional Tips For Drying
Here are a few additional tips to ensure the caulk dries effectively:
- Avoid exposing the caulked area to water or moisture during the drying process.
- Ensure proper ventilation in the room to facilitate faster drying.
- If you have caulked around a faucet or other fixtures, wait for them to dry completely before using them.
- If you need to apply multiple layers of caulk, allow each layer to dry fully before adding the next one.
By allowing sufficient drying time, you can ensure that your caulked stainless steel kitchen sink will provide a durable and watertight seal, keeping your sink in excellent condition for years to come.
Finishing Touches
Once you have successfully caulked your stainless steel kitchen sink, there are a few important finishing touches that will ensure a professional and polished look. These steps will help you clean up any excess caulk and make any necessary touch-ups to achieve a perfect seal.
Clean Up Excess Caulk
Before the caulk dries completely, it’s crucial to clean up any excess caulk that may have seeped out from the joint. Excess caulk not only looks messy but can also impact the overall effectiveness of the seal. Follow these steps to clean up the excess caulk:
- Use a clean, damp cloth or sponge to carefully wipe away any excess caulk. Be mindful not to disturb the freshly applied caulk within the joint.
- For stubborn caulk residue, use a plastic scraper or putty knife to gently remove it. Ensure that you use a plastic tool to avoid scratching or damaging the surface of your stainless steel sink.
- After removing the excess caulk, wipe the area with a clean, dry cloth to make sure there are no leftover residue or moisture.
Inspect And Touch Up If Needed
After cleaning up the excess caulk, it’s essential to inspect the caulking job to ensure it’s perfect. Follow these steps to inspect and touch up the caulk if needed:
- Check for any gaps or areas where the caulk may have pulled away from the joint. These gaps can compromise the seal and lead to leaks over time.
- If you notice any gaps, use a caulking gun to carefully apply a small amount of additional caulk to fill them. Ensure that you apply the caulk evenly along the entire joint.
- Smooth the fresh caulk with a caulk smoothing tool or your finger wrapped in a clean, damp cloth. This will create a seamless finish and ensure a watertight seal.
By thoroughly inspecting and touching up the caulk, you can be confident that your stainless steel kitchen sink is properly sealed and protected against water damage. Remember to allow the caulk to cure fully before using the sink or exposing it to water to ensure the best results.
Conclusion
To recap, caulking a stainless steel kitchen sink is a simple process that can effectively prevent leaks and keep your sink looking clean and well-maintained for years to come. By following the steps outlined in this guide, you can easily achieve a professional-quality finish.
Remember to choose the right caulk, clean the area thoroughly, apply the caulk with precision, and allow it to cure fully. With these tips, you’ll be able to tackle this home improvement project with confidence. So go ahead and give your kitchen sink the protection it deserves!