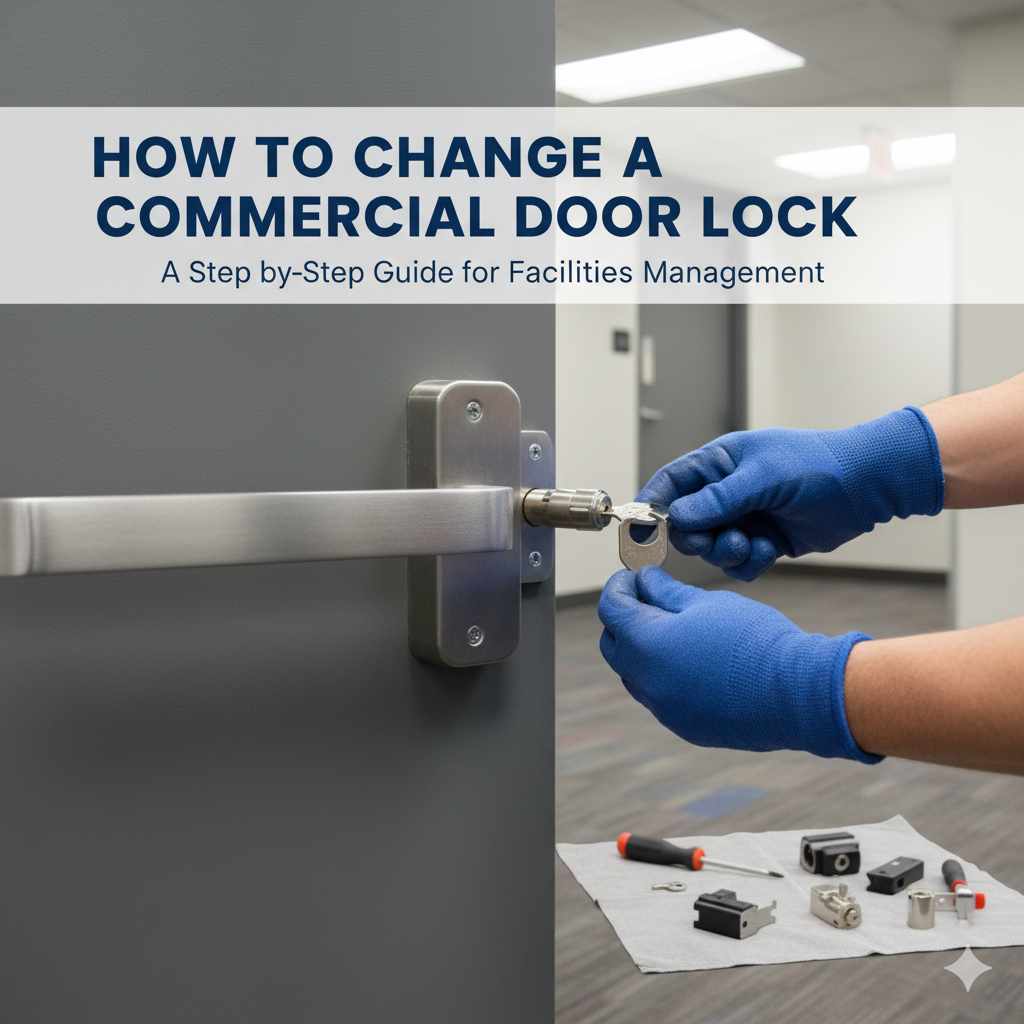
How To Change A Commercial Door Lock: Essential Guide
Quick Summary:
Changing a commercial door lock is a manageable DIY task! With the right tools and clear steps, you can successfully replace your old lock, enhancing security and functionality. This guide breaks down the process simply, making it achievable for any homeowner.
Hello there! Md Meraj here, your friendly guide to making home improvement projects feel less like a chore and more like an accomplishment. You know that feeling when a lock just isn’t working right, or you need to upgrade security? It can be a bit frustrating, especially on a commercial door where it feels like a big job. But guess what? With a few simple tools and this easy-to-follow guide, you can absolutely change a commercial door lock yourself. We’ll walk through each step together, making sure you feel confident and ready to tackle this project. Let’s get your door secured and looking great!
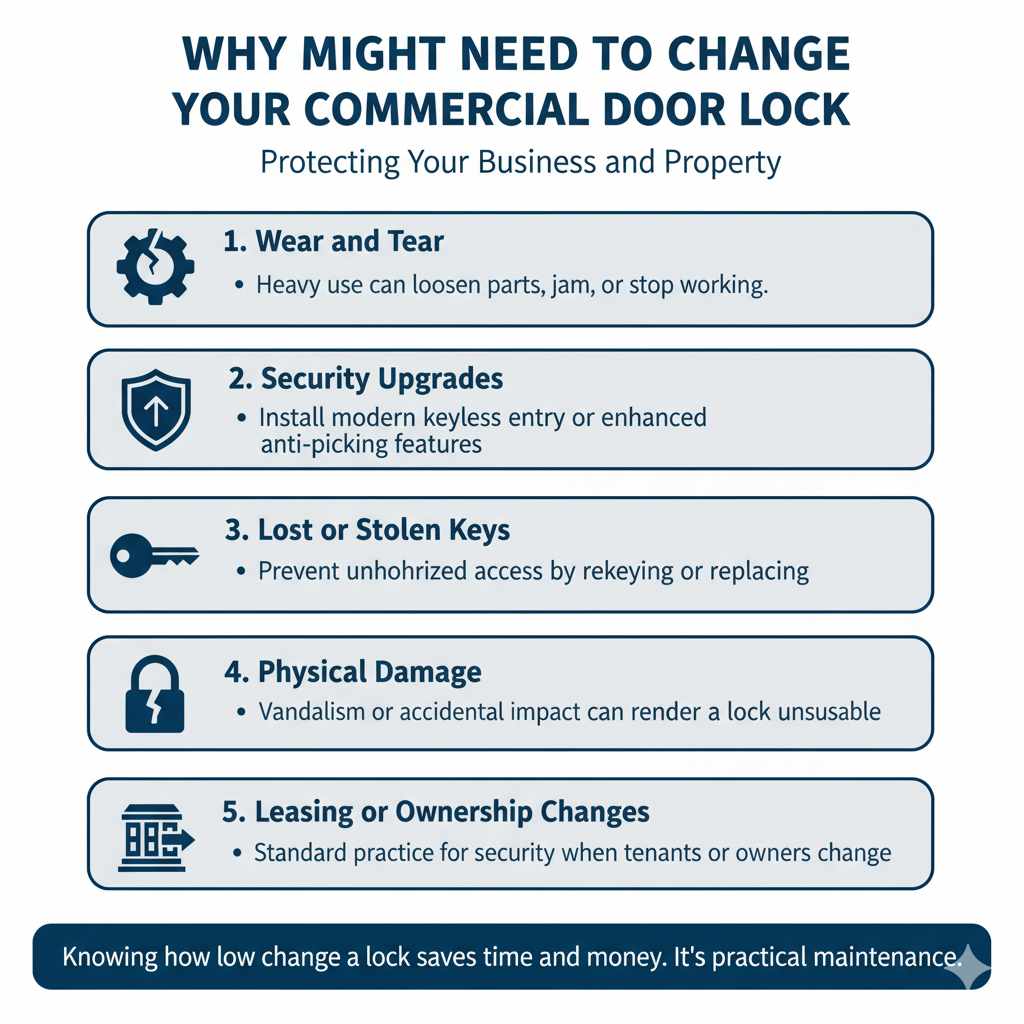
Why You Might Need to Change Your Commercial Door Lock
Commercial door locks are built to be tough and reliable, but like anything, they can wear out or become a security concern. There are several common reasons why you might find yourself needing to change one:
- Wear and Tear: Heavy use over time can cause parts to loosen, jam, or simply stop working smoothly.
- Security Upgrades: You might want to install a more modern, secure lock system, perhaps with keyless entry or enhanced anti-picking features.
- Lost Keys: If keys to the current lock are lost or stolen, changing the lock is the most secure way to ensure unauthorized access is prevented.
- Damage: Vandalism or accidental damage can render a lock unusable.
- Leasing or Ownership Changes: When a property changes hands or a tenant moves out, updating the lock is standard practice for security.
Whatever your reason, knowing how to change a commercial door lock can save you time and money. It’s a practical skill that empowers you to maintain your property effectively.
Essential Tools and Materials You’ll Need
Before we dive into the steps, let’s gather everything you’ll need. Having the right tools makes the job much smoother and safer. Don’t worry if you don’t have everything; most of these are common household or easily rentable items.
Tools:
- Screwdriver Set: You’ll likely need both Phillips head and flathead screwdrivers in various sizes. Commercial locks often use robust screws.
- Adjustable Wrench or Pliers: Useful for gripping and turning nuts or bolts if your lock has them.
- Hammer: For gently tapping parts into place or removing stubborn components.
- Chisel (Optional): May be needed if the strike plate needs adjustment or replacement.
- Utility Knife: For scoring paint or sealant around the lock components.
- Safety Glasses: Always protect your eyes when working with tools.
- Gloves: To protect your hands.
- New Commercial Door Lock: Make sure it’s compatible with your door’s existing cutouts and thickness. Measure carefully!
- New Screws: Often come with the new lock, but it’s good to have spares.
Materials:
- Lubricant (e.g., WD-40): For loosening tight screws or ensuring smooth operation of the new lock.
- Rag or Paper Towels: For cleaning up.
Understanding Commercial Door Lock Types
Commercial doors can feature a variety of lock mechanisms. Knowing what you’re dealing with will help you choose the right replacement and approach the installation correctly. Here are some of the most common types:
| Lock Type | Description | Common Uses | Key Features |
|---|---|---|---|
| Cylindrical Lockset | A common lock where the knob or lever is connected to a mechanism inside the door. Often features a dead-latch. | Office doors, interior commercial doors. | Easy to install, good for moderate security. |
| Mortise Lockset | Installed within a pocket (mortise) cut into the edge of the door. Typically has a larger, more robust body. | High-traffic commercial doors, older buildings, heavy-duty applications. | Very durable, offers high security, can have multiple bolt options. |
| Deadbolt Lock | A bolt that extends directly into the door frame. Operates with a key or thumbturn. | Exterior doors, high-security areas. | Provides strong resistance against forced entry. |
| Lever Handle Lock | Similar to cylindrical locks but uses a lever instead of a knob, often preferred for accessibility. | Public buildings, restrooms, office doors. | Easier to operate, meets accessibility standards. |
| Smart Locks | Electronic locks that can be operated via keypad, smartphone app, or fingerprint. | Modern offices, retail spaces, storage areas. | Keyless entry, remote access, audit trails. |
For this guide, we’ll focus on the most common cylindrical and mortise locksets, as they represent the majority of commercial door lock replacements. If you have a specialized electronic or high-security lock, consult the manufacturer’s instructions or a professional locksmith.
Step-by-Step Guide: How to Change a Commercial Door Lock
Let’s get down to business! Follow these steps carefully, and you’ll have your new lock installed in no time. Remember to work at a comfortable pace and double-check your work.
Step 1: Remove the Old Lock
The first step is to carefully dismantle the existing lock. This usually involves removing the doorknobs or levers and the latch mechanism.
- Locate Screws: Look for visible screws on the inside of the doorknob or lever. These are often on the rose (the decorative plate behind the knob/lever) or directly on the knob/lever shaft.
- Remove Doorknobs/Levers: Unscrew the visible screws. Some knobs might have a small set screw on the underside that needs to be loosened with an Allen wrench or small screwdriver before the knob can be pulled off. Once the screws are out, the knobs or levers should slide off.
- Expose the Latch Mechanism: With the knobs removed, you’ll see the spindle and the backplate of the latch assembly. There are usually two screws holding the latch mechanism in place on the edge of the door. Remove these screws.
- Withdraw the Latch: Gently pull the latch mechanism straight out of the door. It might require a little wiggling. If it’s stuck, a bit of lubricant might help.
- Remove the Faceplate: The latch mechanism will have a metal faceplate on the edge of the door. Note how it’s attached (usually two screws). Remove these screws, and you can then remove the faceplate.
- Remove the Cylinder (if applicable): For some locks, especially mortise locks, the cylinder might be a separate piece that needs to be removed. This often involves unscrewing a retaining screw on the edge of the door once the latch assembly is out.
Keep all the removed parts organized, as you might need to refer to them or compare them to your new lock.
Step 2: Prepare for the New Lock
Once the old lock is out, it’s a good time to inspect the door and the existing cutouts. Ensure the new lock will fit properly.
- Clean the Area: Wipe away any dust, debris, or old paint from the lock openings and the latch area.
- Check Door Thickness and Backset: Commercial doors vary in thickness, and the backset (the distance from the edge of the door to the center of the bore hole) is crucial. Your new lock must match these dimensions. If your new lock has adjustable backset, set it to match the old one. A standard backset for commercial doors is often 2 3/4 inches or 3 1/2 inches. You can measure this by taking the old latch mechanism and measuring from the edge of the door to the center of the spindle hole.
- Inspect Door Edge: Ensure the mortise for the latch faceplate is clean and the correct size. If it’s too tight, you might need to carefully widen it with a chisel.
Step 3: Install the New Latch Mechanism
This is where we start putting the new lock in place. It’s the reverse of removal.
- Insert the New Latch: Slide the new latch mechanism into the hole on the edge of the door. Make sure the bevel on the latch is facing the direction the door closes (towards the strike plate).
- Attach the Faceplate: Align the new faceplate with the mortise on the edge of the door and secure it with the provided screws. Tighten them firmly but don’t overtighten, which could strip the screws or damage the door.
Step 4: Install the New Lock Cylinder and Knobs/Levers
Now, we’ll install the main part of the lock that you interact with.
- Insert the Cylinder/Body: Slide the new lock cylinder (or the main body of the lockset) through the large hole in the door. Ensure the spindle passes through the latch mechanism correctly. For mortise locks, this involves inserting the entire mortise lock body into the pocket.
- Align and Secure: Make sure the cylinder or lever mechanism is flush with the door surface.
- Attach the Rose and Knobs/Levers: Place the rose (decorative plate) over the mechanism and align the screw holes. Insert and tighten the screws that hold the knob/lever assembly to the door. Again, tighten securely but avoid overtightening. If your new lock has a set screw, tighten that as well.
If your lock has a separate deadbolt, follow similar steps for its installation, ensuring the bolt aligns with the strike plate on the door frame.
Step 5: Install the Strike Plate
The strike plate on the door frame is what the latch (and deadbolt, if applicable) engages with. A properly aligned strike plate is crucial for smooth operation and security.
- Align the Strike Plate: Close the door gently. The latch should be able to engage with the strike plate opening. If it doesn’t, you may need to adjust the position of the strike plate.
- Mark and Adjust: If the latch hits the strike plate or the opening, you might need to file the opening larger or reposition the plate. For minor misalignments, sometimes simply loosening the strike plate screws, adjusting its position, and retightening is enough. For significant adjustments, you might need to chisel out the mortise for the strike plate to sit flush. You can find detailed guides on strike plate adjustment from resources like the FBI’s Residential Security Guide, which offers principles applicable to various security hardware.
- Secure the Strike Plate: Once aligned, screw the strike plate firmly into the door frame.
Step 6: Test the New Lock
This is a critical step to ensure everything works correctly before you consider the job done.
- Test with Door Open: With the door open, operate the lock mechanism using the key and the thumbturn (if applicable). Ensure the bolt extends and retracts smoothly.
- Test with Door Closed: Close the door and test the lock again. The latch should engage smoothly into the strike plate. Operate the lock from both the inside and the outside.
- Check Key Operation: Insert the key from the outside and turn it. Ensure it operates the lock smoothly and completely. Repeat for the inside thumbturn.
- Lubricate (Optional but Recommended): A small amount of graphite lubricant (not oil-based like WD-40, which can attract dust) inside the keyway can help ensure long-term smooth operation.
If the lock feels stiff or doesn’t operate correctly, re-check your installation steps, particularly the alignment of the latch and strike plate.
Troubleshooting Common Issues
Even with careful work, you might run into a snag. Here are a few common problems and how to fix them:
-
Lock Won’t Engage/Retract Smoothly:
- Cause: Misalignment of the latch or strike plate, or the spindle not seated correctly.
- Solution: Re-check alignment of latch and strike plate. Ensure the spindle is properly seated in both knobs/levers and the latch mechanism. File the strike plate opening slightly larger if needed.
-
Screws Won’t Tighten:
- Cause: Stripped screw holes in the door or frame.
- Solution: For stripped door holes, insert a wooden dowel or golf tee with wood glue into the hole, let it dry, then re-drill a pilot hole. For stripped frame holes, use longer screws or screw anchors.
-
Key Gets Stuck:
- Cause: Debris in the lock cylinder, or the cylinder is misaligned.
- Solution: Try using a graphite lubricant designed for locks. Ensure the cylinder is properly seated and not binding.
-
New Lock Doesn’t Fit Existing Cutouts:
- Cause: Incorrect lock purchased, or door cutouts are non-standard.
- Solution: Double-check measurements before purchasing. If cutouts need modification, this may require professional tools like a router or jigsaw. For minor adjustments, a chisel might suffice.
Remember, patience is key! If you’re struggling with a particular step, take a break and come back to it with fresh eyes.
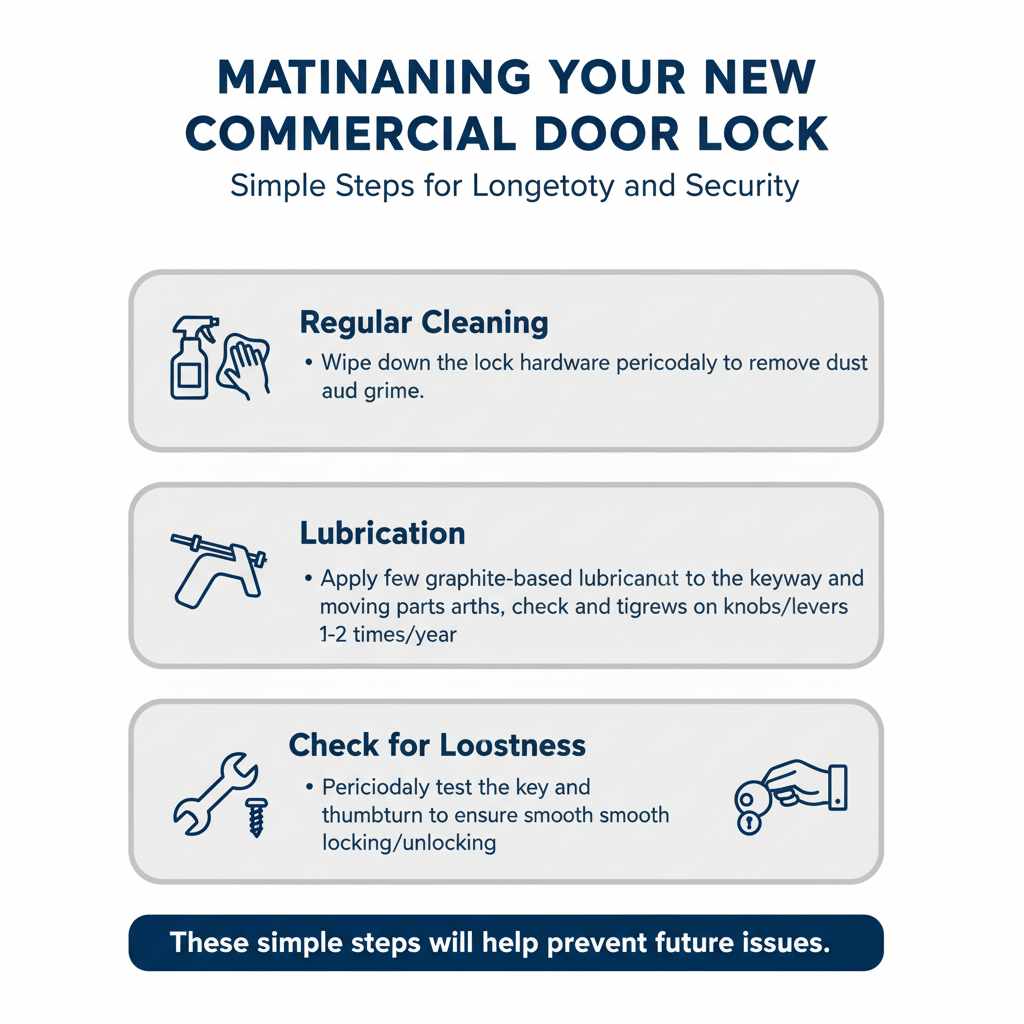
Maintaining Your New Commercial Door Lock
Once your new lock is installed and working perfectly, a little regular maintenance can go a long way in ensuring its longevity and continued security.
- Regular Cleaning: Wipe down the lock hardware periodically to remove dust and grime.
- Lubrication: Apply a graphite-based lubricant to the keyway and any moving parts (like the bolt) once or twice a year. Avoid oil-based lubricants, as they can attract dust and gunk up the mechanism.
- Check for Looseness: Every few months, check that the doorknobs/levers and any exposed screws are still tight. Tighten them as needed.
- Test Operation: Periodically test the lock with the key and thumbturn to ensure it’s still operating smoothly.
These simple steps will help prevent future issues and keep your commercial door secure and functional for years to come.
Frequently Asked Questions (FAQ)
Q1: How long does it typically take to change a commercial door lock?
A1: For a standard cylindrical or mortise lock, if you have all the tools and the new lock fits without major modifications, it usually takes between 30 minutes to 1.5 hours. It depends on your experience level and the complexity of the lock.
Q2: Do I need a professional locksmith to change a commercial door lock?
A2: For most standard commercial door locks, a DIY approach is very achievable with clear instructions. However, if you encounter a highly specialized lock, have a unique door setup, or feel uncomfortable at any point, calling a professional locksmith is always a safe bet.
Q3: What if the new lock doesn’t perfectly match the old one’s size?
A3: This is a common issue. If the backset is different, you might need to adjust the hole on the edge of the door. If the main bore hole size is different, you might need to enlarge it or use a specialized adapter plate. Minor adjustments can often be made with a chisel, but significant changes might require power tools or professional help.
Q4: Can I use a residential lock on a commercial door?
A4: While possible for very low-traffic interior doors, it’s generally not recommended for exterior or high-traffic commercial doors. Commercial locks are built to a higher standard of durability and security to withstand more frequent use and potential tampering. Always choose a lock specifically rated for commercial use.
Q5: How do I know if I have a mortise or cylindrical lock?
A5: Cylindrical locks typically have knobs or levers that attach directly to a mechanism inside a large hole drilled through the door. Mortise locks have a larger, rectangular body that is fitted into a pocket (mortise) cut into the edge of the door. You can usually tell by looking at the edge of the door where the latch mechanism is located.
Q6: What is a “backset” and why is it important?
A6: The backset is the measurement from the edge of the door to the center of the large hole (bore hole) where the lock cylinder is installed. It’s critical because the new lock’s latch mechanism must align with this measurement to function correctly and safely within the door.
Conclusion
There you have it! Changing a commercial door lock might seem daunting at first, but by following these detailed steps, you can confidently tackle this project yourself. We’ve covered everything from gathering your tools to the final test, ensuring you have the knowledge to make a successful replacement. Remember, taking the time to do it right not only enhances your property’s security but also gives you a real sense of accomplishment. Don’t hesitate to review the steps or seek professional advice if needed. With your newly installed lock, you can rest assured that your door is secure and functioning beautifully. Happy DIY-ing!