How To Distress Painted Wood With Sandpaper (Easy Guide)
Have you ever looked at a beautiful piece of furniture or decor and admired its perfectly aged, worn look? You know, the kind that whispers stories of times gone by? It’s a style many of us try to replicate, but sometimes getting that perfectly imperfect look can feel like a mystery.
You might have even tried it yourself and ended up with something that looked a bit too… well, too done, or not quite right. It’s a common struggle when trying to achieve that charming, distressed wood finish. But what if I told you it’s simpler than you think?
This guide will walk you through exactly how to use sandpaper to get that authentic, beautiful distressed look on your painted wood.
Distressing painted wood with sandpaper involves gently abrading painted surfaces to reveal underlying layers or the wood itself, creating a worn, aged appearance. It’s a simple technique for adding character and vintage charm to furniture, crafts, and home decor items.
What is Distressed Wood?
Distressed wood is simply wood that looks old. It has been made to appear worn, aged, or antique. This look can happen naturally over time.
Things like weather, constant use, and just plain living can wear down paint and wood. For instance, think of an old farmhouse table that’s seen countless family dinners. Its edges might be smooth from elbows resting there.
The paint might be chipped in spots where kids’ toys have bumped it.
This natural aging process creates a unique beauty. It tells a story of the item’s life. People love this look for their homes.
It adds warmth and a cozy feel. It can make new items feel like heirlooms. They bring a sense of history and character to a space.
This is why people try to recreate it. They want that timeless appeal.
Why Distressed Wood Looks So Good
There are a few reasons why distressed wood is so popular. One is that it adds a lot of character. A brand-new piece of furniture can look a bit plain.
A distressed piece feels more lived-in. It has a story, even if it’s a made-up one. This makes it feel more welcoming and less formal.
Another reason is its connection to rustic and farmhouse styles. These styles are very popular right now. Distressed wood fits perfectly with these looks.
It complements natural materials like wood and linen. It creates a cozy, comfortable atmosphere. It’s also forgiving.
Small dents or scratches on distressed wood often blend in. They don’t stand out as flaws. This makes it great for busy homes.
Finally, it offers a sense of uniqueness. No two distressed pieces are exactly alike. Even if you try to copy a look, your own hand and choices will make it special.
This personal touch is very appealing. It helps make a house feel more like a home.
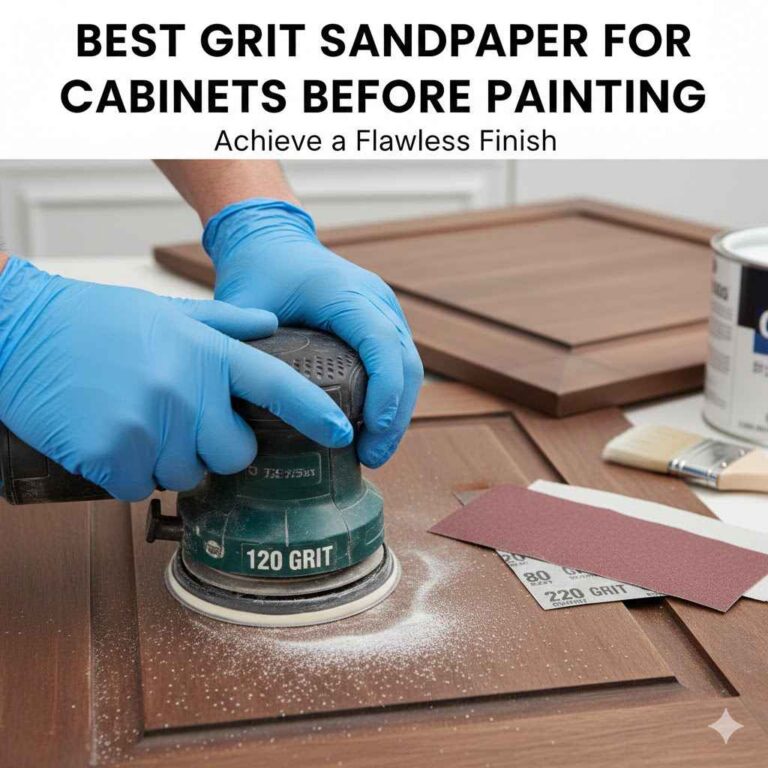
The Magic of Sandpaper for Distressing
Sandpaper is your best friend when it comes to distressing painted wood. It’s a simple tool. But it can create complex and beautiful effects.
Think of it as a controlled way to wear down your paint. You decide where and how much it wears away. This lets you mimic natural aging.
The magic comes from its grit. Sandpaper has tiny abrasive particles. These rub against the surface.
They remove small amounts of material. By choosing different grit papers, you control how rough or fine the abrasion is. A coarser grit removes more paint faster.
A finer grit smooths and refines the look. This control is key to getting the look you want.
My Own Distressing Disaster (and How I Learned!)
I remember my first attempt at distressing a bookshelf. I had painted it a lovely pale blue. I wanted that vintage French country look.
I had heard you just sand it. So, I grabbed the coarsest sandpaper I could find. I really went at it.
I wanted to see that wood grain pop! Well, I ended up with huge gouges. The paint was gone in big patches.
It looked less like a charming antique and more like it had survived a bear attack. I was so disappointed. It felt rough and unfinished, not at all what I imagined.
My heart sank a little. I had to rethink my whole approach. I realized I needed to be gentler and more strategic.
That experience taught me a lot about patience and the right tools. It was a tough lesson, but a valuable one.
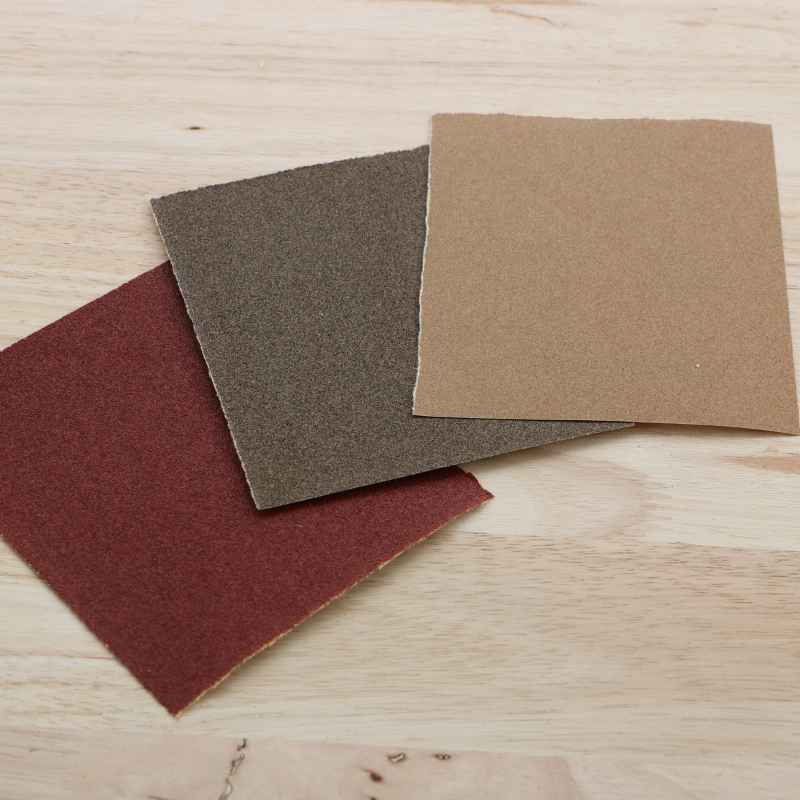
Understanding Sandpaper Grits
Sandpaper grit is a number. It tells you how rough or fine the paper is. Higher numbers mean finer grit.
Lower numbers mean coarser grit.
- Coarse (20-80 grit): For heavy-duty stripping. Not usually for distressing.
- Medium (100-150 grit): Good for removing paint quickly. Use with care.
- Fine (180-220 grit): Great for general distressing. Removes paint gently.
- Very Fine (240-400 grit): For smoothing and subtle effects.
For distressing, I often start with 150 or 180 grit. Then I might use 220 grit for a softer finish.
Choosing the Right Tools for the Job
When you want to distress painted wood, having the right tools makes all the difference. It’s not just about the sandpaper. It’s about how you use it and what else you might need.
This ensures your project looks polished, even when you’re going for a worn look.
First, let’s talk sandpaper. As we learned, grit is important. You’ll want a few different grits.
A medium grit (like 120 or 150) is good for removing more paint in certain spots. A fine grit (like 180 or 220) is perfect for creating softer wear marks. You can buy sandpaper in sheets or in sanding blocks.
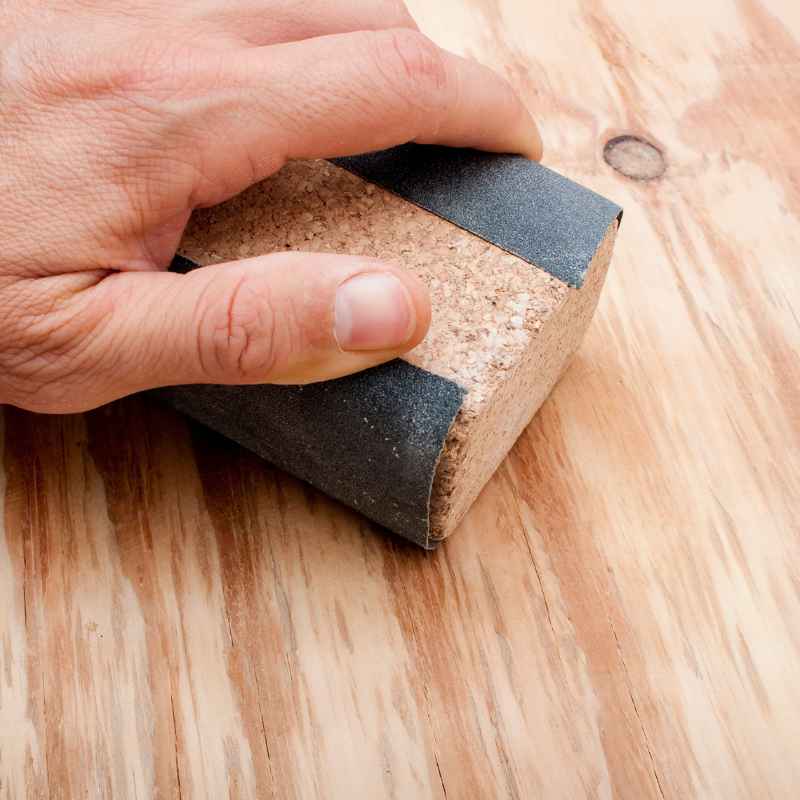
Sanding blocks are easier to hold. They give you more control. They help you get an even pressure.
Beyond sandpaper, you might need a few other things. A soft cloth is essential. You’ll use it to wipe away dust after sanding.
This lets you see your progress. A tack cloth is even better. It’s sticky.
It picks up even the finest dust particles. This is important for a clean finish.
If you’re working on a large piece, like a dresser, an electric sander can be helpful. A random orbital sander is a good choice. It’s less likely to leave swirl marks.
However, you still need to use it gently. For small projects or delicate areas, hand sanding is usually best. It gives you the most control.
Always make sure your project surface is clean before you start painting and distressing.
Sandpaper Types
Sandpaper comes in different materials.
Aluminum Oxide
This is the most common type. It’s good for wood and paint. It lasts a long time.
Silicon Carbide
This is sharper and more brittle. It’s good for finishes like paint and plastic. It works well on wet sanding too.
Preparing Your Wood for Distressing
Before you even think about picking up sandpaper, proper preparation is key. Rushing this step can lead to a less-than-ideal finish. It’s like trying to bake a cake without measuring your flour.
The results are often disappointing. This is true for distressing painted wood too.
First, you need a clean surface. If your wood is dirty, dusty, or greasy, your paint won’t adhere well. And when you sand, you might just be moving dirt around.
Use a mild soap and water solution. Or use a good degreaser. Make sure to wipe it down thoroughly.
Let it dry completely. This step is crucial for a smooth paint job and clean distressing.
Next, you need to apply your paint. The type of paint matters. Latex or chalk paint works very well for distressing.
They are generally easier to sand. They create a softer look. You can use other paints, but you might find them harder to distress.
You might need to apply a primer first. This helps the paint stick. It gives you a good base layer.
Now, the most important prep step for distressing: let the paint cure. This is where many people make a mistake. They think once the paint is dry to the touch, it’s ready.
But paint needs time to harden completely. This can take several days, or even a week or two, depending on the paint and the humidity. If you sand too soon, the paint can peel or clump.
It won’t give you that smooth, worn look. Patience here is a virtue. Wait until the paint is fully cured.
Then you can start the fun part!
My Go-To Distressing Technique: Layering Colors
One of my favorite ways to distress wood is by using multiple paint colors. This gives the piece so much more depth and realism. It mimics how old paint layers would naturally wear away over time.
You see a hint of the color underneath. This is what makes it look truly authentic.
Here’s how I usually do it. I start with my base color. This is the color I want to show through the most.
Let’s say it’s a deep, rich wood tone or a creamy white. I paint the whole piece with this color. Then, I let it dry completely.
After that, I apply a second color on top. This is the color that will be the main visible color. For this example, I’ll use a muted robin’s egg blue.
I apply this second color evenly.
Once the blue paint is dry (but not necessarily fully cured yet, as some paints distress better when not fully hardened), I take my fine-grit sandpaper. I start gently sanding the edges and raised areas. This is where natural wear happens.
I focus on corners, around hardware, and anywhere that would naturally get touched. As I sand, the blue paint wears away. This reveals the base color underneath.
It’s like magic! I can control how much of the base color shows. I can create subtle hints or more obvious patches.
It feels so much more natural than just sanding a single color. This layering technique is my secret weapon for that beautiful, authentic distressed finish.
Layering Colors: Quick Steps
- Paint with your base color. Let it dry.
- Paint with your top color. Let it dry.
- Sand edges and high-wear areas.
- Wipe away dust.
- Seal if desired.
The Art of Sanding: Where and How to Apply Pressure
Sanding is the main event for distressing. But it’s not just about rubbing sandpaper everywhere. It’s about being smart and intentional.
You want to mimic natural wear. So, think about where items actually get worn down in real life.
Edges and Corners: These are always the first places to show wear. Think about a wooden chair. The legs and the edges of the seat get bumped.
The corners of tables get grazed. Always focus your sanding efforts here. Go lightly at first.
You can always sand more. You can’t put paint back on easily.
Raised Areas: If your furniture has details like carvings or raised panels, these areas will wear faster. They catch more friction. Sand these areas gently.
The paint will come off to reveal the detail underneath.
Hardware Areas: Around knobs, hinges, or any metal hardware, paint can wear away. Think about how many times you’ve opened a drawer. The paint near the knob gets touched and rubbed.
Sand these spots to show that wear.
High-Traffic Zones: Areas that get a lot of use will show wear. On a tabletop, this might be the center. On a dresser, it could be the top surface or the edges of drawers.
Be subtle here. You don’t want it to look like you took a sander to the whole thing. A few well-placed rubs are better than overdoing it.
Pressure Control: This is vital. Hold your sandpaper or sanding block lightly. Let the grit do the work.
If you press too hard, you’ll dig into the wood. You might remove too much paint. Or you might scratch the wood itself.
Work in small sections. Wipe away dust often. This allows you to see exactly what you’re doing.
You can stop when it looks right. Remember, less is often more. You can always add more distressing.
Taking it away is much harder.
Distressing ‘Hot Spots’
- Edges: Always a prime spot for wear.
- Corners: High contact areas.
- Raised Details: Carvings, moldings.
- Hardware Areas: Around knobs and pulls.
- Flat Surfaces (Subtly): Where hands or objects frequently touch.
Beyond Sandpaper: Other Ways to Distress
While sandpaper is the star, other methods can help enhance your distressed look. These tools can add different textures and types of wear. They allow for more creative control.
They can give your piece a unique character that just sanding might not achieve on its own.
Steel Wool: Fine-grade steel wool (like 0000) is wonderful for softening edges. It can also create a subtle, all-over sheen. It’s less aggressive than sandpaper.
It’s great for that final touch. You can use it to blend areas where you’ve sanded more heavily. It gives a smooth, aged feel.
Scrapers and Knives: For a more rugged, chipped look, a putty knife or a paint scraper can work wonders. You can carefully chip away at the paint edges. Or use the corner of a putty knife to create small nicks.
This works best on thicker paint layers. Be very careful not to damage the wood underneath too much. This method is for more dramatic effects.
Chains: This sounds wild, but dragging a light chain across the surface can create interesting gouges and scratches. This is for a very rustic, primitive look. You need to be very careful.
It can easily look overdone. It’s best for smaller accents or pieces that are meant to look very old and beaten.
Wire Brush: A stiff wire brush can create fine scratches and texture. It’s good for adding a bit of grain-like texture to painted surfaces. It’s similar to using a very coarse grit sandpaper, but it can reach into crevices better.
Using these tools requires practice. It’s good to test them on scrap wood first. Combine them with sandpaper for a multi-dimensional distressed finish.
For example, you might use a scraper for a deep chip. Then use sandpaper to smooth the edges of that chip. And finally, use steel wool to soften everything.
Alternative Distressing Tools
- Steel Wool (0000 grade): Softens edges, adds subtle sheen.
- Putty Knife/Scraper: For creating chips and deeper nicks.
- Chain: For rustic gouges and scratches (use with extreme caution).
- Wire Brush: Adds texture and fine scratches.
Sealing Your Distressed Masterpiece
Once you’ve achieved the perfect distressed look, you need to protect it. Sealing your piece is like putting a cap on your hard work. It prevents further wear and tear.
It also gives you a consistent finish. Without sealing, your beautiful distressed areas might continue to wear. Or they might get dirty and be hard to clean.
There are a few good options for sealing distressed wood. A clear wax is very popular. It gives a soft, natural sheen.
It feels smooth to the touch. It also allows the distressed texture to remain prominent. Apply the wax with a soft cloth.
Buff it until you get the desired shine. This is a great choice for pieces that don’t see heavy use.
For pieces that need more durability, like tabletops or chairs, a water-based polycrylic or polyurethane is a good choice. These are clear finishes. They protect against spills and wear.
You can find them in matte, satin, or gloss finishes. I almost always choose a matte or satin finish for distressed pieces. A high gloss can sometimes look too new.
It can take away from the aged feel. Apply thin coats. Let each coat dry completely.
Lightly sand with very fine grit sandpaper (like 320 or 400) between coats for a super smooth finish.
Make sure to wipe away all sanding dust thoroughly before applying the next coat. Also, always test your sealer on a scrap piece of painted wood first. Some sealers can change the color of your paint slightly.
You want to make sure you like the final look before applying it to your project. Sealing is the final step. It ensures your distressed beauty lasts for years to come.
Sealing Options
| Sealer Type | Pros | Cons | Best For |
|---|---|---|---|
| Clear Wax | Soft sheen, natural feel, easy application | Less durable, may need reapplication | Decorative items, accent pieces |
| Water-Based Polycrylic/Polyurethane (Matte/Satin) | Durable, protective, good for high-traffic areas | Can slightly alter color, requires careful application | Tabletops, chairs, dressers, high-use items |
When is Distressing Too Much?
This is the million-dollar question for many DIYers. You’re enjoying the process, and suddenly you’ve gone too far. The piece looks damaged, not distressed.
Recognizing the tipping point is key to a successful project. It’s about balance and intention.
One sign you’ve gone too far is when the sanding looks random and chaotic. Natural wear happens in specific places. If your piece looks like it’s been attacked by a wild animal with sandpaper, that’s too much.
The wear should follow the natural lines and contours of the item. It should look like it was caused by actual use over time.
Another indicator is when you’ve removed too much paint. If you’re seeing big patches of bare wood where it wouldn’t naturally occur, you’ve overdone it. The goal is to reveal underlying layers or wood subtly.
It’s not to strip the entire piece bare. Unless, of course, you’re going for a very specific, heavily weathered look where that is the intention.
Think about the piece’s purpose and style. A heavily distressed farmhouse table might be appropriate. A lightly distressed modern side table might be more fitting.
Consider the color choice too. If you’re using very contrasting colors, too much sanding can look stark. It can lose its charm.
Always step back and look at your piece from a distance. Does it look like it’s aged naturally? Or does it look like you’ve tried too hard to make it look old?
If you do go too far, don’t despair. Often, you can fix it. You can repaint the area.
Or you can apply a glaze to tone down the distressing. Sometimes, a strategic wax or glaze can help blend the sanded areas. It’s all about making adjustments until you reach that sweet spot.
The perfect balance between old and new.
Signs You’ve Sanded Too Much
- Random, chaotic wear patterns: Doesn’t mimic natural aging.
- Large, unnatural bare patches: Too much paint removed.
- Exposed wood in unexpected places: Doesn’t follow natural wear lines.
- Looks damaged rather than aged: Lacks subtle charm.
- Overly stark contrast: Especially with contrasting colors.
Real-World Scenarios: Distressing in Action
Let’s look at how distressing applies in different situations. Seeing how it works in real homes and on various items can inspire your own projects. It helps you understand the nuances of the technique.
Scenario 1: The Farmhouse Dining Table
Imagine a solid oak dining table. It’s painted a lovely creamy white. For a farmhouse look, you’d focus on the edges of the tabletop.
The legs would get sanded, especially near the floor where they might get kicked. The center of the tabletop might have some subtle wear. This is where elbows rest.
You might see faint lines from placemats. The goal is to make it look like it’s been used and loved by a large family for decades. Layering colors here is key.
Maybe a light gray base shows through the white paint.
Scenario 2: The Vintage Dresser
A charming old dresser, painted a soft sage green. Here, the edges of the drawers are prime spots. The corners of the dresser frame would also get attention.
Around the drawer pulls is another high-wear area. You might gently distress the top surface. This mimics items being placed on it.
If there’s ornate molding, that would also be highlighted. You’d want to see the color beneath showing on the raised parts. A slightly darker green or even a natural wood tone underneath would add depth.
Scenario 3: A Small Accent Table
A small side table, painted a bold color like teal. For this piece, you might go for a subtler distress. Focus on just the edges and a few high points.
You might reveal a lighter teal or a creamy white underneath. The goal is to soften the bold color. It makes it fit better into a room.
You wouldn’t want to overdo it. It would look too busy. The wear should be light and elegant.
These scenarios show that the amount and style of distressing depend on the piece. It also depends on the overall style you’re trying to achieve. Always think about how that specific item would naturally wear over time.
Distressing Style Guide
- Farmhouse: More pronounced wear on edges, corners, legs. Layered colors common.
- Shabby Chic: Heavy distressing, lots of color layering, often reveals natural wood.
- Rustic: Can include nicks, dents, and more aggressive wear.
- Modern Distressed: Subtle wear, often on edges only. Minimal and controlled.
When to Worry (And When Not To!)
It’s good to know when your distressing is just right and when it might be a cause for concern. Most of the time, distressing is about aesthetics. It’s about creating a look.
But sometimes, there are practical things to consider.
When NOT to worry:
- You see underlying paint layers: This is the goal of multi-color distressing!
- Edges and corners are worn: This is where natural wear happens.
- The piece feels smooth and aged: Not rough or splintery.
- The distressing matches your desired style: Whether it’s subtle or pronounced.
When to pause and check:
- You see deep gouges in the wood itself: This means you’ve gone too deep. You might need to repair it.
- The paint is peeling off in large, uncontrolled flakes: This could mean the paint wasn’t applied well. Or it’s too old.
- The finish feels rough or splintery: This is not a desirable distressed look. It’s a safety hazard.
- You’ve removed almost all the paint: Unless that’s your specific goal, this is likely too much.
- The finish is uneven and looks messy: Not intentionally worn.
If you encounter issues like deep gouges or splintering wood, you may need to repair the area. This could involve filling with wood filler and repainting. Or carefully sanding to smooth it out.
For peeling paint, you might need to scrape away loose bits and repaint that section. The key is to identify the problem and address it. Most ‘problems’ with distressing are fixable with a little extra effort.
Quick Tips for Perfect Distressing
Here are some quick, handy tips to keep in mind. These can help you avoid common pitfalls. They’ll make your distressing projects turn out beautifully every time.
- Test on Scrap: Always test your sandpaper and techniques on a scrap piece of wood first.
- Work in Good Light: You need to see clearly where you are sanding.
- Wipe Away Dust Frequently: This lets you see your progress and avoid over-sanding.
- Sand in the Direction of the Grain: This is crucial for a natural look.
- Less is More: You can always add more distressing. It’s harder to take it away.
- Consider the Piece: Tailor your distressing to the item and its style.
- Don’t Rush: Allow paint to dry and cure properly.
- Layer Colors: This adds depth and realism.
- Seal Your Work: Protect your beautiful distressed finish.
Distressing Cheat Sheet
- Start Gentle: Always begin with lighter pressure.
- Focus on High-Wear Areas: Edges, corners, and frequently touched spots.
- Use Multiple Grits: For varied effects.
- Clean as You Go: Dust hides your progress.
- Embrace Imperfection: It’s what makes it charming.
Frequently Asked Questions About Distressing Wood
Can I distress any painted wood?
Yes, you generally can distress most painted wood. However, the ease and outcome can depend on the type of paint and primer used. Latex and chalk paints are usually the easiest to distress.
Older, oil-based paints might be harder and require coarser sandpaper. Always test on a small, inconspicuous area first.
How do I distress furniture without sanding?
While sandpaper is most common, you can achieve a distressed look with other methods. Applying a second coat of paint and then wiping some of it away while wet (wet distressing) can work. Some people also use glazes or waxes to create an aged effect.
Chemical strippers can also remove paint, but these are harsh and require significant safety precautions.
What grit sandpaper is best for distressing?
For most distressing, a fine-grit sandpaper is best. Start with something around 150 to 180 grit for removing paint and revealing layers. Then, follow up with 220 grit or even finer (like 320) to soften the edges of the distressed areas and create a smooth finish.
Avoid very coarse grits (below 100) unless you want aggressive removal.
How long should I wait for paint to cure before distressing?
While paint may be dry to the touch in a few hours, it needs several days to a week or more to fully cure. If you distress too early, the paint can clump, peel excessively, or create messy edges. For best results, wait at least 3-7 days for latex paints.
Chalk paint can sometimes be distressed sooner.
Can I distress laminate or veneer furniture?
Distressing laminate or veneer furniture is possible, but it requires extra caution. These surfaces are thinner than solid wood. It’s very easy to sand through the laminate or veneer quickly, revealing the material underneath.
Use very fine sandpaper and apply minimal pressure. Focus on just the edges and corners. If you’re unsure, it might be best to avoid distressing these materials or test extensively first.
My distressed finish looks too rough. How can I fix it?
If your distressed finish looks too rough, you can soften it by using a finer grit sandpaper (like 220 or 320). Sand the rough areas gently. You can also use fine steel wool (0000 grade) for a softer effect.
Sometimes, applying a clear wax or glaze over the entire piece can help unify and smooth out the texture, making it look more intentionally aged.
Final Thoughts on Creating Your Distressed Look
Distressing painted wood with sandpaper is a rewarding process. It transforms a plain item into a piece with character. It brings warmth and history into your home.
Remember to be patient. Start gently. Focus on where natural wear would occur.
Layering colors adds a touch of realism that is hard to beat. And don’t forget to seal your work when you’re done. This ensures your beautiful distressed finish lasts.
Enjoy the journey of bringing old-world charm to your projects!