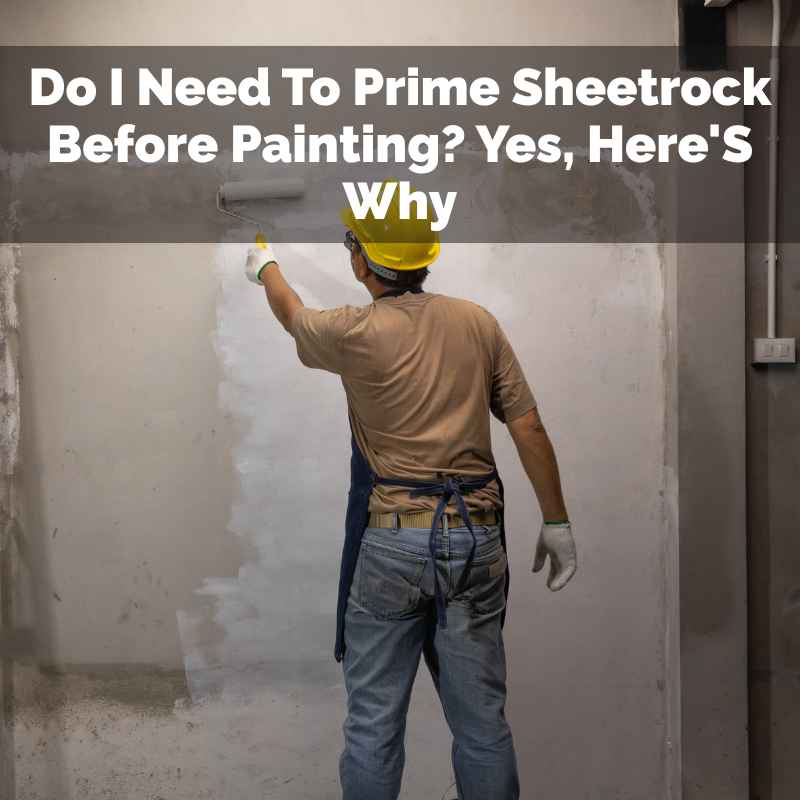
Do I Need To Prime Sheetrock Before Painting? Yes, Here’S Why
It’s a question many DIYers, and even some pros, ponder: Should you really prime Sheetrock before you paint? You might be tempted to skip this step to save time or money. But trust me, from one home improvement enthusiast to another, this is one step you absolutely do not want to skip.
Priming Sheetrock is like setting the table before a big meal. It makes everything that follows so much better. It’s not just about making the paint look good; it’s about making it last.
Let’s dive into why this simple step makes a huge difference for your walls.
Priming Sheetrock before painting is essential for a smooth, even finish. It seals the porous paper and joint compound, prevents paint absorption issues, and ensures better adhesion and durability of your topcoat. Skipping this step can lead to patchy colors, wasted paint, and a less professional look.
What Exactly Is Sheetrock and Why Does It Need Priming?
Sheetrock, also known by its brand name drywall, is the most common material used for interior walls and ceilings in American homes. Think of it as giant, stiff paper sandwiched around a gypsum core. This paper covering is what gives it a smooth surface to paint on.
However, that paper isn’t as smooth as it looks. It’s quite porous. This means it acts like a sponge.
If you try to paint directly onto it, the drywall will soak up the paint unevenly. Some spots will drink up more paint than others.
This is especially true for the areas where the drywall sheets are joined together. These seams are covered with a special paper tape and then coated with joint compound, often called “mud.” This mud is also very porous, even more so than the paper itself. It dries to a chalky finish.
When you apply paint directly to these varied surfaces – paper, mud, and maybe even old paint – you get problems. The paint sinks into the mud more than the paper. This makes the patched areas look darker or duller than the rest of the wall.
The color won’t look uniform. It’s like trying to color on different types of paper with the same crayon; the colors come out differently.
A good primer acts as a barrier. It seals off these different surfaces. This creates a single, consistent surface for your paint.
The paint then sits on top of the primer, not getting soaked in. This is key to a beautiful, even paint job that lasts.
My First “Big” DIY Project: The Powder Room Panic
I remember the first time I decided to tackle a whole room myself. It was a small powder room in our first house. I was so excited to pick out a bold, new color.
I bought the paint, the brushes, everything I thought I needed.
The walls were already painted a light beige, but they looked a bit dingy. I figured I’d just slap on two coats of my new navy blue and call it a day. I skipped the primer.
Why bother, right? The walls were already painted!
That first coat went on… okay. But I noticed right away that the areas I had patched previously looked different. They seemed to be absorbing the navy paint faster.
The color looked lighter there, almost like a faded denim compared to the rich, deep navy on the rest of the wall.
My heart sank a little. I thought, “Maybe a second coat will fix it.” So I painted a second coat. It helped a tiny bit, but the patchiness was still there.
It was subtle, but I could see it. And I knew it was there. It looked unprofessional, like I had rushed the job.
The feeling of disappointment was real. All that effort, and it didn’t look quite right. I ended up having to buy a good quality primer, do a proper primer coat, and then repaint the entire room.
It took twice as long and cost more in the end. That was the moment I learned the hard way about priming Sheetrock.
Why Priming is Your Paint’s Best Friend
Think of primer as a sticky, even foundation for your paint. It does several important jobs:
- Seals Porous Surfaces: Drywall paper and joint compound are like tiny sponges. Primer fills these tiny holes.
- Ensures Even Color: Without primer, paint sinks in more in some spots. This makes the color look uneven.
- Improves Adhesion: Primer helps the paint stick better to the wall. This means fewer chips and peels later.
- Blocks Stains: Some primers can cover up old marks or water stains. This stops them from showing through your new paint.
- Reduces Paint Coats: Because primer creates an even surface, you often need fewer coats of your final paint color.
The Science Behind the Smooth Finish
Let’s get a little technical, but in a simple way. The paper on Sheetrock is made from cellulose fibers. These fibers are open and ready to absorb liquids, like paint.
Joint compound is similar. It’s a gypsum-based product that is very absorbent when dry.
When you apply paint, the liquid part of the paint (the solvent, often water) and the binder (the stuff that makes the paint stick) are absorbed into these pores. The color pigment might not penetrate as deeply. This is why you see the darker or duller spots where more liquid has been absorbed.
A good primer is formulated differently. It has a higher ratio of binder to pigment. This makes it less absorbent.
When you spread primer, it doesn’t soak in as deeply. Instead, it forms a thin, consistent film on the surface. This film has a uniform porosity.
When you apply your topcoat of paint over this primed surface, the paint behaves as it should. The binder and pigment sit on the surface of the primer. Because the primer surface is consistent, the paint applies and dries evenly.
The color looks true and vibrant across the entire wall.
This uniformity is what makes a painted surface look professional. It’s not magic; it’s smart chemistry. The primer bridges the gap between the raw drywall and your finished paint color.
Common Scenarios Where Priming is Non-Negotiable
While priming is always a good idea, there are specific situations where it’s absolutely critical. You might even say it’s impossible to get a good result without it.
One of the biggest scenarios is when you are painting new, unpainted Sheetrock. This is often seen in new home construction or after a major renovation where walls have been replaced or installed. These bare walls have never seen paint.
They are the most porous and will drink up paint like a desert.
Another common time is when you’re painting over dark or vibrant colors with a lighter shade. Dark paints have strong pigments. If you try to cover a deep red or a dark blue with a light beige or white, that dark color will show through.
A good stain-blocking primer is designed to create an opaque barrier. It covers the old color completely, so you only need one or two coats of your new, lighter color.
Water stains, smoke damage, or even stubborn grease marks are also prime candidates for a special type of primer. These stains can bleed through regular paint. You need a primer that is specifically designed to seal these in.
Without it, the stains will reappear, no matter how many coats of paint you put on.
If you’ve done any repairs to the Sheetrock, like patching holes or cracks, you must prime those areas. The joint compound used for repairs is very absorbent. Painting directly over a patch without priming will make it stand out like a sore thumb.
The texture might even look different once painted.
Finally, when you are switching paint finishes or types, priming is a good idea. For example, going from a flat paint to a satin or semi-gloss finish might require a primer to ensure proper adhesion. The smoother, more durable finishes can be trickier for paint to grip onto without help.
When to REALLY Pay Attention to Priming
Consider these situations your “must-prime” moments:
- New, Unpainted Drywall: The surface is completely raw.
- Painting Over Dark Colors: Light paint won’t easily cover deep hues.
- Stains (Water, Smoke, Grease): Special primers block these from showing.
- Repaired Areas: Patched spots need a uniform surface.
- Glossy Surfaces: Paint may not stick well to slick finishes.
What Happens If You Don’t Prime? The Real-World Consequences
So, you’ve decided to skip the primer to save a few hours. What are the actual downsides you’ll face? I’ve lived through some of them, so I can tell you it’s not worth the shortcut.
The most obvious consequence is an uneven paint color. This is often called “flashing.” You’ll see lighter or darker patches where the paint has absorbed differently. This is especially noticeable in certain lighting conditions, like when light hits the wall at an angle.
It makes your walls look patchy and amateurish.
Another issue is poor paint adhesion. Paint needs something to grip onto. Raw drywall paper and joint compound are not ideal surfaces for paint to bond with long-term.
Over time, you might see peeling or chipping paint, especially in high-traffic areas or places with moisture.
You’ll likely use more paint than you planned. Because the drywall is absorbing the paint, you’ll need extra coats to try and achieve a solid color. This not only costs more money but also takes up more of your valuable time.
What you saved on primer, you’ll spend on extra paint and labor.
The finish itself might not look as smooth or rich. Paint has sheen, which is its shininess. When paint soaks into uneven surfaces, the sheen can also be uneven.
Some areas might look matte while others look slightly shiny, even if you’re using the same paint.
If you’re painting over stains, they might bleed through. This is a common and incredibly frustrating problem. You paint a beautiful new color, and then a few days later, a faint yellow or brown stain starts creeping through.
That’s the stain escaping the paint layer because it wasn’t properly sealed.
In summary, skipping primer leads to a less attractive, less durable, and more expensive paint job in the long run. It’s a classic case of “penny wise, pound foolish.”
Choosing the Right Primer for Your Project
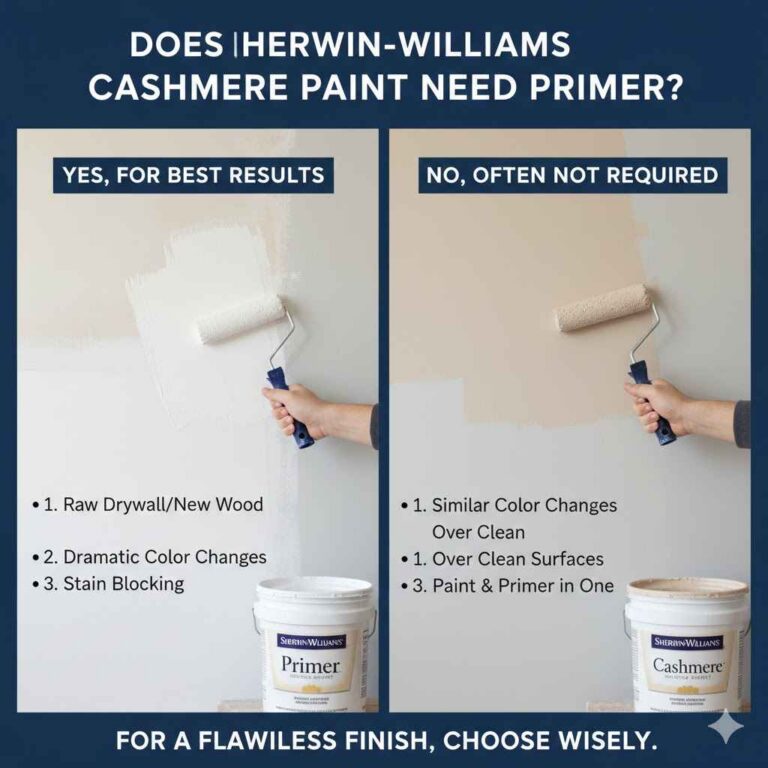
Not all primers are created equal, and picking the right one is important. For general Sheetrock priming, you’ll often see two main types recommended.
First, there are latex-based primers, also called water-based primers. These are great for most interior drywall jobs. They are easy to clean up with soap and water, dry relatively quickly, and have a low odor.
They work well for sealing porous surfaces and providing a good base for latex or acrylic paints.
Second, there are oil-based primers (or solvent-based). These are typically more robust. They offer excellent adhesion and are very good at blocking stains, odors, and even tannins from wood.
If you’re painting over smoke damage, heavy grease, or trying to cover very dark colors, an oil-based primer might be your best bet.
There are also specialized primers. Stain-blocking primers are specifically formulated to prevent stains from coming through. Mold and mildew-resistant primers are good for bathrooms or damp areas.
Bonding primers are designed to help paint stick to slick surfaces.
For most standard Sheetrock jobs where you’re just painting new walls or repainting over a similar color, a good quality latex primer is usually sufficient. Look for primers that are specifically labeled for drywall or interior wall surfaces.
When in doubt, always read the product description. Manufacturers usually tell you what surfaces the primer is best for and what types of paint it works well with. Asking for advice at your local paint store can also be very helpful.
They know their products well and can guide you to the best option for your specific needs.
Primer Types at a Glance
Latex-Based Primer
Best For: General drywall, interior walls, covering minor imperfections.
Pros: Low odor, easy cleanup, fast drying.
Cons: May not block severe stains as well as oil-based.
Oil-Based Primer
Best For: Tough stains (smoke, water), covering dark colors, high-traffic areas.
Pros: Excellent stain blocking, superior adhesion, durable finish.
Cons: Strong odor, requires mineral spirits for cleanup, longer drying time.
The Process: How to Properly Prime Sheetrock
Priming Sheetrock isn’t complicated, but doing it right makes a difference. Here’s a simple breakdown of how to get it done effectively.
First, ensure your walls are clean and dry. Wipe them down to remove any dust or cobwebs. If there are any grease spots, clean them thoroughly.
Any imperfections you see now will show through the paint later, so it’s a good time for minor touch-ups.
If you’ve just installed new drywall or done repairs, make sure all the joint compound is fully dry and sanded smooth. You want a consistent surface texture.
Next, protect your surroundings. Lay down drop cloths to cover your floors and furniture. Use painter’s tape to mask off trim, windows, and electrical outlets.
This will save you a lot of cleanup later.
Now, open your primer can and stir it thoroughly. Sometimes the ingredients can separate. Use a stir stick and mix it until it’s all one uniform color and consistency.
You can use a roller, a brush, or both. For large wall areas, a roller is the fastest. Use a good quality roller cover that’s designed for smooth surfaces.
Start by cutting in the edges and corners with a brush. This is called “cutting in.”
Apply the primer evenly. Don’t try to put it on too thick. A thin, even coat is better than a thick, gloopy one.
Roll in a pattern that helps ensure you don’t miss any spots. Overlap your roller strokes slightly to avoid visible lines.
For areas around trim or outlets, use your brush to get a clean line. Make sure the brushstrokes are smooth and don’t leave heavy marks. A good quality brush will make this much easier.
Once you’ve finished rolling and brushing, step back and look for any missed spots or areas where the primer is too thick. You can often fix these while the primer is still wet.
Let the primer dry completely according to the manufacturer’s instructions. Drying times can vary. Rushing this step can lead to problems when you apply the paint.
After it’s dry, you might notice some raised grain on the paper. This is normal. You can lightly sand the entire surface with a fine-grit sandpaper (like 180-220 grit) to create an even smoother surface for your paint.
Wipe away any dust with a tack cloth or a damp sponge.
Your Sheetrock is now ready for paint. It will absorb the paint much more evenly, and your final color will look its best.
Quick Priming Steps
1. Prep the Walls: Clean, dry, and smooth the surface.
2. Protect Your Area: Cover floors and tape off edges.
3. Stir the Primer: Mix it well before use.
4. Cut In Edges: Use a brush for corners and trim.
5. Roll Large Areas: Apply primer evenly with a roller.
6. Let it Dry: Follow manufacturer’s instructions.
7. Light Sanding (Optional): Smooth the surface for better paint adhesion.
8. Wipe Dust: Clean the surface before painting.
What This Means for Your Home Project
Understanding why priming Sheetrock matters should give you confidence. It’s not an extra step to make your job harder; it’s a foundational step for success.
When is it normal to skip priming? Honestly, very rarely for new drywall or significant repairs. If you are simply repainting over an existing, perfectly painted, same-color wall, some very high-quality paints might claim you can skip priming.
But even then, I’d lean towards priming for the best results.
When should you definitely worry about skipping it? If you are painting new drywall, covering dark colors, or dealing with any kind of stain. In these cases, skipping primer will almost guarantee problems down the line.
You’ll end up spending more time and money trying to fix it.
Simple checks are easy. Look at your wall. Is it bare Sheetrock?
Prime it. Did you just patch a hole? Prime the patch.
Are you going from black to white? Prime it. If you’re unsure, prime.
It’s the safest bet.
The overall takeaway is that priming is an investment. It’s an investment of a small amount of time and money upfront that pays off big in the final appearance and longevity of your paint job. It’s the secret ingredient to making your walls look professionally done.
When to Worry About Skipping Primer
Scenario: Painting new Sheetrock.
Worry Level: High. Paint will soak in unevenly.
Scenario: Covering a dark, bold color with a light one.
Worry Level: High. Old color will likely show through.
Scenario: Areas with water stains or smoke damage.
Worry Level: Very High. Stains will bleed through.
Scenario: Just patched a hole with joint compound.
Worry Level: High. The patch will look different.
Scenario: Repainting over the exact same color and finish.
Worry Level: Low to Medium. Might be okay with high-quality paint, but primer is still best.
Quick Tips for a Smoother Painting Experience
Here are a few extra tips that can make your painting project, including the priming step, go a lot smoother.
Use a Quality Primer: Don’t grab the cheapest can on the shelf. A good primer is worth the small extra cost. It will cover better and perform more reliably.
Don’t Skimp on Brushes and Rollers: Cheap tools can lead to streaks, lint, and frustration. Invest in decent quality brushes and roller covers. They make a big difference in application.
Work in Good Light: Ensure you have plenty of light when you’re priming and painting. This helps you see missed spots and ensures an even application.
Ventilate the Room: Open windows and doors, especially when using oil-based primers, to ensure good air circulation. This helps with drying and reduces fumes.
Read the Can: Seriously, read the instructions on both the primer and the paint cans. They provide crucial information about drying times, recoating times, and cleanup.
Don’t Rush Between Coats: Allow each coat of primer and paint to dry fully. This is critical for adhesion and durability.
Clean Up Promptly: Clean your brushes, rollers, and trays right after you finish. Dried paint is much harder to remove.
Consider a “High-Hide” Primer: If you are covering a very dark color, some primers are labeled “high-hide” or “extra-hiding.” These are specifically designed to cover strongly colored paints more effectively.

Frequently Asked Questions About Priming Sheetrock
Do I have to prime new drywall?
Yes, absolutely. New Sheetrock is very porous and will soak up paint unevenly. Priming creates a uniform surface so your paint color looks consistent and true.
Can I paint over primer without sanding?
You should always lightly sand after the primer dries, especially new drywall. This creates a very smooth surface for paint to adhere to and removes any raised paper grain. Then wipe away the dust.
What kind of primer is best for Sheetrock?
For most interior Sheetrock, a water-based (latex) primer is a good choice. If you have tough stains or are painting over very dark colors, an oil-based primer might be better.
How many coats of primer do I need?
Usually, one good, even coat of primer is enough for new Sheetrock or standard repainting. If you are covering a very dark color or significant stains, you might need a second coat of primer.
Does primer help paint last longer?
Yes, primer helps paint last longer by improving adhesion. It creates a stable surface for the paint to bond with, reducing the chances of peeling or chipping over time.
Can I use a tinted primer?
Yes, tinting your primer can be very helpful, especially when painting with lighter or pastel colors over a darker original color. Tinting the primer closer to your final paint color means you’ll need fewer coats of paint to achieve full coverage.
Final Thoughts on Your Painting Project
So, to wrap it all up, do you need to prime Sheetrock before painting? The overwhelming answer from experience, and from how paint actually works, is a resounding yes. It’s a critical step that ensures your paint looks its best, adheres properly, and lasts for years to come.
Think of it as the unsung hero of your beautiful walls. Happy painting!