How to Fix Stripped Screw: Foolproof Solutions
To fix a stripped screw, you can use a rubber band or a steel wool to provide extra grip for the screwdriver. Stripped screws can be a frustrating issue to deal with, but fortunately, there are simple solutions to fix them.
When a screw’s threads become damaged or worn out, it can make it difficult to remove or tighten the screw properly. However, you don’t need to resort to drastic measures like drilling or extracting the screw. With a few handy tools and tricks, you can easily fix a stripped screw and save yourself time and effort.
We will explore some effective methods to tackle this common problem, using items you likely already have around the house. So, let’s get started and discover how to fix a stripped screw with ease.
Causes Of Stripped Screws
Stripped screws can be caused by using the wrong size screwdriver, excessive force, or worn-out screws. To fix a stripped screw, try using a rubber band or a specialized screw extractor tool to provide better grip and turn it counterclockwise to remove it.
Over-tightening
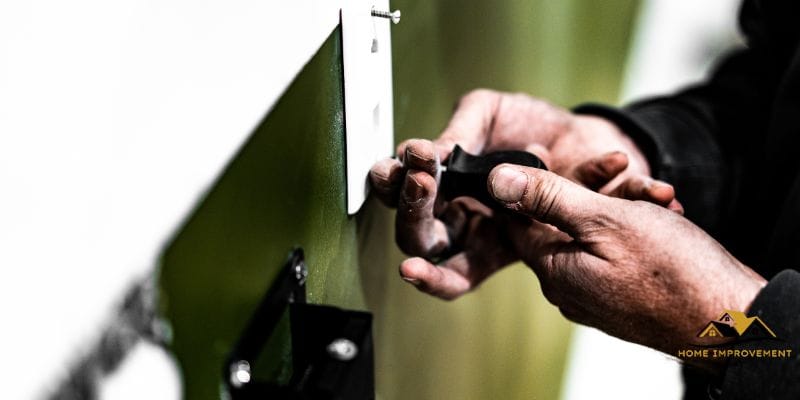
In the quest for a secure and sturdy joint, one common cause of stripped screws is over-tightening.
When we tighten a screw too much, exerting excessive force, we put immense pressure on the screw’s threads, causing them to wear down and eventually strip. This often happens when we use power tools or apply more force than necessary, believing that tighter is always better.
Over-tightening can occur due to a lack of awareness or understanding of how much force is actually required. It’s important to remember that screws need only be tightened until they are snug and firmly in place. Applying excessive torque will do more harm than good.
Wrong Tools
Another common culprit behind stripped screws is using the wrong tools for the job.
When we don’t use the appropriate screwdriver or drill bit size, it becomes difficult to maintain a secure grip on the screw head. This may lead to slipping and sliding while applying force, damaging the screw’s threads in the process.
Always ensure you have the right tools for the job. Match the screw head with the corresponding screwdriver or drill bit, taking note of the size and type required. This will help maintain the integrity of the screw’s threads and prevent unnecessary damage.
Using the wrong tools also includes using a worn-out or damaged screwdriver or drill bit. Ensure your tools are in good condition, with sharp edges and well-fitting heads, to reduce the risk of stripping screws.
Methods For Fixing Stripped Screws
Dealing with stripped screws can be a frustrating challenge, but there are several effective methods you can try. Whether you choose the rubber band technique, using a screw extractor, or drilling a new hole, these approaches can help you resolve the problem without much hassle. Let’s explore each method in detail.
Rubber Band Technique
If you’re looking for a quick fix to tackle a stripped screw, the rubber band technique is worth a try. It might sound unconventional, but it’s surprisingly effective.
Here’s what you need:
- A wide rubber band
- A screwdriver or drill
Follow these steps:
- Place the rubber band over the stripped screw, ensuring it covers the entire head.
- Using your screwdriver or drill, gently apply downward pressure while turning it counterclockwise to remove the screw.
The rubber band acts as a grip-enhancer, providing enough traction to loosen the screw. This technique works best for smaller screws with relatively shallow damage.
Using A Screw Extractor
If the rubber band technique fails or the screw is severely damaged, a screw extractor is your next best option. This tool is specifically designed to remove stripped screws, making the task easier.
Here’s what you’ll need:
- A compatible screw extractor set
- A drill
Follow these steps:
- Select an appropriate-sized extractor bit from your set that matches the size of the stripped screw head.
- Attach the bit to your drill and set the drill to reverse mode.
- Position the bit on the damaged screw head and apply gentle pressure while activating the drill.
- As the extractor bit digs into the screw, it will help loosen and extract it from the material.
This method requires extra care and precision, but with the right tools, you can successfully remove even the most stubborn stripped screws.
Drilling A New Hole
As a last resort, drilling a new hole can be an effective solution for stripped screws that refuse to budge. This method works best when you have a clear understanding of the screw’s position and can safely drill a new hole nearby.
Here’s what you should do:
- Select the appropriate drill bit size for your new hole.
- Place the drill bit on the material adjacent to the stripped screw.
- Slowly and carefully drill a new hole, making sure not to damage the surrounding material.
- Once the new hole is drilled, carefully remove any debris or remnants of the old screw.
- With a new hole ready, you can now insert a new screw and secure it firmly.
Note that this method should only be used when other methods have failed, as it permanently alters the material you’re working with.
By utilizing the rubber band technique, screw extractors, or drilling a new hole, you can successfully fix stripped screws with minimal effort. Remember to choose the method that suits your situation best, and always exercise caution to avoid further damage. With these effective techniques, you’ll be able to overcome the frustration of stripped screws in no time.
Preventing Stripped Screws
In any DIY project, encountering a stripped screw can be frustrating and time-consuming. Fortunately, there are simple measures you can take to prevent this dreaded situation. By using the right screwdriver, applying adequate pressure, and following a few handy tips, you’ll be able to avoid stripped screws and keep your project on track.
Using The Right Screwdriver
One of the most crucial factors in preventing stripped screws is using the appropriate screwdriver for the job. When selecting the screwdriver, ensure that it matches the screw type and size perfectly. Using an ill-fitting or incorrect screwdriver can result in slippage, leading to stripped threads.
Here are some key tips for selecting the right screwdriver:
- Choose a screwdriver with a tip that matches the screw’s head shape (e.g., Phillips, flathead, or star-shaped).
- Confirm that the screwdriver’s tip matches the size of the screw’s head precisely.
- If you have difficulty determining the screw type or size, consult a professional or refer to online resources.
Applying Adequate Pressure
Applying the right amount of pressure is vital in preventing stripped screws. Too much force can result in slippage, damaging the screw’s threads, while insufficient pressure may cause the screwdriver to slip out of the slot. Follow these recommendations to ensure optimal pressure:
- Hold the screwdriver firmly and align it correctly with the screw.
- Apply steady and controlled pressure, using your dominant hand, while keeping the screwdriver perpendicular to the screw’s head.
- If the screw doesn’t budge, refrain from applying excessive pressure. Instead, try using a lubricating agent or tapping the screw lightly to loosen it.
Remember, finding the sweet spot between too much and too little pressure is crucial for preventing stripped screws.
Conclusion
Fixing a stripped screw is not as daunting as it may seem. By using simple methods like rubber bands, pliers, or even a drill, you can easily remove a stubborn stripped screw and save yourself time and frustration. Remember to always use the proper tools and be careful not to damage the surrounding materials.
With these techniques, you’ll be able to tackle any stripped screw with ease and confidence.

