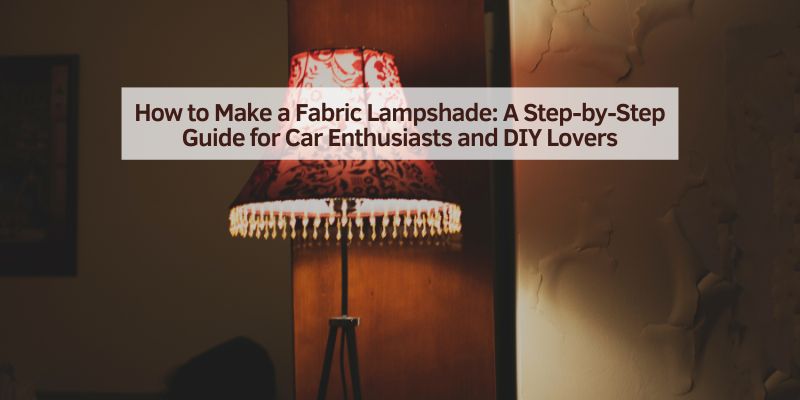
How to Make a Fabric Lampshade: A Step-by-Step Guide for Car Enthusiasts and DIY Lovers
Hey there! I’m so excited to share something a little different with you today. If you’re like me—a car enthusiast who loves personalizing every corner of your space, from your garage to your home—you might be looking for a fun project to add some style to your surroundings. That’s where making a fabric lampshade comes in. It’s a creative, budget-friendly way to brighten up your workspace or living area, and it’s easier than you might think.
I’ve spent hours tinkering with this craft, turning plain lamps into eye-catching pieces that reflect my love for cars and DIY. So, grab a cup of coffee, sit down with me, and let’s dive into how to make a fabric lampshade that’s uniquely yours.
Why Make Your Own Fabric Lampshade?
When I first started messing around with lampshades, I was tired of the boring, mass-produced ones I found in stores. They were either too plain or way too expensive for what they were. Making my own fabric lampshade gave me the freedom to choose exactly what I wanted—colors, patterns, and textures that matched my vibe. For my garage, I made one with a cool checkered flag fabric to give it that racecar feel. For my living room, I went with a sleek navy fabric that screams sophistication.
Plus, it’s a fun project. If you love working with your hands, like when you’re tweaking your car’s engine, this is right up your alley. It doesn’t take a ton of time, and you don’t need to be a crafting expert. It’s also a great way to save money. A custom lampshade from a boutique can cost $50 or more, but I made mine for under $20. And let’s be honest, there’s something so satisfying about saying, “Yeah, I made that,” when someone compliments your work.
What You’ll Need to Get Started
Before we jump into the steps, let’s talk about what you’ll need. I’ve made a bunch of lampshades, so I’ve figured out the essentials. Here’s my go-to list of supplies. Don’t worry, most of these are easy to find at craft stores or online, and you might already have some at home.
- Lampshade frame: You can buy a new one or reuse an old one. I’ve found great frames at thrift stores for a couple of bucks.
- Fabric: Choose something you love, like cotton, linen, or even a car-themed print. You’ll need about 1 yard, depending on your frame size.
- Adhesive styrene: This is a stiff, sticky-backed material that gives your lampshade structure. It’s sold at craft stores or online.
- Spray adhesive: This makes sticking the fabric to the styrene super easy. I use a high-strength one for a strong bond.
- Fabric glue: For finishing edges and securing seams. I like clear-drying glue for a clean look.
- Scissors: Sharp ones for clean cuts. I use my heavy-duty craft scissors.
- Measuring tape: To measure your frame and fabric accurately.
- Pencil or fabric marker: For marking your fabric and styrene.
- Clothespins or binder clips: These hold everything in place while the glue dries.
- Trim (optional): Ribbon, fringe, or braid to hide seams and add flair. I added a black ribbon to my garage lampshade for a polished look.
- Lamp base: You’ll need one to test your finished shade. I used an old base I had lying around.
Here’s a quick table to keep it organized:
| Item | Purpose | Where to Find |
|---|---|---|
| Lampshade frame | Structure for the shade | Thrift stores, craft stores |
| Fabric | Covers the shade, adds style | Fabric stores, online |
| Adhesive styrene | Gives shape and support | Craft stores, online |
| Spray adhesive | Bonds fabric to styrene | Hardware stores, craft stores |
| Fabric glue | Secures edges and seams | Craft stores |
| Scissors | Cuts fabric and styrene | Home, craft stores |
| Measuring tape | Ensures accurate measurements | Home, hardware stores |
| Pencil/fabric marker | Marks cutting lines | Home, craft stores |
| Clothespins/clips | Holds fabric while glue dries | Home, craft stores |
| Trim (optional) | Decorates edges | Craft stores, online |
Choosing the Right Fabric for Your Lampshade
Picking the fabric is my favorite part. It’s like choosing the perfect paint color for your car—it sets the whole vibe. But there are a few things to keep in mind to make sure your lampshade looks great and works well.
First, go for a medium-weight fabric like cotton or linen. These are easy to work with and let just the right amount of light through. I tried a heavy denim once, and it made the light too dim. Thin fabrics, like chiffon, can show glue marks, so I avoid those.
Think about the pattern and color. For my garage, I used a black-and-white checkered fabric that screams racetrack. For my bedroom, I went with a solid gray linen for a calm, modern look. If you want a pattern, make sure it’s not too busy, or it might look overwhelming when the light’s on.
Check how the fabric looks when lit up. I hold my fabric up to a lamp before buying to see how it glows. Some fabrics look amazing in daylight but dull when the lamp is on. Also, make sure the fabric is heat-resistant. Most cotton and linen are fine, but avoid anything super synthetic, like polyester, unless it’s labeled safe for lampshades.
Finally, buy a little extra fabric—about 10% more than you think you’ll need. I messed up a cut once and was so glad I had extra to work with. A yard is usually enough for a standard lampshade, but measure your frame to be sure.
Measuring and Preparing the Frame
Before you start cutting or gluing, you need to know the size of your lampshade frame. I’ve learned that taking accurate measurements saves a lot of headaches later.
Start by measuring the height of your frame from top to bottom. Then, measure the circumference of the top and bottom rings. If your frame is tapered (wider at the bottom than the top), you’ll need to account for that when cutting your fabric and styrene. My first lampshade was a drum shape—same size top and bottom—which made things easier.
If you’re reusing an old frame, strip off any old fabric or covering. I use scissors and a utility knife to carefully remove it. Check for rust or damage. I once had a frame with bent wires, and I fixed it with pliers to make sure it was sturdy.
Mark your measurements on paper so you don’t forget. I also drew a quick sketch of the frame with the numbers written down. It’s like mapping out a car repair plan—it keeps you organized.
Cutting the Styrene and Fabric
Now comes the part where things start taking shape. Cutting the styrene and fabric is a bit like cutting vinyl for a car wrap—you need to be precise.
Start with the adhesive styrene. This stuff is sticky on one side and gives your lampshade its structure. Lay it flat and use your frame measurements to mark the shape. For a drum-shaped shade, it’s a simple rectangle. For a tapered shade, you’ll need a curved shape, like a trapezoid. I use a ruler and pencil to draw the lines, then cut carefully with sharp scissors.
Next, cut your fabric. Lay the styrene on your fabric to use as a template, but add an extra inch all around for overlap. This gives you room to fold the edges and make clean seams. I mark the fabric with a fabric marker and cut slowly to avoid jagged edges.
Pro tip: If your fabric has a pattern, like my checkered one, make sure it’s aligned properly. I spent extra time making sure the checks lined up perfectly, and it was worth it.
Assembling the Lampshade
This is where the magic happens. Assembling the lampshade is like putting together a car part—it’s all about precision and patience.
Start by sticking the fabric to the styrene. Peel back a small section of the styrene’s adhesive backing and align it with the fabric’s wrong side (the side you don’t want to show). Press it down firmly, smoothing out any wrinkles. Work slowly, peeling and sticking a little at a time. I messed up my first one by rushing and ended up with bubbles. Take your time.
Once the fabric is fully stuck to the styrene, trim any excess, leaving about half an inch for folding. Fold the edges over the styrene and secure them with fabric glue. I use clothespins to hold the folds in place while the glue dries. Let it sit for an hour or two.
Now, wrap the styrene around your lampshade frame. The sticky side of the styrene (now covered with fabric) should face outward. Use spray adhesive to attach the styrene to the frame’s top and bottom rings. I spray a light coat on the rings and press the styrene firmly in place. Overlap the ends of the styrene slightly and glue them together with fabric glue for a seamless look.
Adding Finishing Touches
Your lampshade is almost done, but a few finishing touches can take it to the next level. I love this part—it’s like adding chrome accents to a car.
If the top and bottom edges look rough, cover them with trim. I use ribbon, fringe, or braid, depending on the vibe I’m going for. Apply a thin line of fabric glue to the edge and press the trim on, holding it with clips until it dries. For my garage shade, I used black ribbon to match the checkered fabric. It looked so sharp.
Check for any glue spots or loose threads. I use a damp cloth to clean up any glue smudges and trim stray threads with scissors. Step back and admire your work. It’s amazing how a plain frame and some fabric can turn into something so cool.
Testing and Installing Your Lampshade
Before you call it done, test your lampshade. Place it on your lamp base and turn it on. Check how the light shines through the fabric. I was thrilled the first time I lit up my checkered shade—it cast a cool pattern on the wall.
Make sure the shade sits securely on the base. If it’s wobbly, double-check that the frame is even. I had to tweak one of my frames with pliers to make it sit right. Also, use a low-wattage bulb (40W or less) or an LED bulb to avoid overheating. I stick to LEDs—they’re safer and last longer.
If everything looks good, install it in your space. My garage shade went above my workbench, and it’s been a conversation starter ever since. Friends always ask where I got it, and I love telling them I made it myself.
Tips for Success and Common Mistakes to Avoid
I’ve made plenty of lampshades, and I’ve had my share of oops moments. Here are some tips to help you nail it and avoid my mistakes.
- Measure twice, cut once. I ruined a piece of fabric by cutting it too small. Double-check your measurements before you cut.
- Work in a clean space. Dust or pet hair can stick to the adhesive and mess up your shade. I vacuum my workspace first.
- Test your glue. Some glues can bleed through thin fabrics. I test a scrap piece first to make sure it dries clear.
- Don’t rush the drying process. Let the glue set fully before moving on. I once bumped a shade before it was dry, and it shifted out of place.
- Choose a forgiving fabric. Solid colors or small patterns hide mistakes better than bold prints. My checkered fabric was tricky to align, but solids are a breeze.
Why This Project Is Perfect for Car Enthusiasts
If you’re into cars, you probably love customizing things. Making a fabric lampshade is like modding your ride—it’s all about making something your own. You can use fabrics that nod to your car obsession, like racing stripes or vintage car prints. I found a fabric with tiny muscle cars on it, and I’m saving it for my next project.
This project also uses skills you already have, like measuring, cutting, and paying attention to detail. It’s like working on a car part, but instead of grease, you’re dealing with glue. Plus, it’s a great way to add personality to your garage or man cave without breaking the bank.
My Journey with Fabric Lampshades
I started making lampshades about three years ago when I wanted to spruce up my garage. My first one was a mess—crooked seams, glue everywhere—but I kept at it. Now, I’ve made six shades, each one better than the last. My favorite is the checkered one in my garage. It’s held up great, and I still smile every time I turn it on.
I’ve also made shades as gifts. I made one for my buddy’s home office with a navy fabric he picked out. He was blown away that it was handmade. It’s become my go-to project when I want to unwind from car work and still feel creative.
Conclusion: Light Up Your Space with Style
Making a fabric lampshade is one of those projects that’s as rewarding as it is fun. It’s like giving your space a custom paint job—personal, unique, and totally you. From picking the perfect fabric to seeing your creation glow for the first time, every step feels like a win. Whether you’re decking out your garage with a racing-inspired shade or adding a cozy touch to your living room, this DIY is a great way to flex your creative muscles.
I’ve loved sharing my experience with you, and I hope you’re inspired to give it a try. Grab some fabric, fire up your lamp base, and let’s light up your world with something you made yourself. Here’s to bright ideas and happy crafting!
FAQs
What kind of fabric is best for a lampshade?
Medium-weight fabrics like cotton or linen work best. They’re easy to handle and let light through nicely. I avoid heavy fabrics like denim or super thin ones like chiffon.
Can I use an old lampshade frame?
Absolutely. I’ve found great frames at thrift stores. Just strip off the old fabric and check for damage before using it.
Is it safe to use any lamp base?
Yes, but use a low-wattage bulb (40W or less) or an LED bulb to prevent overheating. I stick to LEDs for safety and longevity.
How do I clean a fabric lampshade?
Dust it lightly with a soft cloth or use a lint roller. For stains, dab with a damp cloth and mild soap. I clean mine every few months to keep it looking fresh.
Can I make a lampshade without styrene?
You can, but it won’t be as sturdy. Styrene gives it structure. I tried skipping it once, and the shade sagged after a while.
How much fabric do I need?
About 1 yard is usually enough for a standard lampshade. I always buy a bit extra in case I mess up a cut