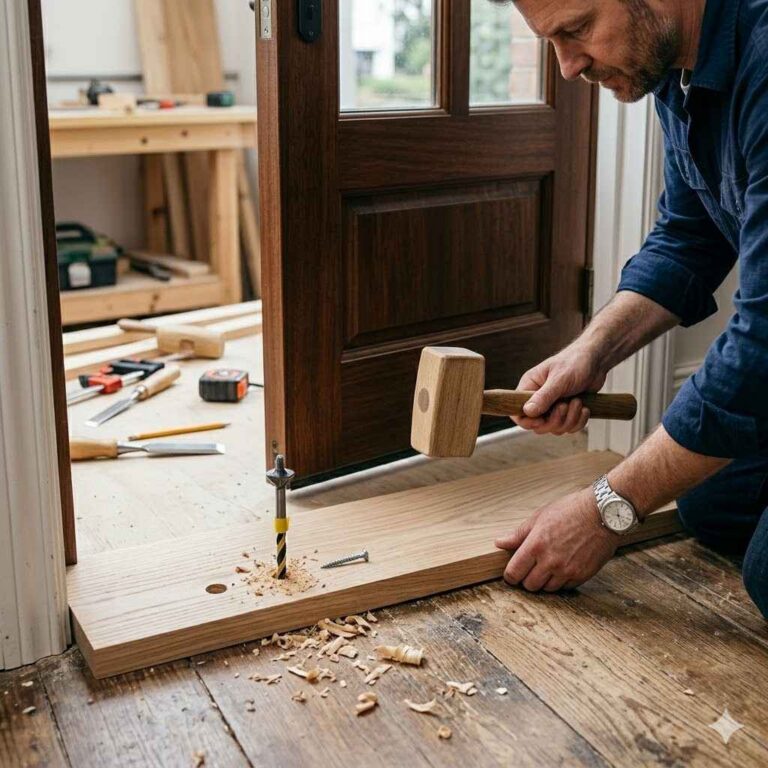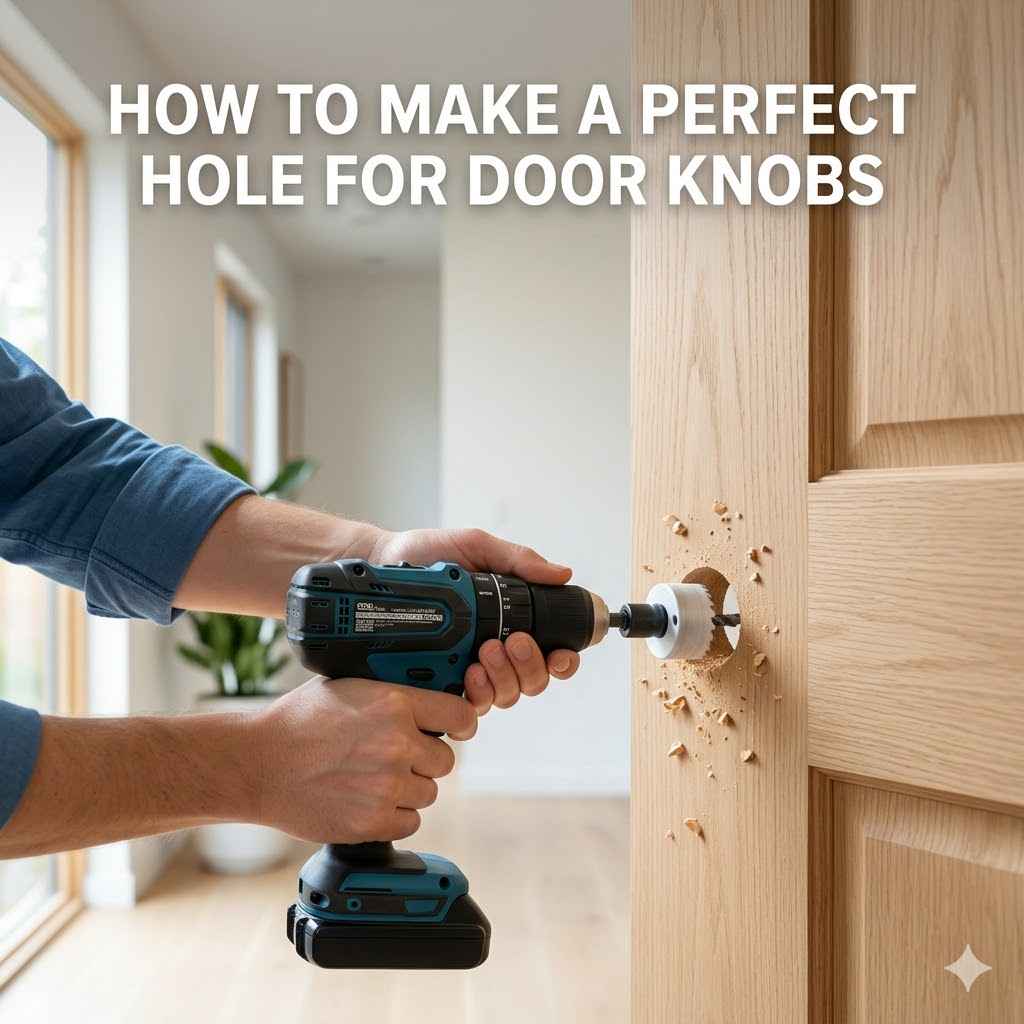
How To Make A Perfect Hole For Door Knobs
Making a hole for a door knob might seem a little tricky when you’re new to DIY projects. You want it to be just right, so the knob works smoothly and looks neat. Sometimes, folks worry about drilling too deep or crooked.
But don’t you fret! We’re going to walk through it step-by-step. You’ll learn How to Make a Perfect Hole for Door Knobs easily.
Preparing Your Door for a Door Knob
Getting ready is super important for any DIY job, and putting in a door knob is no different. You want to make sure you have everything you need before you start. This means gathering your tools and looking at your door.
A little planning saves a lot of headaches later on. We’ll cover the best ways to get your door set up for success.
Choosing the Right Tools
Having the right tools makes a big difference. It helps you do a better job and makes the task easier. For drilling door knob holes, a few key tools are a must-have.
Make sure they are in good working order before you begin.
Drill: You’ll need a power drill. A cordless one is great because it gives you freedom to move. Make sure it has enough power for the job.
A power drill is essential for making holes. It spins a drill bit very fast, allowing you to cut through wood quickly and cleanly. For door knobs, you’ll typically use a spade bit or a hole saw, which are designed for creating larger holes.
cordless drills are popular because they don’t have a cord to get tangled, giving you more flexibility, especially when working on a door that’s already installed. Ensure your drill battery is fully charged so you don’t run out of power mid-project.
Spade Bits or Hole Saw: These are special drill bits for making big holes. Spade bits are flat and have a point in the middle to guide them. Hole saws are like small cups with teeth.
Spade bits are a common choice for drilling door knob holes. They are relatively inexpensive and effective for wood. The sharp point in the center helps to keep the bit from wandering, ensuring a more accurate hole.
Hole saws are another excellent option. They consist of a cylindrical saw with a pilot drill bit in the center. The saw cuts a clean circle of the exact diameter needed.
For standard door knobs, you’ll likely need a 2 1/8 inch hole saw or spade bit. For the latch, a 1-inch or 1 1/4 inch bit is usually required. Using the correct size is vital for the knob to fit properly.
Measuring Tape and Pencil: You need to know exactly where to drill. Mark the spot carefully.
Accurate measurements are key to a well-placed door knob. A good quality measuring tape will ensure you get precise dimensions. A pencil is used to mark the drilling points directly on the door.
For door knobs, you typically measure from the edge of the door to the center of the hole, which is usually around 2 3/8 inches or 2 3/4 inches. Double-checking your measurements before you drill is a good practice to avoid mistakes. Clear, visible marks will guide your drill precisely where you want it.
Safety Glasses: Protect your eyes from wood chips.
Safety glasses are non-negotiable when using power tools. Drilling creates wood dust and chips that can fly out unexpectedly. These particles can cause serious injury to your eyes.
Always wear safety glasses that fit snugly and provide full coverage. They are a simple but crucial piece of safety equipment that should be used every time you operate a drill or any other tool that might produce flying debris. Your eyesight is precious, so take every precaution to protect it.
Chisel (Optional): To clean up the edges if needed.
Sometimes, the edges of the drilled hole might be a little rough. A sharp chisel can be used to carefully clean these up. This is especially helpful if you need a very neat finish or if the wood is prone to splintering.
It’s important to use the chisel carefully to avoid damaging the door surface. A sharp chisel will make the job easier and result in a cleaner appearance for the installed door knob hardware.

Measuring and Marking the Door
Accurate measurements are the foundation of a successful door knob installation. You need to know where the hole should go so that the knob is at a comfortable height and centered correctly on the door. This prevents the knob from being too high, too low, or off-center, which can look awkward and make the knob harder to use.
We will discuss how to mark both the large hole for the knob and the smaller hole for the latch.
Marking the Knob Hole
The main hole for the door knob needs to be drilled precisely. This is usually a larger hole that goes all the way through the door. For most interior doors, this hole is located a few inches from the edge of the door and at a standard height from the floor.
Homeowners often use the existing holes on other doors as a guide if they are consistent. If you are installing a knob on a new door, or replacing an old one with different hardware, you’ll need to measure carefully.
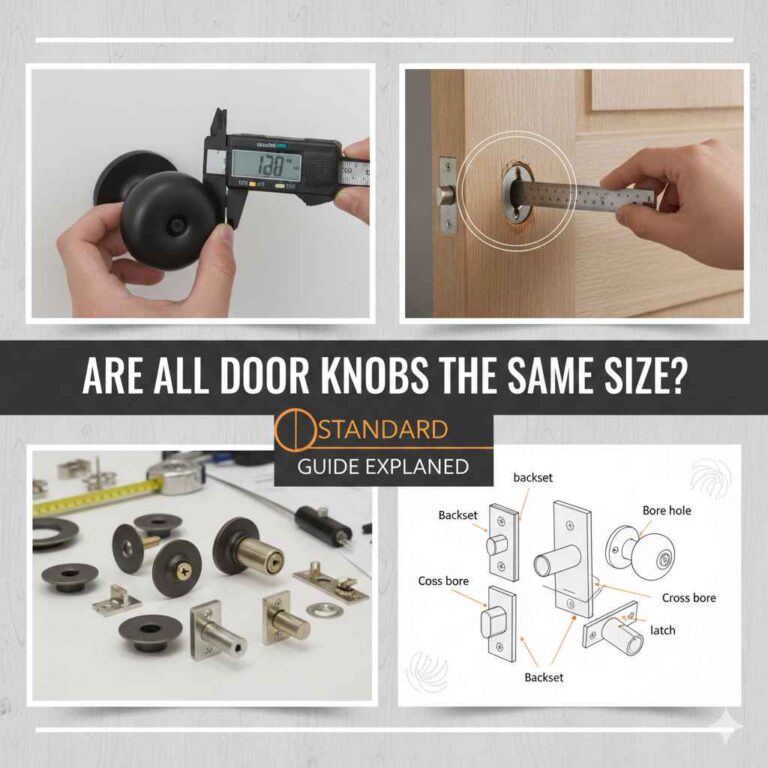
Typically, the center of the knob hole is about 2 3/8 inches from the edge of the door. This measurement is called the backset. For some knobs, the backset might be 2 3/4 inches.
It’s important to check the specifications for your particular door knob hardware. To mark this spot, use your measuring tape and pencil. Measure from the edge of the door to where you want the center of your knob hole to be.
Then, make a clear, visible mark with your pencil. You might also want to mark the height from the floor; a standard height is often around 36 inches, but this can vary based on preference or accessibility needs.
Marking the Latch Hole
Next, you need to mark where the latch will go. This is a smaller hole on the edge of the door. The latch is the mechanism that keeps the door closed when it’s not locked.
It extends from the door into the door frame. Proper placement ensures the door closes smoothly and stays shut. If this hole is not drilled correctly, the latch won’t engage with the strike plate in the door frame, and the door might not latch or close properly.
To mark the latch hole, you’ll first determine the correct backset. This is the distance from the edge of the door to the center of the latch hole. As mentioned, 2 3/8 inches is very common.
If your knob hardware came with a template, follow its instructions for marking. If not, measure the distance from the center of the main knob hole to the edge of the door where the latch will be. This should match the backset specified for your knob.
Once you have this measurement, mark the center of the latch hole on the edge of the door. It’s a good idea to make a small ‘X’ to clearly indicate the center point for drilling.
Drilling the Knob Hole
Drilling the main hole for the door knob requires precision. You want to make sure the hole is straight and clean. A crooked hole can make the door knob sit at an angle, and rough edges can make it difficult to install the knob.
We will cover how to drill this hole effectively, ensuring a good fit for your hardware.
Using a Hole Saw
A hole saw is often the easiest way to create a clean, large hole for a door knob. It’s designed to cut circular holes of a specific diameter. Most door knobs require a 2 1/8 inch hole.
Using a hole saw ensures a consistent diameter, which is crucial for the knob’s internal mechanism to fit correctly. The pilot bit in the center of the hole saw helps to keep it steady as you start drilling.
Place the pilot bit of the hole saw on your marked center point for the knob hole. Apply firm, steady pressure. Start the drill slowly to let the pilot bit get a good grip.
Once it starts cutting, you can increase the drill’s speed. It’s helpful to drill partway through from one side, then flip the door over and finish drilling from the other side. This technique helps prevent splintering or blowout on the exit side, leaving a cleaner finish.
Using a Spade Bit
If you don’t have a hole saw, a spade bit can also be used. Spade bits are flat with a pointed tip. You’ll need a spade bit that matches the diameter required for your door knob, usually 2 1/8 inches.
Like with a hole saw, start slowly and apply steady pressure.
When using a spade bit, it’s even more important to drill from both sides of the door. Start drilling from your marked spot on one side. Let the point of the spade bit go just through the other side of the door.
You should be able to see the tip poking out. Then, flip the door over and align the drill with the hole you just started from the other side. This ensures the hole goes through cleanly without the wood tearing out, which can happen if you try to drill all the way through from one side.
Ensuring a Straight Hole
A straight hole is vital for the knob to function correctly and look good. If the hole is drilled at an angle, the knob might not sit flush against the door, or the spindle that connects the two knobs might be crooked. This can cause the knob to feel loose or bind when turned.
Taking your time and keeping the drill as perpendicular to the door’s surface as possible is important.
To help ensure a straight hole, try to keep your body aligned with the drill. Look at the drill bit from different angles as you are drilling. If you are using a corded drill, you can sometimes use the cord to help gauge its angle.
For larger doors, it might be helpful to have someone assist you by looking at the drill from the side to guide you. Some drills have a spirit level built into them, which can also be a handy guide.
Drilling the Latch Hole and Mortise
After drilling the large hole for the knob, you need to prepare the edge of the door for the latch. This involves drilling a smaller hole for the latch mechanism and then creating a shallow recess, called a mortise, so the latch plate sits flush with the door’s edge. A properly fitted latch is essential for the door to open and close smoothly and securely.
Drilling the Latch Hole
The latch hole is drilled into the edge of the door where the latch mechanism will sit. This hole is usually smaller than the knob hole, typically around 1 inch or 1 1/4 inches in diameter, depending on the latch size. You will use a spade bit or a hole saw for this, matching the size specified by your hardware.
Align your drill bit with the mark you made on the edge of the door. Drill straight into the door edge until you reach the depth required for the latch. You can often tell when you’ve reached the right depth by measuring the latch itself.
The drill should go in far enough so that the latch can be fully .
Creating the Latch Mortise
Once the latch hole is drilled, you need to create a clean, flat area on the edge of the door for the latch plate to sit flush. This is called a mortise. If the latch plate protrudes from the door edge, it can prevent the door from closing properly against the frame.
The mortise should be just deep enough for the latch plate to sit flush with the door’s edge.
You can create the mortise using a sharp chisel. Hold the latch plate against the door edge where it will be installed. Trace around its outline with a pencil.
Then, use your chisel to carefully remove wood within that outline. Start by making shallow cuts along the traced line. Then, gradually deepen the mortise by taking out thin slivers of wood.
It’s better to remove too little wood and have to adjust, than to remove too much and create a gap. Check the fit of the latch plate frequently as you work.
Installing the Door Knob Hardware
With the holes drilled and the mortise prepared, you’re ready to install the door knob. This is the final step where all your careful drilling and measuring pay off. The hardware usually comes in a few main pieces: the knobs, the spindle, the latch mechanism, and the strike plate.
Assembling the Latch Mechanism
The latch mechanism slides into the hole you drilled on the edge of the door. The bolt part of the latch should extend into the door. The flat face of the latch assembly should sit in the mortise you created.
Secure the latch mechanism to the door using the screws provided. Make sure it is installed with the angled side of the bolt facing the direction the door will close. This helps the door to catch the strike plate easily.
Many modern latches have adjustable backsets, meaning you can set them for either 2 3/8 or 2 3/4 inches before installation. Ensure you have the backset set correctly for your door. If the latch doesn’t fit snugly or seems loose, it might indicate that the hole was not drilled to the correct diameter or depth.
Always tighten the screws firmly, but avoid overtightening, which could strip the screw holes.
Attaching the Door Knobs
The door knobs themselves usually attach to the spindle. The spindle is a rod that passes through both door knobs and the latch mechanism, allowing them to operate together. Most knobs have screws on the inside that need to be tightened to secure them to the spindle.
Some knobs have a hidden screw mechanism, often requiring a small tool to release or tighten. Follow the manufacturer’s instructions for your specific hardware.
Insert the spindle through the latch mechanism. Then, position the first knob on one side of the door, aligning it with the spindle. Secure it according to the instructions.
Repeat for the knob on the other side of the door. Make sure both knobs are securely attached and that the spindle is properly engaged with the latch. Test the knob by turning it.
It should operate the latch smoothly. If it feels stiff or loose, you may need to adjust the knob or check the spindle’s engagement.
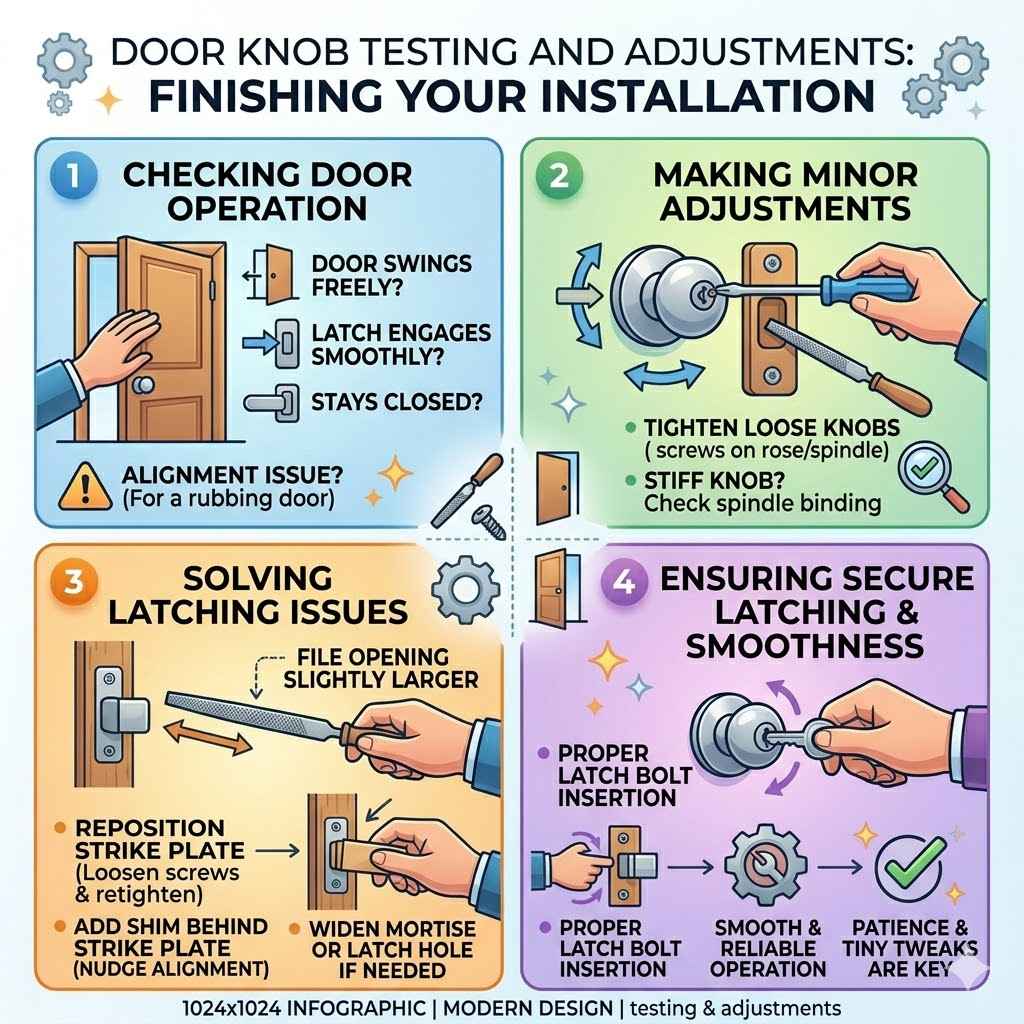
Testing and Adjustments
After everything is installed, it’s crucial to test the door knob’s function. This ensures that the door opens, closes, and locks properly. Sometimes, minor adjustments are needed to make everything work perfectly.
These adjustments are usually simple and can save you a lot of frustration.
Checking Door Operation
Open and close the door several times. Does it swing freely? Does the latch engage with the strike plate in the door frame smoothly?
Does it stay closed? If the door rubs against the frame, or if the latch doesn’t quite make it into the strike plate, there might be a slight alignment issue.
Ensure the strike plate on the door frame is also correctly aligned and installed. If the latch bolt hits the strike plate instead of sliding into the opening, you might need to file the opening of the strike plate slightly larger. Sometimes, you can also adjust the position of the strike plate itself by slightly loosening its screws, repositioning it, and then retightening.
Small adjustments can make a big difference in how smoothly the door operates.
Making Minor Adjustments
If the knob feels loose, check the screws that hold the knobs to the spindle. If the door doesn’t latch securely, you might need to slightly widen the mortise or the latch hole. For latching issues, sometimes a shim behind the strike plate can help nudge the door into better alignment.
If the knob is stiff to turn, ensure the spindle is not binding within the latch mechanism.
It’s rare to get everything perfect on the first try. Be prepared to make small tweaks. The goal is for the door knob to operate smoothly and reliably.
Most issues can be resolved with a bit of patience and minor adjustments. If the problem persists, re-read the installation instructions for your specific hardware. Sometimes, a specific feature of the knob may require a particular adjustment.
Frequently Asked Questions
Question: What is the standard size for a door knob hole?
Answer: The standard size for the main door knob hole is 2 1/8 inches in diameter. The hole for the latch mechanism on the edge of the door is typically 1 inch or 1 1/4 inches.
Question: How far from the edge of the door should the knob hole be?
Answer: This is called the backset. For most interior doors, the center of the knob hole is 2 3/8 inches from the edge of the door. Some hardware uses a 2 3/4 inch backset.
Question: Can I use a regular drill bit to make a door knob hole?
Answer: No, you should use a spade bit or a hole saw that is the correct diameter. Regular drill bits are too small for the large holes needed for door knobs.
Question: What if the latch doesn’t line up with the strike plate?
Answer: You might need to adjust the strike plate’s position on the door frame. Sometimes filing the strike plate opening slightly larger or adding a shim can help align it better with the latch.
Question: How do I prevent the wood from splintering when drilling?
Answer: Drill from both sides of the door, completing the hole from the opposite side. Starting slowly and using steady pressure also helps. A sharp drill bit makes a cleaner cut.
Conclusion
Learning How to Make a Perfect Hole for Door Knobs is a skill that anyone can master. With the right tools and careful measurements, you can achieve a professional look. Follow these steps, and you’ll have your new door knob installed securely and working smoothly in no time.
Enjoy your newly functional door!