How to Paint Walls: Essential Ceiling Trick
Quick Summary:
Tired of messy paint lines on your ceiling? This guide reveals the essential ceiling trick for perfectly painted walls. Learn simple techniques and the right tools to achieve crisp, clean edges, transforming your room with a professional finish. Get ready for a cleaner, easier painting experience!
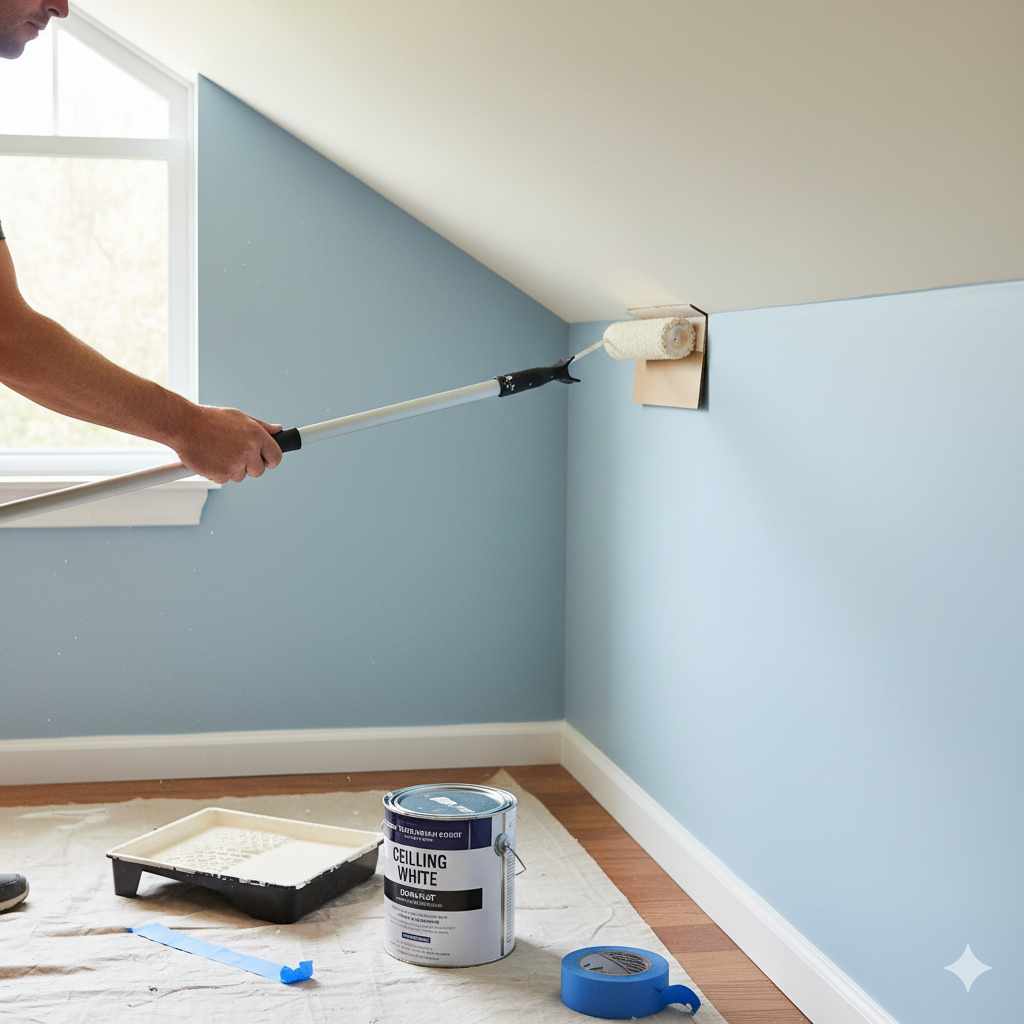
Hey there, DIY friends! Md Meraj here. Painting a room can feel like a big job, right? You want those walls looking fresh and new, but the thought of accidentally getting paint on the ceiling can make anyone hesitate. It’s a common worry, and frankly, it’s a frustrating one when you’re trying to get that smooth, clean look. But don’t you worry! With a few smart tricks and the right approach, you can paint your walls like a pro, keeping that ceiling perfectly untouched. We’re going to walk through it step-by-step, making this project totally doable and even enjoyable. Let’s get those walls looking amazing!
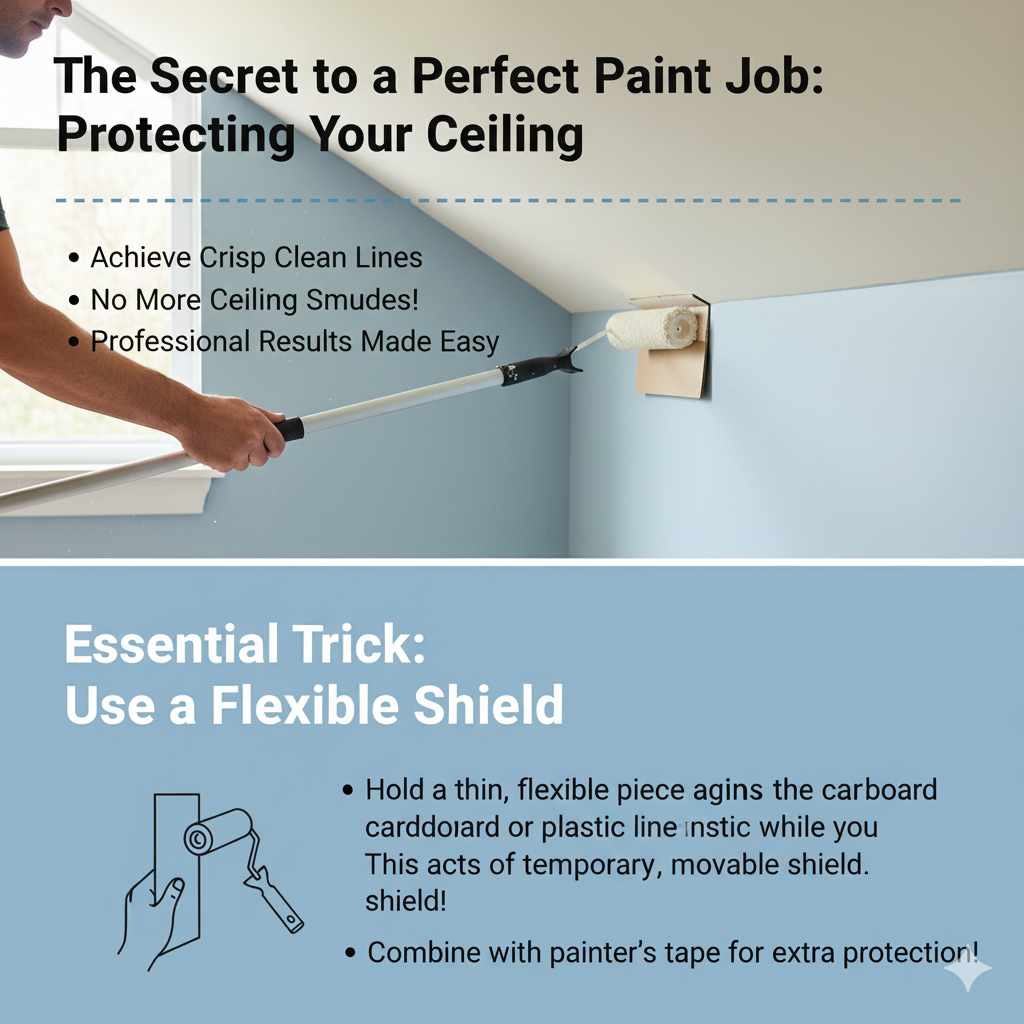
The Secret to a Perfect Paint Job: Protecting Your Ceiling
Painting walls is one of the most satisfying DIY projects. It can completely transform a space without breaking the bank. However, the biggest hurdle for many beginners (and even some seasoned painters!) is achieving clean lines, especially where the wall meets the ceiling. Smudges and drips on the ceiling can really detract from an otherwise beautiful paint job. It makes the whole room look a bit unfinished. But what if I told you there’s a surprisingly simple trick that makes this whole process much easier and cleaner? It’s all about preparation and using the right tools in a smart way. We’re going to dive into how to master this, so you can confidently tackle your next painting project and get those crisp, professional-looking edges you’ve always wanted.
Why Is This “Ceiling Trick” So Important?
You might be thinking, “Is it really that big of a deal?” Absolutely! A clean line between your wall and ceiling is a hallmark of a professional paint job. When paint bleeds onto the ceiling, it often means:
- Extra Work: You’ll have to go back and touch up the ceiling, which is tedious and can be hard to match perfectly.
- Frustration: It can be disheartening to see your hard work marred by a stray drip or smudge.
- Unprofessional Look: Even if the walls look great, ceiling drips can make the entire room feel less polished.
The good news is that preventing this is much easier than fixing it. It boils down to a few key strategies that I’ve relied on for years to ensure a clean finish every time. Let’s break down what you’ll need and how to do it.
Gathering Your Painting Toolkit
Before we get to the magic trick, let’s make sure you have the right gear. Having the proper tools makes any job easier and safer. Here’s what you’ll want:
Essential Painting Supplies:
- Paint: Of course! Choose your desired color and finish.
- Primer: If you’re painting over a dark color, stains, or bare drywall, primer is a must.
- Paint Rollers: Get a good quality roller with the right nap for your wall texture. A 3/8-inch nap is usually a good all-rounder for smooth walls.
- Roller Tray: For holding your paint.
- Paint Brushes: A 2-2.5 inch angled sash brush is perfect for cutting in (painting edges).
- Painter’s Tape: High-quality tape is crucial for clean lines.
- Drop Cloths: To protect your floors and furniture.
- Bucket: For water or cleaning solutions.
- Rags and Paper Towels: For spills and cleanup.
- Extension Pole: For your roller, to reach high spots and the ceiling edge comfortably.
- Ladder or Step Stool: For safe access.
- Sanding Sponge or Fine-Grit Sandpaper: For smoothing imperfections.
- Spackle or Joint Compound: For filling small holes or cracks.
The Essential Ceiling Trick: Mastering the “Cutting In” Technique
This is where we really focus on keeping that ceiling pristine. “Cutting in” is the process of painting the edges of your walls, where they meet the ceiling, trim, or corners. It requires a steady hand and the right technique. Forget about trying to get a roller right up to the edge – that’s where most mistakes happen. Instead, we’ll rely on a brush and a bit of patience.
Step 1: Prepare Your Workspace
This is the foundation for a clean paint job. Even with the ceiling trick, good prep work is key.
- Clear the Room: Move furniture away from the walls or to the center of the room.
- Cover Everything: Lay down drop cloths to protect your floors. Cover any furniture you couldn’t move with plastic sheeting or old sheets.
- Clean the Walls: Wipe down the walls with a damp cloth to remove dust and grime. This ensures the paint adheres well.
- Repair Imperfections: Fill any nail holes or cracks with spackle. Let it dry, then lightly sand the area smooth. Wipe away dust.
Step 2: Apply Painter’s Tape (Optional but Recommended for Beginners)
While the “trick” doesn’t strictly require tape if you have a perfect touch, for beginners, it’s a lifesaver. It provides a physical barrier and a guide for your brush.
- Choose the Right Tape: Use a high-quality painter’s tape designed for clean paint lines. Blue or green tapes are common.
- Apply Carefully: Press the tape firmly along the edge where the wall meets the ceiling. Ensure there are no gaps or bubbles. For an extra seal, you can run a putty knife or even your fingernail along the edge of the tape to press it down. This is a pro tip that helps prevent paint seepage.
Step 3: The “Cutting In” Brush Technique
This is the core of our ceiling trick. It’s about control and precision.
- Dip Your Brush: Load your angled sash brush with paint, but only dip about one-third of the bristles into the paint. You don’t want to overload the brush, as this leads to drips.
- Offload Excess Paint: Gently tap the brush against the inside edge of the paint can to remove any excess. You want a smooth, consistent coating on the brush, not globs.
- Start Your Stroke: Begin painting about 1-2 inches away from the ceiling line.
- The “Pull” Stroke: This is crucial. Instead of pushing the brush towards the ceiling, you’ll be using a gentle “pulling” motion away from the ceiling. Imagine you’re pulling the paint down and onto the wall, away from the edge.
- Work in Sections: Paint in short, controlled strokes. Work along a section of the wall, about 2-3 feet at a time.
- Maintain a Wet Edge: As you move along, slightly overlap your previous strokes to maintain a “wet edge.” This helps prevent lap marks (visible lines where one section of paint dries before the next is applied).
- Focus on the Line: Keep your brush tip angled slightly away from the ceiling. If you feel the brush getting too close, stop, reload if necessary, and adjust your angle. The goal is to guide the paint onto the wall, not towards the ceiling.
Md Meraj’s Pro Tip: If you’re using painter’s tape, you can paint slightly over the tape. The tape will catch any errant paint. Just be sure to remove the tape while the paint is still slightly wet (more on this later!).
Step 4: Rolling the Walls
Once you’ve cut in your edges, it’s time to roll the main part of the wall.
- Load the Roller: Pour paint into your roller tray. Roll the roller back and forth in the tray to coat it evenly.
- Start Rolling: Begin rolling in a large “W” or “M” pattern on the wall. This helps distribute the paint evenly.
- Work in Sections: Roll from ceiling to floor, or from one edge of the wall to the other. Overlap each section by about 25-50% to ensure a consistent finish and avoid roller marks.
- Maintain a Wet Edge: Just like with the brush, maintain a wet edge to prevent visible lines between dried and wet paint.
- Don’t Press Too Hard: Let the roller do the work. Pressing too hard can cause drips and uneven coverage.
Step 5: Removing the Painter’s Tape (The Critical Moment!)
This is another point where mistakes can happen. Removing the tape at the wrong time can peel off fresh paint or leave a jagged line. Here’s how to get it right:
- Timing is Key: Wait until the paint is dry to the touch, but not fully cured. This usually means waiting at least an hour, but check your paint can’s instructions. If you wait too long, the paint can bond to the tape, leading to peeling. If you remove it too soon, you risk smudging the wet paint.
- The Gentle Pull: Grasp the tape at one end. Pull it back slowly and at a 45-degree angle away from the painted wall.
- Keep it Steady: Maintain a consistent, steady pull. Avoid jerky movements.
- If Paint Sticks: If you notice the paint starting to lift with the tape, stop. You can try using a utility knife to score the line between the tape and the paint. This breaks the bond. Then, try pulling the tape again.
The “No Tape” Alternative: The Feathered Edge
For those with a confident hand or a very steady surface, you can skip the tape entirely. This is often called the “feathered edge” technique. After cutting in with your brush, you’ll use a technique where you slightly feather the paint line. This involves using less paint on your brush and applying very light pressure, blending the edge of the cut-in paint with the rolled paint as you go. It’s more advanced and requires practice, but can save time and the need to remove tape.
Common Painting Problems and How to Solve Them
Even with the best tricks, sometimes things don’t go perfectly. Here are a few common issues and how to address them:
Problem: Paint Dripped onto the Ceiling
Solution: If the paint is still wet, use a clean, damp rag to gently wipe away the drip immediately. If the paint has dried, you’ll need to touch it up. Use a small artist’s brush and a bit of your ceiling paint to carefully cover the drip. For a cleaner line, you might need to re-tape the ceiling edge before touching up.
Problem: Jagged Paint Lines
Solution: This often happens if the tape wasn’t sealed properly or was removed too late. If the paint is still wet, you might be able to gently smooth the edge with a damp cloth. If it’s dry, you can try to carefully score the line with a utility knife and then use a small artist’s brush to clean up the line. Sometimes, repainting the edge with the ceiling color can create a crisper border.
Problem: Roller Marks or “Holes” in the Paint
Solution: This usually occurs if you didn’t maintain a wet edge or if you pressed too hard with the roller. If the paint is still wet, you can often blend these areas by gently re-rolling over them, overlapping with the wet paint. If it’s dry, you might need to lightly sand the area and apply another thin coat, ensuring you maintain that wet edge.
Problem: Uneven Color Coverage
Solution: This can happen if you didn’t stir your paint thoroughly, didn’t apply enough coats, or if the roller nap wasn’t suitable for the wall texture. Ensure your paint is well-mixed. Apply a second coat if needed, following the same rolling technique. For textured walls, use a roller with a thicker nap to get into the grooves.
Tools for Precision: A Closer Look
Let’s talk a bit more about the tools that make a big difference in achieving those clean lines.
The Angled Sash Brush
This isn’t just any paintbrush. The angled head on a sash brush is designed for control. It allows you to get right into corners and along edges with precision. For cutting in, a synthetic bristle brush is often recommended for latex or acrylic paints, as they are easier to clean and maintain their shape.
High-Quality Painter’s Tape
Don’t skimp here! Cheap tape can bleed, leave residue, or tear the paint off your walls. Look for brands known for clean lines. Different tapes are designed for different surfaces and paint types. For example, delicate surface tapes are available if you’re worried about damaging the underlying paint or wallpaper. Always test a small section first if you’re unsure.
For more information on choosing the right tools for your painting projects, the Popular Mechanics guide to paint brushes offers excellent insights.
Roller Extension Pole
This is a game-changer for reaching high areas without overstretching or constantly climbing a ladder. It allows you to stand comfortably and maintain better control of the roller, leading to more even coverage and fewer drips. Look for one that’s lightweight and easy to adjust.
Painting Your Ceiling: A Quick Note
While our focus is on painting walls without getting paint on the ceiling, sometimes the ceiling itself needs a refresh. If you’re painting both walls and ceiling, always paint the ceiling first! This way, any drips or mistakes on the ceiling can be easily cleaned up or painted over before you start on the walls. Use a roller with a long nap for textured ceilings and a standard nap for smooth ones. For vaulted or high ceilings, an extension pole is essential.

FAQ: Your Painting Questions Answered
Q1: How much paint do I need for one room?
A1: A general rule of thumb is one gallon of paint covers about 350-400 square feet. Measure your walls (length x height) and subtract the area of doors and windows. Divide the total square footage by your paint’s coverage rate to estimate how much you’ll need. It’s always better to have a little extra for touch-ups.
Q2: What’s the best way to clean paint brushes?
A2: For latex or acrylic paints, rinse brushes thoroughly with warm water until the water runs clear. Then, use a brush comb to remove any remaining paint and reshape the bristles. For oil-based paints, you’ll need mineral spirits or paint thinner, followed by soap and water. Always follow the manufacturer’s instructions on your paint can.
Q3: How many coats of paint should I apply?
A3: Typically, two coats are recommended for best coverage and durability. The first coat acts as a primer and ensures even color, while the second coat provides depth and a uniform finish. Lighter colors over dark ones might require more coats, or a good quality primer.
Q4: Can I paint over glossy paint?
A4: Yes, but it’s not recommended to paint directly over a high-gloss finish without preparation. Glossy surfaces are very smooth, and paint won’t adhere well. You’ll need to lightly sand the surface to create a “tooth” for the new paint to grip, or use a specialized bonding primer. Always clean the surface thoroughly after sanding.
Q5: What is the difference between matte, eggshell, satin, and semi-gloss paint finishes?
A5: These refer to the sheen or reflectivity of the paint. Matte has no shine and hides imperfections well, good for ceilings and low-traffic areas. Eggshell has a very low sheen, offering a bit more washability than matte. Satin has a soft sheen and is more durable and washable, making it great for living rooms and hallways. Semi-gloss is shinier and very durable, ideal for trim, doors, and kitchens/bathrooms where moisture is a concern.
Q6: How long should I wait between coats of paint?
A6: Always check your paint can’s label, as drying times vary. Generally, for latex-based paints, you’ll want to wait at least 2-4 hours between coats. For oil-based paints, it could be 6-8 hours or even longer. Ensure the previous coat is dry to the touch before applying the next.
Q7: What is “cutting in” and why is it important?
A7: “Cutting in” is the process of painting the edges and corners of a wall where a roller can’t reach, such as along the ceiling, baseboards, window frames, and door frames. It’s crucial because it creates clean, sharp lines that define the space and give a professional finish. It requires a steady hand and a good quality angled brush.
Conclusion: Your Walls, Perfectly Painted
See? Painting your walls without a single drip on the ceiling is absolutely achievable. It’s all about being prepared, using the right tools like a good angled brush, and mastering that gentle “pulling” stroke when you’re cutting in. Remember the importance of high-quality painter’s tape if you’re a beginner, and always pay attention to the timing when removing it. Don’t be afraid to take your time; rushing is the enemy of a clean paint job!
By following these steps, you’re not just painting walls; you’re transforming your space with confidence and skill. Each project you tackle will build your experience, and you’ll find yourself becoming more comfortable and efficient with every brushstroke. So, gather your supplies, put on some music, and get ready to enjoy the satisfaction of a beautifully painted room. You’ve got this!