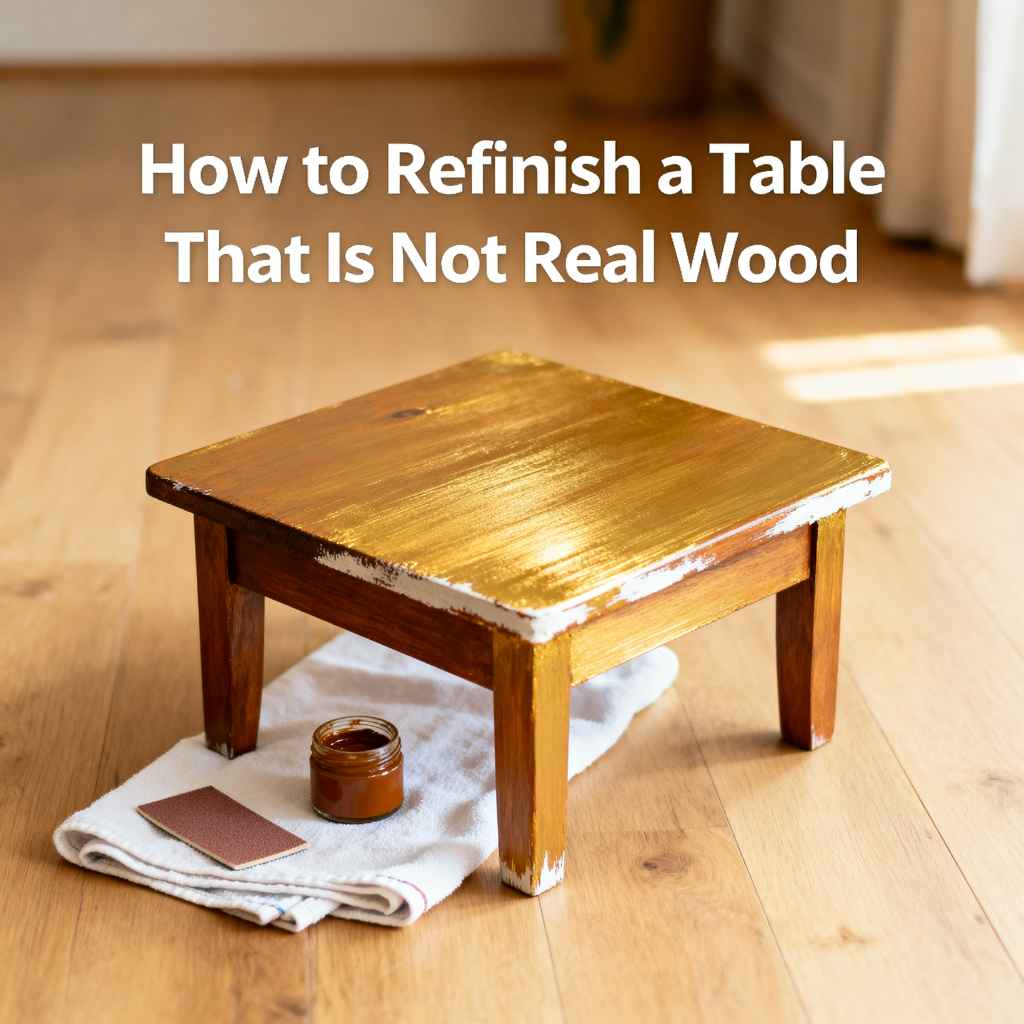
How to Refinish a Table That Is Not Real Wood
Sometimes, a table might look like wood but is actually made from other materials. This can make it tricky to know what to do if you want to refresh its look. Many people wonder how to refinish a table that is not real wood because they are unsure about the right steps.
It might seem challenging, but it doesn’t have to be. We’ll guide you through a simple, step-by-step process. Get ready to give your table a beautiful new finish.
Refinishing Laminate Or Veneer Tables
Many tables that don’t use solid wood are covered in laminate or veneer. These surfaces can look great but require a different approach to refinishing than solid wood. Understanding the material is key to getting a good result.
This section will explain the differences and why your approach needs to be careful. We will cover how to identify these materials and prepare them for a new look.
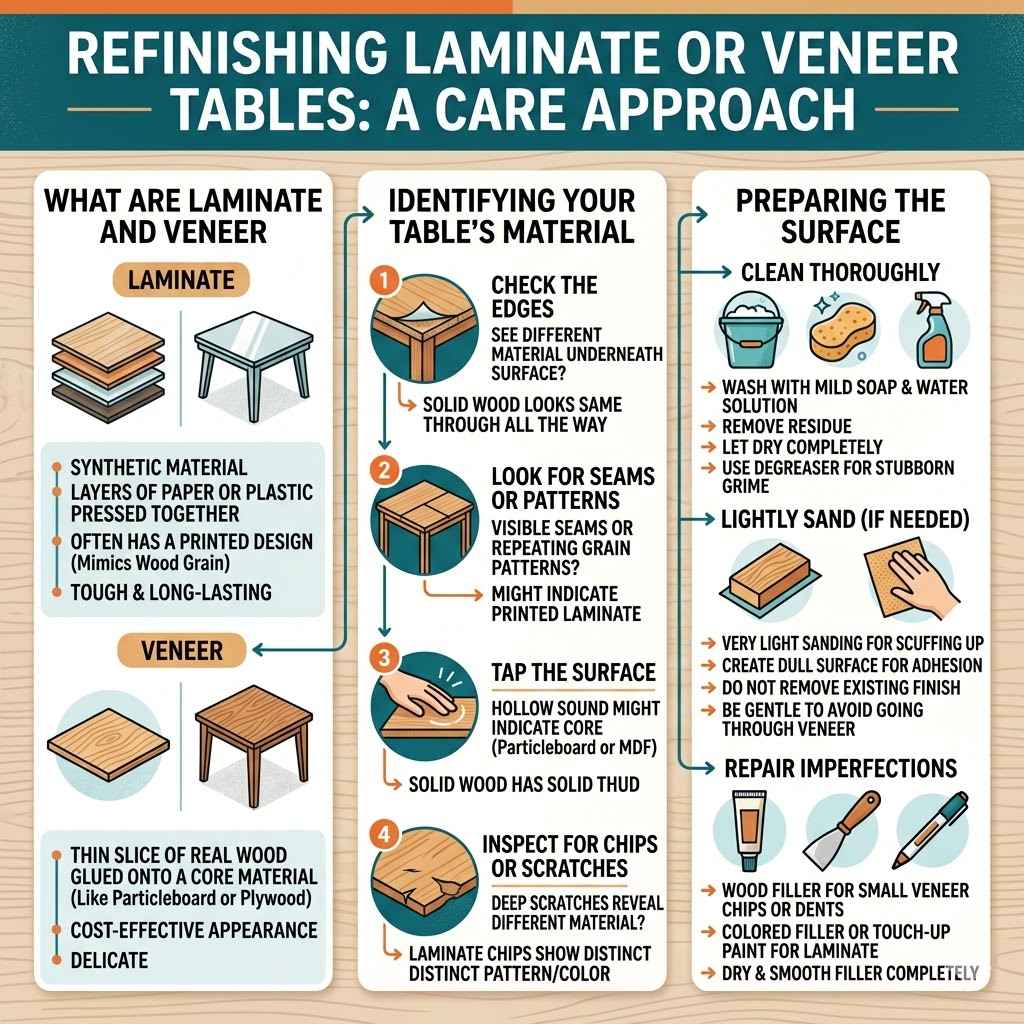
What Are Laminate and Veneer
Laminate is a synthetic material made from layers of paper or plastic pressed together. It often has a printed design that mimics wood grain. It’s tough and can last a long time.
Veneer is a thin slice of real wood glued onto a core material, like particleboard or plywood. It gives the appearance of solid wood but is more cost-effective. Veneers can be delicate.
Identifying Your Table’s Material
Before you start, you need to know what you are working with. This helps you choose the right products and methods.
- Check the Edges The edges of the table are often a good place to look. If you see a different material underneath the surface, it’s likely laminate or veneer. Solid wood usually looks the same all the way through.
- Look for Seams or Patterns Laminate can sometimes have visible seams where pieces meet. Wood veneer might show a repeating grain pattern if it’s printed.
- Tap the Surface A hollow sound when you tap the surface might indicate particleboard or MDF underneath a veneer or laminate. Solid wood typically has a more solid thud.
- Inspect for Chips or Scratches Deep scratches on veneer might reveal a different material beneath. Laminate chips often show a distinct pattern or color difference underneath the top layer.
It’s important to be sure about the material. Using the wrong technique can damage the surface permanently. For instance, sanding too aggressively on veneer can go right through it, exposing the core.
Preparing the Surface
Proper preparation is essential for any refinishing project, especially with laminate and veneer. This step ensures the new finish will adhere well and look smooth.
- Clean Thoroughly Wash the table with a mild soap and water solution. Wipe it down with a clean, damp cloth to remove any residue. Then, let it dry completely. A degreaser can be useful for stubborn grime.
- Lightly Sand (If Needed) For laminate or veneer that is in good condition but just needs to be scuffed up for better adhesion, a very light sanding is usually all that’s required. Use fine-grit sandpaper, like 220-grit or higher. The goal is to create a dull surface, not to remove the existing finish. Be very gentle to avoid going through the veneer.
- Repair Imperfections If there are small chips or dents in veneer, you can use wood filler. For laminate, minor damage might be harder to repair invisibly. You can use a colored filler or touch-up paint for small cosmetic issues. Make sure any filler is completely dry and smooth before proceeding.
This careful preparation sets the stage for a successful refinish. Skipping these steps can lead to peeling paint or uneven adhesion.
Refinishing Plastic Or Melamine Tables
Tables made from plastic or melamine offer a different challenge. These materials are not wood-based at all. They often have smooth, non-porous surfaces.
This makes it difficult for paint and finishes to stick. Our goal here is to help you create a durable and attractive new surface. We will focus on cleaning, priming, and painting plastic and melamine.
Understanding Plastic and Melamine
Plastic tables are common, especially for outdoor or casual use. Melamine is a type of plastic resin often used to coat particleboard, giving it a smooth, hard, and water-resistant finish. Both are designed to be durable and easy to clean.
However, their slick nature means standard paint won’t adhere well.
Cleaning for Optimal Adhesion
The first step is critical for any surface, but especially for non-porous materials like plastic and melamine. A clean surface is the foundation of a lasting finish.
- Degrease the Surface Use a strong degreaser or a mixture of warm water and TSP (trisodium phosphate) substitute. This removes any oils, grease, or residue that might prevent paint from sticking. Rinse thoroughly with clean water.
- Wipe with Rubbing Alcohol After cleaning and drying, wipe the entire surface down with rubbing alcohol. This acts as a final cleaner and helps to etch the surface slightly, improving adhesion. Use a lint-free cloth.
- Allow to Dry Completely Ensure the table is completely dry before moving on. Any moisture can interfere with the primer.
Skipping this deep cleaning can result in paint that peels or flakes off shortly after application. It’s worth the extra effort.
The Importance of Primer
Primer is your best friend when painting plastic or melamine. It acts as a bridge between the slick surface and your topcoat of paint.
- Choose the Right Primer You need a primer specifically designed for plastics or for slick surfaces. Look for terms like “bonding primer” or “plastic primer.” These contain special agents that grip the surface.
- Apply Thin Coats Apply the primer in thin, even coats. Two thin coats are better than one thick coat. This helps prevent drips and ensures full coverage.
- Allow Proper Drying Time Follow the manufacturer’s instructions for drying times between coats and before applying paint. Rushing this step can compromise the bond.
A good quality primer will make all the difference in how long your new paint job lasts. It provides a uniform base for the paint to adhere to.
Painting Plastic and Melamine
Once the primer is dry, you can apply your chosen paint. The type of paint matters for durability.
- Use Durable Paint Spray paint specifically formulated for plastics is an excellent option. Alternatively, you can use a good quality acrylic latex paint or an enamel paint. For extra durability, consider a paint and primer in one for plastic.
- Apply Multiple Thin Coats Just like with primer, apply paint in thin, even layers. Allow each coat to dry before applying the next. This builds up a strong, smooth finish.
- Consider a Topcoat/Sealer For added protection, especially on tabletops that will see heavy use, apply a clear acrylic sealant or a polycrylic topcoat. This adds an extra layer of durability and scratch resistance.
This systematic approach will give your plastic or melamine table a fresh, new look that can withstand daily use.
Refinishing Metal Tables
Metal tables, whether they are iron, aluminum, or steel, also require special care when refinishing. These surfaces are prone to rust and can be slippery for paint. The key is proper preparation, rust treatment, and using the right type of paint.
This section guides you through how to refinish a metal table effectively.
Preparing Metal Surfaces
Metal surfaces need thorough cleaning and preparation to ensure paint adheres properly and to prevent future rust.
- Clean Off Grime and Grease Use a strong degreaser or a solution of warm water and dish soap to remove all dirt, grease, and oil. Rinse well and let it dry completely.
- Remove Loose Paint and Rust Use a wire brush, sandpaper, or a wire wheel attachment on a drill to remove any flaking paint or rust. For heavier rust, you might need a rust remover product.
- Sand for Adhesion Lightly sand the entire metal surface with medium-grit sandpaper (around 120-grit). This creates a rougher texture for the primer to grip onto. Wipe away all dust with a tack cloth.
A clean, slightly roughened surface is crucial for a paint job that will last.
Treating Rust
Rust is a metal’s worst enemy. If you find any rust, it must be dealt with before painting.
- Scrape and Sand As mentioned, thoroughly scrape and sand away all visible rust. Get down to bare metal if possible.
- Apply a Rust Converter or Inhibitor After removing the rust, apply a rust converter or rust inhibitor. A rust converter chemically changes rust into a stable, paintable surface. A rust inhibitor prevents future rust from forming. Follow product instructions carefully.
- Prime Over Treated Areas Once the rust treatment is dry, apply a coat of metal primer. This seals the treated area and provides a good base for your paint.
Ignoring rust will cause your paint job to fail, with rust spots reappearing through the new finish.
Choosing the Right Paint and Primer
Metal requires specific types of primers and paints for best results.
- Metal Primer Always start with a primer designed for metal. These primers are formulated to adhere well to metal and provide corrosion resistance. Look for “metal primer,” “rust-inhibiting primer,” or “direct-to-metal (DTM)” primer.
- Paint Type For outdoor metal furniture or high-traffic areas, a durable enamel paint is recommended. Oil-based enamels offer excellent durability and a hard finish. Water-based acrylic enamels are also available and offer good performance with easier cleanup. Spray paint for metal is also a convenient option.
- Application Apply the primer in thin, even coats. Allow it to dry completely as per the manufacturer’s instructions. Then, apply your chosen paint color in multiple thin coats, allowing proper drying time between each.
A quality paint job on metal can make an old table look new again and protect it from the elements.
Protecting Your Refinished Metal Table
To ensure your metal table’s new finish lasts, consider adding a protective topcoat.
- Clear Coat for Durability For added protection against scratches, UV rays, and moisture, apply a clear spray sealant or a clear enamel topcoat. Ensure it’s compatible with your chosen paint.
- Regular Maintenance Clean the table regularly with mild soap and water. Address any new chips or scratches promptly to prevent rust from forming.
With the right preparation and materials, you can give any metal table a fantastic makeover.
Painting Techniques For Non-Wood Surfaces
No matter the material of your table, the way you apply paint makes a big difference. This section focuses on practical painting methods that work well for surfaces that are not real wood. We’ll cover getting a smooth finish and making your paint job last.
Surface Preparation is Key
We’ve touched on this for each material, but it’s worth repeating: preparation is the most important step.
- Cleanliness is Paramount Ensure the surface is free of dust, dirt, grease, and any old finishes that might be loose. Use appropriate cleaners for your table’s material.
- Light Sanding For Grip For most non-wood surfaces, a light sanding with fine-grit sandpaper (220-grit or higher) is needed to create a surface for the primer to adhere to. This is not about removing material, but about scuffing it up.
- Wipe Away Dust After sanding, always wipe the surface down with a tack cloth. This removes the fine dust particles that sandpaper leaves behind, which can ruin a smooth finish.
A pristine surface means a flawless final look.
Applying Primer Correctly
Primer is the foundation of your paint job. Using it properly ensures durability and even color.
- Use the Right Primer Always select a primer that is compatible with your table’s material (plastic, laminate, metal). A bonding primer is often a good choice for slick surfaces.
- Thin, Even Coats Apply primer in thin, consistent coats. Avoid heavy application, which can lead to drips and uneven coverage. Two thin coats are almost always better than one thick coat.
- Drying Time Matters Allow the primer to dry fully according to the manufacturer’s instructions before applying paint. This allows the primer to create its strong bond.
A well-primed surface is less likely to have paint peel or chip.
Painting Application Methods
How you apply the paint affects the final appearance and durability.
- Spray Painting Spray paint offers a smooth, even finish, especially on intricate shapes or smooth surfaces. It’s a popular choice for plastic and metal. Work in a well-ventilated area and apply in thin, overlapping passes, holding the can about 8-12 inches away.
- Brushing and Rolling If using brush-on paint, choose high-quality synthetic brushes for latex paints or natural bristle brushes for oil-based paints. Use a foam roller for smooth finishes on larger, flat areas. Apply paint in the direction of the grain if mimicking wood, or in smooth, consistent strokes.
- Multiple Thin Coats Regardless of the method, applying several thin coats of paint is key. This builds up coverage, hides imperfections, and creates a more durable finish than one or two thick coats.
Patience during the painting process will yield the best results.
Adding a Protective Topcoat
For most refinished non-wood tables, a topcoat is highly recommended.
- Purpose of Topcoat A topcoat, like polycrylic or a clear enamel, adds a layer of protection against scratches, moisture, and wear. This is especially important for tabletops.
- Compatibility is Crucial Ensure the topcoat is compatible with your paint. Most water-based paints work well with water-based topcoats like polycrylic.
- Apply Thinly and Evenly Apply the topcoat in thin, even layers, just like the paint. Allow each coat to dry fully before applying the next. Two to three thin coats are usually sufficient.
This final step seals your work and extends the life of your refinished table.
Troubleshooting Common Issues
Even with careful planning, you might encounter some problems when you refinish a table that isn’t real wood. This section helps you identify and fix common issues. We’ll cover what to do if paint won’t stick or if you get an uneven finish.
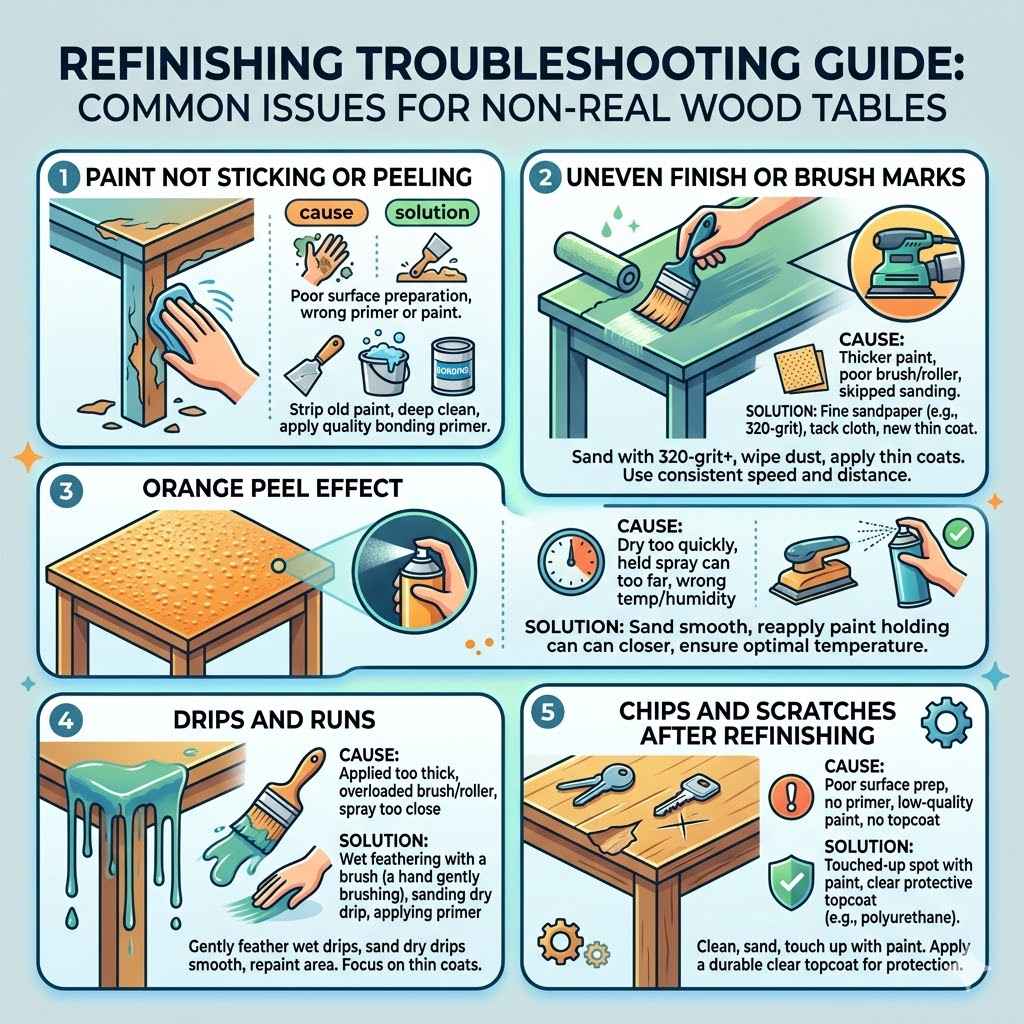
Paint Not Sticking or Peeling
This is a common problem, especially on plastic, laminate, or metal. It almost always comes down to surface preparation.
- Cause The surface was not properly cleaned, degreased, or lightly sanded to create adhesion. Or, the wrong type of primer or paint was used.
- Solution You will likely need to strip the failed paint and primer. Start over with a thorough cleaning and degreasing. Then, use a quality bonding primer specifically designed for your table’s material. Ensure the primer and paint are fully dry between coats.
For plastic and metal, a dedicated plastic primer or metal primer is non-negotiable.
Uneven Finish or Brush Marks
Getting a perfectly smooth finish can be tricky. Brush marks or an uneven texture can detract from your table’s appearance.
- Cause Applying paint too thickly, using a poor-quality brush or roller, or not sanding lightly between coats. For spray paint, the can might have been held too far away or too close, or the coats were uneven.
- Solution For brush marks, lightly sand the dried paint with very fine-grit sandpaper (320-grit or higher). Wipe away dust with a tack cloth and apply another thin coat of paint. If the finish is generally uneven, you might need to sand it down and repaint. If using spray paint, focus on maintaining a consistent distance and speed.
Allowing adequate drying time between coats also helps prevent unevenness.
Orange Peel Effect
This refers to a bumpy texture similar to an orange peel, often seen with spray paint.
- Cause The paint is drying too quickly before it has a chance to level out. This can happen if you spray too far away from the surface, if the paint is too thick, or if the temperature is too hot and dry.
- Solution Lightly sand the affected area with fine-grit sandpaper until smooth. Wipe clean and reapply paint, this time holding the can closer and using thinner, overlapping coats. Ensure you are painting in optimal temperature and humidity conditions.
Testing your spray technique on scrap material can help you avoid this.
Drips and Runs
These are unsightly lines where excess paint has dripped down a vertical surface.
- Cause Applying paint too thickly, overloading the brush or roller, or spraying too close to the surface.
- Solution If the paint is still wet, you might be able to gently feather it out with a brush. If the paint is dry, carefully sand down the drip until it’s smooth. Wipe away dust and apply a thin coat of primer or paint to the area. For severe drips, you may need to sand the entire area down and repaint.
Always aim for thin coats to prevent drips from forming.
Chips and Scratches After Refinishing
Even after refinishing, your table can get damaged again.
- Cause Inadequate surface preparation, not using a primer, using a low-quality paint, or not applying a protective topcoat.
- Solution For minor chips and scratches, you can try touching them up. Lightly sand the damaged area, clean it, and apply a thin coat of your paint color. Once dry, apply a protective clear coat over the repaired spot. For more significant damage, you might need to repaint the entire surface. A durable topcoat can prevent this in the future.
Regular maintenance and avoiding harsh cleaners will also help preserve the finish.
Frequently Asked Questions
Question: Can I refinish a particle board table with a veneer top
Answer: Yes, but you need to be very careful. Sand very lightly, if at all, as sanding through the veneer will expose the particle board, which is difficult to refinish smoothly.
Question: What is the best paint for a plastic patio table
Answer: Spray paint designed for plastic is usually the easiest and most effective. Look for brands that specifically state they adhere to plastic. Using a plastic-specific primer first is highly recommended.
Question: How do I know if my table is laminate or veneer
Answer: Check the edges. If you see a different material underneath the surface layer, it’s likely laminate or veneer. Laminate is often a printed pattern, while veneer is a thin slice of real wood.
Question: Do I need to prime metal furniture before painting
Answer: Absolutely. Metal furniture needs a special primer designed for metal. This prevents rust and ensures the paint adheres properly for a long-lasting finish.
Question: Can I paint over old, peeling paint on a metal table
Answer: No, you should not paint over peeling paint. You must remove all loose or peeling paint using a wire brush or sandpaper. Then, treat any rust and prime the surface before applying new paint.
Wrap Up
Refinishing a table that isn’t real wood is achievable with the right approach. You’ve learned how to prepare surfaces like laminate, plastic, and metal. We covered using special primers and durable paints.
Following these steps helps you avoid common issues. Now you can confidently refresh your table’s look and extend its life.