How to Remove a Sink: Kitchen or Bathroom (7 Steps)
Removing a sink means shutting off the water, disconnecting the P-trap and supply lines, unfastening the mounting clips, and cutting the caulk seal before lifting it free — a job that costs $100 to $300 through a plumber. Skipping the shut-off valve step is the single most common mistake, and it floods the cabinet in seconds. This guide covers the full removal process for kitchen and bathroom sinks, the tools you need, and disconnecting a garbage disposal first.
Quick Answer
Shut off the water, disconnect the supply lines and P-trap, unclip the mounting brackets, then run a utility knife along the caulk line and lift the sink free. Kitchen sinks with a garbage disposal need that unplugged and detached first. Most beginners finish in 30 to 60 minutes; a plumber charges $100 to $300 for the same job.
Why Remove a Sink Yourself?
DIY sink removal is straightforward once you know the order of operations, and it skips the $100 to $300 a plumber typically charges for the same job. You control the pace, and you learn where your shut-off valves and P-trap actually are, which helps with any plumbing repair later.
The trade-off is tight cabinet space and the occasional stuck or corroded clip. Rusty mounting hardware and old caulk are the two things that slow beginners down the most, not the actual disconnection steps.
Tools and Materials You’ll Need
Most of these tools are already in a basic toolbox, and none of them cost much to buy if you need one.
- Adjustable wrench: for loosening supply line and P-trap nuts.
- Basin wrench: reaches nuts in the tight space behind a sink bowl.
- Screwdriver: flathead or Phillips, depending on your sink’s mounting clips.
- Utility knife: to cut the caulk or sealant bead.
- Bucket and rag: to catch and mop up residual water.
- Plumber’s putty (optional): only needed if you are reinstalling a sink later.
| Wrench Type | Typical Cost | Best For |
|---|---|---|
| Adjustable Wrench | $10–$20 | Fits most exposed supply-line and P-trap nuts |
| Basin Wrench | $15–$30 | Reaching nuts behind the bowl in tight cabinets |
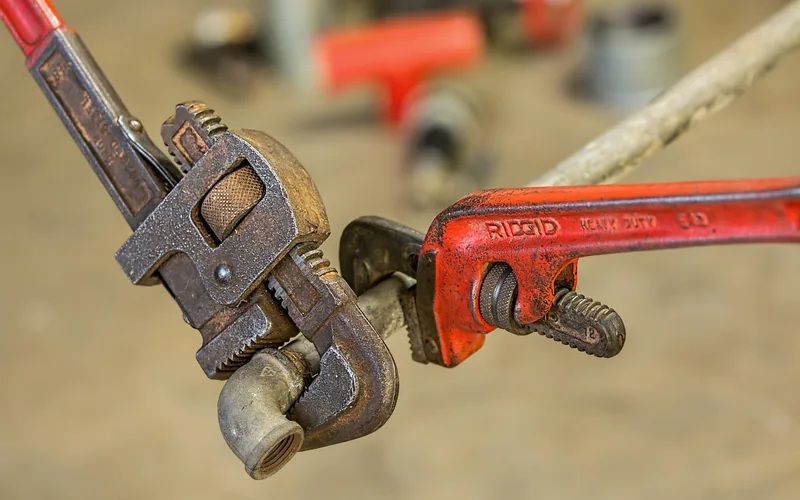
| Pipe Wrench | $20–$40 | Stuck or corroded fittings, heavier-duty jobs |
Table 1: Wrench types for sink removal, by cost and use case.
Best Basin Wrench Pick
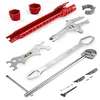
6-Piece Basin & Sink Wrench Set – $29.99
Covers the basin wrench, adjustable jaws, and P-trap nut sizes this guide’s Step 2 and Step 6 both call for, so one set handles the whole removal without a second trip to the store.
- Best for: tight cabinets where a standard wrench cannot reach the mounting nuts
- Why we picked it: six sizes cover both supply-line nuts and P-trap slip nuts in one set
- Main drawback: bulkier to store than a single adjustable wrench
Compare more basin wrench options
 Option 1 Saycker 8-in-1 Basin Wrench – $8.99
|
 Option 2 Fyxentia 2-Piece Basin Wrench – $4.99
|
 Option 3 Saycker 14-in-1 Basin Wrench – $8.99
|
As an Amazon Associate we earn from qualifying purchases.
Step-by-Step Guide to Remove a Sink
These steps work for both kitchen and bathroom sinks. Kitchen sinks add one extra step if a garbage disposal is attached.
Step 1: Turn Off the Water
Find the shut-off valves under the sink and turn them clockwise until they stop. No valves under the sink? Shut off the main water supply to the house instead. Turn the faucet on for a few seconds afterward to confirm no water flows and to drain the remaining pressure from the lines.
Step 2: Disconnect the Water Supply Lines
Place a towel or bucket underneath, then use an adjustable wrench to loosen the nuts connecting the flexible supply hoses to the shut-off valves. A little water will still drip out of the lines even with the valves closed.
Step 3: Remove the P-Trap
Position the bucket under the P-trap, the curved pipe below the drain. Loosen the slip nuts on both ends with an adjustable or basin wrench and pull the trap free. Expect a cup or two of standing water to spill out.
Step 4: Disconnect the Garbage Disposal (Kitchen Sinks Only)
If the sink has a garbage disposal, unplug it or switch off its breaker first. Use a screwdriver or wrench to release the mounting ring that holds the disposal to the sink flange, then set the disposal aside before continuing.
Step 5: Unfasten the Mounting Clips
Reach underneath the counter and locate the clips or bolts holding the sink to the countertop. Loosen each one with a screwdriver. Rusty clips can be stubborn — a few drops of penetrating oil and a slow, steady turn usually frees them without snapping the clip.
Step 6: Cut the Caulk Seal
Most sinks are sealed to the countertop with a bead of caulk or plumber’s putty. Run a utility knife along the seam where the sink meets the counter to break that seal. Keep the blade angled toward the sink, not the counter, to avoid scratching the countertop surface.
Step 7: Lift Out the Sink
Gently wiggle the sink from underneath to break any remaining sealant contact, then lift it free from above. Kitchen sinks are heavier and often need a second person; bathroom sinks are usually light enough for one person to handle alone.
📊 A professional plumber typically charges $100 to $300 to remove and replace a residential sink, depending on region and whether the countertop or plumbing needs extra work — Source: Plumbing Manufacturers International, safeplumbing.org
Benefits and Challenges of DIY Sink Removal
Removing a sink yourself saves the plumber’s fee and gives you a working knowledge of your own supply lines and drain layout, which helps if you ever have a leak. The trade-offs are real: tight cabinet space, occasional rusted hardware, and a heavier lift on double-bowl kitchen sinks. If a clip snaps or a fitting won’t budge after reasonable effort, that is the point to call a professional rather than force it, per general guidance from This Old House.
Common Mistakes to Avoid
Most sink-removal problems trace back to skipping a step, not bad luck. Watch for these:
- Forgetting to shut off the water: confirm both valves are off and test the faucet before disconnecting anything.
- Using the wrong wrench size: an ill-fitting wrench strips the nut and turns a five-minute step into a stuck-bolt repair.
- Rushing the caulk-cutting step: a fast, flat cut gouges the countertop; a slow, angled cut does not.
- Skipping the garbage disposal disconnect: trying to lift a kitchen sink with the disposal still attached strains the drain flange and can crack it.
Cost Breakdown
| Item | Cost | Notes |
|---|---|---|
| Adjustable Wrench | $10–$20 | Reusable for other plumbing jobs |
| Basin Wrench | $15–$30 | Optional, helps in tight cabinets |
| Penetrating Oil | $5–$8 | For rusted or stuck clips |
| Plumber’s Putty | $3–$7 | Only needed for reinstallation |
Table 2: Estimated tool and material costs for a DIY sink removal.
“We ignored a rusty P-trap during one removal and it started leaking a few weeks after reinstalling it — now we inspect every P-trap and slip nut for corrosion before putting a sink back together, not just during the removal itself.”
Tips From Experience
A couple of habits make repeat sink removals go faster and cleaner:
- Tape the wrench jaws: wrap painter’s tape around the jaws to avoid scratching chrome supply lines.
- Photograph the plumbing first: a quick photo of the connections before you start makes reassembly or a new sink install much faster.
- Inspect every pipe you remove: check the P-trap and supply lines for corrosion or wear, and replace anything questionable, per Family Handyman.
If you’re removing the sink to install a new one, our sink plumbing installation guide picks up right where this one ends, and our undermount kitchen sink replacement guide covers the kitchen-specific mounting differences.
Frequently Asked Questions
What Tools Do I Need to Remove a Sink?
You need an adjustable wrench, a screwdriver, a bucket, a towel, and a utility knife. A basin wrench helps in tight cabinets where a standard wrench cannot reach the mounting nuts. All of these are inexpensive and available at any hardware store.
How Long Does It Take to Remove a Sink?
Most beginners finish in 30 to 60 minutes. Experienced plumbers do it in 15 to 20 minutes. Go slow on the first attempt, and get a second person to help lift a heavier kitchen sink.
Can I Remove a Sink Without a Plumber?
Yes. It is a beginner-friendly DIY job as long as you shut off the water first and use the right size wrench for each nut. Call a plumber only if a fitting is seized or a pipe is visibly corroded.
What If the Sink Is Stuck?
Apply penetrating oil to rusty clips or bolts and let it sit for a few minutes before trying again. Gently wiggle the sink from underneath to loosen it. If it still will not budge, check for a hidden clip or a second bead of caulk you missed.
How Do I Avoid Leaks During Sink Removal?
Turn off the water and place a bucket under the P-trap and supply lines before disconnecting anything. Double-check that both shut-off valves are fully closed, and inspect every fitting for corrosion once it is out.
Can I Reuse the Sink After Removal?
Yes, if it is free of cracks or heavy wear. Clean it, check the drain flange and mounting holes for damage, and store it somewhere flat. See our drain stopper removal guide if you also need to clean out the stopper assembly before storing or reinstalling it.
What’s the Hardest Part of Sink Removal?
Tight cabinet space and rusted or corroded clips are the two things that slow most people down. A basin wrench and a few minutes of patience with penetrating oil solve both without forcing anything.
Conclusion
Removing a sink comes down to seven steps in order: shut off the water, disconnect the supply lines, remove the P-trap, detach the garbage disposal if there is one, unfasten the mounting clips, cut the caulk seal, and lift the sink free. Most beginners finish in under an hour with a basic wrench set and a bucket — no plumber required unless a fitting is seized or corroded.
Sponsored / affiliate links. As an Amazon Associate I earn from qualifying purchases. I may earn additional commission from eligible campaigns.