How to Replace an Undermount Kitchen Sink (No Countertop Removal)
An undermount kitchen sink is removed and reinstalled entirely from below the countertop, through mounting clips and a silicone seal, never by lifting it out from above. Skip the water shutoff or mismatch the cutout by more than 1/16 inch and you risk a cracked countertop or a flooded cabinet. This guide covers clip-versus-epoxy removal, cutout measuring, and the typical $700–$900 installed cost.
Undermount Sink Replacement: Quick Step Overview
- Shut off the water and disconnect supply lines: Turn both shutoff valves clockwise, then open the faucet to drain the lines into a bucket.
- Detach the drain and P-trap: Loosen the slip nut on the P-trap and disconnect the drain assembly from below.
- Release the mounting clips and cut the seal: Unscrew the underside clips, then slice through the old silicone bead with a putty knife.
- Lower the old sink out from below: Support the sink’s full weight, ideally with a helper, as it drops free of the cutout.
- Set the new sink with fresh sealant and clips: Run a bead of silicone around the rim, lift the new sink into place, and re-secure the clips.
- Reconnect plumbing and test for leaks: Reattach the drain, P-trap, and supply lines, then run water and check every connection.
Why Replace an Undermount Kitchen Sink?
When I decided to replace my sink, it wasn’t just about looks. My old sink was scratched up from years of use, and there was a small leak that drove me nuts. Undermount sinks, which sit below the countertop, are awesome because they’re sleek and easy to clean, but they can wear out over time. Replacing one can fix leaks, update your kitchen’s style, or even make it more functional with a deeper basin or better material.
Common reasons to replace an undermount sink include damage like cracks or stains, outdated designs, or wanting a different size or material. For me, it was a mix of wanting a modern stainless steel sink and fixing that annoying drip. Whatever your reason, swapping out an undermount sink can breathe new life into your kitchen without breaking the bank.
Tools and Materials You’ll Need
Before I started, I made sure I had everything ready. Trust me, nothing’s worse than being halfway through and realizing you’re missing a tool! Here’s what I used to replace my sink, and you’ll likely need the same:
- New undermount sink: Make sure it fits your countertop cutout.
- Silicone sealant: For securing the sink and preventing leaks.
- Plumber’s putty: For sealing the drain assembly.
- Adjustable wrench: To tighten nuts and fittings.
- Screwdriver: For removing clips or faucet screws.
- Putty knife: To scrape off old sealant.
- Plumber’s tape (Teflon tape): For leak-proof connections.
- Bucket and towels: To catch water and keep things dry.
- Hacksaw or reciprocating saw: If you need to adjust the countertop.
- Sink clips or brackets: To secure the new sink.
- Safety gear: Gloves and safety glasses for protection.
I got most of these at my local hardware store for about $50, not counting the sink itself, which cost around $200 for a good-quality stainless steel model. Having everything on hand made the process so much smoother.
Best Undermount Sink Clips Pick
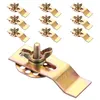
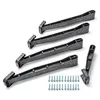
Undermount Sink Clips 10 Pack (Premium Mounting Kit) – $12.99
The exact style of clip this guide’s tools list calls for — heavy-steel brackets that bolt to the underside of the countertop and hold the sink while the silicone bead cures.
- Best for: Replacing worn or bent original clips on a standard-weight undermount sink
- Why we picked it: Anti-corrosion coating matches the moisture exposure clips see under a sink
- Main drawback: Epoxy for the bolt anchors is sold separately
Compare more sink clip options
 Option 1 Enhon Sink Clips Kit 12 Pack – $11.99
|
 Option 2 ARCORA Undermount Sink Clips 25 Pack – $26.99
|
 Option 3 CINCLIPS Complete Repair Kit (No Epoxy) – $25.00
|
As an Amazon Associate we earn from qualifying purchases.
Preparing Your Workspace
The first thing I did was clear the area. I moved dishes, sponges, and anything else around the sink. Then, I turned off the water supply. This is super important—don’t skip it! The shut-off valves are usually under the sink. I turned them clockwise to close them, then opened the faucet to drain any leftover water into a bucket.
Next, I cleared out the cabinet under the sink. I took out cleaning supplies and anything else stored there. I also laid down towels to catch any spills. This prep work took about 15 minutes, but it saved me from a messy disaster later. A clean, organized workspace makes everything easier, especially when you’re crawling under the sink.
Disconnecting the Old Sink
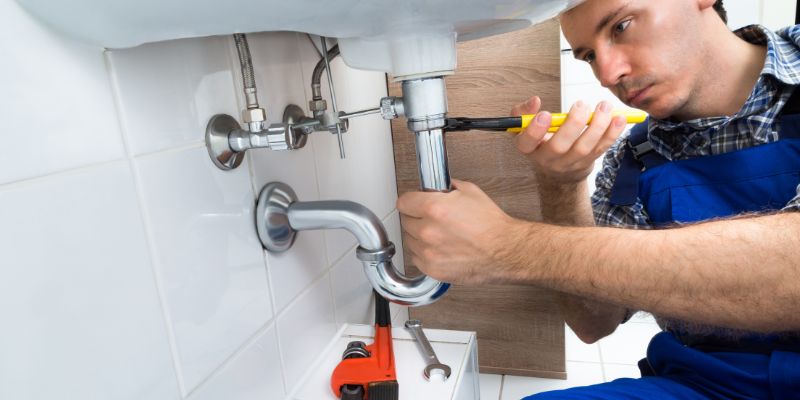
Now comes the part where you say goodbye to the old sink. I started by disconnecting the plumbing. Using my adjustable wrench, I loosened the nuts on the water supply lines and removed them. There was a little water left in the lines, so I kept my bucket handy. Then, I disconnected the drain pipe by loosening the slip nut on the P-trap. If your sink has a garbage disposal, you’ll need to unplug it and remove it, too. Mine didn’t, so I skipped that step.
After the plumbing was disconnected, I moved on to the sink itself. Undermount sinks are held in place with clips or brackets and sealant. I used my screwdriver to remove the clips, which were screwed into the underside of the countertop. Then, I carefully scraped off the old silicone sealant with a putty knife. This part was a bit tedious, but I took my time to avoid damaging the countertop. Once everything was loose, I gently pushed the sink down and out from below. It was heavy, so I had a friend help me lift it out.
Checking the Countertop Cutout
With the old sink out, I checked the countertop cutout to make sure the new sink would fit. This is a big deal because undermount sinks need to match the hole exactly. I measured the cutout’s length and width and compared them to the new sink’s dimensions. My new sink was slightly larger, so I had to use a hacksaw to trim the countertop just a bit. If you’re not comfortable cutting stone or quartz, you might need a professional for this step.
If the cutout is too small or too big, you could run into problems. A cutout that’s too small means the sink won’t fit, and one that’s too big can make it hard to secure the sink properly. In my case, the small adjustment took about 20 minutes, and I made sure to clean up the dust afterward to keep the area tidy.
Do You Need to Remove the Countertop to Replace an Undermount Sink?
No, in most cases you don’t. Undermount sinks are removed and installed entirely from below, so the countertop itself never has to come off. The catch is size: the replacement sink needs to match the old cutout within about 1/16 inch of the standard kitchen sink dimensions it’s replacing, or the clips won’t seat and the seal won’t hold. Professional installers often still pull the countertop on quartz or granite jobs — mainly to guarantee a flush fit, not because it’s structurally required.
Why Won’t My Old Undermount Sink Come Loose?
If the clips are already off and the sink still won’t budge, the countertop installer likely used construction adhesive or epoxy in addition to clips — common on quartz and granite. Score all the way around the rim with a utility knife first, then work a stiff putty knife under the lip in small sections rather than prying at one spot, which is what actually cracks countertops.
Installing the New Undermount Sink
This was the exciting part—putting in the new sink! I started by dry-fitting the sink to make sure it sat flush against the countertop. It looked perfect, so I moved on to applying silicone sealant. I ran a thin bead of silicone along the edge of the sink’s rim, where it would meet the countertop. You don’t need a ton—just enough to create a watertight seal.
Then, I carefully lifted the sink into place from below. This is another step where having a helper is great, especially for heavier sinks. Once it was positioned, I secured it with the clips or brackets that came with the sink. I tightened them just enough to hold the sink snugly against the countertop, being careful not to overtighten and crack anything. After that, I wiped away any excess silicone that squeezed out for a clean finish.
Reconnecting the Plumbing
With the sink in place, it was time to hook up the plumbing again. I started with the drain assembly. I applied plumber’s putty around the drain flange, then inserted it into the sink’s drain hole. From below, I secured it with the provided nut and washer, tightening it with my wrench. This creates a tight seal to prevent leaks.
Next, I reconnected the P-trap to the drain pipe, using plumber’s tape on the threads to ensure a leak-proof connection. If you have a garbage disposal, you’d reattach it now. Then, I reconnected the water supply lines, wrapping the threads with plumber’s tape and tightening them with my wrench. I double-checked everything to make sure it was secure.
Testing the New Sink
Before celebrating, I had to make sure everything worked. I turned the water supply back on and checked for leaks. I ran the faucet for a minute, watching the drain and supply lines closely. No drips—phew! I also filled the sink with water to test the drain. It emptied smoothly, and the silicone seal held tight.
If you spot a leak, don’t panic. I had a small drip at first because I hadn’t tightened the drain nut enough. A quick turn with the wrench fixed it. Testing is crucial because it’s easier to fix issues now than after you’ve put everything away.
“A quarter-turn on the drain nut with the wrench stopped the drip for good — but it only showed up once we filled the basin all the way and let it sit, not just running the tap for a few seconds.”
Cleaning Up and Adding Finishing Touches
Once I was sure the sink was leak-free, I cleaned up. I wiped down the sink and countertop to remove any sealant or putty residue. Then, I put everything back in the cabinet under the sink. I also checked the faucet to make sure it was secure, as sometimes removing the old sink can loosen it.
For a final touch, I polished the new stainless steel sink with a microfiber cloth to make it shine. It looked amazing against my granite countertop, and I couldn’t stop admiring how fresh the kitchen felt. This step took about 10 minutes but made a big difference in the final look.
Tips for Success and Common Mistakes to Avoid
Looking back, a few things helped me nail this project. First, take your time measuring the cutout. A wrong size can ruin the whole job. Second, don’t skimp on sealantsignals. Cheap ones can fail, and you’ll be back at square one. I used a good-quality silicone sealant, and it’s held up perfectly.
One mistake to avoid is overtightening the clips or nuts. I almost did this and could’ve damaged my countertop. Go slow and check your work as you go. Also, don’t rush the cleanup—leftover sealant can be a pain to remove later. And always double-check your plumbing connections to avoid leaks.
Here’s a quick table summarizing the key steps and tools:
| Step | Tools Needed | Tips |
|---|---|---|
| Disconnect plumbing | Adjustable wrench, bucket | Keep towels handy for spills |
| Install a new sink | Screwdriver, putty knife | Have a helper for heavy sinks |
| Check cutout | Measuring tape, hacksaw | Measure twice to avoid mistakes |
| Install new sink | Silicone sealant, clips | Use just enough sealant for a tight seal |
| Reconnect plumbing | Plumber’s tape, wrench | Check for leaks after reconnecting |
| Test the sink | Bucket, towels | Run water to check for leaks |
When to Call a Professional
I did this project myself, but I know it’s not for everyone. If you’re not comfortable with plumbing or cutting countertops, a professional can help. I called a plumber once for a tricky drain issue, and it cost about $150 for a quick fix. It’s worth it if you’re unsure about handling heavy sinks, complex plumbing, or delicate materials like quartz. A pro can also ensure the job meets local codes, which is important if you plan to sell your home later.
Maintaining Your New Sink
To keep your new sink in top shape, I learned a few maintenance tricks. Clean it regularly with mild soap and water to prevent stains. For stainless steel, avoid abrasive scrubbers that can scratch the surface. I use a soft sponge and a vinegar solution for tough water spots. Check the drain and sealant every few months for signs of wear or leaks. If you have a garbage disposal, run it with cold water to keep it working smoothly.
Why This Project Is Worth It
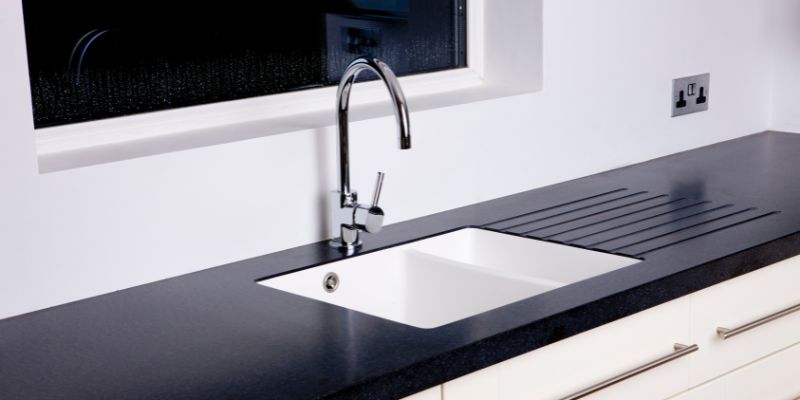
Replacing my undermount sink was one of the best home projects I’ve done. It fixed the leaks, made my kitchen look modern, and even increased its functionality with a deeper basin. It took me about 4 hours total, and the cost was under $300, including the sink. Compare that to paying a contractor $1,000 or more, and it’s a no-brainer for DIY fans. Plus, the satisfaction of doing it yourself is hard to beat!
📊 Undermount and farmhouse sink installations run 20–40% more than a drop-in swap — professional replacement typically totals $700–$900, reaching $1,400+ on complex quartz or granite jobs. — Source: HomeGuide Sink Installation Cost data, 2026
FAQs
How long does it take to replace an undermount kitchen sink?
It took me about 4 hours from start to finish. If you’re new to DIY, it might take 5-6 hours. Having a helper can speed things up, especially for lifting the sink.
Can I replace an undermount sink without cutting the countertop?
Yes, if the new sink matches the existing cutout perfectly. I had to trim mine slightly, but if the measurements are the same, you can skip that step.
What’s the best material for an undermount kitchen sink?
Stainless steel is durable and affordable, which is why I chose it. Granite composite is great for a modern look, and cast iron is super sturdy but heavier. Pick one that fits your budget and style.
How do I know if my new sink will fit?
Measure the countertop cutout and compare it to the new sink’s dimensions. I did this twice to be sure. If it’s off by a little, you might need to trim or get a pro to adjust it.
What if I find a leak after installing the new sink?
Check the drain and water supply connections. I had a small leak because the drain nut wasn’t tight enough. Tighten any loose fittings, and make sure you used enough plumber’s tape and sealant.
How much does it cost to replace an undermount kitchen sink?
Professional replacement typically runs $700–$900, and undermount or farmhouse styles cost 20–40% more than a drop-in sink. Doing it yourself cuts most of that labor cost — expect to spend roughly $250–$400 total on the sink, clips, and sealant.
Why won’t my old undermount sink come loose?
If the mounting clips are already off and the sink still won’t drop, it’s likely also glued with construction adhesive or epoxy — common on quartz and granite counters. Score the full seal line with a utility knife and work a putty knife under the rim gradually instead of prying at one point, which is what cracks countertops.
Conclusion: Transform Your Kitchen with Confidence
Replacing an undermount kitchen sink might sound intimidating, but I’m here to tell you it’s doable. From gathering tools to testing the new sink, every step is manageable with a little planning and patience. I felt like a pro when I finished mine, and the sleek new look made my kitchen feel brand new. Whether you’re fixing a leak, upgrading your style, or just ready for a change, this project can make a big impact without a huge cost.
So, grab your tools, follow these steps, and enjoy the process. You’ll be amazed at how rewarding it is to see your new sink shining in your kitchen. If you hit any snags, don’t worry—a plumber is just a call away. Here’s to a better kitchen and the pride of a job well done!
Sponsored / affiliate links. As an Amazon Associate I earn from qualifying purchases. I may earn additional commission from eligible campaigns.