What Grit Sanding Is Best Before Using Finishing Oil?
For bare wood before penetrating oil, stop at 180 grit on hardwoods and 150 to 180 on softwoods. Use the coarsest grit that leaves the surface even, then let the product label decide if it sets a different limit. Sand finer than needed and the oil can sit on top instead of soaking in. Sand too coarse and the surface can look blotchy or feel rough after cure. This guide shows how to choose the final grit by wood species, oil type, and the finish-absorption result you want.
What you’ll need


- Sandpaper in 150, 180, and 220 grit
- Sanding block or random orbit sander
- Vacuum, brush, or tack cloth if compatible with your finish
- Bare wood sample or project piece
- Clean rag for grain raising
- Finishing oil label or product sheet
What grit should you stop at before oil?
Stop at the coarsest grit that leaves the surface even and open enough for absorption. For penetrating products, that usually means 150 to 180 grit on bare wood, with 180 grit the safer stop on most hardwoods. If the wood starts to feel slick or glassy before that, it is already burnishing.
Penetrating finishes need pores that still open to the surface. That includes tung oil, Danish oil, hardwax oil, and some oil-based finishes. Once sanding goes past the point where those pores stay open, the finish has less room to move in and more chance to sit unevenly on the surface.
Open-pored woods
Open-pored species such as oak and ash usually tolerate about 150 to 180 grit well for penetrating oil. Their larger pores leave more paths for absorption, so you can stop earlier without making the surface feel coarse. If the oil label gives a lower ceiling, follow that.
Medium-pored woods
Medium-pored woods often land at around 180 grit. That stop gives a smoother hand feel while still leaving enough open structure for oil to soak in evenly. If the project is a tabletop or panel that you will wipe frequently, 180 is often the best balance.
Dense woods and blotch-prone woods
Dense woods such as maple and birch need more care. They can look even at 180 grit, but sanding much finer can cut absorption and make the color pull unevenly. On those woods, a lighter final pass at 180 is usually safer than pushing to 220.
Should you sand to 150 or 180 before applying oil finish?
Choose 150 when the wood is open-pored and the oil needs a little more soak-in. Choose 180 when the wood is denser, the surface needs a cleaner hand feel, or the piece will show uneven absorption easily. For most DIY projects, 180 is the safer default because it limits roughness without closing the pores too much.
Choosing 150 grit
Use 150 on open-pored woods when the final look depends on absorption rather than a polished surface. It is also a reasonable stop for some softwoods, where finer sanding can reduce initial wetting of the fibers.
Choosing 180 grit
Use 180 when you want a more controlled result on hardwoods. It is the better choice for maple, cherry, and birch, where overly fine sanding can increase uneven absorption. A common first-timer mistake is chasing a silky feel before oiling; with penetrating finishes, that often works against even color.
When 220 grit is acceptable
220 grit is usually too fine for bare wood before penetrating oil, but it can be acceptable when the product behaves more like a wiping varnish or when the manufacturer says to stop there. For film finishes, 180 to 220 grit is acceptable, but that guidance does not transfer cleanly to a true penetrating oil.
How do you prep the wood before finishing oil?
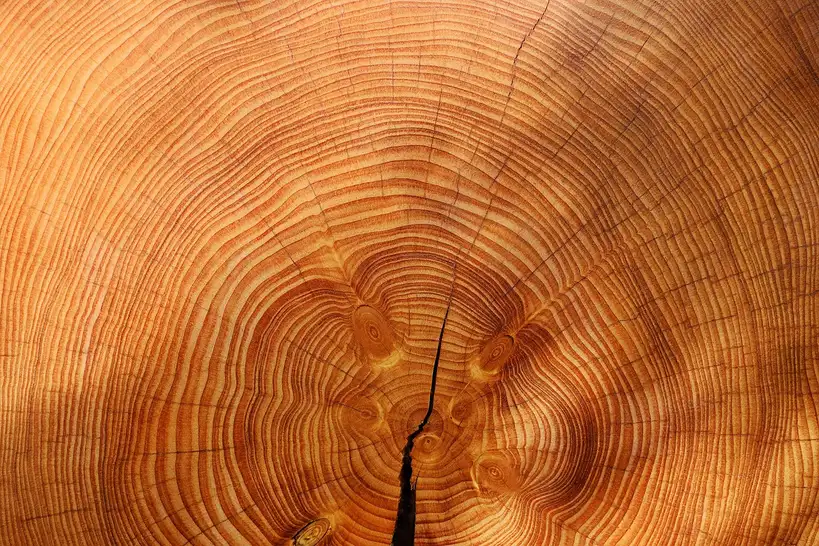
Prep the face grain first, then treat end grain separately, then raise the grain if the product or project needs it. The goal is even absorption, not the finest possible scratch pattern. Face grain and end grain take oil differently, so they should not be sanded as if they were the same surface.
- Sand the face grain to your target grit.
- Inspect for a uniform scratch pattern and no shiny patches.
- Sand end grain one step finer only if it still absorbs too heavily.
- Wipe off dust before any wetting or oiling step.
- Raise the grain with a barely damp rag if the project will show fuzz after wetting.
- Let the wood dry completely, then knock the raised fibers down lightly.
Face grain first
Face grain is the main prep target on panels, tabletops, and boards. Sand it evenly, but do not polish it past the point where the surface starts to look shiny from burnishing. Burnished wood can reduce how evenly stain or oil soaks in, which is why a surface can look smooth and still take finish badly.
Treat end grain separately
End grain absorbs differently because the fibers are exposed like straws. It usually drinks more finish than face grain, so it can darken or dull faster. On tabletops, edges, and cut ends, pay attention to this difference and keep the end grain from racing ahead of the face grain in absorbency.
Raise the grain, then knock it down
Use a barely damp rag to raise the grain before finishing when a smoother post-oil feel matters. Let the wood dry completely, then make a light knockdown pass with fine paper. This step matters most on woods that fuzz after wetting, or when a later waterborne step is part of the schedule.
Finishing oil grit decision table
Use the table as a starting point, then let the actual absorption on your project decide whether to stop or back off one step. The right final grit is the one that leaves an even surface without sealing the pores shut. If the label gives a lower ceiling, that label wins.
| Wood group | Typical examples | Final grit for penetrating oil | Why this stop works |
|---|---|---|---|
| Open-pored | Oak, ash, walnut | 150 to 180 | Leaves enough pore openness for even soak-in |
| Medium-pored | Cherry, mahogany, teak | 180 | Balances smoothness with absorption control |
| Dense | Maple, birch, beech | 180, sometimes 150 on open grain areas | Reduces burnishing and uneven oil uptake |
| Dense and blotch-prone | Hard maple, cherry, birch panels | 180 or a lighter final pass | Helps avoid patchy soak-in and color shifts |
Over-sanded wood recovery
If the surface was sanded too fine, the fix is usually to reopen it with a slightly coarser pass. Start with 180 grit on a test area, then recheck absorption. If the oil still beads or wipes strangely, step back to 150 on the affected face only, then clean the dust and retest.
Say your maple tabletop was taken to 220 grit and the first coat of oil sits in pale patches. The recovery is not more oil. It is a light resand to 180 on the face grain, with extra attention to the edges and end grain, then a fresh wipe after dust removal.
Common mistakes
Most problems come from sanding for smoothness instead of absorption. Penetrating finishes need wood pores open enough to take the product evenly, so the wrong grit can create the exact blotchiness you were trying to avoid. Fix the prep, not the sheen, when the first coat looks uneven.
- Burnishing the surface. Stop before the wood turns glassy. Burnished wood can reduce how evenly stain or oil soaks in.
- Skipping end grain. End grain pulls finish differently and can look darker or drier than the face.
- Using between-coat grit on bare wood. 320–400 grit is for scuff sanding after the first coat cures, not for raw wood.
- Leaving dust in pores. Vacuum, brush, or wipe before oil so the finish can reach the wood instead of the debris.
Do not confuse bare-wood prep with between-coat scuff sanding. Between coats, 320–400 grit or a fine synthetic abrasive pad is used for adhesion after the first coat cures when the finish needs it. On raw wood, that same grit can overclose the surface and reduce absorption before the finish ever goes on.
Frequently asked questions
What grit should I sand to before using finishing oil?
For most projects, stop at 180 grit on hardwoods and 150 to 180 on softwoods. Use the coarsest grit that still gives you an even scratch pattern. If the product label gives a tighter limit, follow that instead of pushing finer for a smoother feel.
Is 220 grit too fine before oiling wood?
Usually, yes. On bare wood, 220 grit can close the pores enough to slow absorption and make the first coat sit unevenly. It is more appropriate for some film finishes, where 180 to 220 grit is a normal prep range, not for most penetrating oils.
Does the wood species change the sanding grit before oil?
Yes. Open-pored woods can stop earlier, while dense woods usually do better with a careful 180-grit finish. End grain also needs separate attention because it absorbs more strongly than face grain. Species and cut direction matter more than a fixed grit number.
Do I sand differently for tung oil, danish oil, or hardwax oil?
Yes, but only in the final stop, not the whole process. Tung oil and Danish oil need open pores. Hardwax oil varies by brand, so follow the label for the final sanding stop; a wiping-varnish-like blend may tolerate 220 on the label, but a pure penetrating oil usually should not.
What happens if I sand too fine before finishing oil?
The wood can burnish, the pores can close, and the finish may absorb less stain or oil. That often shows up as patchy color, weak wetting, or a surface that feels dry even after application. A light resand to 180 or 150 usually fixes it.
Should I raise the grain before applying oil finish?
Raise the grain with a barely damp rag if the project will fuzz after wetting or if you want a smoother final feel after the first coat. Let the wood dry completely, then make a light knockdown pass. That keeps the first oil coat from roughing up the surface later.
Do I need to sand between coats of finishing oil?
Sometimes, but only lightly and only if the cured coat needs it. Use 320–400 grit or a fine synthetic abrasive pad for scuff sanding when you need to knock down dust nibs or improve adhesion, then remove the dust. That step is for the cured coat, not for changing the bare-wood prep grit.
How do I prep end grain before applying oil?
Sand end grain with the face grain, then check whether it is pulling too much finish. If it is, stop one step finer only on that end grain area, not the whole piece. On tabletops and cut edges, this keeps the ends from looking darker or drier than the field.
Sponsored / affiliate links. As an Amazon Associate I earn from qualifying purchases. I may earn additional commission from eligible campaigns.