Clear Wood Finishing Oil: How to Keep the Natural Color Look
Choose a water-white, low-ambering clear wood finishing oil labeled “clear” or “natural,” and test it on a scrap piece from the same wood before you coat the full project; thin coats keep the wood closest to its original tone. Skip that step, and many oils deepen color, add a yellow cast, or leave blotchy sheen that is hard to fix later. This guide explains how to pick the right finish and apply it so the wood stays light, even, and protected. Note that pure tung oil is different from many products sold as “tung oil finish,” which are blended products rather than straight oil alone.
What you need before you start


Oil finish options to compare
- Pure tung oil
- Boiled linseed oil
- Raw linseed oil
- Danish oil
- Hard wax oil
Tools and prep materials
- Mineral spirits for a first-coat test mix, if the product directions allow it
- Clean lint-free rags
- Sanding pads or sandpaper in a moderate grit range
- Tack cloth or vacuum with brush attachment
- A scrap board or hidden spot for a color test
- Disposable gloves and a metal container for oily rags
Oil finishes soak into wood rather than building a thick surface film. That usually keeps the grain visible, but it also means the finish can deepen color fast if you apply too much or leave wet oil sitting on top. Manufacturer technical data sheets for penetrating oils and hardwax products consistently stress thin application, thorough wipe-off, and recoat windows tied to temperature, humidity, and coat thickness; wood-finishing guidance from extension services and finishing manufacturers also warns that pigment-free oils still shift tone because they wet the fibers and change light reflection.
How to choose the least color-shifting oil
There is no single “best” oil for every project. The right choice depends on the species, the product formula, and how much protection you need. For example, many products sold as “Danish oil” or “tung oil finish” are blended systems that include oils, resins, and solvents rather than straight oil alone, so their color change and build can be very different from pure tung oil or raw linseed oil. For the lightest look, start with a low-ambering, clear-labeled product and verify it on a scrap from the same wood; that is more reliable than trusting the marketing name.
Compare the common oils
- Pure tung oil: often a relatively low-color-shift option among common oils, with a natural look and light sheen, but still some warmth. Comparative finishing guides generally place it lower on the ambering scale than boiled linseed oil, though exact results vary by brand and wood species.
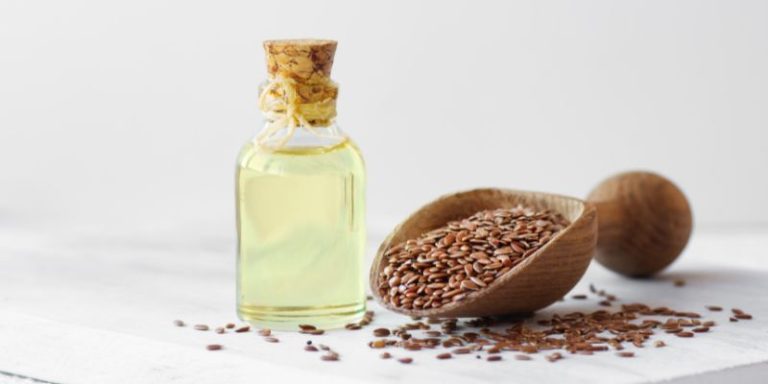
- Raw linseed oil: very natural in appearance, but it dries slowly and is more labor intensive to maintain.
- Boiled linseed oil: dries faster because it uses metallic driers, but it can darken wood more. Product data sheets for BLO often note added driers and longer protection is not the same as faster cure; the metallic driers improve oxidation speed, not color stability.
- Danish oil: a blend of natural oils and resins, sometimes with mineral spirits; it adds a wet look and more surface protection. Because formulas vary, one brand can amber much more than another.
- Hard wax oil: an oil-plus-wax hybrid that goes on in a thin film, is buffed quickly, and allows repairable spot fixes. It tends to build a more uniform low-sheen surface, but it still changes color and can look slightly richer than bare wood.
If your goal is to keep wood pale, pick the least ambering product that still fits the use. For a tabletop that needs easy maintenance, hard wax oil often gives a more even, understated surface than a wetter-looking oil blend, but it still changes color more than bare wood and can warm the tone on species that already read golden or pink.
How do you prep wood for a pale finish?
Use enough sanding to even the surface, but do not sand so fine that the wood closes up and resists penetration. On pine and other softwoods, too much fine sanding can make color uneven because the finish sits differently in latewood and earlywood.
Set the sanding level by species
- Pine and similar softwoods: stop at a moderate grit and test first; these woods are prone to blotching and grain raising.
- Oak: keep the sanding even so the open grain does not pull in too much finish in one pass.
- Hardwoods with an already finished-looking surface: use the least aggressive prep that still removes contamination and opens the surface enough for adhesion.
Sand a test area, wipe it clean, and apply the chosen oil before committing to the full piece. That single test spot shows whether the wood is going to jump darker, blotch, or stay close to the original tone.
Watch for grain raising and blotching
Softwoods can raise grain when they first meet liquid finish, and pine is the usual trouble spot. If the test area feels fuzzy after the first coat dries, level it lightly before the next coat. If the color turns patchy, change the prep or the oil before moving on. Extension guidance on blotch-prone woods generally recommends keeping sanding consistent and avoiding ultra-fine grits that can reduce even absorption.
How do you apply oil without darkening wood?
Use the first coat only as the product directions allow, and follow the manufacturer’s instructions for whether a thinning step is appropriate. Some oil finishes are intended to go on straight, while others allow a reduced first coat for better penetration and more even coverage on raw wood. That helps the oil move into the surface instead of pooling on top, which is one of the fastest ways to make wood look darker than intended. Product directions for penetrating oils and hardwax finishes commonly specify a thin spread rate and a wipe-back step to prevent glossy buildup and uneven cure.
Apply in a controlled sequence
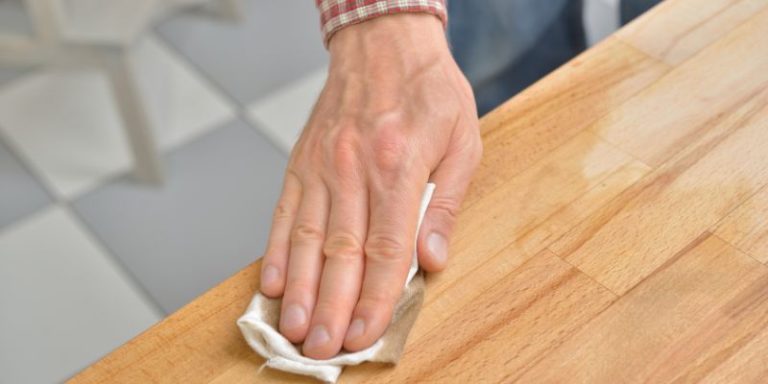
- Wipe or brush on a thin first coat.
- Watch the color shift on the test area.
- Wipe away extra oil before it starts to set.
- Let the surface dry fully before deciding on the next coat.
- Repeat only if the protection you need is still missing.
Do not chase extra sheen with extra coats. More coats usually mean more warmth and a wetter look, especially on wood that already reads as “finished.”
Suppose a pine shelf panel measures about 18 by 36 inches and the first coat makes one end look noticeably darker than the other after a few minutes. That usually means the wipe-off timing was uneven, not that the wood needs a heavier second coat. Rework the application speed before adding more product.
A common first-timer mistake is to keep rubbing because the finish still looks wet. That can push oil around instead of removing it, which leaves streaks and makes the board look patchy once it dries.
How many coats and how much wipe-off?
For a natural look, use the fewest coats that still leave a continuous finish. One coat is often enough for a very pale appearance on a display piece; two thin coats are a more practical ceiling for most DIY work when color control matters most.
Yes, you need to wipe away extra oil to keep the wood light. Leaving a heavy surface film is one of the main reasons wood looks darker and glossier than expected. Wipe until the surface looks evenly damp, not glossy-wet.
Top up in small, measured passes
Add a small amount on the first pass, then recheck after a few minutes. If the surface still drinks the oil quickly, add the same amount again only to the dry-looking areas. Stop as soon as the color evens out.
Dry time and cure time
Some oil finishes become completely dry within a few days and fully cured in 7–30 days. Temperature and humidity change both numbers. If the wood still looks wet, feels tacky, or leaves a thumbprint, it is not ready for another coat or normal use. Manufacturer technical data sheets commonly list recoat windows based on touch dryness and room conditions rather than a single fixed clock time, because oil oxidation slows in cool or damp spaces.
Common mistakes that make wood look darker
- Leaving excess oil on the surface instead of wiping it off evenly
- Skipping a test spot on pine or oak
- Using too many coats on wood that already looks finished
- Assuming tung oil, linseed oil, and Danish oil behave the same on every species
- Sanding too fine on softwoods and reducing penetration unevenly
Boiled linseed oil and many Danish oil blends usually deepen color more than a very light-look finish. Raw linseed oil can keep a traditional appearance, but it asks for more maintenance and slower drying. Pure tung oil often lands in the middle: still warm, but not automatically the least color-shifting choice in every case. On maple and cherry, for example, the same oil can read more amber or red than it does on oak or pine, so the species matters as much as the product label.
Indoor vs outdoor use
Indoor pieces can use light, low-odor penetrating oils or hardwax products when color control and easy touch-up matter most. Outdoor pieces need a different standard: UV exposure, rain, and mildew pressure can break down many interior oils quickly, and some finishes that look great inside will chalk, wash out, or gray outdoors. Exterior oil products often warm the color more because they rely on more robust resins, added solvents, or UV-package ingredients that increase ambering compared with a furniture-grade interior oil. For decks, benches, and exposed trim, follow the manufacturer’s exterior-use rating and don’t assume “natural oil” means weatherproof.
Color-control checklist
This table is a quick decision guide for staying close to the wood’s original light tone. Use it as a starting point, then let the test spot decide the final choice.

| Wood species | Starting sand grit | Test-spot result | Oil type | First-coat wipe-off timing | Number of coats | Expected color-change risk | Decision | Ambering risk | Blotch risk | Sheen change | Indoor/outdoor suitability | Recommended max coats |
|---|---|---|---|---|---|---|---|---|---|---|---|---|
| Pine | 180 | Check for blotching and grain raising before the full coat | Pure tung oil or a very light hard wax oil | Wipe within 5 minutes, then recheck at 10 minutes | 1 to 2 | Medium to high | Use the least ambering option and keep wipe-off strict | Medium | High | Low to medium | Best indoors; exterior only with a rated exterior oil system | 2 |
| Oak | 180 to 220 | Look for even absorption in the open grain | Pure tung oil for less shift, Danish oil for more protection | Wipe within 10 minutes, then check the grain again | 1 to 2 | Medium | Choose tung oil if color matters most; choose Danish oil if protection matters more | Medium | Low to medium | Low to medium | Mostly indoors; outdoors only with exterior-rated oil and maintenance | 2 |
| Finished-looking hardwoods | 220 | Confirm the surface still accepts oil without dark patches | Hard wax oil or pure tung oil | Wipe within 3 to 5 minutes | 1 | Low to medium | Use a thin-build option to avoid a wet look | Low to medium | Low | Low | Best indoors; exterior use is limited and product-specific | 1 |
| Maple | 180 to 220 | Check for uniform color because dense grain can show lap marks | Low-amber clear oil or hard wax oil | Wipe within 3 to 5 minutes | 1 | Low to medium | Prioritize clarity and test for subtle yellowing before full coverage | Low | Low | Low | Indoor preferred; outdoors usually not ideal for fine color control | 1 |
| Cherry | 180 to 220 | Expect natural darkening and verify the oil does not accelerate it too much | Clear, low-amber oil | Wipe within 5 minutes | 1 to 2 | High | Use minimal coats because cherry already warms over time | High | Low | Medium | Indoor preferred; exterior use usually changes color quickly | 2 |
| Walnut | 180 to 220 | Confirm the oil does not make the brown go muddy or overly glossy | Pure tung oil or low-build hard wax oil | Wipe within 5 to 10 minutes | 1 to 2 | Medium | Keep sheen low and avoid heavy buildup | Medium | Low | Low to medium | Mostly indoors; exterior use depends on a true exterior formulation | 2 |
Frequently asked questions
How do you keep wood from getting darker with oil finish?
Pick the least ambering product, apply a thin first coat, and wipe off all extra oil before it sets. A test spot on the same species is the best predictor of the final tone. On softwoods, sanding and absorption matter as much as the oil itself.
Which wood finishing oil changes color the least?
There is no universal winner for every wood, but a clear, low-ambering tung oil or a low-build hardwax oil is often a good place to start when color control matters most. That said, many “tung oil finish” and “Danish oil” products are blends, so the actual shift depends on the formula, not just the name on the can. Always confirm on a scrap piece first.
Can you keep pine from going blotchy when using oil?
Yes, but pine needs more control than oak. Sand evenly, avoid over-sanding the softest areas, and use a test spot before the full coat. If the first pass looks patchy, a thinner mix or a lighter wipe-off schedule usually helps more than extra coats.
Should you sand more or less if you want a natural color look?
Sanding more is not always better. Too fine a finish can reduce penetration and make some boards look darker or less even after oiling. A moderate sanding step usually gives the best balance between smoothness and color control, especially on pine and other softwoods.
How long should wood oil dry before it stops looking wet?
Many oil finishes dry to the touch within a few days, while full cure can take 7–30 days depending on temperature, humidity, and coat thickness. If the surface still looks glossy-wet after the first day, it usually needs more wipe-off or more dry time.
What finish gives wood protection without a plastic-looking sheen?
Pure tung oil and hard wax oil are common choices when you want protection without a thick, plastic look. Tung oil leans more natural, while hard wax oil adds a thin protective layer and can be spot-repaired. Both need careful application to stay understated.
Do you need to wipe off all excess oil to keep the wood light?
Yes. Any oil left sitting on top tends to deepen color and raise the sheen. Wipe until the surface is uniformly damp and no liquid pools remain. Then let it dry fully before judging whether another coat is worth the added color shift.
Will tung oil, linseed oil, or Danish oil darken wood differently?
Yes. Pure tung oil usually shifts color less than boiled linseed oil, which can deepen tone faster because it contains metallic driers. Danish oil often reads wetter and darker because it is usually a blend of oils, resins, and sometimes mineral spirits. The species changes the result too, so a product that looks subtle on oak may appear richer on maple or cherry.
Can you oil over stain?
Yes, but only if the stain is fully dry and the stain system is compatible with the oil finish you plan to use. Oil over stain can deepen the color, increase the warm cast, or soften contrast, especially if the stain is still curing or if the top oil contains strong solvents. Check the stain manufacturer’s full dry time first, then test the exact oil on a stained scrap or hidden area before coating the whole piece. If the stain is still off-gassing or feels cool/tacky, wait longer.
Sponsored / affiliate links. As an Amazon Associate I earn from qualifying purchases. I may earn additional commission from eligible campaigns.