Which Way Do Door Hinges Go? Expert Guide
Many folks get a little unsure when it comes to putting up a new door or fixing an old one. You might be wondering, Which Way Do Door Hinges Go? Expert Guide is here to help.
It can seem tricky at first, but it’s really not that hard once you know the simple steps. We’ll walk you through it clearly so you can get your door working right, no problem. Let’s figure out where those hinges belong!
Understanding Door Hinge Direction
Figuring out which way door hinges go is a common question, especially for DIYers. It’s not about a super complicated technical skill; it’s more about understanding a simple rule that makes doors open the way we expect them to. Most people want doors to swing outwards from a room, but sometimes they need to swing inwards.
Knowing the hinge’s direction helps you set that up correctly. This guide breaks it down so you can see exactly what to do, making your door project much easier.
The Basic Rule of Hinge Swing
The way a door opens, or “swings,” depends on how its hinges are placed. Think about it: if you want a door to open away from you into a room, the hinge knuckles need to be on the side of the door that’s opposite the direction of the swing. If the hinges are on the right side of the doorframe, the door will swing to the left.
If they’re on the left, it swings to the right.
This rule helps create a smooth and logical movement for any door. It’s a fundamental concept in carpentry and home improvement. Getting it right means your doors will work as intended without any awkward resistance or unexpected movements.
Here’s a simple way to remember it:
- If the hinge pin is on your side, the door opens towards you.
- If the hinge pin is away from you, the door opens away from you.
This visual cue is incredibly helpful when you’re looking at a door and trying to decide which way it should go. It’s like a built-in indicator for the hinge’s intended function.
Visualizing the Hinge Knuckle and Pin
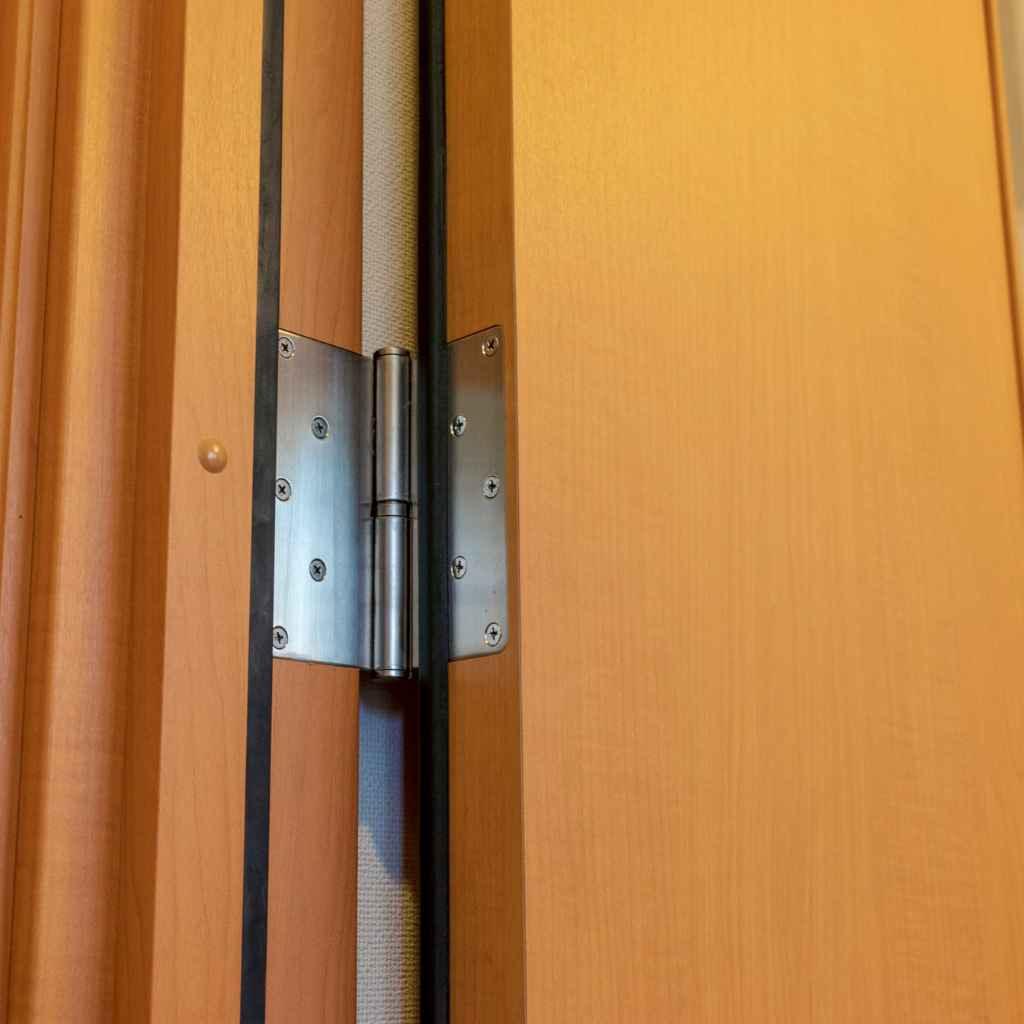
When you look at a door hinge, you’ll see two main parts: the leaves and the pin. The leaves are the flat parts that attach to the door and the frame. The pin is the rod that goes through the knuckles of the leaves, holding them together.
The “knuckles” are the rounded sections of the leaves that interlock.
The direction the door swings is determined by which side the knuckles and pin are on relative to the door’s opening. For a standard swing, the knuckles face the direction you want the door to open. This allows the door to pivot outwards smoothly.
Common Hinge Types and Their Application
There are several common types of door hinges, each designed for specific uses and aesthetics. The most frequent type you’ll encounter in homes is the standard butt hinge. These are simple, strong, and versatile, making them ideal for interior and exterior doors.
Another type is the ball-bearing hinge, which is excellent for heavier doors like entry doors or closet doors. The ball bearings reduce friction, making the door easier to open and close, and prolonging the hinge’s life.
For doors that need to swing both ways, like those in kitchens or hospitals, a double-acting hinge is used. These are a bit more complex and allow for a push or pull motion in either direction.
When installing, it’s crucial to match the hinge type to the door’s weight and expected usage. Using the wrong type can lead to sagging doors, difficulty opening, or premature wear and tear.
Butt Hinges
Butt hinges are the workhorses of the hinge world. They consist of two flat metal plates, called leaves, joined by a barrel (or barrel and pin). One leaf attaches to the door’s edge, and the other attaches to the door frame.
They are the most common type for interior and exterior residential doors.
The way a butt hinge is installed dictates the door’s swing. For a door to swing outward from a room, the knuckles of the hinge are placed on the side that the door opens. For example, if a door opens to the right, the hinges will be on the right edge of the door, with their knuckles facing the right.
These hinges typically come with screws to attach them securely. It’s important to use screws long enough to grip the stud behind the door frame for maximum stability, especially for heavier doors.
Ball-Bearing Hinges
Ball-bearing hinges have small ball bearings located between the knuckles of the hinge leaves. These bearings significantly reduce friction, allowing doors to open and close more smoothly and quietly. They are especially beneficial for heavier doors, such as solid wood entry doors or commercial doors, as they distribute the weight more effectively and reduce wear on the hinge.
The installation process is similar to standard butt hinges, but the benefit of reduced friction is noticeable. They often have a slightly thicker barrel to accommodate the ball bearings. You’ll find them available in various finishes to match your door hardware.
When choosing ball-bearing hinges, consider the weight of your door. Most manufacturers provide guidelines on the weight capacity of their hinges. For very heavy doors, using three or even four ball-bearing hinges might be necessary for proper support.
Double-Acting Hinges
Double-acting hinges are designed to allow a door to swing in both directions. You’ve likely seen these in places like restaurant kitchens or saloon doors. They often have a spring mechanism that returns the door to its closed position after it’s pushed open.
These hinges are more complex than standard hinges. They are mounted in the center of the door’s thickness and connect to both the door and the frame in a way that allows for two-way movement. The spring action is a key feature, ensuring the door doesn’t stay open indefinitely.
When installing double-acting hinges, precise alignment is critical for the spring mechanism to work correctly and for the door to close evenly. They are less common for standard home doors but are essential for specific functional needs.
How to Determine Hinge Direction Before Installation
Before you even pick up a screwdriver, it’s smart to plan how your door should open. Think about the room layout and how people will use the door. For instance, a bedroom door usually opens into the bedroom, not the hallway, so you have more usable wall space inside the room.
Conversely, a closet door might swing into the closet to keep the room clear.
Once you know which way the door needs to swing, you can figure out where the hinges should go. Imagine standing on the side from which you want the door to open. If you want it to swing to your left, the hinge knuckles should be on your left.
If you want it to swing to your right, the knuckles should be on your right.
This pre-planning step saves a lot of potential rework. It ensures the door’s function aligns with the space’s practical needs.
Step-by-Step Hinge Placement Planning
To get the hinge direction right before installing, follow these simple steps.
- Identify the Desired Swing: Decide which way you want the door to open. Will it swing into the room or out of it? Imagine standing on the side where you’ll be opening the door.
- Visualize the Hinge Knuckles: The knuckles are the rounded parts of the hinge that interlock around the pin. If you want the door to swing towards you, the knuckles should be on the side you are standing on. If you want it to swing away from you, the knuckles should be on the opposite side.
- Mark Hinge Locations: Once you know the swing direction, you’ll mark where the hinges will go on both the door and the frame. This involves measuring and marking precise spots.
This planning phase is key to a successful installation. It ensures the door functions exactly as you intended.
Installing Hinges for the Correct Swing
Once you’ve planned your hinge placement, the actual installation is straightforward. It’s all about accuracy. You’ll typically need to cut out shallow recesses, called mortises, in the door and frame so the hinge leaves sit flush.
This makes the door close properly without any gaps.
When you place the hinge leaves in their mortises, ensure they are aligned with the planned swing direction. For a standard interior door, the hinge knuckles will be on the side of the door that swings outwards. So, if the door opens to the right, the hinges will be on the right side of the door edge and the right side of the frame.
Using the provided screws, attach the hinge leaves. Start with one hinge, attach it loosely, then add the door. Check the swing.
Once you are sure of the alignment, secure all hinges tightly. This method ensures a good fit and a smooth opening door.
Mortising for Flush Hinge Installation
Mortising is the process of creating a small, rectangular cut-out, or recess, in the wood of the door and door frame. This is where the hinge leaves will sit. The goal is to make the hinge leaf sit perfectly flush with the surface of the wood.
This flush fit is crucial for several reasons. Firstly, it allows the door to close completely without any obstructions. If the hinges protrude, the door won’t shut tightly, leaving gaps and preventing proper closure.
Secondly, it provides a cleaner, more finished look, as the hinge hardware is integrated into the wood rather than sitting on top of it.
To mortise, you’ll use a sharp chisel and a hammer. Carefully mark the outline of the hinge leaf onto the wood. Then, using the chisel, gradually remove thin layers of wood from within the marked area until the depth is just right for the hinge leaf to sit flush.
This takes patience and a steady hand.
Attaching Hinges to the Door and Frame
After creating the mortises, you’re ready to attach the hinges. Start by holding one leaf of the hinge against the mortise on the edge of the door. Use screws to secure it.
It’s often helpful to start with only one or two screws to allow for slight adjustments.
Next, position the door within the frame, aligning the other hinge leaves with their corresponding mortises in the frame. You might need a helper for this step, especially with heavier doors. Once the hinge leaves are in place, insert and partially tighten the screws for the frame.
With all hinges loosely attached, test the door’s swing. Open and close it a few times to check for smooth operation and alignment. Make any necessary minor adjustments by slightly loosening or tightening screws.
Once satisfied, fully tighten all screws to firmly secure the hinges and the door.
Troubleshooting Common Hinge Problems
Even with careful installation, you might run into a few common hinge issues. A door might squeak, not close properly, or feel loose. These problems usually have simple fixes.
Squeaking is often due to a lack of lubrication. A bit of WD-40 or graphite powder applied to the hinge pin can usually solve this. If the door doesn’t close right, it might be because the hinges are loose, the mortises are too deep, or the door itself has warped slightly.
Loose hinges are fixed by tightening the screws. If the screws don’t seem to hold, the wood might be stripped. In that case, you can use longer screws or wood filler to create a more secure anchor.
Understanding these common problems and their solutions will help you keep your doors working smoothly.
Fixing Squeaky Door Hinges
A squeaky door hinge is annoying and can often be fixed with a simple lubricant. The noise comes from metal-on-metal friction as the hinge moves. The easiest way to tackle this is to apply a lubricant directly to the hinge pin.
You can use a spray lubricant like WD-40 or a silicone-based spray. Aim the nozzle at the top of the hinge pin and spray a small amount. Then, open and close the door several times to work the lubricant down into the hinge mechanism.
Wipe away any excess lubricant with a clean cloth.
Another effective lubricant is graphite powder. You can puff it into the top of the hinge pin. For very stubborn squeaks, you might need to gently tap the hinge pin upwards with a hammer and a nail or screwdriver, lubricate the exposed pin, and then tap it back down.
This ensures the lubricant reaches all parts of the hinge.
Adjusting Hinges for a Sticking Door
If your door is sticking or rubbing against the frame, it’s usually an alignment issue with the hinges. The most common cause is that the hinges are not seated properly or have loosened over time.
First, check if the hinge screws are tight. If they are, and the door still sticks, you might need to adjust the mortise depth. If a hinge leaf is sticking out too much, the door will bind.
You can carefully chisel out a tiny bit more wood from the mortise to make the hinge sit more flush.
Alternatively, if the mortise is too deep, you can place a small shim (a thin piece of cardboard or wood veneer) behind the hinge leaf to bring it out slightly. This subtle adjustment can make a big difference in how smoothly the door swings and closes.
Another trick for minor sticking issues is to slightly bend the hinge. For a door that sticks on the latch side, you might gently pull the hinge knuckles outward on the hinge side. For sticking on the hinge side, you might push them inwards.
This is a more advanced technique and should be done with caution.
Dealing with Stripped Screw Holes
When screws no longer grip the wood in a hinge hole, it means the hole has become “stripped.” This often happens if screws are over-tightened or if the wood is soft.
A simple fix is to use longer or slightly thicker screws. These can sometimes reach deeper into the wood or bite into a new part of the hole. If that doesn’t work, you can fill the stripped hole.
A common method is to use wooden toothpicks or golf tees. Insert them into the hole with a little wood glue, break them off flush with the surface, and let the glue dry. Then, you can re-drill a pilot hole and drive the hinge screw into the repaired hole.
Wood filler or even a dowel rod can also be used for more robust repairs.
For very common door hinges, a quick statistic shows that roughly 15-20% of home repair calls related to doors involve issues with loose or stripped hinge screws, highlighting how common this problem is.
Which Way Do Door Hinges Go? Expert Guide Recap
We’ve covered the basics of door hinge direction and how to ensure your doors swing the way you want them to. Understanding the hinge knuckles and their placement is key. Whether you’re installing new doors or fixing old ones, this knowledge makes the job much clearer.
Remember to plan your swing direction before you start. Then, use the right tools for mortising and careful screw placement. Common issues like squeaks or sticking doors have simple fixes, ensuring your doors operate smoothly.
The Importance of Hinge Alignment
Getting door hinges aligned correctly is more than just making a door look good; it’s about functionality and longevity. When hinges are perfectly aligned, the door hangs straight, closes smoothly, and operates without excessive force. This proper alignment distributes the weight of the door evenly across the hinges and the door frame, preventing undue stress on the hardware and the surrounding wood.
Misaligned hinges can lead to a cascade of problems. The door might drag on the floor, rub against the frame, or not latch properly. Over time, continuous misalignment can cause the door to sag, the frame to weaken, or even the hinges themselves to bend or break.
Therefore, taking the time to ensure accurate hinge placement and alignment is a vital step in any door installation or repair project.
Achieving Perfect Alignment with Mortises
Mortises, the recessed areas for hinge leaves, are the foundation of good alignment. If these mortises are cut to the exact depth and dimensions of the hinge leaves, the hinges will sit flush. This flush fit is critical.
A hinge leaf that protrudes even a fraction of an inch can prevent the door from closing properly.
When cutting mortises, it’s best to err on the side of caution. You can always remove more wood, but you can’t easily add it back. Use a sharp chisel and a soft mallet to gently tap out the wood.
Check the fit of the hinge leaf frequently. The goal is for the hinge leaf to be perfectly level with the surrounding wood surface.
Accuracy in mortising ensures that the door and frame meet cleanly when the door is closed. This not only looks better but also improves insulation and security, as there are no unwanted gaps.
Tips for Precise Mortise Cutting
Cutting precise mortises requires patience and the right tools. Start by accurately marking the outline of the hinge leaf on the wood. Use a sharp utility knife to score the wood along your pencil lines.
This helps prevent the wood from splintering outwards when you chisel.
When chiseling, don’t try to remove too much wood at once. Make several shallow passes, gradually deepening the mortise. Hold the chisel at a slight angle, bevel-side down, to help shave off wood cleanly.
Tap the chisel with a mallet or the handle of a screwdriver.
Constantly check the depth against the thickness of the hinge leaf. You want the leaf to sit flush, not sink too deep or stick out. Using a mortise gauge or a depth-setting tool can help maintain consistent depth across all mortises for a set of hinges.
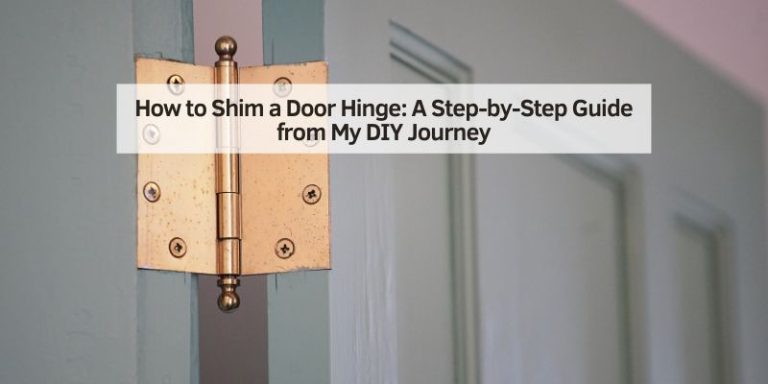
The Role of Shims in Hinge Adjustment
Shims are thin, tapered pieces of wood or plastic used to make fine adjustments to the positioning of hinges. They are incredibly useful when a door doesn’t quite hang right, even after the initial installation.
For example, if a door is sticking on the latch side, it might mean the hinges on that side are not quite flush, or the frame might be slightly out of plumb. Placing a thin shim behind the hinge leaf that’s closest to the sticking point can push the door away from the frame just enough to resolve the issue.
Conversely, if the door is sticking on the hinge side, it might mean the hinge mortise is too deep. In this case, you would remove the hinge, place a shim in the mortise, and then reattach the hinge. These small adjustments, enabled by shims, are crucial for achieving a perfectly swinging door.
When and How to Use Shims
You’ll typically reach for shims after you’ve installed the door and noticed an issue with its swing or closure. The first thing to do is identify where the door is sticking or if it hangs unevenly.
If the door rubs against the top of the frame or the strike plate area, you might need to add a shim behind the top hinge leaf on the door frame side. This will push the top of the door slightly outward.
If the door rubs against the hinge side of the frame, it might indicate that the mortise for that hinge leaf is too deep. You would then remove the hinge leaf from the frame, place a thin shim (often made from a piece of cardboard or veneer) into the mortise, and then re-screw the hinge leaf back into place. This effectively makes the hinge sit slightly proud, pushing the door away from the frame.
The key is to use very thin shims initially and add more layers if needed. It’s a process of trial and error to find the perfect adjustment.
Reinforcing Stripped Screw Holes
Stripped screw holes are a common headache in woodworking and home repair. When the wood fibers inside a screw hole are damaged, the screw can no longer grip, making it impossible to securely fasten a hinge.
The most common way to repair stripped holes for hinges is by filling the hole and then redrilling. Simple materials like wooden toothpicks, matchsticks, or even golf tees can be used. Apply wood glue to the toothpicks, insert them into the stripped hole, and let the glue dry completely.
Once dry, you can snap or cut off the excess, drill a new pilot hole, and then re-insert the hinge screw. This provides a solid base for the screw to grip.
For larger or more heavily stripped holes, using wood filler or a dowel rod is a more robust solution. A dowel rod is essentially a small wooden peg that can be glued into the hole, providing a strong anchoring point for the screw. The principle is the same: fill the hole, let it dry, and then drill a new pilot hole.
The Toothpick and Glue Method
This is a classic and effective method for repairing small stripped screw holes, like those found in door frames where hinges are attached. It’s simple, uses common household items, and is surprisingly strong once dry.
Gather a few wooden toothpicks (round ones work well) and some wood glue. Apply a small amount of wood glue to the toothpicks. Insert as many toothpicks as you can comfortably fit into the stripped screw hole.
You want to pack the hole tightly with the glued toothpicks.
Once the hole is filled, break or cut off the excess toothpick material so it’s flush with the surface. Let the glue dry completely, which usually takes at least an hour, but overnight is best for maximum strength. After the glue has cured, you can drill a new pilot hole into the center of the repaired area and then drive the hinge screw back in.
The toothpicks provide a solid new material for the screw threads to bite into.
Using Wood Filler or Dowels
For larger or more critical repairs, wood filler or dowels offer a more substantial solution than toothpicks. Wood filler is a paste-like substance that hardens into a solid material. You can apply it directly into the stripped hole, packing it in firmly.
After the wood filler has dried according to the manufacturer’s instructions (this can vary, but often takes several hours or overnight), you can sand it smooth and then drill a new pilot hole for the hinge screw. If you’re using a dowel rod, you’ll drill out the stripped hole slightly larger to accept the dowel. Then, apply wood glue to the dowel and insert it into the hole, tapping it in firmly.
Once the glue is dry, saw off the excess dowel flush with the surface, sand smooth, and drill a pilot hole.
A study on wood repairs indicated that properly executed dowel repairs can restore screw-holding strength to over 90% of the original wood’s capacity, making them ideal for structural elements like door hinges.
Advanced Hinge Considerations
Beyond the basic installation, there are more advanced aspects to consider with door hinges, especially for specific applications or when dealing with unique door types. These can include specialized hinges for security, specific aesthetic requirements, or functionality that goes beyond a simple in-and-out swing.
For instance, security hinges have features that make them difficult to remove from the outside, providing an extra layer of protection. Concealed hinges offer a sleek, minimalist look by being hidden when the door is closed. Understanding these specialized options can help you choose the best hardware for any project, enhancing both form and function.
Security Hinges for Enhanced Protection
Security hinges are designed to prevent unauthorized removal of a door, making them a great choice for exterior doors or interior doors in sensitive areas. The key feature of most security hinges is that they have a fixed pin or a non-removable pin mechanism.
In a standard hinge, the pin can be removed, allowing the door to be lifted off its hinges. This is a security vulnerability. Security hinges often have a protruding knuckle or a set screw that prevents the pin from being withdrawn, even when the door is open.
Another type of security hinge has a channel that engages with a fixed pin or stud when the door is closed. This means that even if the hinge pin were somehow removed, the door could not be lifted out of the frame. These hinges add a significant layer of physical security to a door.
Features of Security Hinges
Security hinges come with several features aimed at deterring forced entry. One common feature is a non-removable pin. In standard hinges, the pin can be tapped out from the bottom, allowing the door to be separated from the frame.
Security hinges prevent this by having the pin permanently fixed, often with a cap or a mechanism that blocks its removal.
Another important feature is the “security stud” or “anti-lift” stud. This is a small pin that extends from one hinge leaf into a corresponding hole or groove in the other hinge leaf when the door is closed. If someone tries to pry the door open and remove the hinge pin, the stud still keeps the door attached to the frame, preventing it from being lifted off.
Materials are also important. Security hinges are typically made from heavy-duty steel, often with a robust coating to prevent rust. They are usually thicker and heavier than standard hinges to withstand more force.
The screws used to attach security hinges are also often longer and made of hardened steel to resist tampering.
Concealed Hinges for a Clean Aesthetic
Concealed hinges, also known as invisible hinges, are designed to be completely hidden when the door is closed. This provides a very clean, minimalist, and modern look, as there are no visible hinges disrupting the lines of the door and frame.
These hinges are more complex than standard butt hinges and require precise installation, often involving more intricate mortising or specific mounting hardware. They are commonly used in custom cabinetry, modern architectural designs, and for doors that need to blend seamlessly into a wall or other surface.
While they offer a sophisticated aesthetic, concealed hinges can be more expensive and require a higher level of skill to install correctly. However, the effect they create is often worth the effort for projects where visual appearance is paramount.
Installation Requirements for Concealed Hinges
Installing concealed hinges is more involved than standard hinges. They typically require precise routing or mortising into both the door edge and the frame, often with specific jigs or templates provided by the manufacturer.
These hinges often have multiple adjustment points, allowing for fine-tuning of the door’s position once installed. This is important because the hidden nature of the hinges means any slight misalignment is more noticeable. You’ll need to ensure that the door closes perfectly flush with the frame and that there are no gaps.
The process usually involves creating specific recesses for the hinge body and any adjustment screws. For many concealed hinges, precise depth and positioning are critical. This is why using the manufacturer’s instructions and recommended tools is essential for a successful installation.
Specialty Hinges for Unique Doors
Beyond the common types, there’s a world of specialty hinges designed for very specific applications. These can include strap hinges for large, rustic gates, pivot hinges for doors that swing from a pivot point rather than the edge, or spring hinges that automatically close the door.
For example, pivot hinges are often used for heavy doors or doors designed to be flush with the wall. They mount to the top and bottom of the door and a pivot point on the floor and ceiling, allowing for a different kind of swing mechanism.
Spring hinges contain a spring mechanism that pulls the door closed after it’s opened. They are common on screen doors or doors that need to remain shut. Understanding the specific needs of your door will help you select the right specialty hinge.
Pivot Hinges Explained
Pivot hinges offer an alternative to traditional side-mounted hinges. Instead of attaching to the edge of the door and the frame, pivot hinges mount to the top and bottom of the door and a pivot point set into the floor and the header above the doorframe. This allows the door to rotate on a vertical axis.
Doors with pivot hinges can swing either one way or two ways, and they can often support much heavier doors than standard hinges because the weight is distributed differently. They are often used for large entry doors, commercial doors, or contemporary designs where a clean look is desired and traditional hinges might be visually intrusive.
Installation requires precision, as the pivot point needs to be perfectly aligned vertically. This usually involves setting a floor plate and a top plate, and then carefully positioning the door onto the pivot hardware. Some pivot hinges also include a closing mechanism to help return the door to its closed position.
Frequently Asked Questions
Question: How do I know which side of the door the hinges should be on?
Answer: You place the hinges on the side of the door that faces the direction you want the door to swing open. For example, if you want the door to swing to the right, the hinges go on the right edge of the door.
Question: Can I use any type of hinge for any door?
Answer: No, it’s best to match the hinge type to the door’s weight and intended use. Heavier doors need stronger hinges like ball-bearing types, while lightweight doors can use standard butt hinges.
Question: What if my screws are not holding in the hinge holes?
Answer: If the screw holes are stripped, you can repair them by filling them with toothpicks and glue, wood filler, or a dowel rod before re-inserting the screws.
Question: Do all interior doors swing the same way?
Answer: No, the swing direction of interior doors is determined by convenience and room layout. Typically, doors swing into the room they serve.
Question: How do I make sure my door closes properly after installing hinges?
Answer: Ensure your hinges are perfectly aligned and flush with the door and frame. Use shims to make minor adjustments if the door is sticking or not closing tightly.
Wrap Up
Understanding which way door hinges go is a key skill for any home project. By following these steps, you can confidently install or adjust your doors for optimal function and appearance. Remember to plan your swing, ensure precise hinge placement, and address any issues that arise.
Your doors will operate smoothly for years to come.