How to Measure Hinges for a Door: A Step-by-Step Guide
Hey there! So, you’re looking to replace or install hinges on a door, maybe for your car or a garage door, and you’re wondering how to measure hinges for a door. I totally get it—hinges seem like small parts, but getting them right is a big deal. A couple of years ago, I was fixing up my old pickup truck’s door, and I learned the hard way that picking the wrong hinge size can make things creak, sag, or worse, not close at all. I’ve also swapped out hinges on my garage door and even helped a friend with their RV.
Through all that trial and error, I’ve figured out how to measure hinges like a pro. In this article, I’m going to walk you through everything I’ve learned, step by step, so you can get the perfect hinges without the headache. Whether it’s for your car, garage, or even a camper, I’ve got you covered. Let’s dive in and make this easy!
Why Measuring Hinges Correctly Matters
Let me tell you why this is so important. Hinges are like the unsung heroes of any door. They hold everything together, let the door swing smoothly, and keep it secure. If the hinges are too small, too big, or the wrong type, you’ll end up with a door that doesn’t align, makes annoying noises, or even falls off. I remember when I bought hinges for my truck without measuring first. They were too short, and the door sagged every time I opened it. It was a hassle to return them, and I wasted a whole afternoon.
Measuring hinges properly ensures the door fits snugly, operates smoothly, and lasts a long time. Whether it’s your car door, a garage door, or something else, the right measurements save time, money, and frustration. Let’s start by understanding what parts of a hinge you need to measure.
Parts of a Hinge You Need to Measure
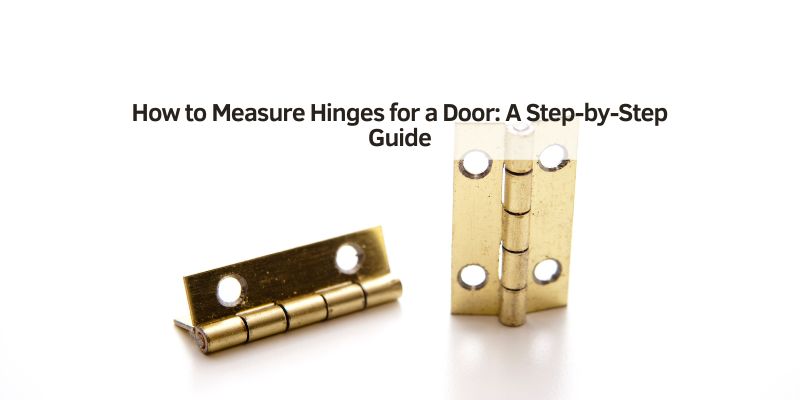
When I first started, I didn’t even know what to measure on a hinge. It’s not just about length—there’s more to it. Here’s what I focus on now:
- Leaf Width: This is the flat part of the hinge that attaches to the door and frame. It’s usually measured across its widest point.
- Leaf Length: The length of the flat part, from top to bottom.
- Knuckle Length: The cylindrical part where the hinge pivots. This is often the same as the leaf length but not always.
- Pin Diameter: The rod that runs through the knuckle, letting the hinge rotate.
- Thickness: How thick the hinge material is, which affects strength.
- Screw Hole Spacing: The distance between the holes where screws go, critical for matching existing holes.
When I was working on my garage door, I forgot to check the screw hole spacing. The new hinges didn’t line up, and I had to drill new holes—such a pain! Knowing these parts makes measuring way easier. Let’s talk about the tools you’ll need.
Tools You’ll Need to Measure Hinges
You don’t need a fancy toolbox, but a few simple tools make this job a breeze. Here’s what I use:
- Tape Measure or Ruler: A metal tape measure is best for precision. I use a 12-inch ruler for smaller hinges.
- Caliper (Optional): Great for measuring pin diameter or thickness accurately. I borrowed one from a friend when I needed exact numbers.
- Notebook and Pen: Write down your measurements. Trust me, you won’t remember them all.
- Screwdriver: To remove the hinge if it’s already installed.
- Camera (Your Phone Works): Take pictures of the hinge and door setup for reference.
When I measured the hinges on my RV’s storage door, I snapped a quick photo. It helped me explain what I needed at the hardware store. These tools are simple but get the job done. Now, let’s get to the actual measuring process.
Step-by-Step Guide to Measuring Hinges for a Car Door
Car doors are tricky because they’re heavy and need strong hinges. I learned this when I replaced the driver’s side hinge on my pickup. Here’s how I did it:
- Open the Door: Prop it open with a block or have someone hold it. This gives you access to the hinges.
- Locate the Hinges: Most car doors have two or three hinges, usually bolted to the door and frame. Mine had two, one near the top and one near the bottom.
- Remove the Hinge (If Needed): I used a screwdriver to take off the top hinge for easier measuring. If you can’t remove it, measure in place.
- Measure Leaf Width: Lay your tape measure across the flat part of the hinge. My truck’s hinge was 2 inches wide.
- Measure Leaf Length: Measure from the top to the bottom of the flat part. Mine was 4 inches long.
- Check Knuckle Length: This is usually the same as the leaf length, but I measured it anyway to be sure. It was 4 inches too.
- .Measure Pin Diameter: If you have a caliper, use it to measure the pin. Mine was about 0.25 inches. If you don’t have a caliper, estimate with a ruler.
- Measure Screw Hole Spacing: Measure the distance between the centers of the screw holes. My hinge had four holes, with 1.5 inches between them.
- Note the Thickness: Use a caliper or ruler to check the hinge’s thickness. Mine was 0.1 inches, which told me it was sturdy enough for a car door.
I wrote all these numbers down and took a picture of the hinge. When I went to the auto parts store, I showed them my notes, and they found the exact match. Let’s move on to measuring hinges for a garage door, which is a bit different.
Measuring Hinges for a Garage Door
Garage doors are heavier and often have multiple hinges, so precision is key. I helped my neighbor replace hinges on their sectional garage door last summer. Here’s what I did:
- Identify the Hinge Type: Garage doors use roller hinges or strap hinges. My neighbor’s were roller hinges, which connect sections and guide the door along tracks.
- Locate the Hinge: Most garage door hinges are numbered (e.g., #1, #2) based on their position. We started with the #1 hinge at the bottom.
- Remove the Hinge (If Possible): We unscrewed the hinge to measure it accurately. If you can’t remove it, work around the rollers.
- Measure Leaf Width and Length: The #1 hinge was 2.5 inches wide and 7 inches long. Each section’s hinge might vary, so check all of them.
- Check Roller Stem Length: If it’s a roller hinge, measure the stem that holds the roller. Ours was 2 inches long.
- Measure Screw Hole Spacing: The holes were 1.75 inches apart. This was crucial to avoid drilling new holes.
- Note the Thickness: The hinge was 0.12 inches thick, built to handle the door’s weight.
We measured every hinge on the door because they weren’t all the same size. Taking the time to do this saved us from buying the wrong replacements. Next, let’s cover other types of doors, like RVs or trailers.
Measuring Hinges for RV or Trailer Doors
RV and trailer doors are unique because they’re often lightweight but exposed to vibration and weather. I helped a friend replace a storage compartment hinge on their camper. Here’s how it went:
- Open the Compartment: Secure the door so it doesn’t swing. My friend’s RV door had a latch to hold it open.
- Inspect the Hinge: RV hinges are often piano hinges (long and continuous) or butt hinges. This was a butt hinge, similar to a car door hinge.
- Measure the Length: The hinge ran the full length of the door, about 12 inches.
- Measure Leaf Width: It was 1.5 inches wide, smaller than a car hinge.
- Check Pin Diameter: The pin was thinner, about 0.2 inches, since the door was lighter.
- Measure Screw Hole Spacing: The holes were 1 inch apart, with six holes total.
- Note Material and Finish: The hinge was stainless steel to resist rust, which is common for RVs.
This process was similar to measuring a car door hinge, but required extra attention to the material. RV hinges need to withstand outdoor conditions, so I made a note to look for corrosion-resistant ones.
Common Mistakes to Avoid
I’ve made my fair share of mistakes measuring hinges. Here’s what I learned to avoid:
- Not Measuring All Hinges: On my garage door, I assumed all hinges were the same. They weren’t, and I had to make a second trip to the store.
- Ignoring Screw Hole Spacing: If the holes don’t match, you’ll need to drill new ones. That’s a headache I could’ve skipped.
- Forgetting Thickness: A thin hinge won’t support a heavy door. My first car hinge was too flimsy and bent after a week.
- Not Checking Material: For outdoor doors like RVs or garages, non-rustproof hinges will corrode fast. I learned this after replacing a rusty trailer hinge.
Writing down every measurement and double-checking saved me from repeating these mistakes. Let’s talk about how to choose the right hinge once you have your measurements.
Choosing the Right Hinge
Once you’ve got your measurements, picking the right hinge is straightforward. Here’s what I look for:
- Match the Size: Ensure the leaf width, length, and screw hole spacing match your measurements.
- Check the Weight Capacity: Car and garage doors need heavy-duty hinges. My truck’s hinges were rated for 100 pounds each.
- Consider Material: Stainless steel or galvanized hinges are best for outdoor use. Indoor hinges can be standard steel.
- Look at the Finish: For aesthetics, choose a finish that matches your door. My garage hinges were powder-coated to blend in.
- Verify the Pin Type: Some hinges have removable pins, which are easier to install. Others are fixed, which can be sturdier.
When I replaced my truck’s hinges, I brought my old hinge to the store. Showing it to the clerk helped me get the right match. If you’re shopping online, double-check the specs against your notes.
Installing Your New Hinges
Installing hinges is as important as measuring them. Here’s how I do it:
- Remove the Old Hinge: Unscrew the old hinge carefully. I keep the screws in a cup so they don’t roll away.
- Test Fit the New Hinge: Hold it in place to ensure the holes line up. My garage hinge fit perfectly, but I had to adjust my RV hinge slightly.
- Secure the Hinge: Use the original screws or new ones if needed. Tighten them evenly to avoid warping.
- Check Alignment: Open and close the door to ensure it swings smoothly. My truck door needed a slight tweak to align properly.
- Lubricate: Add a drop of oil to the hinge pin to prevent squeaking. I use WD-40 for this.
Taking my time with installation made all the difference. A poorly installed hinge can ruin even the best measurements.
When to Call a Professional
Sometimes, measuring and replacing hinges is more than you can handle. I’ve been there. Here’s when I call a pro:
- Complex Doors: My friend’s RV had a curved door that required custom hinges. A professional handled it better than I could.
- Heavy Garage Doors: Sectional garage doors are heavy and dangerous. A pro can ensure safety.
- No Matching Hinges: If you can’t find hinges that match your measurements, a locksmith or mechanic can source or modify them.
I called a mechanic for my truck’s second hinge because I couldn’t find the right size. It cost me $75, but it saved me hours of frustration.
My Biggest Takeaway
Measuring hinges isn’t rocket science, but it takes attention to detail. I’ve learned that writing down every measurement, checking twice, and understanding your door’s needs make all the difference. Whether it’s a car, garage, or RV door, the process is similar: know your hinge, measure carefully, and choose wisely. I’ve gone from guessing sizes to confidently replacing hinges, and it feels great to get it right.
Conclusion
There you go—everything I’ve learned about how to measure hinges for a door! From my pickup truck’s sagging door to my neighbor’s garage and my friend’s RV, I’ve tackled hinges of all kinds. It’s not just about grabbing a tape measure; it’s about knowing what to measure, avoiding mistakes, and picking the right hinge for the job. I hope this guide makes your next hinge project a breeze, whether you’re fixing a creaky car door or upgrading your garage. Take your time, write down those numbers, and you’ll have a door that swings like a dream. Got a spare hinge lying around? Maybe it’s time to practice!
FAQs
What tools do I need to measure hinges?
You need a tape measure or ruler, a caliper for precision (optional), a screwdriver to remove the hinge, and a notebook to write down measurements. A phone camera helps for reference.
Can I use the same hinges for a car and a garage door?
Not usually. Car hinges are smaller and designed for lighter doors, while garage door hinges are heavier-duty and often include rollers. Always match the hinge to the door’s weight and type.
What happens if I use the wrong hinge size?
The door might sag, not close properly, or make noises. I used a too-small hinge on my truck once, and it bent within a week. Measure carefully to avoid this.
How do I know if a hinge is strong enough?
Check the weight rating on the hinge packaging. For heavy doors like garage or car doors, choose hinges rated for at least the door’s weight. My truck needed 100-pound-rated hinges.
Do I need to replace all hinges on a door?
Not always, but it’s best to replace them as a set for even weight distribution. I replaced only one hinge on my garage door once, and the others wore out faster.