Door Locks and Deadbolts: Install, Rekey, Reset, Fix
Start with the symptom: sticking or sagging points to repair, key-access changes point to rekeying, lost smart-lock access points to a reset, new hardware points to installation, and any lock that binds with the door open needs removal and inspection. Pick the wrong fix and you can strip screws, throw the latch out of line, or leave an exterior door easier to force. This guide maps common lock problems on entry, interior, and garage-to-house doors to the right DIY fix, tool list, and locksmith stop point.
What you’ll need


- Phillips screwdriver in two sizes
- Flathead screwdriver
- Small level
- Drill, only if the door prep or mounting pattern requires it
- Long-nose pliers, mainly for clips, tailpieces, or stubborn parts
- Tape measure
- Wood shims
- Graphite-free lock lubricant
- Utility knife
- Center punch
- Wood filler
- Screw extractor
- Replacement deadbolt, latch, strike plate, cylinder, or smart-lock retrofit kit
- Fresh batteries for smart locks
Gather tools around the job you are actually doing. Most lock work usually needs only screwdrivers, a tape measure, a small level, and lubricant. Bring out the drill, screw extractor, wood filler, or long-nose pliers only when the door prep, old fasteners, clips, or damaged parts call for them.
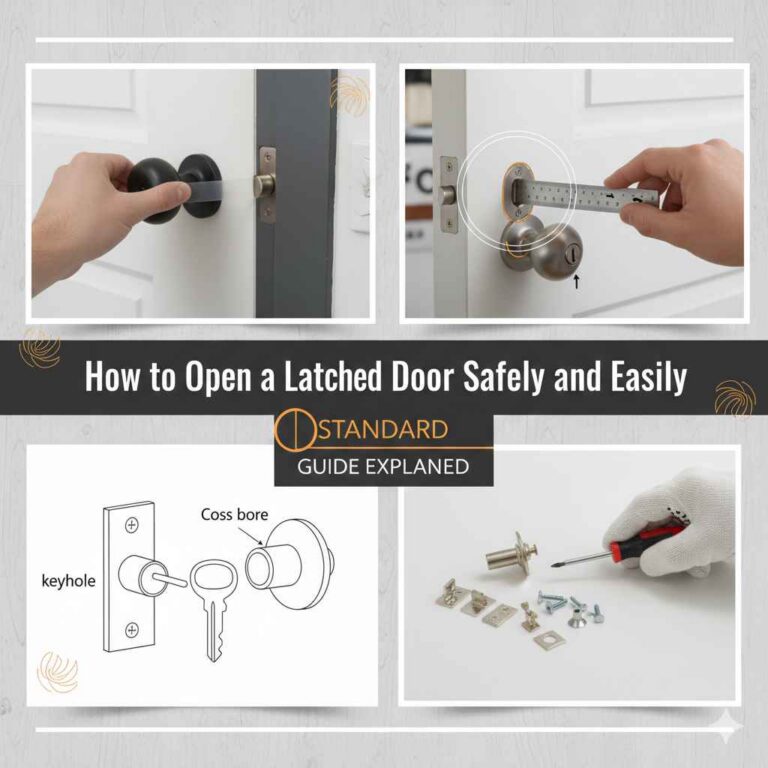
Before buying parts, identify the lock type: knob lock, lever lock, single-cylinder deadbolt, double-cylinder deadbolt, rim deadbolt, mortise lock, or a retrofit smart lock that reuses the existing deadbolt. Then measure the door prep, backset, cross-bore, edge-bore, door thickness, and bolt throw, because the lock style sets the fit, handing, and function, and some smart retrofits work only with a standard single-cylinder deadbolt format.
Check the door prep before loosening anything: backset, cross-bore size, edge-bore size, door thickness, bolt throw, and whether the existing bore layout matches the new hardware. Also inspect reveal gaps around the door, hinge sag, and whether the door sits level in the frame. A door that is out of level can defeat a new lock that is otherwise installed correctly.
Lock symptom decision table
| Symptom | Likely cause | DIY fix | Tools | Stop-point for a locksmith |
|---|---|---|---|---|
| Deadbolt will not extend fully when door is closed | Strike plate opening is off-center or too shallow; door/frame alignment issue | Test bolt with door open, mark contact point, loosen strike, shift to center, deepen opening only if wood is solid | Phillips screwdriver, flathead screwdriver, small level, utility knife | Call if the frame is split, the strike needs major relocation, or the bolt still binds after alignment |
| Deadbolt works with door open but not latched shut | Wrong latch orientation, incorrect backset setting, warped door, or over-tightened through-bolts | Confirm bevel/orientation, reset latch length, back off mounting screws a quarter-turn, recheck reveal gaps | Phillips screwdriver, small level, tape measure | Call if the door edge is damaged or the bore layout does not match the lock |
| Key turns but bolt barely moves | Loose tailpiece connection, bent actuator, or worn internal parts | Remove interior trim, inspect tailpiece engagement, tighten hardware, replace latch if wear is visible | Phillips screwdriver, long-nose pliers | Call if the cylinder cam slips or the internal hub is cracked |
| Knob lock latch sticks and door needs a hard push to open | Latch-to-strike misalignment or sagging hinges, not a bad cylinder | Tighten hinge screws, shim hinge leaf if needed, center latch in strike opening | Phillips screwdriver, wood shims, small level | Call if the jamb has shifted or the latch pocket is torn out |
| Knob or lever turns loosely without retracting latch | Broken return spring or failed internal hub | Remove trim and confirm through-bolts are tight; replace the lockset if the hub has failed | Phillips screwdriver, flathead screwdriver | Call if hidden fasteners or seized trim prevent removal |
| Key is hard to insert or remove | Dirty keyway, worn key, wrong keyway, or slight cylinder damage | Clean keyway, try a fresh cut key, lubricate lightly with graphite-free lock lubricant | Flathead screwdriver, lubricant | Call if the keyway is visibly deformed or the key will not enter straight |
| Broken key stuck in cylinder | Worn key or forced turn under bind | Stop turning, keep plug centered, extract gently from the keyway opening | Long-nose pliers, flathead screwdriver | Call if the fragment sits deep in the plug or the cylinder starts turning during extraction |
| Smart lock motor strains or stalls | Mechanical bind in the deadbolt, wrong handing, or torque beyond the unit’s limit | Operate deadbolt by thumb-turn first, correct handing in setup, realign strike before app pairing | Phillips screwdriver, small level, fresh batteries | Call if the bolt needs force even by hand; motor setup will not fix hardware bind |
| Smart lock will not enroll in the app | Old owner data still present, missed QR code scan, weak batteries, or unsupported radio path | Factory reset, delete prior users, rescan QR code, reinstall batteries, confirm Wi-Fi, Bluetooth, Thread, or Matter support as listed by the maker | Phone, fresh batteries, Phillips screwdriver | Call if enrollment failure appears only when the lock is mounted and the deadbolt also binds mechanically |
| New strike plate does not cover old holes or marks | Different screw spacing or lip profile; old plate should not be reused blindly | Dry-fit the new plate, mark screw-hole placement, fill abandoned holes if needed, replace instead of forcing misalignment | Phillips screwdriver, utility knife, wood filler, center punch, drill | Call if the frame edge is too damaged to hold screws securely |
How do you install a door deadbolt yourself?
Install a deadbolt only after the door prep and alignment check has passed. Check the backset, cross-bore, edge-bore, and door thickness before installing a deadbolt, match the lock to those dimensions, mount the latch in the maker’s stated orientation, and test full bolt throw before tightening everything down. If the bolt binds with the door open, stop there and inspect the latch, tailpiece, and bore alignment instead of forcing the assembly.
Pre-check before installation
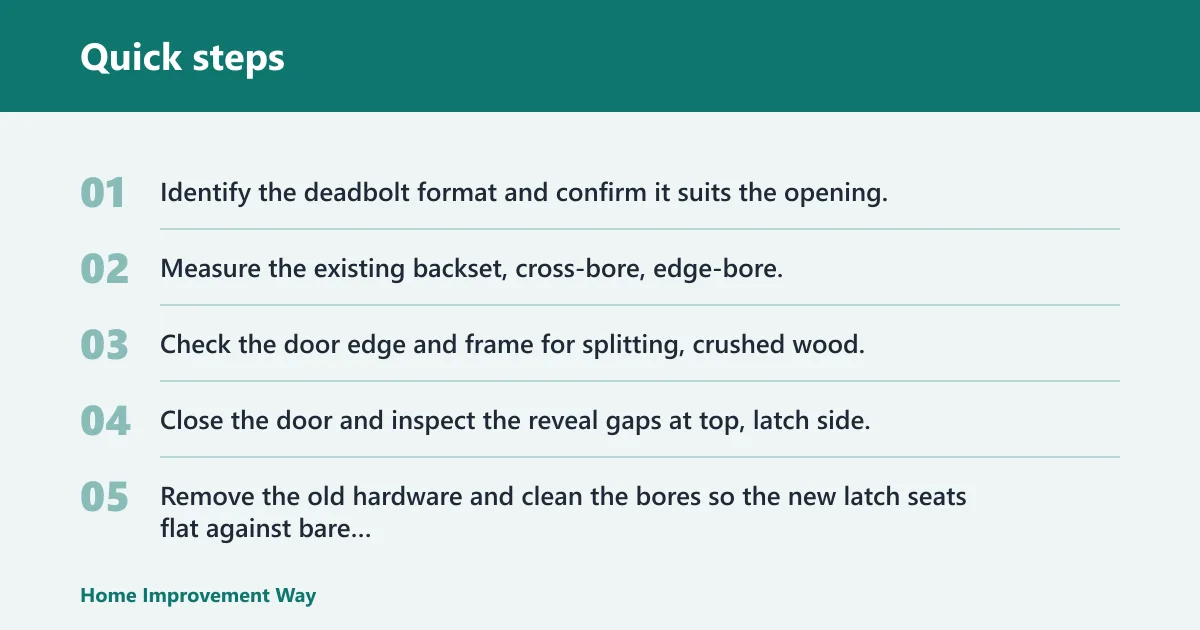
- Identify the deadbolt format and confirm it suits the opening, paying special attention to single-cylinder versus double-cylinder needs and any fire-safety or code limits.
- Measure the existing backset, cross-bore, edge-bore, and door thickness so the new lock fits the old prep instead of forcing a mismatch.
- Check the door edge and frame for splitting, crushed wood, or oversized bores that can leave the latch loose.
- Close the door and inspect the reveal gaps at top, latch side, and hinge side to spot sag before hardware goes on.
Installation sequence
- Remove the old hardware and clean the bores so the new latch seats flat against bare wood or sound paint.
- Set the latch to the correct backset and insert it with the bolt oriented as the maker specifies, because the wrong orientation can block full throw.
- Fasten the latch faceplate evenly, stopping when it sits flush rather than buried into the door edge.
- Insert the exterior half and pass the tailpiece through the latch hub without twisting it off-center.
- Mount the interior half and start the through-bolts by hand to avoid cross-threading.
- Snug the through-bolts gradually, alternating sides, because over-tightening can pinch the mechanism and create a false “bad lock” symptom.
- Close the door slowly and watch where the bolt meets the strike before installing or reusing the strike plate.
- Shift or replace the strike plate if the bolt hits the lip or top edge, and mark new screw-hole placement before drilling.
- Drive the strike screws straight and upgrade to longer screws if the frame wood is sound and better anchoring is needed.
- Test key operation, thumb-turn operation, and full bolt throw with the door open first, then closed.
Say your replacement deadbolt has an adjustable latch and the old one was set for a different backset. Leave that latch in the wrong position and the exterior trim can sit crooked by a few millimeters, while the bolt scrapes the strike even though every screw feels tight.
How do you remove an old deadbolt or lockset?
Remove the interior trim first, because most residential deadbolts hide their mounting screws on the inside. Start with the least destructive method: score paint lines, expose hidden screws, pull the cylinder and latch straight out, and stop before you pry hard enough to split the door edge or enlarge the bore.
Removal steps
- Open the door and score any painted seam around trim plates with a utility knife so finish does not tear away with the hardware.
- Look for visible interior screws, snap-on covers, or a small release slot that hides the fasteners.
- Back out the interior mounting screws first and separate the inside trim from the exterior half.
- Pull the exterior cylinder or trim straight out, supporting it so the tailpiece does not gouge the bore.
- Remove the latch screws from the door edge and slide the latch body out without twisting the edge bore.
- Clean rust, paint, and wood splinters from the bores to see whether the prep can be reused safely.
Stuck, rusted, or stripped hardware
- Press the screwdriver firmly into the screw head and try a slow, controlled turn before escalating.
- Tap the screwdriver handle lightly to break paint or mild corrosion at the screw head.
- Use a screw extractor only after confirming the surrounding wood is solid enough to tolerate the extra force.
- Stop if the screw spins in rotten wood, the bore begins to wallow out, or hidden fasteners still resist identification.
Suppose an older door has painted-over trim and a rusted deadbolt faceplate. Score the paint line first and clear the screw heads. If the faceplate still will not release after the screws come out, the usual cause is finish buildup or a rust bond, not a hidden extra fastener.
How do you rekey a door lock without replacing it?
Rekeying changes key access without changing the full lock body, but only if the cylinder is designed for it and a matching keyway kit is available. It is a good fit after a move or key loss when the hardware still works properly. It will not fix sticking, sagging, or a worn latch.
Decide whether rekeying is the right path
- Choose rekeying when the lock works smoothly and the goal is to invalidate old keys.
- Choose repair when the key turns roughly, the latch drags, or the hardware is loose.
- Choose replacement when the lockset is low quality, non-rekeyable, damaged, or a security upgrade is the real goal.
Rekey workflow
- Verify that the cylinder is rekeyable and identify the keyway before buying a pin kit, because many kits are brand- and keyway-specific.
- Remove the cylinder only if the lock design allows homeowner service without destructive disassembly.
- Keep parts in order and use the correct rekey kit for that keyway instead of mixing pins from unrelated hardware.
- Reassemble the cylinder and test the new key with the cylinder out of the door before reinstalling.
- Reinstall the cylinder and confirm smooth operation with the door open, then with the door closed.
Some residential cylinders come out with simple trim removal, while others need retaining clips, follower tools, or a lockset design that is better left to a locksmith. There are dedicated how-to references for changing a lock cylinder and for removing and installing a door lock, but the safe cutoff stays the same: stop when cylinder removal itself risks damaging a working lock.
Rekeying is often enough after a move if the hardware is sound and the strike anchoring is solid. Replacement is the better security choice when the cylinder quality is poor, the frame screws are short or loose, the strike plate is deformed, or a keyed lock is being converted to a keyless or smart format.
Can you install or reset a smart lock on an existing deadbolt?
Yes, if the smart lock is compatible with the deadbolt style, door prep, handing, and the torque needed to turn the bolt. The deadbolt must work smoothly by hand before electronics go on. Use a reset for lost app access or ownership changes, and choose replacement when the existing hardware is incompatible or worn.
Compatibility checks before install
- Confirm whether the unit is a full deadbolt replacement or a retrofit smart lock that turns the existing thumb-turn.
- Verify deadbolt style, handing, door thickness, and that the thumb-turn torque required is within the smart unit’s limits.
- Check whether the maker supports the radio path needed in the house: Wi-Fi, Bluetooth, Thread, or Matter.
- Inspect the bolt travel by hand before mounting anything, because electronics will not correct mechanical friction.
Install and enrollment path
- Install batteries and mount the interior unit only after the deadbolt turns freely by hand.
- Complete manual calibration or handing setup exactly as the maker directs so lock direction is correct.
- Open the app, choose Add device, scan the QR code or enter the device code, and finish enrollment.
- Assign user codes only after the lock completes its open-close cycle cleanly several times.
Reset path after ownership change or setup failure
- Delete old users in the app under Settings > Users or the maker’s equivalent menu before adding new codes.
- Run the maker’s factory-reset sequence from the lock’s settings or button combination, because reset steps vary by model.
- Remove the lock from the app or home platform under Settings > Devices, then add it again by QR code or device code.
- Rebuild automations only after local locking, unlocking, and status reporting work correctly.
DIY smart-lock installation usually takes only an hour or two when the existing deadbolt already fits and moves freely. A drill is rarely necessary for smart-lock installs, and long-nose pliers are rarely necessary as well. If hardware bind shows up only after the motor is attached, fix the alignment first instead of repeating app setup.
Average smart-lock pricing ranges from $100 to $300. Professional smart-lock installation labor often runs $50 to $100, while a full professional smart-lock installation can cost $307 to $617.
Why won’t the lock latch, turn, or open smoothly?
Most rough lock operation starts with alignment, not the cylinder. Check strike plate position, hinge sag, reveal gaps, and bolt engagement before blaming internal parts. Repair makes sense when the problem is friction or looseness. Replace the lock or call for service when the cylinder, latch hub, or door prep is damaged.
If that didn’t work, try this next
- Test the lock with the door open; if it binds there, remove trim and inspect the cylinder, tailpiece, and latch body.
- Loosen through-bolts by a quarter-turn and retest, because overtightening can squeeze the chassis out of alignment.
- Lubricate the keyway and latch lightly with graphite-free lock lubricant, then cycle the lock several times.
- Tighten hinge screws and use thin shims to lift a sagging latch side before moving the strike plate.
- Replace the strike plate if its opening is worn, too narrow, or positioned to force the bolt sideways.
- Remove the lock for inspection if the key turns but the bolt lags, slips, or retracts inconsistently.
Broken keys, seized cylinders, and internal damage
- Stop turning immediately if a key breaks; forcing the plug can trap the fragment deeper and turn a simple extraction into a lockout.
- Keep the cylinder plug centered and try to extract only the exposed fragment without rotating the lock.
- Replace the cylinder or the full lock when the keyway is distorted, the plug seizes, or the cam slips under light hand pressure.
- Call a locksmith if the door cannot be secured or opened without further forcing.
Strike plate and frame checks
- Inspect the strike opening for shiny rub marks that show where the latch or bolt is hitting.
- Reuse the strike plate only if the opening centers the bolt cleanly and the screw holes still hold tightly.
- Replace the strike when lip shape, wear, or screw-hole placement forces the bolt off-line.
- Add wood filler only for abandoned holes that no longer carry load, then relocate screws into sound wood.
A common first-timer mistake is replacing a sticky deadbolt when the real fault is a door that has dropped slightly at the latch side. The new hardware may feel better for one day, then the bolt hits the strike lip again because the frame geometry never changed.
Professional locksmith visits typically cost around $100 to $200. That is usually money well spent when new bores are needed, the door edge is split, screws are seized, the cylinder is frozen, or a smart lock will not complete setup because the deadbolt itself is still binding.
Common mistakes
Buying or reusing the wrong parts
- Do not buy a deadbolt until the backset, bore sizes, and door thickness are confirmed.
- Do not assume an old strike plate can stay just because the new bolt fits through it once.
- Do not treat mortise, rim, and bored deadbolts as interchangeable formats.
Creating bind during assembly
- Do not tighten through-bolts fully before the exterior and interior halves sit square to the door faces.
- Do not bury a faceplate under finish buildup; trim or clean the recess so hardware sits flat.
- Do not keep drilling when the bore is oversized or the door edge is split; that is a repair issue first.
Choosing the wrong fix
- Use repair for sticking, jamming, loose trim, bent tailpieces, and worn latches.
- Use rekey for key control when the hardware itself still works well.
- Use reset for lost smart-lock access, code cleanup, or ownership changes.
- Use replacement for non-rekeyable hardware, major wear, format changes, or real security upgrades.
Prevention: Once the lock works, retighten visible screws, replace weak batteries on schedule in smart locks, and recheck strike alignment after seasonal door movement instead of waiting for a hard bind.
Frequently asked questions
Should I repair, rekey, or replace my door lock?
Repair a lock that sticks, sags, or has loose hardware. Rekey a working lock when old keys should stop working. Replace the lock when the cylinder is not rekeyable, the latch hub is worn, the format is changing, or security upgrades to the strike and hardware are overdue.
What tools do I need to install a deadbolt?
Start with a Phillips screwdriver in two sizes, a flathead screwdriver, and a small level. Add a tape measure for fit checks. A drill and long-nose pliers are occasional tools, not standard needs, unless screw holes, clips, or damaged hardware make the job less straightforward.
When should I call a locksmith instead of DIY?
Call when screws are seized, new bores must be drilled, the door edge is split, the cylinder is seized, a broken key sits deep in the plug, or smart-lock setup fails because the deadbolt still binds mechanically. On-site service is faster than damaging the door by forcing progress.
Can I install a smart lock on an existing deadbolt?
Yes, if the smart lock is made for that deadbolt style and the bolt turns smoothly by hand first. Confirm door prep, handing, thumb-turn torque, battery installation, and app enrollment by QR code or device code before expecting Wi-Fi, Bluetooth, Thread, or Matter features to work properly.
What should I check before replacing a strike plate?
Check whether the current plate centers the latch or bolt, whether the opening is deep enough, and whether the screw holes still land in solid wood. Replace the plate when wear, lip shape, or hole placement pushes the bolt sideways or leaves weak screw anchoring in the frame.
Sponsored / affiliate links. As an Amazon Associate I earn from qualifying purchases. I may earn additional commission from eligible campaigns.