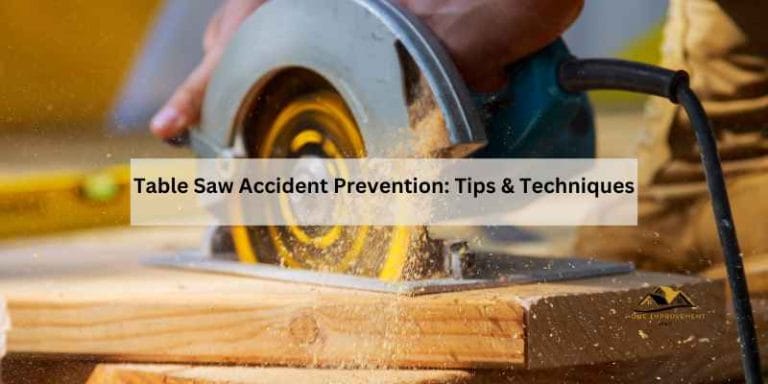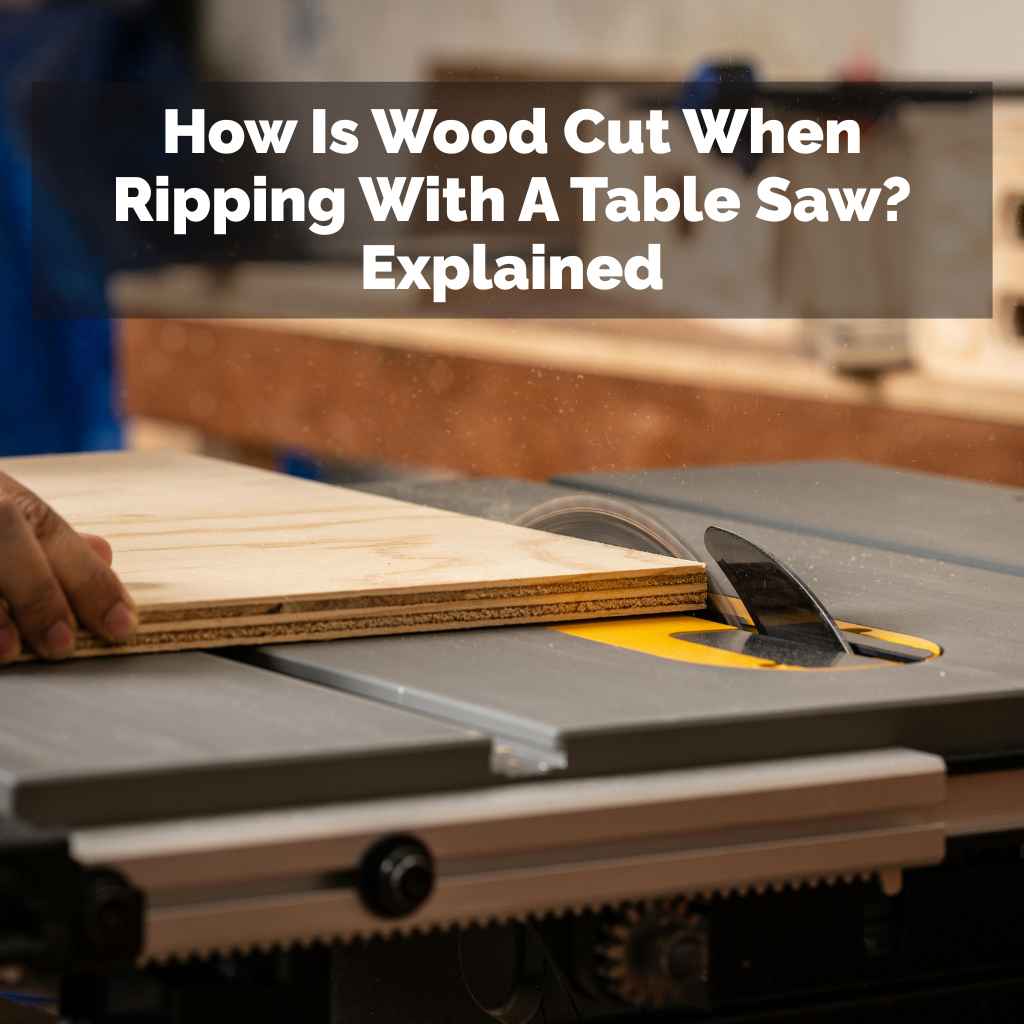
How Is Wood Cut When Ripping With A Table Saw? Explained
Cutting wood for a project can feel like a puzzle. Sometimes, you need to slice a long piece into narrower ones. This is called ripping.
Doing it with a table saw feels tricky. You want straight cuts. You also want to stay safe.
It’s easy to get worried. This guide will make it clear. We will break down how to rip wood.
You will learn the best ways. You will also learn what to watch out for.
Ripping wood with a table saw involves cutting along the grain to create narrower widths. It requires proper setup, understanding safety features like the blade guard and splitter, and using the rip fence correctly. Following these steps ensures accurate, straight cuts and a safe workshop environment.
Understanding the Rip Cut
A rip cut is a cut made parallel to the wood’s grain. Think of it as slicing a loaf of bread lengthwise. You are reducing the width of the board.
This is different from a crosscut. A crosscut goes across the grain, shortening the board. Table saws are fantastic for rip cuts.
They offer precision and speed.
Why do we rip wood so much? Many projects need specific sizes. You might buy a 1×6 board.
But your project needs two pieces that are 2 inches wide. Ripping is how you get those narrower pieces. It’s a fundamental skill for any woodworker.
Getting it right means your projects look better. It also means you waste less wood.
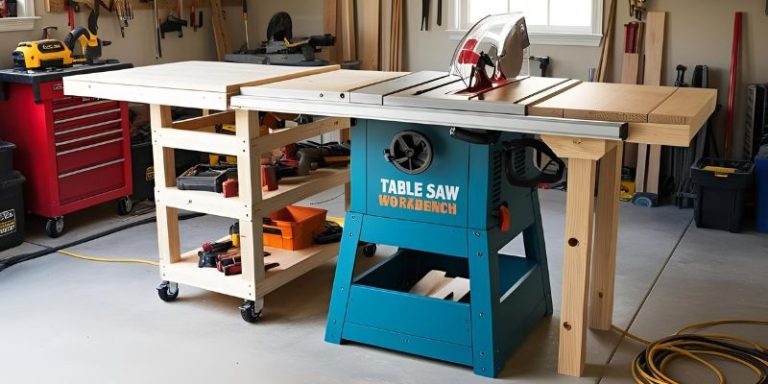
The main tool for this is the table saw. It has a flat table. A circular blade sticks up through it.
You push the wood past the blade. For rip cuts, you use the rip fence. This fence guides the wood.
It keeps it parallel to the blade. This fence is key to making straight, accurate cuts. Without it, your cuts would wander.
My First Ripping Disaster
I remember my first table saw. I was so excited. I wanted to build a simple bookshelf.
I had a nice piece of pine. I needed to rip it into narrower strips for the shelves. I set up the rip fence.
I thought I had it right. I pushed the wood forward. Suddenly, the wood kicked back!
It shot across the room. I jumped back. My heart was pounding.
I was lucky. Nothing hit me. That was a scary lesson.
It taught me how important safety is. It also showed me I needed to learn more.
I learned that day that the table saw is a powerful tool. It demands respect. It needs you to pay attention.
It’s not something to rush. After that scare, I read everything I could. I watched videos.
I talked to experienced woodworkers. They all stressed the same things: setup, safety, and understanding the saw. It took time.
But I learned to feel confident. Now, ripping wood is a normal part of my process. It’s not scary anymore.
It’s just another step.
Table Saw Safety First!
Blade Guard: Always use it if possible. It catches dust and can help stop kickback. Some thin ripping tasks make it hard, but try to adapt.
Riving Knife/Splitter: This is super important. It’s a metal plate behind the blade. It keeps the wood from closing up on the blade.
This stops the wood from binding and kicking back.
Push Sticks/Pads: Use these when your hands get close to the blade. They push the wood forward safely.
Eye Protection: Always wear safety glasses. Wood chips can fly.
Hearing Protection: Table saws are loud. Protect your ears.
Setting Up for a Safe and Accurate Rip
Getting ready is half the battle. A good setup means a good cut. And more importantly, it means staying safe.
Let’s walk through it step by step. This is what I do every time.
Blade Height Adjustment
The blade needs to be set at the right height. For most rip cuts, you want the blade teeth to extend just above the wood surface. About a quarter-inch is usually perfect.
Why? Too high, and it can grab more aggressively. It can increase the chance of kickback.
Too low, and you’ll be fighting the cut.
To set it, turn off the saw. Wait for the blade to stop. Lower the blade until it’s below the table surface.
Turn on the saw. Let it reach full speed. Then, slowly raise the blade.
Watch the teeth. Stop when they peek just above the wood you plan to cut. Then, turn off the saw and wait for it to stop again.
This is a crucial safety step. Don’t rush it.
The Crucial Rip Fence
The rip fence is your guide. It’s a metal bar that runs parallel to the blade. You set its distance from the blade.
This distance determines the width of your cut. Measure from the blade’s furthest tooth to the fence. Use a reliable tape measure.
Make sure the fence is locked down tight. If it moves during the cut, your wood will be ruined.
Tip: Always measure from the blade to the fence at both the front and back. They should be the same. If they aren’t, the fence is not parallel to the blade.
This will cause a tapered cut. Most table saws have a way to adjust the fence’s alignment. Check your saw’s manual.
Fence Alignment Check
What to Do: Measure the distance from the blade to the rip fence at the front edge of the saw table. Then measure again at the back edge of the saw table.
Ideal Result: Both measurements should be exactly the same.
If Not: Your fence is not parallel to the blade. This will cause the wood to pinch the blade or drift. You’ll need to adjust your fence’s setting.
Consult your saw’s manual for specific instructions.
Using the Riving Knife
This metal piece is a lifesaver. It sits right behind the blade. It’s thinner than the blade’s kerf (the cut line width).
Its job is to keep the kerf open as the wood passes. This prevents the wood from pinching the spinning blade. Pinching can cause kickback.
Kickback is when the wood is violently thrown back towards you. It’s very dangerous. Ensure your riving knife is installed and aligned correctly.
It should match the blade’s kerf. Many modern saws have a blade guard that is integrated with the riving knife. This is the best setup.
Dust Collection
Table saws make a lot of dust. Good dust collection makes your shop cleaner. It also helps you see your cut line better.
It can also improve air quality. Connect a shop vac or dust collector to the port on your saw. Make sure it’s running when you cut.
A clean work area is a safer work area.
The Actual Ripping Process: Step-by-Step
Now you’re set up. It’s time to make the cut. Take a deep breath.
Focus. Do not let yourself be distracted.
1. Material Check
Look at your piece of wood. Is it flat? Is it straight?
If it’s warped or twisted, it will not feed well. It could bind. It could cause kickback.
Try to use the flattest piece you have. If a board is significantly warped, it might not be suitable for a rip cut. Or, you might need to flatten it first with a jointer or planer.
2. Engaging the Saw
Turn on the table saw. Let the blade reach full speed. This is important.
Cutting with a blade not at full speed can cause burning and rough cuts. It also increases the risk of binding.
3. Feeding the Wood
Hold the wood firmly against the rip fence. Use your right hand (if you’re right-handed) to push the wood forward. Your left hand should be on the other side of the blade, also guiding the wood.
Keep both hands flat on the wood. Never let your fingers get close to the blade. You should always be able to see your hands and where they are in relation to the blade.
Start feeding the wood slowly. Let the blade do the work. Do not force the wood.
A smooth, steady feed rate is best. As the wood moves past the blade, continue to keep it pressed against the fence. This is critical for a straight cut.
Keep feeding until the entire piece has passed the blade.
4. Using Push Sticks
What happens when the piece you are ripping gets very narrow? Your hands might get too close to the blade to safely push the wood. This is where push sticks and push pads come in.
A push stick is a simple wooden or plastic tool with a notch. You hook it over the end of the wood and push. A push pad is a larger block of wood with a handle.
It grips the wood.
As the wood gets shorter, switch to your push stick. Keep feeding the wood until it’s completely clear of the blade. Never reach over the blade to grab the offcut.
Wait until the blade stops spinning completely. Then, carefully retrieve your cut pieces.
Push Stick Techniques
When to Use: Any time your hands are within 6 inches of the blade, or when the offcut piece is narrower than about 4 inches.
How to Hold: Grip the push stick firmly. Place the notch on the end of the wood you are pushing. Apply steady pressure forward.
Never Reach Over: Always wait for the blade to stop. Use the push stick to slide the cut pieces off the table.
5. The Offcut
The piece of wood that falls away from the fence is the offcut. The piece that stays against the fence is your desired width. Be aware of which is which.
Sometimes, the offcut is what you need. If so, you’ll need to set your fence up so the main piece is the offcut.
6. After the Cut
Once the wood is through the blade, let it fall off the table. Do not try to grab it while the blade is spinning. Turn off the saw.
Wait for the blade to stop completely. Then, you can safely remove your cut pieces. Check your cut.
Is it straight? Is it the correct width? If not, don’t immediately blame yourself.
Recheck your setup. Your fence might have moved. Your wood might have been warped.
Common Mistakes and How to Avoid Them
Even experienced woodworkers make mistakes. The goal is to learn from them and prevent them from happening again. Here are some common pitfalls when ripping wood:
Mistake 1: Not Using the Rip Fence Correctly
What Happens: The wood drifts away from the fence during the cut. Or, the user doesn’t press the wood against the fence firmly enough. This leads to a cut that is not parallel to the edge.
It might be tapered or wavy.
How to Avoid: Always double-check that the rip fence is locked down. Keep the wood pressed firmly against the fence throughout the entire cut. Use your push stick to maintain this pressure, especially on narrow pieces.
Make sure your fence is parallel to the blade. Measure at both ends.
Mistake 2: Rushing the Cut
What Happens: Trying to push the wood through too fast. This can cause the blade to bog down. It can lead to burning.
It also makes it harder to control the wood. This increases the risk of kickback.
How to Avoid: Let the saw do the work. Feed the wood at a steady, consistent pace. If the blade bogs down, ease up on the pressure.
Do not try to force it. It’s better to have a slightly slower cut than a dangerous one.
Mistake 3: Not Using a Riving Knife or Splitter
What Happens: The wood pinches the blade. The kerf closes up behind the blade. This causes the wood to be violently ejected backward.
This is classic kickback.
How to Avoid: Always ensure your riving knife or splitter is installed and properly aligned. It should be set slightly thinner than the blade’s kerf. It should be positioned directly behind the blade.
If your saw doesn’t have one, consider an aftermarket one or a different cutting method for critical rips.
Kickback Prevention Checklist
Riving Knife: Is it installed and aligned?
Blade Height: Is it set just above the wood?
Wood Flatness: Is the board warped or twisted?
Feed Rate: Are you feeding the wood smoothly, not forcing it?
Fence Contact: Are you keeping the wood firmly against the fence?
Clearance: Is there anything behind the saw that could snag the offcut?
Mistake 4: Reaching Over the Blade
What Happens: Trying to grab the cut piece too soon, or reaching across the blade to get the wood. A moment of inattention can lead to a severe injury.
How to Avoid: Always wait for the blade to stop completely. Use push sticks or a push block to clear the wood from the table. Never position your hands directly in line with the blade’s path.
Mistake 5: Cutting Very Narrow Rips Without Support
What Happens: Trying to rip a piece of wood that is only an inch or less wide. It’s hard to maintain control. The wood can easily tilt.
It can fall into the blade.
How to Avoid: For very narrow rips, consider using a zero-clearance insert. This reduces the gap around the blade. Also, consider using a specialized jig for narrow rips.
This could be a crosscut sled with a built-in fence for ripping, or a dedicated ripping jig. These provide much more stable support.
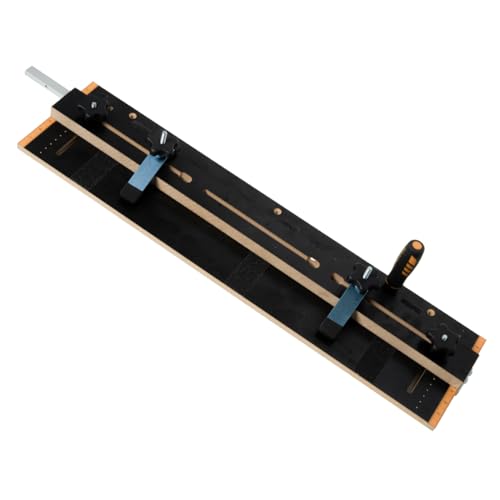
Jigs for Narrow Rips
Zero-Clearance Insert: Reduces the gap around the blade. This helps support thin pieces and prevents them from falling into the gap.
Crosscut Sled with Rip Fence: You can build a sled that has a fence on it. You place your wood against this fence and push the sled through the saw. This offers excellent stability.
Dedicated Ripping Jig: Some commercially available jigs are designed to hold very narrow stock securely for ripping.
Real-World Contexts for Rip Cuts
Where do you see rip cuts being used most often? Think about common woodworking projects.
Furniture Making
Building chairs, tables, or cabinets often requires ripping boards to specific widths. For example, table legs might be made from wider boards ripped down. Drawer sides and bottoms are frequently ripped from wider panels.
Cabinetry
When building kitchen cabinets or built-ins, you’ll rip down plywood or solid wood panels. This is how you create the sides, shelves, and face frames of cabinets. Precision is key here.
Doors and drawer fronts also often start as ripped pieces.
Small Projects and Crafts
Even simple projects like birdhouses, picture frames, or decorative boxes involve rip cuts. You might be cutting thin strips for trim or for the main components of a project.
Dovetail Jigs and Other Accessories
Many woodworking accessories are made from plywood. The panels for these jigs are often ripped to very precise widths. This allows for accurate assembly of complex tools.
User Behavior: A common habit is to grab the nearest board without checking its condition. Always inspect your wood. Look for knots, cracks, or warpage.
A little inspection upfront can save you a lot of trouble later.
What This Means for You: Normal vs. Concerning Signs
Understanding when something is right and when it’s wrong is important. It helps you stay safe and produce good work.
Normal Signs of a Rip Cut
- Smooth Sound: The saw makes a consistent, relatively smooth sound. It’s not straining or chattering.
- Clean Cut Line: The edge of the wood should be straight and relatively smooth. Some fuzziness is normal, especially with softer woods.
- No Burning: Unless you’re cutting very dense hardwood very slowly, you shouldn’t see significant black scorch marks along the cut.
- Wood Stays Against Fence: The wood feeds smoothly without wobbling or drifting.
Concerning Signs During a Rip Cut
- Blade Bogging Down: The saw motor sounds like it’s struggling. This means the blade is encountering too much resistance.
- Wood Chatter: The wood vibrates loudly or shakes as it passes the blade.
- Blade Binding: The wood feels like it’s getting stuck or jammed on the blade.
- Sparks or Unusual Noises: These can indicate the blade is hitting something it shouldn’t, or that the blade itself is damaged.
- Kickback: The wood is violently thrown back towards you. This is the most dangerous sign and requires immediate attention to your setup and technique.
- Warping or Tilting Wood: The wood is not staying flat or parallel to the fence.
If you notice any concerning signs, stop the saw immediately. Turn it off. Wait for it to stop.
Then, investigate. Do not try to push through a problem.
Quick Tips for Better Rip Cuts
Here are some quick things you can do to improve your ripping results.
- Use a sharp blade: A dull blade is a dangerous blade. It cuts poorly. It makes the saw work harder. It increases the risk of kickback. Sharpen or replace your blades regularly.
- Use a high-tooth-count blade for ripping: While not as critical as for crosscuts, a blade with more teeth (e.g., 40-60 teeth) can give a smoother rip cut, especially in hardwoods.
- Keep your saw clean: Dust and wood chips can build up on the table, fence, and under the saw. This can affect accuracy and safety.
- Stand to the side: Never stand directly behind the saw when ripping. Stand slightly to the side. This puts you out of the path of potential kickback.
- Have a clear path: Make sure there’s nothing behind the saw that the offcut could catch on.
Blade Choices for Ripping
General Purpose Blade: A 24-tooth blade is common for ripping. It cuts fast but can leave a rougher surface.
Rip Blade: Blades with fewer teeth (10-24) are designed specifically for ripping. They have larger gullets to clear sawdust efficiently. They cut quickly but might leave a rougher finish.
Combination Blade: A blade with 40-60 teeth can do both ripping and crosscutting reasonably well. It’s a good choice for general use.
Always ensure your blade is sharp. This is more important than the number of teeth for safety and cut quality.
Frequently Asked Questions About Ripping Wood
What is the most important safety feature when ripping wood?
The riving knife or splitter is the most critical safety feature for rip cuts. It keeps the cut kerf open, preventing the wood from pinching the blade and causing dangerous kickback.
How do I know if my rip fence is aligned correctly?
Measure the distance from the blade to the fence at both the front and back of the saw table. If the measurements are identical, the fence is aligned parallel to the blade. If they differ, adjust the fence until they match.
Can I rip very thin pieces of wood on a table saw?
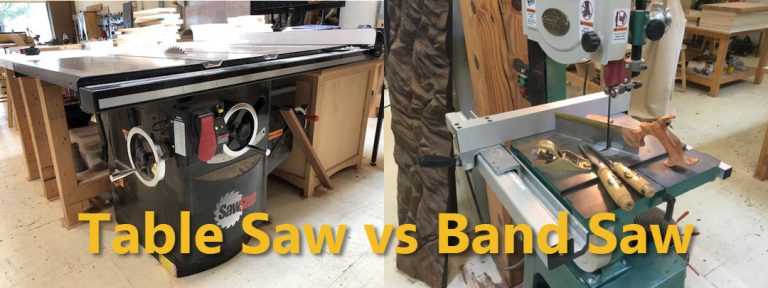
Yes, but with extreme caution. Use a zero-clearance insert and a push stick or specialized jig for support. Always keep your hands well away from the blade.
For very thin rips, a table saw might not be the safest tool. Consider a band saw or a router table with a jig.
What is a good blade for ripping hardwood?
For hardwood, a sharp blade with a moderate number of teeth, like a 40-tooth combination blade, or a dedicated rip blade designed for hardwoods can work well. The key is sharpness and proper feed rate. Avoid forcing the cut.
How do I prevent burning when ripping?
Ensure your blade is sharp. Use a blade designed for ripping or a good combination blade. Cut at a steady, consistent speed, letting the saw do the work.
Make sure the blade is at full speed before the wood contacts it. Also, ensure your riving knife is properly aligned and the wood isn’t binding.
When should I use a push stick instead of my hands?
You should always use a push stick or push block when your hands would come within about 6 inches of the blade. This is especially important when ripping narrow pieces of wood, where hand placement becomes critical for safety.
Final Thoughts on Mastering the Rip Cut
Ripping wood with a table saw is a skill that builds confidence. It takes practice and attention to detail. Always prioritize safety.
Understand your saw’s features. Check your setup before every cut. With these practices, you’ll make accurate, clean cuts.
You’ll also keep yourself safe. Happy woodworking!