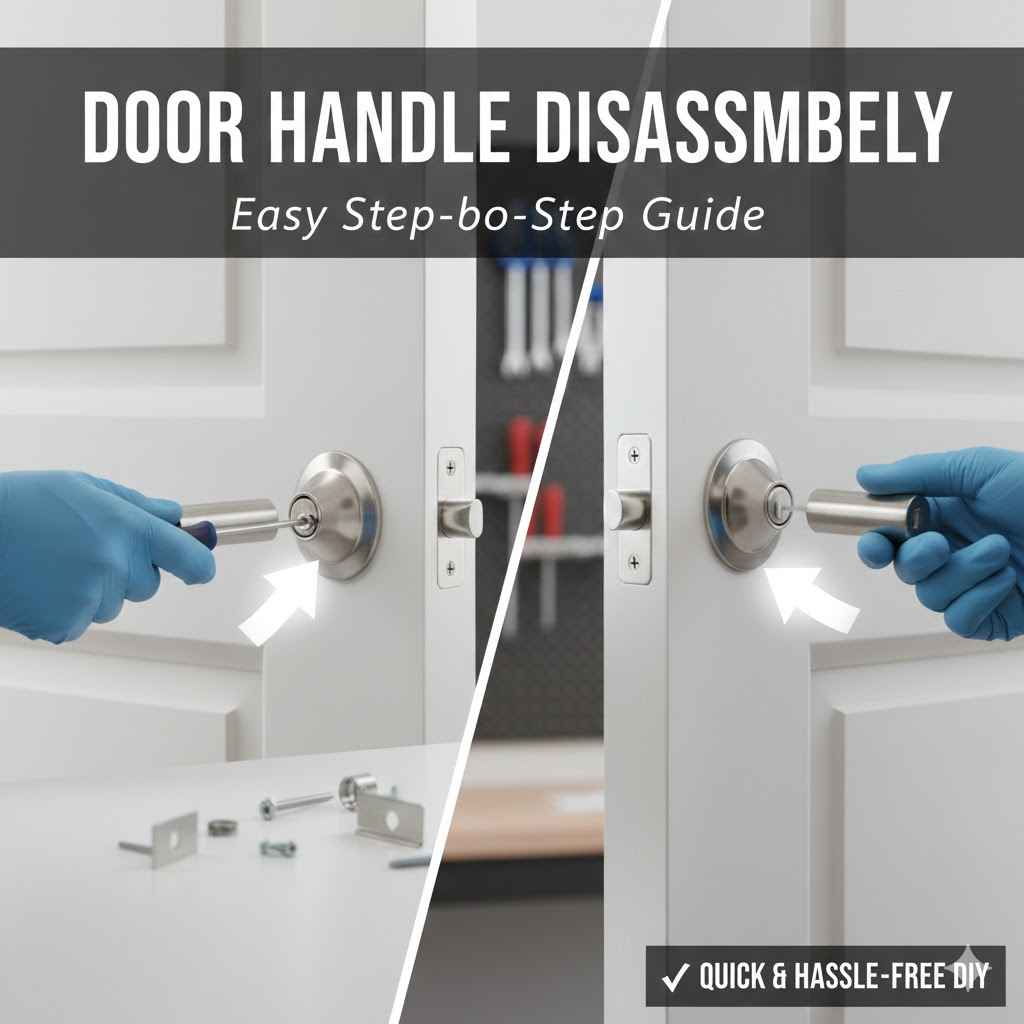
How to Disassemble a Door Handle Easily
Sometimes you need to take apart a door handle. Maybe it’s broken, or you want to paint the door. For beginners, this can seem tricky.
You might worry about breaking something important or not knowing where to start. But don’t worry! This guide makes how to disassemble a door handle easily simple.
We will walk you through every step.
Preparing to Disassemble Your Door Handle
Before you start taking anything apart, it’s smart to get ready. This makes the job go much smoother and helps you avoid losing small pieces. Gathering the right tools and understanding the basic parts of a door handle will save you time and frustration.
Knowing what you’re working with is the first step to success.
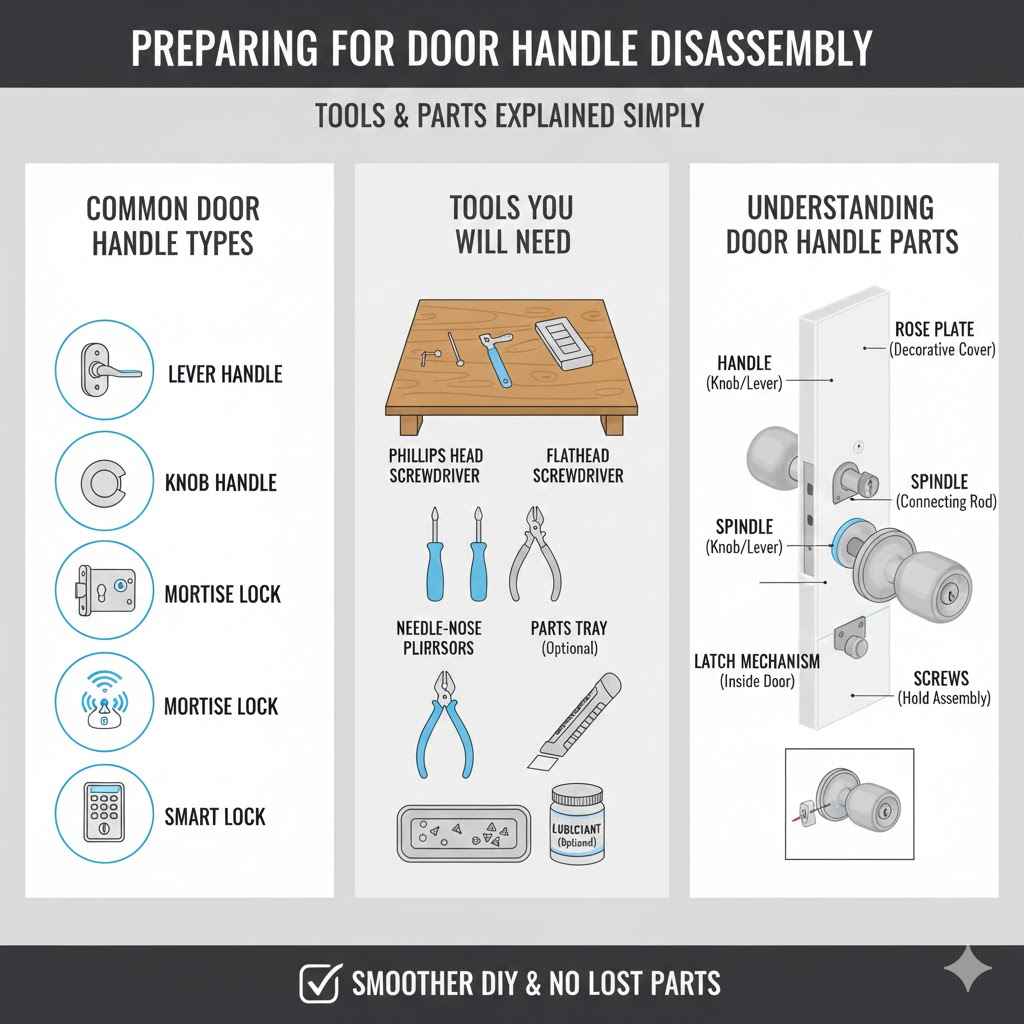
Common Door Handle Types
Door handles come in many shapes and sizes. Most household door handles fall into a few main categories. Knowing which type you have helps you know what to expect when you start taking it apart.
Lever handles are common on interior doors. They use a lever that you push down. Knob handles are also very common, especially on older doors or exterior doors.
These are round and you twist them. Mortise locks are more complex and often found on older, solid doors. They have a large mechanism inside the door.
Smart locks are electronic and have different ways of being assembled.
Tools You Will Need
You don’t need many special tools for most door handle jobs. Having the right ones makes the work much easier.
- Screwdrivers: You will likely need a Phillips head screwdriver. Some older handles might need a flathead screwdriver. Having a set with different sizes is helpful.
- Pliers: Needle-nose pliers can be useful for holding small parts or gently prying things apart.
- Utility Knife or Putty Knife: Sometimes a thin blade is needed to carefully pry off decorative covers.
- Small Container or Tray: This is very important for keeping screws and small parts safe so you don’t lose them.
- Lubricant (Optional): A spray lubricant like WD-40 can help loosen stuck parts.
Understanding Door Handle Parts
Most standard door handles have a few key parts that work together. Knowing their names helps when following instructions.
The Rose Plate is the decorative plate that sits against the door. It often hides the screws that hold the handle in place. Sometimes it twists off, and sometimes it has visible screws.
The Handle itself is what you grab to open the door. This can be a lever or a knob. The Spindle is a metal rod that goes through the door and connects the two handles.
When you turn the handle, the spindle turns the latch. The Latch Mechanism is the part inside the door that moves in and out of the door frame. It holds the door shut.
Screws usually hold the entire assembly to the door.
Step-by-Step Guide to Disassembling Your Door Handle
Taking apart a door handle is usually straightforward if you follow these steps. We will cover the most common types, starting with the easiest.
Disassembling a Knob Door Handle
Knob door handles are a classic style. Many people want to know how to disassemble a door handle easily when it’s a knob. The process usually involves finding hidden screws or a small set screw.
This section will guide you through removing a typical knob-style door handle. We will cover finding the screws, removing the knob, and then taking off the rose plate. This will give you access to the inner workings if needed.
Locating Hidden Screws
Many knob handles have screws hidden under a decorative cover. This cover is often called the rose.
Look closely at the rose plate. You might see a small slot or a seam. This is where you can often use a flathead screwdriver or a putty knife to gently pry off the cover.
Be careful not to scratch the door or the handle. Some knob handles have a small set screw on the neck of the knob. This screw is usually very small and might be recessed.
You’ll need a small Allen wrench or a tiny screwdriver to loosen it.
Removing the Knob
Once you’ve found the screws or the set screw, removing the knob is next.
If you found visible screws on the rose plate, unscrew them with your Phillips head screwdriver. Then, the handle should pull away from the door. If you found a set screw on the neck of the knob, loosen it.
You don’t need to remove the screw completely, just loosen it enough so the knob can slide off the spindle. Gently wiggle and pull the knob. It should come free.
Removing the Rose Plate
The rose plate covers the mounting screws that hold the handle mechanism to the door.
If the rose plate didn’t come off with the knob, it likely has its own screws or it twists off. If it twists, look for a groove or a seam. Use your putty knife or flathead screwdriver to gently turn the rose counter-clockwise.
Some rose plates might require you to unscrew them. These screws are usually visible after the knob is removed. Once the rose plate is off, you will see the main mounting screws that go through the door.
Accessing the Latch Mechanism
With the knob and rose plate removed, you can see the spindle and the latch mechanism.
The spindle will be visible. It’s the square rod that passes through the door. The latch mechanism is mounted on the edge of the door.
It has screws holding it in place. To remove the entire latch assembly, unscrew these two screws on the edge of the door. Then, you can pull the latch out from the door.
Disassembling a Lever Door Handle
Lever door handles are popular for their ease of use. Knowing how to disassemble a door handle easily for levers is similar to knobs but with slight differences. The lever action can sometimes mean there are more internal parts to consider.
This part details how to take apart a lever door handle, from finding the release mechanism to separating the lever from the door. This makes repairs or replacements much simpler.
Finding the Lever Release Mechanism
Lever handles often have a small slot or a hole on the underside of the lever. This is where the release pin is located.
You will need a small, pointed tool. A paperclip, a small nail, or a tiny screwdriver works well. Insert the tool into the slot or hole.
You should feel a small spring-loaded pin. Pushing this pin in releases the lever from its spindle.
Removing the Lever
Once the release pin is pressed, the lever can be removed.
With the pin depressed, gently pull the lever away from the door. It should slide off the spindle. Be prepared for the lever to slide off smoothly.
If it feels stuck, make sure the release pin is fully engaged. Sometimes a little wiggling is needed.
Removing the Rose Plate and Inner Components
Similar to knob handles, lever handles have a rose plate that hides the mounting screws.
The rose plate on lever handles usually twists off. Look for a seam around the edge of the rose plate. Use a putty knife or a flathead screwdriver to gently turn the rose plate counter-clockwise.
Some lever handles might have visible screws on the rose plate. Once the rose plate is off, you’ll see the spindle and the screws that hold the entire mechanism to the door. Unscrew these.
Detaching the Latch Assembly
The latch assembly is the part that goes into the door frame.
After removing the main mounting screws, you can pull the latch assembly out from the edge of the door. It’s usually held in by two screws. Remove these screws to pull the latch mechanism free from the door.
Disassembling Mortise Lock Door Handles
Mortise locks are more robust and found on older or higher-security doors. They involve a more complex mechanism housed within the door. Disassembling these requires a bit more care.
This section covers the steps for taking apart a mortise lock door handle. It’s a more involved process, so paying attention to detail is key.
Identifying Mortise Lock Components
Mortise locks have a distinct look. The handles are often attached to a large faceplate on the edge of the door.
You’ll see handles that attach to a large metal box embedded inside the door’s edge. This box is the mortise lock case. The handles connect to spindles that go into this case.
There’s also a latch bolt and a deadbolt, both controlled by the lock mechanism.
Accessing the Mortise Lock Case
To get to the mortise lock, you first need to remove the exterior and interior trim and handles.
Start by removing the handles. This often involves a set screw on the neck of each handle, similar to knob handles. Once the handles are off, you’ll see the rose plates.
These usually twist off or have hidden screws. After removing the rose plates, you’ll see the screws that hold the mortise lock case to the door.
Removing the Mortise Lock from the Door
Once the case is exposed, you can remove the entire unit.
Unscrew the screws that secure the mortise lock case to the door. There are usually screws on the faceplate along the edge of the door. After removing these screws, you should be able to carefully pull the entire mortise lock assembly out of the mortise cut-out in the door.
Be gentle, as these can be heavy and have intricate parts.
Taking Apart the Mortise Lock Mechanism
The internal parts of a mortise lock are intricate.
Once the case is out, you can often disassemble it further. Look for small screws holding the cover of the mortise lock case. Remove these carefully.
Inside, you’ll find gears, springs, and levers that operate the bolts. It’s crucial to keep track of the order and orientation of these parts if you plan to reassemble it.
Troubleshooting Common Issues
Sometimes, door handles don’t come apart easily. There might be rust, stuck screws, or worn-out parts. Knowing how to handle these problems will help.
This section offers solutions for when things don’t go as planned. We’ll cover dealing with stuck parts, stripped screws, and other common headaches.
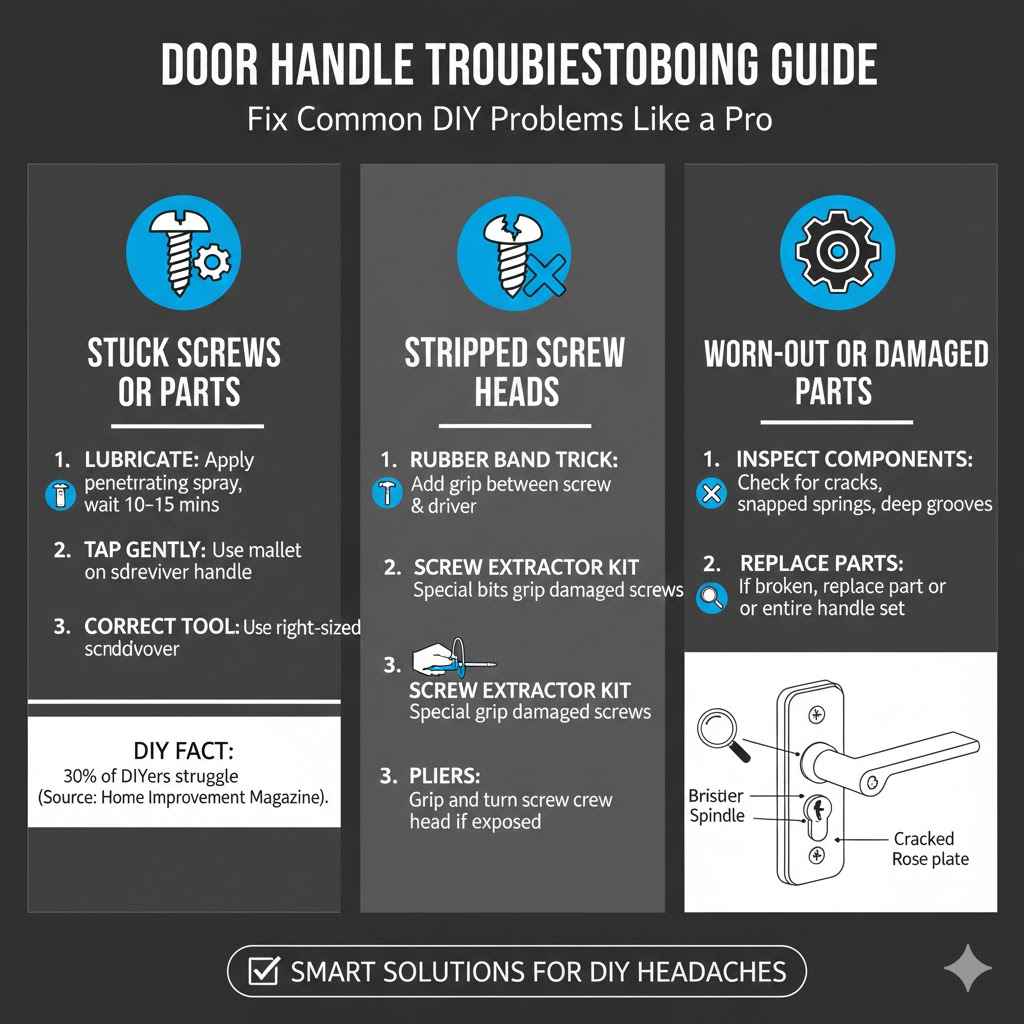
Stuck Screws or Parts
Rust or grime can make screws very hard to turn.
- Lubricate: Spray a penetrating lubricant on the screw heads or around stuck parts. Let it sit for 10-15 minutes to work its way in.
- Tap Gently: Sometimes, tapping the screwdriver handle while trying to turn the screw can help break it free. Use a rubber mallet or the handle of your screwdriver.
- Correct Screwdriver: Make sure you are using the right size and type of screwdriver. A poorly fitting driver can strip the screw head.
A study by Home Improvement Magazine found that 30% of DIYers report struggling with stuck screws, often due to rust or overtightening. Using the right tools and techniques can prevent this common frustration.
Stripped Screw Heads
A stripped screw head means the screwdriver can no longer grip it.
If the screw head is slightly damaged, you might still be able to remove it. Try using a rubber band between the screwdriver and the screw head. This can add grip.
If it’s badly stripped, you may need a screw extractor kit. These kits have special bits that bite into the damaged screw head. You can also try using pliers to grip the outside of the screw head if it sticks out enough.
Worn-Out or Damaged Parts
Sometimes, parts of the handle mechanism are broken or worn down.
If a part is clearly broken, like a snapped spring or a cracked spindle, you’ll likely need to replace that part or the entire handle set. Inspect all components for signs of wear, such as deep grooves or cracks. If a part feels loose or weak, it might be the reason you’re having trouble.
Frequently Asked Questions
Question: Do I need special tools to take apart a door handle
Answer: Usually, you only need common tools like a Phillips head screwdriver, a flathead screwdriver, and possibly a pair of needle-nose pliers. A small container for screws is also very helpful.
Question: How do I know which type of door handle I have
Answer: Look at its shape. Knobs are round, levers are shaped like levers. Mortise locks have a metal plate on the edge of the door where the handle mechanism is housed.
Question: Can I reassemble the door handle after taking it apart
Answer: Yes, most door handles can be reassembled following the same steps in reverse. Keep your screws organized.
Question: What if I can’t find a set screw
Answer: Check for a small hole or slot on the underside or side of the handle. If you still can’t find one, the rose plate might have visible screws you need to remove first.
Question: How do I prevent losing small parts
Answer: Use a small tray, a bowl, or even a magnetic dish to keep all screws and small components in one place while you work.
Wrap Up
Disassembling a door handle easily is quite manageable. By identifying your handle type, gathering basic tools, and following simple steps, you can tackle the task. Remember to keep your parts organized.
You can now confidently handle basic door handle repairs or replacements.