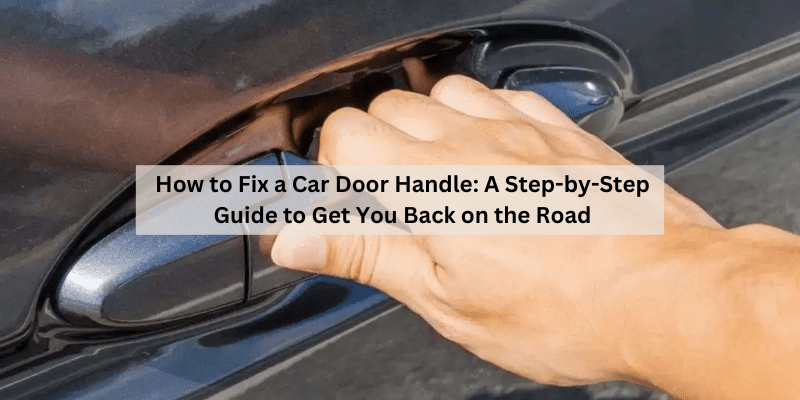
How to Fix a Car Door Handle (Tighten, Replace or Lube It)
Most car door handles fail from a loose mounting screw, a broken linkage rod, or a worn latch mechanism – tightening or lubricating fixes the first two in under 15 minutes. Ignoring it means climbing across the passenger seat, or a safety risk if you can’t exit quickly in an emergency. This guide covers 4 fix methods (tighten, replace, interior-specific, lubricate) for under $20 in parts.
Why Fixing a Car Door Handle Matters
Let’s talk about why a broken door handle is such a hassle. When my driver’s side handle stopped working, I had to climb in through the passenger side—embarrassing and inconvenient! A faulty handle isn’t just annoying; it can be a safety issue. If you can’t open the door quickly in an emergency, that’s a problem. Plus, it makes your car look neglected, and who wants that. If your handle has hidden fasteners, see our guide on removing a door handle without visible screws first.
Fixing it yourself saves you money—shops can charge $100 or more for this repair. I spent $15 on parts and did it in an hour. It’s also super satisfying to solve the problem on your own. Whether you’re dealing with an interior or exterior handle, let’s figure out what’s wrong first.
Diagnosing the Problem
Before you start fixing, you need to know what’s broken. I made the mistake of assuming my handle was shot, but it was just a loose screw. Here’s how I diagnose the issue:
- Check for looseness: Grab the handle and wiggle it. If it feels wobbly, it might just need tightening. My handle was loose at first, and a quick screw fix did the trick.
- Test the door: Try opening the door from both inside and outside. If one works but not the other, it’s likely a specific handle issue. My exterior handle failed, but the interior one was fine.
- Listen for clicks: Pull the handle and listen. A click means the mechanism is trying to work, but something’s off. No click? The linkage or latch might be broken.
- Look for visible damage: Check for cracks or missing pieces. My friend’s handle was snapped clean off after a fender bender.
Understanding the problem helps you choose the right fix. It’s like being a car detective—pretty fun when you figure it out!
Tools and Materials You’ll Need
Having the right tools makes this job so much easier. I learned this after trying to pry off a door panel with a butter knife—don’t do that! Here’s what I use:
- Screwdriver set: Phillips and flathead screwdrivers for removing screws. I got a set for $10.
- Trim removal tool: To pop off the door panel without breaking the clips. I bought one for $5 online.
- Socket wrench set: For bolts holding the handle in place. My $20 set has been a lifesaver.
- Replacement handle: If yours is broken, get one for your car’s make and model. I found mine for $12 on an auto parts site.
- Lubricant: WD-40 or silicone spray for sticky mechanisms. I had some at home.
- Gloves: To keep your hands clean. I use cheap work gloves.
- Optional: Replacement clips: Door panel clips can break, so I keep extras (about $5 for a pack).
My total cost was around $30, but you might already have some tools. Check your car’s manual for specific handle part numbers before buying.

Method 1: Tightening a Loose Door Handle
If your handle is wobbly but still works, tightening it might be all you need. This was my first fix, and it took 10 minutes. Here’s how I did it:
- Remove the door panel: Pop off the panel using a trim removal tool. I started at the bottom and gently pried until the clips released. Unscrew any hidden screws—mine were behind the armrest.
- Locate the handle screws: Look for screws or bolts holding the handle. My exterior handle had two bolts inside the door frame.
- Tighten them: Use a screwdriver or socket wrench to tighten the screws. I turned mine until they were snug but didn’t overtighten to avoid stripping.
- Test the handle: Reattach the panel loosely and test the handle. Mine felt solid after this.
- Reassemble: Snap the panel back on and secure all screws. I made sure the clips clicked into place.
This fix is quick and free if you have tools. It saved my handle from getting worse and felt like a win!
Method 2: Replacing a Broken Exterior Door Handle
📊 A shop replacement runs $120-280 in parts and labor, versus roughly $20-40 for a DIY OEM or aftermarket handle — Source: T1A Auto, door handle cost guide
If your exterior handle is cracked or won’t open the door, you’ll need to replace it. I did this when my driver’s side handle broke after years of use. Here’s the step-by-step (see our full door handle removal guide for more detail on this part):
- Get the right part: Order a handle for your car’s make, model, and year. I found one online for $12 that matched my sedan.
- Remove the door panel: Use a trim tool to pry off the panel. I unscrewed the armrest and window controls first, then popped off the clips.
- Disconnect the handle: Find the handle’s linkage rod—a metal or plastic piece connecting it to the latch. I unclipped mine with a flathead screwdriver.
- Remove the old handle: Unscrew the bolts holding the handle to the door frame. Mine had two bolts, and I used a socket wrench. Slide the handle out from the outside.
- Install the new handle: Slide the new handle into place and secure it with the bolts. I reconnected the linkage rod and tested it before tightening everything.
- Reassemble and test: Snap the panel back on, reconnect any controls, and test the handle. My new handle worked perfectly, and the door opened smoothly.
This took me about 45 minutes. It’s a bit more work, but seeing that new handle in action was so rewarding.
Method 3: Fixing an Interior Door Handle
Interior handles can break too, and I fixed one on my passenger side when it stopped opening the door. Here’s how I tackled it:
- Remove the door panel: Pop off the panel with a trim tool. I unscrewed the armrest and disconnected the window switch first.
- Inspect the handle: Look for broken plastic or a disconnected linkage. My handle’s plastic clip had snapped.
- Replace the handle: If it’s broken, get a new interior handle for your car. I found one for $10. Unscrew the old handle (mine had one screw) and unclip the linkage rod.
- Install the new handle: Attach the linkage to the new handle and screw it in place. I tested it by pulling the handle before reassembling.
- Reassemble the panel: Snap the panel back on and secure all screws and clips. I reconnected the window switch and checked the handle again.
This fix took 30 minutes and was easier than the exterior handle. My passenger door was back in business, and I didn’t need a mechanic.
Best Door Handle Repair Tool Pick
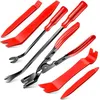
Doaho 7-Piece Car Trim Removal Tool Kit
Non-scratch pry tools get the interior door panel off cleanly – the exact step Method 3 above walks through.
- Best for: removing the panel without cracking clips or scratching trim
- Why we picked it: plastic tips are safe on interior panels, unlike metal screwdrivers
- Main drawback: won’t help with exterior handle bolts, which need a socket set
Compare more car door handle repair options
 Option 1 Dorman Door Lock Rod Clips (6-Pack)
|
 Option 2 WD-40 Specialist Silicone Lubricant
|
 Option 3 52-in-1 Precision Screwdriver Set
|
As an Amazon Associate we earn from qualifying purchases.
Method 4: Lubricating a Sticky Door Handle
Sometimes, the handle isn’t broken—it’s just sticky. I used this trick when my back door handle felt stiff. Here’s what I did:
- Access the mechanism: Remove the door panel to reach the handle’s linkage and latch. I used a trim tool to pop it off.
- Clean the area: Wipe away dirt or grime with a rag. I found some gunk buildup on my linkage.
- Apply lubricant: Spray WD-40 or silicone lubricant on the linkage and latch. I sprayed lightly and moved the handle to spread it.
- Test the handle: Pull the handle a few times to work in the lubricant. Mine loosened up right away.
- Reassemble: Snap the panel back on and test again. I made sure the door opened smoothly.
This took 15 minutes and cost me nothing since I had WD-40. It’s a great fix for handles that feel sluggish but aren’t broken.
Troubleshooting Common Issues
Sometimes, things don’t go perfectly. Here’s how I handled some problems:
- Handle still loose: If tightening doesn’t work, check for stripped screws. I replaced a stripped screw with a slightly larger one.
- Door won’t open: If the new handle doesn’t work, the linkage might be misaligned. I rechecked mine and clipped it back properly.
- Broken clips: Door panel clips can snap. I replaced mine with spares from a $5 pack.
- Sticky latch: If the door still won’t open, lubricate the latch itself. I sprayed WD-40 into the latch mechanism to fix a stubborn door.
These fixes are simple and keep you from getting stuck. A little patience goes a long way!
Comparing Fixing Methods
To help you choose the best method, here’s a table based on my experiences:
| Method | Best For | Cost | Time Needed | Tools Needed | Difficulty |
|---|---|---|---|---|---|
| Tightening Loose Handle | Wobbly but functional handles | $0-$5 | 10 min | Screwdriver, socket wrench | Easy |
| Replacing Exterior Handle | Broken or cracked handles | $10-$30 | 45 min | Trim tool, socket wrench, screwdriver | Medium |
| Fixing Interior Handle | Broken interior handles | $8-$20 | 30 min | Trim tool, screwdriver | Medium |
| Lubricating Sticky Handle | Stiff or sluggish handles | $0-$5 | 15 min | Trim tool, lubricant | Easy |
I love tightening for quick fixes, but replacing the handle is best for lasting results. Pick what matches your issue and skill level.
Preventing Future Door Handle Problems
Once your handle is fixed, you want it to stay that way. Here’s what I do to keep mine working:
- Be gentle: I avoid yanking the handle, especially in cold weather when plastic can get brittle.
- Lubricate regularly: I spray WD-40 on the linkage every 6 months to keep it smooth.
- Check screws: I tighten handle screws yearly to prevent loosening.
- Protect from weather: If your car’s parked outside, a car cover helps shield handles from rain and sun. I use one for my old car.
These habits keep my handles in great shape and save me from future repairs.
Safety Tips for Fixing Your Car Door Handle
Working on your car is fun, but safety comes first. Here’s what I keep in mind:
- Disconnect the battery: If you’re working on power windows or locks, disconnect the car battery to avoid shocks. I did this for my driver’s door.
- Work in a safe space: Park on a flat surface and use the parking brake. I work in my garage to avoid traffic.
- Wear gloves: Protect your hands from sharp edges inside the door. I cut my finger once without gloves.
- Keep tools organized: I lay out my tools on a towel to avoid losing them. It saves time and frustration.
These tips keep you safe and make the job smoother.
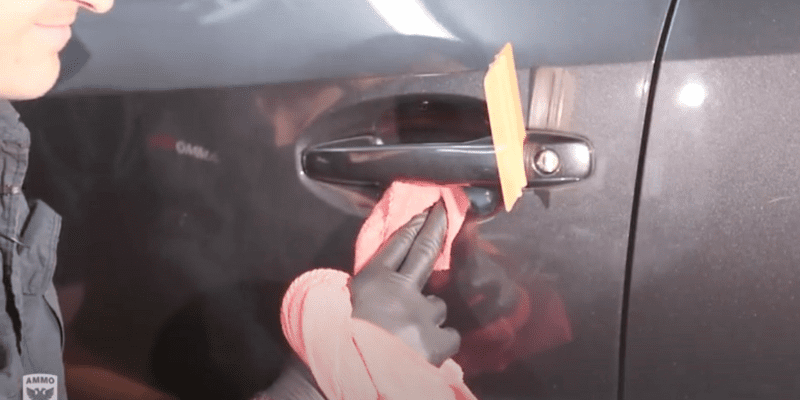
Adding Style to Your Car Door Handle
Fixing your handle is a great chance to add some flair. I had fun upgrading mine:
- Painted handles: I painted my new handles to match my car’s color for a custom look.
- Chrome covers: I added chrome handle covers for $15 to give my car a sleek vibe.
- LED accents: For my tech-loving friend, I helped install LED handle lights for a cool nighttime effect.
These touches make your car stand out while keeping it functional.
“It’s not just about saving money, though I saved over $100 – it’s about taking charge of your car. Every time I open my driver’s door with that smooth, solid handle, I know I did it myself.”
Conclusion
Start with the cheapest fix first: tighten the mounting screw, then check the linkage rod before assuming you need a full replacement. Most handle problems are fixed in under 30 minutes for less than $20 in parts – a shop visit for the same job runs $120-280.
Frequently Asked Questions
How do I know if my car door handle needs replacing?
If it’s cracked, won’t open the door, or feels broken when you pull it, it probably needs replacing. I replaced mine when it snapped off completely.
Can I fix a car door handle without tools?
You’ll need at least a screwdriver to tighten screws or remove the panel. I tried without tools once and couldn’t get the panel off properly.
How long does it take to fix a car door handle?
Tightening takes about 10 minutes, lubricating 15 minutes, and replacing a handle 30-45 minutes. My first replacement took an hour, but now I’m faster.
Will fixing the handle myself void my car’s warranty?
Usually not, as long as you don’t damage other parts. I checked my warranty, and this repair was fine since it’s a simple fix.
What if my door still won’t open after fixing the handle?
Check the linkage or latch for issues. I had to lubricate my latch after replacing the handle to get the door working smoothly.
Sponsored / affiliate links. As an Amazon Associate I earn from qualifying purchases. I may earn additional commission from eligible campaigns.