How To Get Permanent Marker Off A Wood Table (Tested Methods)
Dealing with permanent marker on a wood table can feel like a disaster. It happens fast. Maybe a child was coloring.
Perhaps you made a mistake yourself. You see that dark line on your beautiful wood, and your heart sinks. You wonder if it’s ruined forever.
Many people feel this panic. But don’t worry! There are ways to fix this.
We will look at safe and effective methods. You can save your table. Let’s explore them together.
Removing permanent marker from a wood table involves using specific household items and gentle techniques. Success depends on the wood finish and the ink’s age. Always test a small, hidden area first to avoid damaging the wood’s finish.
Understanding Permanent Marker on Wood
Permanent markers use strong dyes. These dyes are designed to stick. They bond well to many surfaces.
Wood is porous. This means the ink can soak in. The deeper it goes, the harder it is to remove.
What makes it tricky is the finish on the wood. A good finish can protect the wood. It might keep the ink from soaking in too much.
Older ink that has dried for a long time is also tougher. Fresh ink is usually easier to clean up. Knowing this helps us pick the right cleaning method.
The type of wood matters too. Soft woods like pine are more likely to absorb ink. Hardwoods like oak or maple offer more resistance.
The color of the marker plays a role. Darker inks are often more stubborn. Light-colored inks might lift easier.
Even the sheen of the finish, like matte versus glossy, can affect how the ink behaves on the surface. It’s not just about the marker; it’s about the whole picture.
My Permanent Marker Mishap
I remember one time vividly. It was a Saturday afternoon. My niece was visiting.
She had a brand-new set of permanent markers. She loves to draw. We were at my dining room table.
It’s a lovely oak piece. I turned around for just a minute. When I looked back, there it was.
A bright blue streak right across the middle. My stomach dropped. I felt a wave of annoyance.
Then came the worry. Would this stain ruin my table? I remembered trying to wipe it.
It just smeared. That made me feel even more helpless. The marker looked so bold against the wood grain.
I thought I’d have to live with it forever. It felt like a small disaster in my home. That moment taught me a lot.
I spent the next hour searching online. Many suggestions seemed harsh. Some mentioned strong chemicals.
Others talked about sanding. I was scared of making it worse. I wanted a gentle way first.
I tried a few things that didn’t work. Then I found a method using rubbing alcohol. I was hesitant.
Would alcohol damage the finish? I decided to try it on the underside of the table first. It worked!
Slowly and carefully, I managed to lift the ink. It took patience. But seeing that blue line disappear was such a relief.
It showed me that common household items could be powerful tools.
This experience was a turning point. It made me realize that permanent marker mistakes aren’t always permanent problems. It encouraged me to explore safe cleaning for wood furniture.
Now, I feel much more confident. I know there are options before I despair. It’s all about choosing the right approach for your specific situation.
Every scratch and smudge tells a story. This one told me about resilience and learning.
Common Household Items That Work
You don’t always need fancy cleaners. Many items already in your home can tackle permanent marker. These are often gentler.
They are also budget-friendly. Let’s look at some top contenders.
Top Household Cleaners for Marker Stains
1. Rubbing Alcohol (Isopropyl Alcohol): This is a go-to. It’s a solvent.
It breaks down many inks. Use it on a cotton ball or soft cloth. Work gently.
It’s very effective.
2. Toothpaste (Non-gel): Yes, toothpaste! White, paste-type toothpaste works.
It’s mildly abrasive. It can lift ink without scratching too much. Baking soda in the toothpaste helps.
Use a small amount. Rub gently in a circular motion.
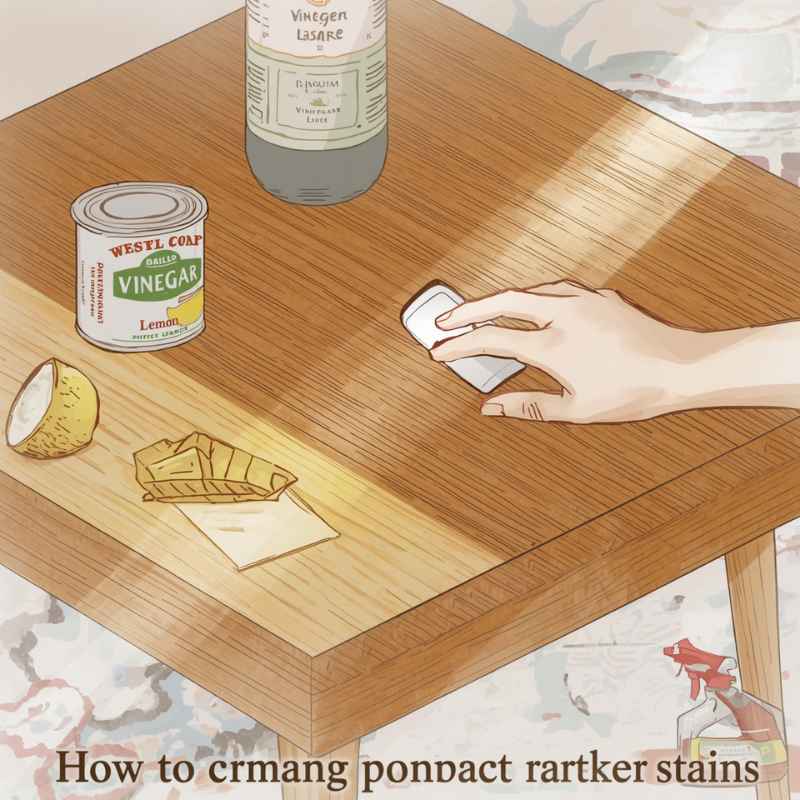
3. Baking Soda Paste: Mix baking soda with a little water. Make a paste.
This is another gentle abrasive. It can scrub away the ink. Apply it with a soft cloth.
4. Hairspray: Some older hairsprays contain alcohol. This can help dissolve ink.
Spray a little on a cloth. Dab it onto the stain. Be sure to wipe it clean afterward.
Newer formulas might not work as well.
5. Magic Eraser (Melamine Foam): These are very effective. But they are also abrasive.
Use them with extreme caution. They can remove the wood’s finish. Test in an unseen spot first.
Dampen it slightly. Rub very lightly.
Remember, the key is to be patient. Start with the mildest option. Only move to stronger ones if needed.
Always test first! This prevents bigger problems. Your goal is to remove the ink, not the finish.
It’s also wise to understand why these work. Rubbing alcohol and hairspray are solvents. They dissolve the ink binders.
Toothpaste and baking soda use mild abrasion. They physically lift the ink particles. Magic Erasers work like very fine sandpaper.
They physically wear away the stained layer. Each has its own mechanism. Knowing this helps you choose wisely.
The Rubbing Alcohol Method: A Step-by-Step Guide
Rubbing alcohol is often the first thing people try. It’s usually safe for finished wood. But testing is still crucial.
Here’s how to use it effectively.
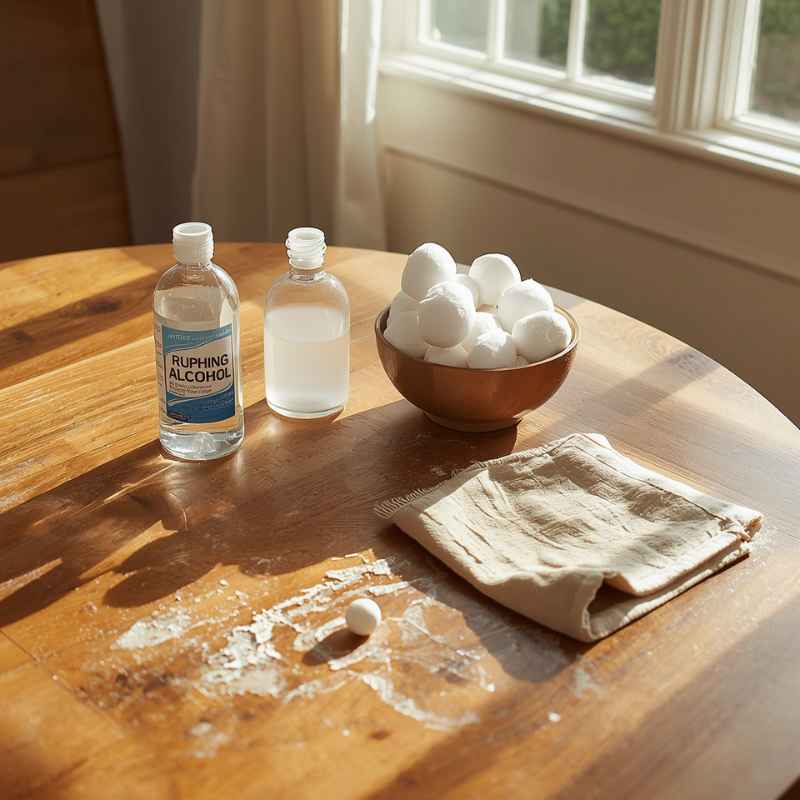
What you’ll need:
- Isopropyl alcohol (70% or 91%)
- Soft, clean cloths (microfiber is great)
- Cotton balls or swabs
- Water
- Wood polish (optional, for after)
Steps:
- Test First: Find an inconspicuous spot on your table. A leg bottom or the back edge works well. Apply a little rubbing alcohol to a cotton swab. Gently rub the test spot. Wait a minute. Wipe it clean. Check for any dulling or damage to the finish. If it looks okay, proceed.
- Apply Alcohol: Dampen a clean cloth or cotton ball with rubbing alcohol. Do not soak it. You want it damp, not dripping.
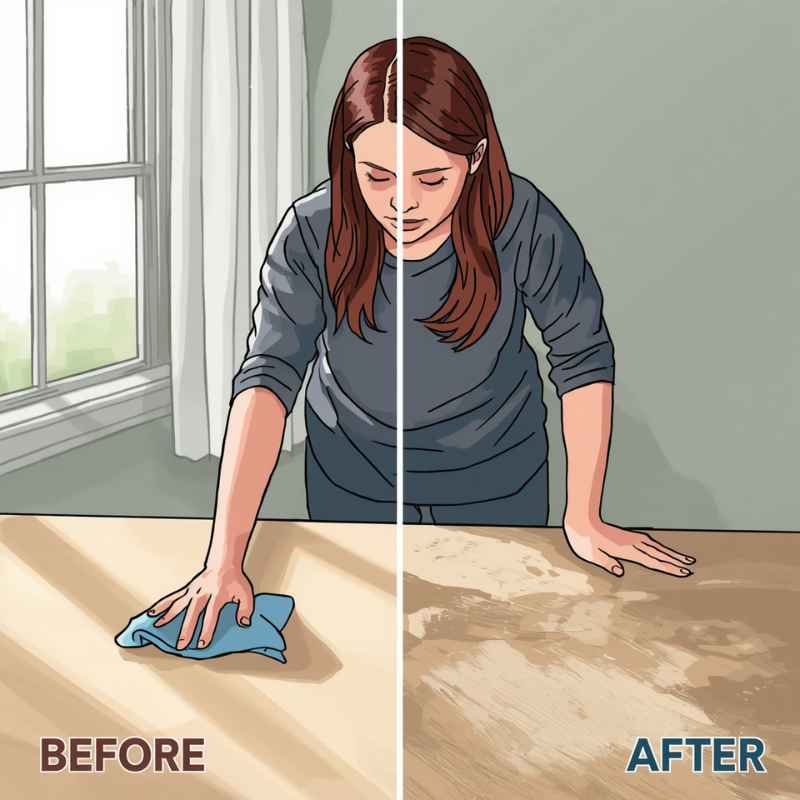
- Dab and Rub Gently: Lightly dab the alcohol onto the marker stain. Then, use a gentle, circular motion to rub. Work from the outside of the stain inward. This stops the ink from spreading.
- Wipe Away Ink: As the ink lifts, use a clean, dry part of the cloth to wipe it away. You should see the ink transferring to the cloth.
- Repeat as Needed: You might need to repeat the dabbing and wiping process several times. Be patient. Let the alcohol work. Avoid scrubbing too hard.
- Clean the Area: Once the ink is gone, dampen a clean cloth with plain water. Wipe the area to remove any alcohol residue.
- Dry and Polish: Pat the spot dry with another clean cloth. If the area looks dull, apply a little wood polish. This helps restore the shine.
I’ve used this method many times. It’s my favorite for fresh stains. The trick is the light touch.
Too much pressure can damage the finish. It’s like a gentle massage for the wood. Sometimes, a 91% alcohol works faster.
But 70% is usually fine and maybe a bit gentler. Always follow up with a clean damp cloth. You don’t want that alcohol sitting on the wood.
What if the stain is really old? You might need to let the alcohol sit for a moment. Just a few seconds.
Then try the gentle rub. Don’t let it dry completely on the wood. Keep it damp and keep wiping.
The goal is to lift the ink before it dries again. If you’re using cotton swabs, switch to a fresh one often. You don’t want to put the ink back onto the wood.
The Toothpaste Trick for Stubborn Marks
When alcohol doesn’t quite do the job, toothpaste is a good next step. It’s not as strong as some commercial cleaners. But its mild abrasive nature can lift ink that’s set in a bit.
Remember, this is for white, non-gel toothpaste.
What you’ll need:
- White, non-gel toothpaste
- Soft cloths
- Water
Steps:
- Test: Just like with alcohol, test on a hidden spot first. Ensure it doesn’t harm your table’s finish.
- Apply Toothpaste: Put a small amount of toothpaste directly onto the marker stain.
- Rub Gently: Use a soft cloth to rub the toothpaste into the stain. Use small, circular motions. Don’t press hard. You are trying to gently buff away the ink.
- Wipe Clean: Use a damp cloth to wipe away the toothpaste and lifted ink. Rinse the cloth often.
- Repeat if Necessary: If some ink remains, you can apply a little more toothpaste. Repeat the gentle rubbing process.
- Final Wipe: Wipe the area clean with a damp cloth. Dry it with a clean, soft cloth.
This method feels a bit strange the first time. Rubbing toothpaste on a table! But the baking soda in it acts like a very fine sandpaper.
It works on the surface. It’s best for ink that hasn’t soaked too deep. If you use too much pressure, you can dull the finish.
So, gentle is the word here. I’ve seen this work wonders on scuff marks too. It’s a multi-purpose friend for furniture.
What kind of toothpaste? Anything basic and white. Avoid the kinds with whitening crystals or gels.
Those can be too harsh. The simpler, the better. Think classic Colgate or Crest white paste.
It’s the mild abrasiveness we want, not the fancy extras. And make sure the cloth is soft. A rough cloth with even gentle toothpaste can cause tiny scratches.
The Baking Soda Paste Method
Similar to toothpaste, baking soda offers mild abrasion. It’s a natural cleaner that’s very versatile. When combined with water, it forms a gentle paste.
What you’ll need:
- Baking soda
- Water
- Soft cloths
Steps:
- Test Spot: Always test this on an unseen part of your table.
- Make the Paste: Mix about two parts baking soda with one part water. Stir until you have a thick paste. It should be spreadable but not runny.
- Apply Paste: Gently spread the paste over the marker stain.
- Rub Gently: Use a soft cloth to rub the paste into the stain. Move in small circles. Be careful not to scrub too hard.
- Wipe and Rinse: Use a damp cloth to wipe away the baking soda paste and any lifted ink.
- Repeat if Needed: If the stain is still visible, you can try applying the paste again.
- Final Clean: Wipe the area with a clean, damp cloth. Then, dry it thoroughly with a soft cloth.
This method is great when you want something very natural. It’s less likely to damage finishes than harsher chemicals. The key is the consistency of the paste.
Too watery, and it won’t have enough grit. Too thick, and it might be harder to spread and remove. It’s a fine balance.
I’ve used baking soda paste for all sorts of cleaning tasks. It’s good for soap scum in the shower, and it works on my pots and pans too. For wood, the gentle nature is key.
It’s more about lifting than dissolving. So, if the ink is truly bonded into the wood grain, this might need more patience. Or it might not be enough on its own.
It’s a solid option to try before anything else.
Hairspray and Magic Erasers: Use with Caution
These can be effective. But they also carry a higher risk of damage. Always use them as a last resort.
And test, test, test!
Hairspray Technique
What you’ll need:
- Alcohol-based hairspray (older formulas are often best)
- Soft cloths
- Water
Steps:
- Test: Crucial for hairspray. It can damage certain finishes.
- Spray Cloth: Spray a small amount of hairspray onto a soft cloth. Do not spray directly on the table.
- Dab and Wipe: Gently dab the stained area with the damp cloth. Then, lightly wipe.
- Wipe Clean: Immediately wipe the area with a clean, damp cloth to remove residue.
- Dry: Pat dry with a soft cloth.
Note: Modern hairsprays have fewer solvents. They may not work well. Older aerosol cans are more likely to contain helpful alcohol.
Magic Eraser Caution
What you’ll need:
- Magic Eraser (melamine foam)
- Water
- Soft cloths
Steps:
- Test: Absolutely essential. Magic Erasers are abrasive. They can remove finish.
- Dampen Eraser: Lightly dampen the Magic Eraser. Wring out excess water. It should be damp, not wet.
- Rub VERY Lightly: Gently rub the marker stain. Use minimal pressure. You are just trying to lift the ink.
- Check Frequently: Stop and check the area often. See if the finish is dulling. If it is, stop immediately.
- Wipe Clean: Wipe the area with a damp cloth.
- Dry: Pat dry with a soft cloth.
Note: A Magic Eraser is essentially a very fine abrasive sponge. It can take off the protective top layer of your wood finish if used too aggressively. Always use the lightest touch possible.
I’ve used a Magic Eraser a couple of times. It was on a minor scuff. I was shocked at how well it worked.
But I also noticed the spot felt different. It was less shiny. That told me it had removed some of the topcoat.
So, for marker, I’d reserve this for the worst-case scenario. And I’d be ready to re-finish the spot if needed. It’s powerful, but requires respect.
Hairspray is a bit of a gamble. It relies on the alcohol content. If your hairspray doesn’t have much alcohol, it won’t do much.
It might even leave a sticky residue. So, always read the ingredients if you can. Or just stick to rubbing alcohol.
It’s more direct and reliable for dissolving ink.
When to Call in the Pros (or What to Expect)
Sometimes, the ink has gone too deep. Or the finish is already damaged. In these cases, you might need more than household items.
What are your options?
What Professionals Can Do
Wood Refinishing: A professional can strip the old finish, remove the stain (often with specialized chemicals or light sanding), and reapply a new protective finish. This is the most thorough solution for deep stains or damaged finishes.
Spot Repair: For smaller areas, a skilled refinisher might be able to do a spot repair. They will try to match the existing finish. This is less intrusive than a full refinish.
Color Matching: Sometimes, the stain is removed, but the wood is discolored. A pro can use stains to re-color the wood to match the rest of the table.
When should you consider this? If your table is an antique or very valuable. If the stain is very large or deep.
If you’ve tried multiple gentle methods and nothing worked. Or if you’re worried about damaging the piece further.
A good furniture restorer has skills you don’t often find at home. They know the different wood types. They understand various finishes.
They have access to professional-grade products. While it costs more, it can save a beloved piece of furniture. It’s an investment in preserving something important.
Don’t feel defeated if home remedies don’t work. It doesn’t mean you failed. It just means the problem is a bit more complex.
Sometimes, the most expert solution is the best one. It gives you peace of mind. And a table that looks beautiful again.
Protecting Your Wood Table Moving Forward
Once you’ve successfully removed marker, you’ll want to protect your table. This prevents future headaches. What can you do?
Prevention Tips
Use Placemats and Coasters: This is the simplest defense. Protect the surface from spills and scratches. It also gives kids a designated drawing spot.
Apply a Protective Finish: If your table isn’t well-sealed, consider adding a clear coat. Polyurethane or a good quality furniture wax can add a layer of protection.
Supervise Children: Always keep an eye on little ones when they’re using markers. Provide them with paper or a coloring mat. Designate a play area away from the table.
Clean Spills Immediately: Don’t let liquids sit on the wood. Wipe them up right away. This prevents water stains and protects the finish.
Regular Cleaning: Dust your table regularly with a soft cloth. Use a wood cleaner designed for your finish occasionally. This keeps the finish healthy.
Think of your table’s finish as its armor. The more intact and well-maintained it is, the better it can resist damage. A good layer of wax or polish can make a big difference.
It creates a slick surface. Ink has a harder time gripping onto it.
And when it comes to kids and art supplies, a little preparation goes a long way. A large roll of paper or a vinyl mat can be a lifesaver. These act as a barrier.
They absorb any stray marks. It keeps the fun going without the worry. It sets boundaries for where art can happen.
Real-World Scenarios
Let’s look at how different situations play out. Knowing these can help you decide the best approach.
Scenario Breakdown
Scenario 1: Fresh Marker on a Varnished Table
What happened: A toddler drew a quick line. The varnish is smooth and shiny.
Likely Outcome: Rubbing alcohol or even just a damp cloth might remove it easily.
The varnish offers good protection.
Scenario 2: Old Marker on an Oiled Walnut Table
What happened: A permanent marker line from months ago. The oil finish has soaked into the wood.
Likely Outcome: This is tougher.
Rubbing alcohol might lift some. Baking soda paste could help. You might need to re-oil the spot afterward.
Scenario 3: Marker on an Unfinished Pine Table
What happened: A strong permanent marker line. Pine is soft and porous. The wood is bare.
Likely Outcome: This is very difficult. The ink has likely soaked deep into the wood fibers. You might need to lightly sand the area.
Re-finishing would likely be necessary.
Scenario 4: Marker near a Joint or Crack
What happened: Ink got into a small gap in the wood.
Likely Outcome: Cotton swabs are your best friend here. They can get into small spaces.
You might need to use a toothpick very carefully to lift ink from deep cracks.
The environment matters. Is the table in a humid room? Is it old and dry?
These things can affect how the wood reacts to cleaning. For instance, a humid environment might make the wood swell slightly. This could make ink harder to remove.
A very dry environment might make the finish brittle. This increases the risk of damage when cleaning.
User behavior is also a factor. Are you cleaning it as soon as you see the mark? Or is it sitting there for days?
Immediate action is always best. The longer the ink sits, the more it bonds with the wood. It’s like a race against time.
Every minute counts in those first few hours.
When Is It Normal? When to Worry?
It’s normal to see a faint line left behind after cleaning. Especially if the ink was dark or sat for a while. This faint line might just be slight discoloration.
Or it could be a tiny bit of the finish that was affected. Usually, a light polish or wax can help blend this in. It’s not usually a sign of deep damage.
You should worry if:
- The finish is visibly damaged: This means the finish is dull, streaky, or has actually been removed in places. This is common if you scrubbed too hard or used a harsh cleaner.
- The wood color has changed: If the wood itself looks lighter or darker after cleaning, the stain may have gone deeper than the finish. Or the cleaning agent might have altered the wood’s natural color.
- The marker stain reappears: Sometimes, ink can wick up from deeper in the wood. This is called “wicking.” If you clean it, and it comes back, it’s a sign the ink is deeply embedded.
- You are using abrasive tools: Steel wool, coarse sandpaper, or very harsh scrubbing with a Magic Eraser. These are red flags. They mean you are likely damaging the wood’s surface.
If you see any of these signs, stop cleaning. It’s better to pause and reassess. You might need a different approach.
Or you might need professional help. Pushing too hard can turn a small problem into a big one. It’s like trying to fix a leaky faucet.
If you twist too hard, you might break it completely. Then the repair bill is much higher.
The goal is to be thorough but gentle. Think of it like tending to a plant. You give it water and light.
You don’t yank on its leaves. You want to nurture it back to health. Your wood table deserves that same care.
Patience is your best tool.
Quick Fixes and Tips
Here are some final thoughts to keep in mind:
Top Tips for Marker Removal
1. Act Fast: The sooner you treat the stain, the easier it will be to remove.
2. Always Test First: Never skip testing in an inconspicuous area.
3. Go Mild to Strong: Start with the gentlest methods (like a damp cloth or mild soap) and escalate only if needed.
4. Use a Light Touch: Gentle dabbing and circular motions are key. Avoid harsh scrubbing.
5. Work Inward: Clean from the outside edge of the stain towards the center to prevent spreading.
6. Wipe Clean: Always remove cleaning residue with a damp cloth and then dry the area.
7. Consider the Finish: Different finishes (varnish, lacquer, oil) react differently. Be aware of what you have.
8. Patience is Key: Some stains take time and repeated effort. Don’t rush the process.
What about those specialized “marker removers”? They exist, but they can be harsh. Many contain strong solvents.
They might work quickly. But they can also damage the wood finish. If you use one, follow the instructions precisely.
And test, test, test. Often, the household items are just as effective and much safer.
Think about the marker itself. Was it a fine-tip permanent marker? Or a thick industrial one?
This can influence how deep the ink penetrated. A fine tip might leave a thinner line. But it could also penetrate more deeply if pressed hard.
A thick marker might sit more on the surface. It’s a bit of a mystery sometimes. That’s why testing is so vital.
Frequently Asked Questions
Your Questions Answered
Can I use nail polish remover on permanent marker on wood?
Nail polish remover usually contains acetone, which is a very strong solvent. It can easily strip wood finishes and even damage the wood itself. It is generally not recommended for use on wood furniture.
Always opt for gentler methods first.
What if the marker is on an unfinished wood table?
Unfinished wood is very porous. The ink will soak in deeply. You may need to lightly sand the area to remove the stained wood fibers.
After sanding, you will likely need to re-finish that spot to protect it.
How do I know what kind of finish my table has?
This can be tricky. If it’s very shiny and hard, it’s likely varnish or lacquer. If it feels softer and can be scratched with a fingernail, it might be wax or oil.
If you’re unsure, assume it’s a delicate finish and proceed with extreme caution and testing.
Will these methods remove wood stain?
The methods discussed are designed to remove ink. Some mild abrasives like toothpaste or baking soda might slightly lighten the wood’s natural color if used aggressively. However, they are unlikely to remove the underlying wood stain itself.
If the wood stain is affected, it may require professional refinishing.
Can I use a microfiber cloth for everything?
Microfiber cloths are excellent because they are soft and absorbent. They are great for applying cleaners, wiping away ink, and buffing. Just ensure the cloth is clean before using it to avoid transferring any dirt or debris to the wood.
What if the marker is on a painted wood table?
For painted wood, start with the mildest cleaning methods. A damp cloth with a tiny bit of mild dish soap is often effective. If that doesn’t work, try a paste of baking soda and water applied gently.
Avoid harsh solvents that could lift the paint.
It’s smart to ask these questions. Each table is a bit different. And the challenges can vary.
Having a set of go-to answers helps you feel prepared. It removes some of the guesswork. And reduces the chance of making a mistake.
Thinking about the finish type is important. A well-maintained finish is your best defense. If your table’s finish is old or worn, it’s more vulnerable.
You might consider re-finishing it before accidents happen. It’s like giving your table a fresh coat of armor.
Conclusion
Accidents happen. Permanent marker on a wood table can be a scary sight. But it doesn’t have to be a permanent problem.
With the right knowledge and gentle techniques, you can often restore your table. Remember to always test first. Start with the mildest methods.
And be patient. You have the power to fix this. Your beautiful wood table can look great again.