How to Install Pocket Door Handle: Proven Effortless Guide
Quick Summary:
Installing a pocket door handle is a straightforward DIY project. This guide provides simple, step-by-step instructions using common tools, ensuring a secure and stylish fit for your pocket door with minimal effort and excellent results.
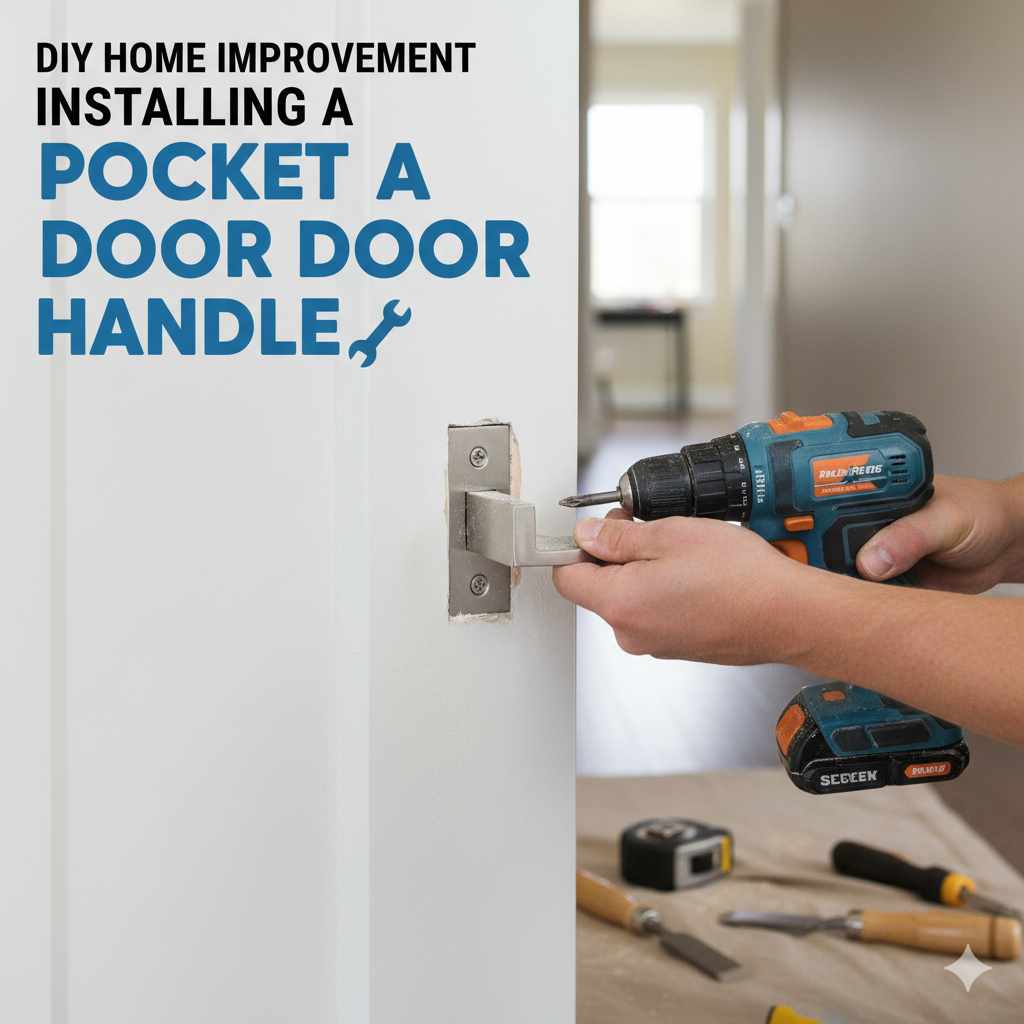
Pocket doors are fantastic space-savers, but a wobbly or missing handle can be a real nuisance. Don’t let a small detail like a handle installation stop you from enjoying your smooth-gliding door. Many homeowners feel a bit intimidated by home improvement tasks, but I’m here to tell you that installing a pocket door handle is surprisingly simple. With a few basic tools and this clear, step-by-step guide, you’ll have your new handle securely in place in no time. We’ll break down everything you need to know, from choosing the right handle to the final tightening of screws. Get ready to boost your confidence and your door’s functionality!
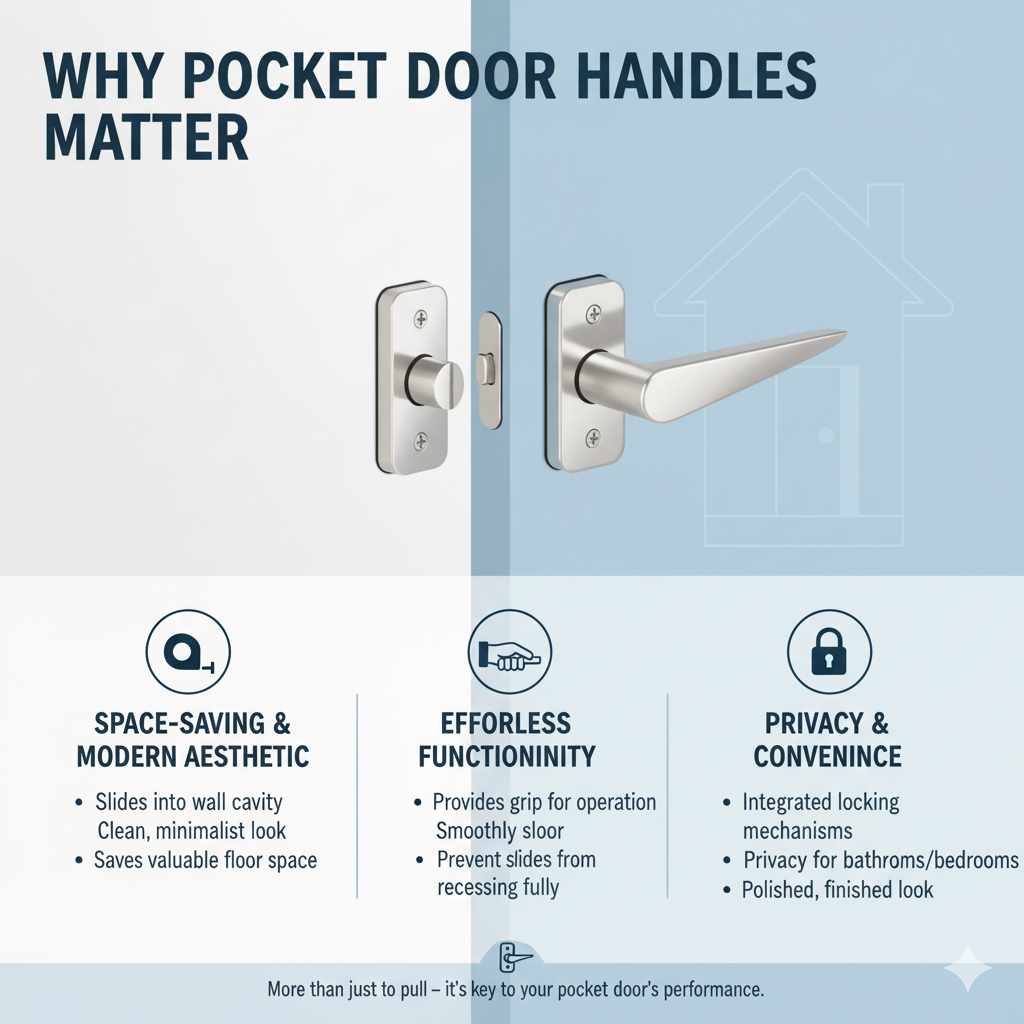
Why Pocket Door Handles Matter
Pocket doors slide into a wall cavity, offering a clean, modern look and saving valuable floor space. But they need a way to be pulled out and pushed back in! That’s where the handle comes in. A good pocket door handle isn’t just about aesthetics; it’s about functionality and ease of use. It provides a grip to operate the door smoothly and can also act as a lock or privacy indicator for bathrooms and bedrooms. A well-installed handle ensures the door glides effortlessly and looks polished.
Choosing the Right Pocket Door Handle
Before we dive into installation, let’s talk about picking the perfect handle. There are several types, and the one you choose will depend on your door’s thickness and your personal style.
Types of Pocket Door Handles
- Passage Handles: These are the most common and don’t include a locking mechanism. They’re great for living rooms or closets where privacy isn’t a concern.
- Privacy Handles: These come with a locking feature, usually a small button or thumb-turn on the interior side. Ideal for bathrooms and bedrooms.
- Dummy Handles: These are purely decorative and don’t operate any mechanism. They are sometimes used for doors that don’t need to be pulled open, or for a symmetrical look on double pocket doors.
- Mortise Lock Handles: These are more complex and involve a larger mechanism that fits into a routed-out section (mortise) in the door’s edge. They often include a key lock.
What to Consider When Buying
- Door Thickness: Most pocket door handles are designed for standard door thicknesses (typically 1 3/8″ to 1 3/4″). Always check the specifications.
- Backset: This is the distance from the edge of the door to the center of the hole for the handle spindle. Pocket door hardware usually has a specific backset.
- Style and Finish: Match the handle to your existing hardware and décor. Finishes like brushed nickel, oil-rubbed bronze, matte black, and polished chrome are popular.
- Ease of Installation: For a beginner, simpler designs that require minimal routing or complex fitting are best.
Tools and Materials You’ll Need
Gathering your tools before you start makes the process much smoother. Here’s what you’ll likely need:
- Your New Pocket Door Handle Kit: This usually includes the handles, spindle, and mounting screws.
- Measuring Tape: For precise placement.
- Pencil: To mark drilling points.
- Drill: With drill bits appropriate for the size of the holes required by your handle kit. A spade bit or hole saw might be needed for the main bore.
- Screwdriver: Usually a Phillips head, but check your hardware.
- Chisel and Hammer: Sometimes needed for minor adjustments or to create a recess for the strike plate.
- Safety Glasses: Always protect your eyes!
- Optional: Jigsaw or Router: If your door doesn’t have pre-drilled holes and you need to create them. For beginners, it’s often easier to buy handles designed for existing holes or to have a carpenter help with this step.
Step-by-Step Guide: Installing Your Pocket Door Handle
Let’s get your new handle installed! We’ll assume your door already has the necessary holes drilled for the handle. If not, that’s a more involved process usually requiring a router or jigsaw, and it might be best to consult a professional or a more advanced guide for that specific task. This guide focuses on attaching the handle to an already prepared door.
Step 1: Understand Your Handle Kit
Open your new pocket door handle kit and lay out all the pieces. Familiarize yourself with them: two handles (often an interior and exterior), a spindle (the rod that connects them), and screws. Some kits might also include a small latch mechanism or a strike plate for the door frame. Read the manufacturer’s instructions carefully, as there can be slight variations.
Step 2: Check the Door Bore Holes
Most pocket door handles are designed to fit into two holes drilled into the door: a larger hole (the bore) through the face of the door, and a smaller hole (the edge bore) on the edge of the door for any latch mechanism. Ensure these holes are present and are the correct size for your handle’s spindle and latch. If they aren’t, you may need to drill them. For guidance on drilling, you can refer to resources like This Old House’s guide to drill bits which can help you select the right tools for the job.
Step 3: Install the Latch Mechanism (If Applicable)
Some pocket door handles have a simple spring latch that slides into the edge bore. If your kit includes one:
- Slide the latch mechanism into the edge bore on the side of the door.
- Ensure the face of the latch is flush with the door’s edge.
- If the latch plate sticks out, you might need to use a chisel to carefully mortise (create a slight recess) for it to sit flush. This is important for the door to slide into the pocket smoothly.
- Secure the latch with the provided screws.
Step 4: Attach the First Handle
Take one of the handles (it doesn’t usually matter which one first) and align it with the large bore hole on one side of the door. The spindle will pass through this hole and connect to the latch mechanism (if you have one).
- Feed the spindle through the hole in the door and into the corresponding hole on the latch mechanism.
- Position the handle so it sits flat against the door face, covering the bore hole.
- Many handles are secured by screws that go through the face of the handle and into the spindle or a mounting plate. Others might have set screws on the underside. Follow your kit’s specific method.
Step 5: Attach the Second Handle
Now, take the second handle. Align it on the opposite side of the door, ensuring the spindle from the first handle slides correctly into its mounting point.
- Carefully push the second handle into place, making sure it’s flush with the door face and the spindle is fully engaged.
- Secure this handle using the same method as the first one (screws, set screws, etc.).
Step 6: Test the Handle and Latch
Once both handles are attached, it’s time to test them!
- Gently try to operate the handles. They should feel secure and not wobbly.
- If you have a latch, test its action. It should retract when you operate the handle and extend when you release it.
- Carefully slide the door into its pocket. The latch should engage with the strike plate (if installed on the frame) or simply allow the door to slide smoothly.
- If the door sticks or the latch doesn’t work correctly, double-check that the handles are fully seated and screwed in tight. Ensure the latch mechanism isn’t binding.
Step 7: Final Tightening and Adjustments
Give all visible screws a final snug turn. Be careful not to overtighten, as this can strip the screws or damage the door. If the handles still feel loose, check for any mounting plates or hidden screws that might need attention. If the door is rubbing or the latch isn’t aligning properly, you might need to make minor adjustments to the door frame or the latch plate, which sometimes involves a bit of chiseling. For a comprehensive understanding of door adjustments, the Fine Homebuilding website offers excellent resources on common door issues and fixes.
Troubleshooting Common Issues
Even with the best guide, sometimes things don’t go perfectly. Here are a few common hiccups and how to fix them:
| Problem | Possible Cause | Solution |
|---|---|---|
| Handle is wobbly | Screws are loose; spindle not fully seated. | Tighten all visible and hidden screws. Ensure the spindle is correctly inserted into both handles. |
| Latch doesn’t retract/extend | Latch mechanism is misaligned; internal parts binding. | Remove handles, check latch alignment in the edge bore. Ensure no debris is obstructing it. Try lubricating the mechanism. |
| Door sticks when sliding | Latch plate is too proud; door is warped; hardware is misaligned. | Carefully mortise the door frame for the latch plate. Check if the door itself is binding in the track. Ensure handles aren’t protruding too much. |
| Screws won’t tighten | Hole is stripped; wrong screw size. | Use slightly larger screws, or fill the hole with wood filler and re-drill a pilot hole. Ensure you’re using the screws provided with the kit. |
Maintaining Your Pocket Door Handle
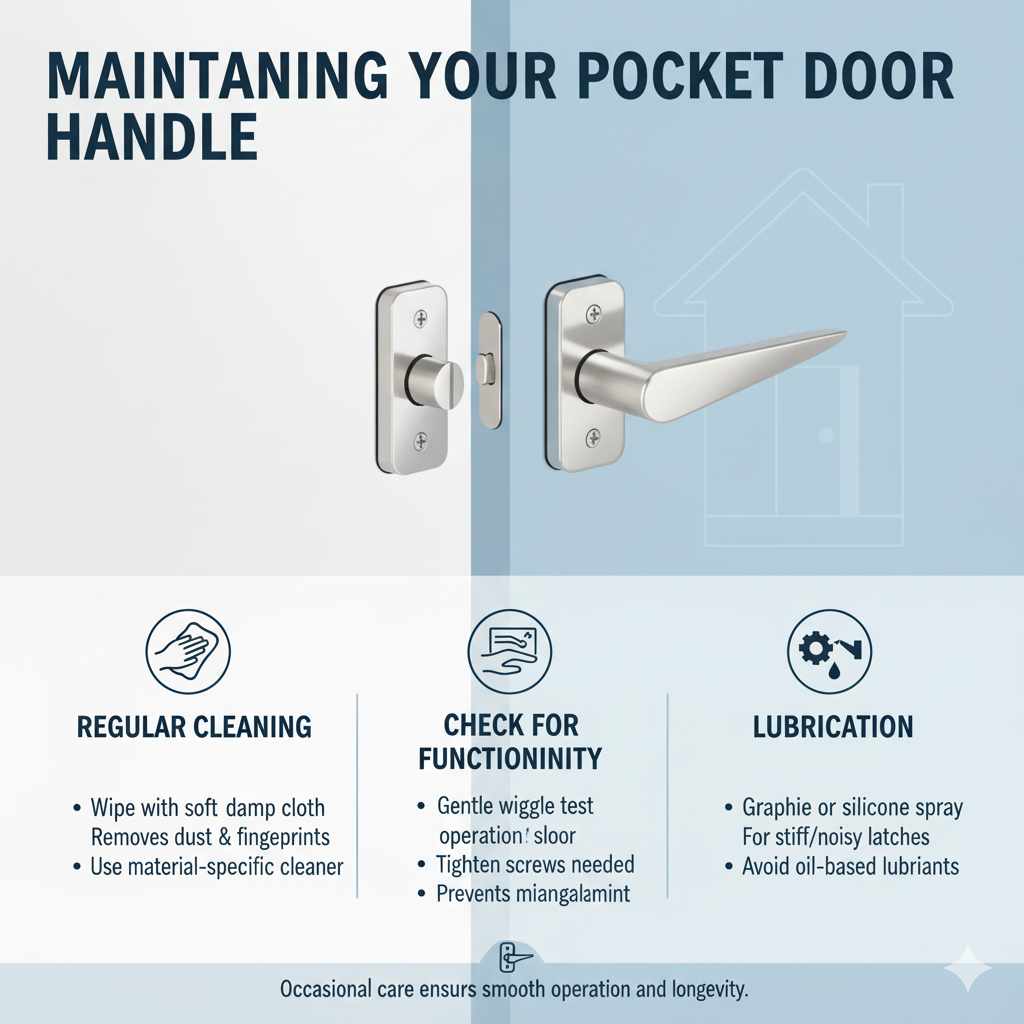
Once installed, your pocket door handle should provide years of reliable service. However, a little occasional maintenance can go a long way:
- Regular Cleaning: Wipe down the handles with a soft, damp cloth to remove dust and fingerprints. For metal finishes, use a cleaner recommended for that specific material.
- Check for Looseness: Every few months, give the handles a gentle wiggle to ensure they haven’t come loose. Tighten any screws if necessary.
- Lubrication: If the latch mechanism feels stiff or noisy, a light application of graphite lubricant or a silicone-based spray can help smooth its operation. Avoid oil-based lubricants, as they can attract dust.
Frequently Asked Questions (FAQ)
Q1: How do I know if my door is ready for a pocket door handle?
A1: Your door needs two holes: a larger one (bore) drilled through the face, and a smaller one on the edge for the latch. Most modern pocket doors come pre-drilled. If yours isn’t, it’s a more advanced modification.
Q2: Can I install a pocket door handle if my door doesn’t have pre-drilled holes?
A2: Yes, but it requires precision drilling. You’ll need specific drill bits (like a spade bit for the bore) and potentially a jig or router to ensure the holes are perfectly aligned. For beginners, it’s often easier to purchase a handle kit designed for existing holes or seek professional help for this step.
Q3: My new handle came with a small strike plate. Where does it go?
A3: The strike plate typically attaches to the door frame on the side where the latch will engage when the door is closed. It guides the latch and helps secure the door. Ensure it’s aligned with your latch mechanism.
Q4: How tight should I screw in the handles?
A4: Tighten them until they are snug and the handle feels secure against the door, but avoid overtightening. Overtightening can strip the screws or damage the door’s finish or internal components.
Q5: My pocket door handle is sticking out too far. What can I do?
A5: This usually means the latch plate on the edge of the door isn’t sitting flush. You may need to use a sharp chisel to carefully create a slight recess (a mortise) in the door’s edge for the latch plate to sit flush. Take small, controlled cuts.
Q6: What’s the difference between a pocket door handle and a regular door handle?
A6: Pocket door handles are specifically designed to be flush or nearly flush with the door surface so they don’t obstruct the door sliding into the wall. They often have a unique shape (like a pull or a recessed grip) and a smaller footprint compared to standard door knobs or levers.
Q7: Do I need a lock on my pocket door handle?
A7: That depends on the room! For bathrooms, bedrooms, or any space requiring privacy, a lock is highly recommended. For closets or pantries, a non-locking (passage) handle is usually sufficient.
Conclusion
See? Installing a pocket door handle is a very achievable DIY task that can significantly improve the look and function of your space. By following these steps, you’ve successfully upgraded your pocket door, adding both style and usability. Remember, the key is preparation: gather your tools, understand your hardware, and take your time with each step. Don’t be afraid to consult the manufacturer’s instructions specific to your handle kit. With a little patience and these straightforward instructions, you’ve proven that you have the skills to tackle this project and enjoy the lasting results. Happy home improving!