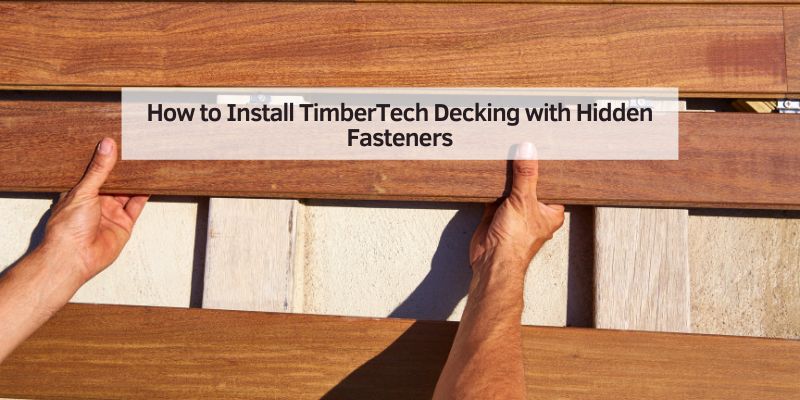
How to Install TimberTech Decking with Hidden Fasteners
TimberTech decking installs fastener-free on top using CONCEALoc, Cortex, SIDELoc, EDGELoc, or TOPLoc — the right one depends on whether your boards are grooved or square-edge. Using the wrong system, or a competitor’s clips, can void TimberTech’s warranty since groove profiles differ by brand. This guide covers picking the correct fastener for your boards, the exact bit size each system needs, and the full step-by-step install.
Why Choose TimberTech Decking?
TimberTech is made from composite or capped polymer materials, which makes it durable, low-maintenance, and resistant to fading, staining, and mold — see our breakdown of composite decking material options and who makes TimberTech for more background. Unlike wood, it won’t splinter or warp, which matters if you’ve got kids or pets running around. Browse our full decking guides hub for related topics like fire resistance and cost.
The real star of the show is hidden fasteners. These systems secure the deck boards without a single screw head marring the surface — a clean, polished look, and no exposed screws to snag a lawn chair or bare foot. TimberTech offers several hidden fastener options, like CONCEALoc, Cortex, SIDELoc, EDGELoc, and TOPLoc, each designed for specific decking lines and board profiles. This guide breaks down which ones to use and how to install them.
Tools and Materials You’ll Need
Installing TimberTech decking with hidden fasteners is straightforward, but you’ll need the right tools and materials to get the job done. Gather these essentials before you begin:
| Item | Purpose |
|---|---|
| Drill/Driver | For driving screws into fasteners and joists. A cordless one works great. |
| Miter Saw | For clean, precise cuts on deck boards. Use a fine-toothed, carbide-tipped blade (12″ 100-tooth or 10″ 80-tooth). |
| Measuring Tape | To measure board lengths and ensure accurate cuts. |
| Level | To check that your deck frame is even and structurally sound. |
| Spacer Tool | To maintain consistent gaps (1/8″ to 3/16″) between boards. |
| TimberTech Decking Boards | Choose grooved boards for CONCEALoc/EDGELoc or square-edge boards for Cortex/SIDELoc/TOPLoc. |
| Hidden Fasteners | CONCEALoc, Cortex, SIDELoc, EDGELoc, or TOPLoc, depending on your board type. |
| Stainless Steel Screws | Use TimberTech-recommended screws (like TORX® ttap®) for a secure hold. |
| Safety Gear | Safety glasses, gloves, and ear protection for safe cutting and drilling. |
| Chalk Line | To mark straight lines for cutting and alignment. |
| Deck Cleaner | For post-installation cleaning to keep your deck looking pristine. |
Pro tip: Double-check that your deck boards and fasteners are compatible. CONCEALoc and EDGELoc work only with grooved TimberTech boards, while Cortex, SIDELoc, and TOPLoc are for square-edge or full-profile boards. Ordering the wrong fasteners means waiting on a reorder before you can finish — confirm compatibility before checkout.
Preparing Your Deck Frame
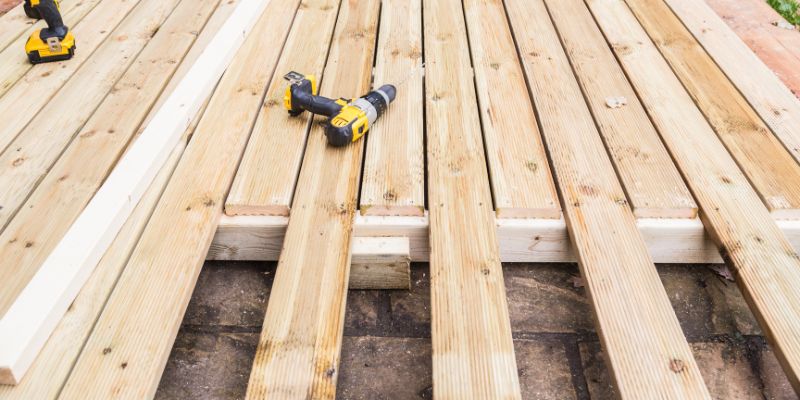
Your deck frame is the backbone of your TimberTech deck, so it needs to be rock-solid — a wobbly or uneven frame causes problems down the road no matter how well you install the boards.
Start by checking your joists. They should be spaced 16 inches on center for most TimberTech decking, tightened to 12 inches on center for stairs and any angled or diagonal board installations. Use a level to ensure the frame is even, and inspect for any signs of rot or damage. If you’re building a new frame, make sure it’s square by measuring diagonally from corner to corner — both measurements should be equal.
Next, install blocking between joists where boards will meet at butt joints. This gives your fasteners a solid surface to grip. Use treated lumber for blocking to match the durability of TimberTech boards. Finally, sweep the frame clean of debris — dust and dirt can interfere with fastener installation.
Framing a Triangle-Shaped or Angled Deck Section
An angled corner or triangle-shaped section needs the same 12-inch-on-center joist spacing used for stairs — tighter than the standard 16-inch spacing — because the angled boards cross fewer joists at full support. Always drive fasteners perpendicular into the joist; never drive a screw at a sideways angle to “reach” a joist that isn’t square underneath the board. If a board’s cut end won’t land squarely on a joist, add a sister joist or blocking under that specific run instead of angling the fastener.
Choosing the Right Hidden Fastener System
TimberTech offers several hidden fastener systems, and choosing the right one depends on your deck design and board type. Here’s a rundown of the main options:
- CONCEALoc: Stainless steel clips that slide into the grooves of TimberTech PRO or EDGE decking. Fastener-free surface, easy to install with just a drill, strong hold for tighter butt joints. Uses a T15 star-drive bit.
- Cortex: Screws driven through the board’s surface, covered by color-matched plugs made from the same material as your decking. Ideal for full-profile boards, stairs, and perimeter boards where grooved boards aren’t an option. Uses a T20 TORX® ttap® bit with a 7/32″ pre-drill.
- SIDELoc: Screws driven at a 45-degree angle through the side of square-edge boards, pulling the board tight to the joist. Clean look without grooves; the installation tool guides the angle for you.
- EDGELoc: Designed for TimberTech EDGE grooved boards (Prime, Prime+, and Premier collections only — not compatible with Advanced PVC/AZEK lines). Presets a consistent 7/32″ board gap and uses a T15 star-drive bit.
- TOPLoc: Face-driven, color-matched screws for fascia and perimeter boards where a hidden clip isn’t practical — the screw head is visible but color-matched to blend in. Uses a T20 drive.
- FUSIONLoc: A collated clip system that installs fast with the FastenMaster TigerClaw Gun. More advanced — best for pros or confident DIYers.
Pick based on your board type: grooved TimberTech PRO or EDGE boards use CONCEALoc or EDGELoc, while square-edge AZEK or full-profile boards use Cortex, SIDELoc, or TOPLoc for fascia.
📊 CONCEALoc and EDGELoc both use a T15 star-drive bit; Cortex and TOPLoc use a T20 drive. EDGELoc also presets a fixed 7/32″ gap between boards during installation, and is compatible only with TimberTech’s grooved Composite decking (Prime, Prime+, Premier) — not the Advanced PVC/AZEK line. — Source: TimberTech EDGELoc Product Page
Can You Use Trex or Veranda Fasteners on TimberTech Decking?
No — stick to TimberTech’s own CONCEALoc, Cortex, SIDELoc, EDGELoc, or TOPLoc systems. Trex and Veranda hidden fasteners use different groove profiles and are engineered around each brand’s own board expansion and contraction rates, so a cross-brand fastener can fit loosely or bind under thermal movement. Using a non-TimberTech fastener on TimberTech boards can also void the TimberTech warranty. If a board is grooved, match the fastener to the board’s actual manufacturer rather than assuming universal clips are interchangeable.
Step-by-Step Installation Guide
Now for the actual installation. This is broken down into clear, manageable steps.
Step 1: Lay the Starter Board
Your starter board sets the tone for the entire deck, so take your time to get it right. Start at the edge of your deck, closest to the house or another structure. Place the first board perpendicular to the joists, with its outer edge flush against the rim joist. If you’re using CONCEALoc, secure the starter board with an L-Bracket or TOPLoc Face Fasteners on the outer edge. For Cortex or SIDELoc, drive screws at a 45-degree angle through the board’s side or top, depending on the system.
Use a chalk line to ensure the starter board is perfectly straight. Double-check with a level, and make sure the board is secure before moving on — a wonky starter board throws off the whole deck.
Step 2: Install Hidden Fasteners
Once your starter board is in place, install the hidden fasteners. Here’s how for each system:
- CONCEALoc: Slide a CONCEALoc clip into the groove of the starter board at each joist. Press the clip down so its teeth grip the groove’s top edge. Drive a stainless steel screw (T15 bit) through the clip into the joist at a 45-degree angle. The clip’s spacer tab presets a consistent 1/8″ to 3/16″ gap between boards. Place the next board against the clips, slightly raising its outer edge to slide it into place. Repeat for each board.
- Cortex: Pre-drill with a 7/32″ bit, then drive a Cortex screw through the board’s surface into the joist using the T20 TORX® ttap® driver. The screw should sit flush with the board. Insert a color-matched plug into the hole, tapping it gently with a hammer until secure. Practicing on a scrap board first helps get the depth right.
- SIDELoc: Use the SIDELoc installation tool to drive screws at a 45-degree angle through the side of a square-edge board into the joist. The tool ensures the screw catches enough of the board without piercing the top.
For butt joints, use two clips or screws per board end, one on each side of the joint, secured to a 1-1/2″ joist or block. This ensures a tight, stable connection.
Step 3: Install Main Deck Boards
With your fasteners in place, continue installing the main deck boards. Measure and cut each board to length, keeping the grain facing upward to avoid chipping. Use a miter saw with a fine-toothed blade for clean cuts. Slide each board’s grooved edge (if using CONCEALoc) into the previously installed fasteners, then secure the other side with new fasteners. For Cortex or SIDELoc, follow the same screwing and plugging process.
Maintain consistent spacing between boards — 1/8″ to 3/16″ for side-to-side gaps and 3/16″ where boards meet structures or posts. A spacer tool keeps things uniform. On a large deck, consider starting away from the house and working inward, so any cut or “off-sized” boards end up less visible.
Step 4: Picture Frame Your Deck
To give your deck a polished look, add picture frame boards around the perimeter. These boards hide the ends of the main deck boards and create a clean border. Cut the picture frame boards to size, and secure them with TOPLoc Face Fasteners or Cortex screws, depending on your board type. For angled cuts (like 45-degree miters), offset the fastener ½” toward the long point of the joist to avoid exiting the side.
Step 5: Finishing Touches
Once all boards are installed, give your deck a thorough inspection. Check for loose fasteners, uneven gaps, or any boards that need trimming. Clean the deck with a composite deck cleaner to remove dust and debris — sweeping and cleaning twice a year keeps a TimberTech deck looking new.
If you’re adding stairs or railings, follow TimberTech’s specific installation guides for those components. Cortex is especially handy for stairs, since it’s the only hidden fastener system that works across the entire deck surface, including steps.
Best Cortex Hidden Fastener Pick
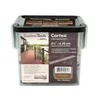
TimberTech Cortex Hidden Plug Fasteners (100 ln/ft) – $114.13
The genuine TimberTech Cortex kit this guide’s Step 2 walks through — 224 screws, 240 color-matched plugs cut from real TimberTech deck board material, and 3 setting tools included, so the T20 bit spec above matches exactly.
- Best for: Square-edge or full-profile boards, stairs, and perimeter runs
- Why we picked it: Genuine TimberTech system — no cross-brand groove-fit risk covered above
- Main drawback: Pricier than generic universal clips, and plugs are color-specific to your board line
Compare more install essentials
 Option 1 TimberTech CONCEALoc (Box of 175) – $166.97
|
 Option 2 Torx T15–T40 Star Bit Set – $5.99
|
 Option 3 20V Cordless Drill Driver Kit – $64.99
|
As an Amazon Associate we earn from qualifying purchases.
Common Mistakes to Avoid
Here are common pitfalls and how to steer clear of them:
- Using the Wrong Fasteners: Always match your fasteners to your board type. Grooved boards need CONCEALoc or EDGELoc, while square-edge boards work with Cortex, SIDELoc, or TOPLoc. Check TimberTech’s installation guide to confirm compatibility — and never substitute a Trex or Veranda fastener.
- Skipping the Frame Check: A weak or uneven frame will cause boards to shift or creak. Take the time to inspect and reinforce your frame before starting.
- Ignoring Gapping Rules: Proper spacing (1/8″ to 3/16″ side-to-side, 3/16″ at structures) allows for expansion and contraction. Too-tight gaps can lead to buckling, especially in hot climates.
- Rushing Cuts: Use a sharp, fine-toothed blade and cut slowly to avoid chipping.
- Not Testing Fasteners: Practice on a scrap board to get the feel of your fastener system, especially with Cortex plugs. It’s better to mess up on a spare piece than on your deck.
- Skipping Coastal-Grade Screws: For saltwater coastal installs, use 316 stainless steel screws instead of the standard 305 grade to resist corrosion, and avoid flathead fasteners near the coast.
Maintenance Tips for Your TimberTech Deck
One of the best things about TimberTech decking is how little maintenance it requires. Here are the go-to tips for keeping it in top shape:
- Sweep regularly to remove leaves, dirt, and debris.
- Clean with a composite deck cleaner twice a year. Avoid harsh chemicals like bleach, which can damage the protective capping.
- For tough stains, use a soft-bristle brush and warm, soapy water.
- Check fasteners annually to ensure they’re secure, especially after extreme weather.
- Avoid dragging heavy furniture across the deck to prevent scratches.
With these simple steps, a TimberTech deck stays beautiful and functional for decades through both hot summers and cold winters.
Why Hidden Fasteners Are Worth It
Hidden fasteners cost a bit more and take slightly longer to install than face screws, but the clean, seamless look is hard to beat — it makes a deck feel like a premium outdoor space. Hidden fasteners also protect the board’s capping, which extends the life of the deck, and eliminate exposed screw heads that catch a foot or scratch furniture.
“The first time I ordered fasteners for a TimberTech deck, I grabbed CONCEALoc clips for a square-edge board that needed Cortex instead — and lost a week waiting on the right order. Since then I always check the board profile against the fastener spec sheet before checkout, not after the boards show up.”
Frequently Asked Questions
What Are Hidden Fasteners, and Why Should I Use Them?
Hidden fasteners are clips or deck screws that secure deck boards from the sides or below, leaving no visible screw heads on the surface. They give a deck a clean, professional look, reduce tripping hazards, and protect the board’s capping, which boosts durability.
Can I Use Hidden Fasteners with Any TimberTech Decking?
Not quite. CONCEALoc and EDGELoc work with grooved TimberTech PRO or EDGE boards, while Cortex, SIDELoc, and TOPLoc are for square-edge boards. Trex or Veranda hidden fasteners should not be substituted — different groove profiles and expansion rates can cause a loose or bound fit and may void the TimberTech warranty. Always check TimberTech’s installation guide to match your boards with the right fasteners.
Do I Need Special Tools for Installing Hidden Fasteners?
Yes, a specific driver bit for each system. CONCEALoc and EDGELoc both use a T15 star-drive bit, while Cortex and TOPLoc use a T20 TORX® ttap® driver. Beyond the bit, you just need a drill/driver, a miter saw, and a spacer tool for consistent gaps.
How Much Spacing Should I Leave Between Deck Boards?
1/8″ to 3/16″ for side-to-side gaps. Where boards meet structures or posts, leave a 3/16″ gap. These spaces allow for expansion and contraction, especially in changing weather. A spacer tool keeps the gap consistent across the whole deck.
How Long Does It Take to Install a TimberTech Deck?
It depends on deck size and experience level. For a standard 12×16-foot deck, expect about two weekends as a DIYer, including prep and finishing. Hidden fasteners take a bit longer than face screws, but the polished look is worth it. A professional crew can often finish in a few days.
Can I Install TimberTech Decking in a Triangle or Angled Shape?
Yes, with tighter joist spacing. Angled or triangle-shaped sections need 12-inch-on-center joist spacing instead of the standard 16 inches, since fewer joists cross each angled board at full support. Always drive fasteners perpendicular into the joist — add a sister joist or blocking rather than driving a screw at a sideways angle.
How Do I Clean My TimberTech Deck After Installation?
Sweep away debris and use a composite deck cleaner twice a year. Warm, soapy water and a soft-bristle brush work well for stubborn stains. Avoid harsh chemicals like bleach, which can harm the deck’s protective layer.
Conclusion
Building a TimberTech deck with hidden fasteners comes down to matching the fastener to the board profile — CONCEALoc or EDGELoc (T15 bit) for grooved boards, Cortex or TOPLoc (T20 bit) for square-edge boards and fascia — then keeping joist spacing, gapping, and fastener spacing consistent throughout. Follow the steps above — prepping your frame, choosing the right fasteners, and installing with care — and the result is an outdoor space that’s both fastener-free on the surface and built to last.
Sponsored / affiliate links. As an Amazon Associate I earn from qualifying purchases. I may earn additional commission from eligible campaigns.