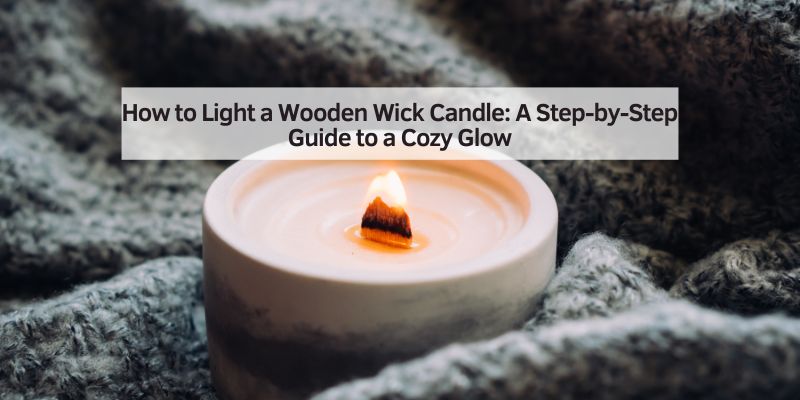
How to Light a Wooden Wick Candle: A Step-by-Step Guide to a Cozy Glow
Hey there! If you’ve ever picked up a wooden wick candle, you know there’s something special about that soft, crackling glow. It’s like bringing a tiny fireplace into your home. I’ve been lighting these beauties for years, and I can tell you, they’re a game-changer for creating a cozy vibe. But here’s the thing: lighting a wooden wick candle isn’t quite the same as lighting a regular cotton wick candle. It takes a bit of know-how to get that perfect burn. Don’t worry, though—I’m here to walk you through it. In this guide, I’ll share everything I’ve learned about how to light a wooden wick candle, from prepping the wick to keeping it burning beautifully. Let’s dive in and make your home glow with warmth and charm!
Why Wooden Wick Candles Are Special
I remember the first time I lit a wooden wick candle. The soft crackling sound instantly hooked me. It’s not just a candle—it’s an experience. Wooden wick candles are made with a thin strip of wood instead of the usual cotton wick. This wood creates a unique, fireplace-like ambiance with a gentle popping sound as it burns. They also tend to burn more evenly and release fragrance better than traditional candles. But because the wick is different, it needs a little extra care to light and maintain. Trust me, once you get the hang of it, you’ll never go back to regular candles.
Choosing the Right Wooden Wick Candle
Before we get to lighting, let’s talk about picking the perfect candle. Not all wooden wick candles are created equal. I’ve tried a bunch over the years, and here’s what I look for. First, check the quality of the wax. Soy or coconut wax blends are my go-to because they burn cleanly and slowly. Next, make sure the candle is from a reputable brand. Cheap candles might have uneven wicks or poor-quality wood, which can make lighting tricky. Also, consider the size of the candle. Smaller ones are easier to manage for beginners, while larger ones with multiple wicks might need more attention. Pick a scent you love—something like vanilla or cedarwood can make your space feel so inviting.
Preparing to Light Your Wooden Wick Candle
Okay, let’s set the stage for a perfect burn. I’ve learned that a little prep goes a long way. Start by finding a safe spot for your candle. It should be on a flat, heat-resistant surface, away from drafts, curtains, or anything flammable. I usually place mine on a ceramic coaster in the middle of my coffee table. Next, check the wick. If it’s a brand-new candle, the wick should be about a quarter-inch long. If it’s too long (say, over half an inch), grab a pair of scissors and trim it down. A shorter wick burns better and prevents smoking. Also, make sure the candle is at room temperature. If it’s too cold, the wax might not melt evenly.
Tools You’ll Need to Light a Wooden Wick Candle
You don’t need a ton of fancy gear, but having the right tools makes things easier. Here’s what I keep handy:
| Tool | Why It’s Useful |
|---|---|
| Long-reach lighter | Keeps your fingers safe and makes it easy to reach the wick. |
| Wick trimmer | Perfect for trimming the wick to the right length before lighting. |
| Candle snuffer | Helps you extinguish the candle without blowing wax everywhere. |
| Matches (optional) | A backup if you don’t have a lighter. Just make sure they’re long enough to be safe. |
I love my long-reach lighter because it gives me control without burning my fingers. If you’re using matches, be extra careful to avoid dropping ash into the wax.
Step-by-Step Guide to Lighting a Wooden Wick Candle
Now, let’s get to the fun part—lighting the candle! I’ve lit hundreds of wooden wick candles, and this method works every time. Follow these steps, and you’ll have that cozy crackle in no time.
Step 1: Trim the Wick
Before you even think about lighting, check the wick. If it’s longer than a quarter-inch, trim it with a wick trimmer or small scissors. I learned this the hard way—long wicks can create too much smoke or an uneven flame. A quick trim ensures a clean, steady burn.
Step 2: Clear the Wax Pool
If you’ve lit the candle before, there might be some debris in the wax pool, like burnt wick pieces or ash. Gently scoop these out with a spoon or a wick trimmer. I like to keep the wax pool clean because it helps the candle burn evenly and prevents any weird smells.
Step 3: Light the Wick at an Angle
Here’s where wooden wicks are a bit different. Hold your lighter or match at a slight angle so the flame touches the base of the wick. Keep it there for about 10-15 seconds. Wooden wicks take a little longer to catch than cotton ones, so be patient. I usually tilt the candle slightly (not too much!) to help the flame spread across the wick. You’ll hear a soft crackle when it’s lit properly.
Step 4: Let the Wax Pool Form
Once the wick is lit, let the candle burn until the wax melts across the entire surface. This usually takes about an hour for a medium-sized candle. I made the mistake of blowing out my candle too soon once, and it left a tunnel in the wax. A full wax pool ensures an even burn and maximizes the candle’s lifespan.
Step 5: Enjoy the Ambiance
Now, sit back and enjoy! The crackling sound and warm glow are so relaxing. I love lighting my wooden wick candle during a quiet evening with a book or when I’m hosting friends. It’s like a little luxury that makes any moment feel special.
Common Mistakes to Avoid
I’ve made plenty of mistakes with wooden wick candles, so let me save you some trouble. First, don’t rush the lighting process. If the wick doesn’t catch right away, don’t keep flicking your lighter on and off—it can leave soot on the wax. Instead, hold the flame steady for a few extra seconds. Also, avoid trimming the wick too short. If it’s less than an eighth of an inch, it might not burn properly. And never leave your candle unattended. I once forgot about a candle in my living room, and let’s just say it was a close call. Safety first!
Maintaining Your Wooden Wick Candle
To keep your candle burning beautifully, a little maintenance goes a long way. After each burn, let the wax cool completely before trimming the wick again. I usually do this the next day. If you notice the flame getting too big or smoky, it’s a sign the wick is too long—trim it before the next use. Also, try not to burn your candle for more than four hours at a time. Long burns can overheat the wax and shorten the candle’s life. I like to set a timer on my phone to remind me when it’s time to snuff it out.
Troubleshooting Common Issues
Sometimes, things don’t go as planned. Here are some issues I’ve run into and how to fix them.
Weak Flame
If the flame is tiny or keeps flickering out, the wick might be too short or clogged with debris. Gently trim away any charred bits and try relighting. If it’s still weak, the candle might need a longer burn time to establish a good wax pool.
Too Much Smoke
A smoky flame usually means the wick is too long or there’s a draft. Trim the wick to a quarter-inch and move the candle to a draft-free spot. I once had a smoky candle because it was too close to an open window—moving it fixed the problem instantly.
Uneven Burn
If the wax is tunneling (burning down the middle instead of across the surface), you might not be letting it burn long enough. Next time, let it burn until the wax pool reaches the edges of the container. You can also use a candle warmer to melt and level out the wax.
Enhancing the Wooden Wick Candle Experience
Once you’ve mastered lighting your candle, there are ways to make it even more enjoyable. I love pairing my candles with cozy decor, like a soft blanket or some fairy lights. Try placing your candle in a decorative holder to reflect the light and add charm to your space. You can also experiment with different scents for different moods—lavender for relaxation, citrus for energy. I sometimes light two candles with complementary scents, like sandalwood and vanilla, to create a custom fragrance.
Safety Tips for Burning Wooden Wick Candles
Safety is so important when it comes to candles. I’ve learned a few key rules over the years. Always keep your candle in sight and away from kids or pets. Don’t place it near anything that can catch fire, like curtains or paper. If you’re using a multi-wick candle, make sure all wicks are lit to avoid uneven burning. And always use a snuffer to put out the flame—it’s safer than blowing it out and prevents wax splatter. I keep a small fire extinguisher in my kitchen just in case, but I’ve never needed it.

Why I Love Wooden Wick Candles
There’s something magical about wooden wick candles. The crackling sound, the warm glow, the way they fill a room with scent—it’s all so comforting. I’ve used them for everything from quiet nights at home to dinner parties with friends. They’re more than just candles; they’re a way to create memories and make any space feel special. Once you get the hang of lighting and caring for them, they become a staple in your home.
Conclusion
Lighting a wooden wick candle might seem tricky at first, but with a little practice, it becomes second nature. I’ve shared all my tips and tricks—from trimming the wick to letting the wax pool form—so you can enjoy that cozy, crackling glow without any hassle. Whether you’re lighting one to unwind after a long day or to set the mood for a special occasion, these candles bring warmth and charm to any moment. So grab your favorite wooden wick candle, follow these steps, and let its magic transform your space. Here’s to many cozy nights filled with flickering light and that perfect fireplace crackle!
FAQs
Why does my wooden wick candle keep going out?
If your candle keeps extinguishing, the wick might be too short or clogged with debris. Trim away any charred bits and make sure the wick is about a quarter-inch long. Also, check for drafts—moving the candle to a still spot can help.
How long should I burn my wooden wick candle?
Aim to burn it until the wax melts across the entire surface, which usually takes about an hour for a medium candle. Don’t burn it for more than four hours at a time to avoid overheating the wax.
Can I use a regular lighter to light a wooden wick candle?
Yes, but a long-reach lighter is safer and easier. It keeps your fingers away from the flame and gives you better control when lighting the wick.
Why is my wooden wick candle smoking?
Smoke usually means the wick is too long or there’s a draft. Trim the wick to a quarter-inch and move the candle to a draft-free area. A clean wax pool also helps reduce smoke.
How do I clean the wax pool of my candle?
Once the wax is cool, use a spoon or wick trimmer to gently scoop out any debris, like burnt wick pieces or ash. This keeps the candle burning cleanly and evenly.