How to Prevent Orange Peel With Spray Paint
When you spray paint something, you sometimes get a bumpy texture that looks like an orange peel. This is a common problem, especially for folks who are just starting out with spray painting. It can be frustrating to see your project turn out bumpy instead of smooth.
But don’t worry! We’re going to walk through exactly how to stop this from happening. You’ll learn simple steps to get that nice, smooth finish you want.
What Causes Orange Peel in Spray Paint
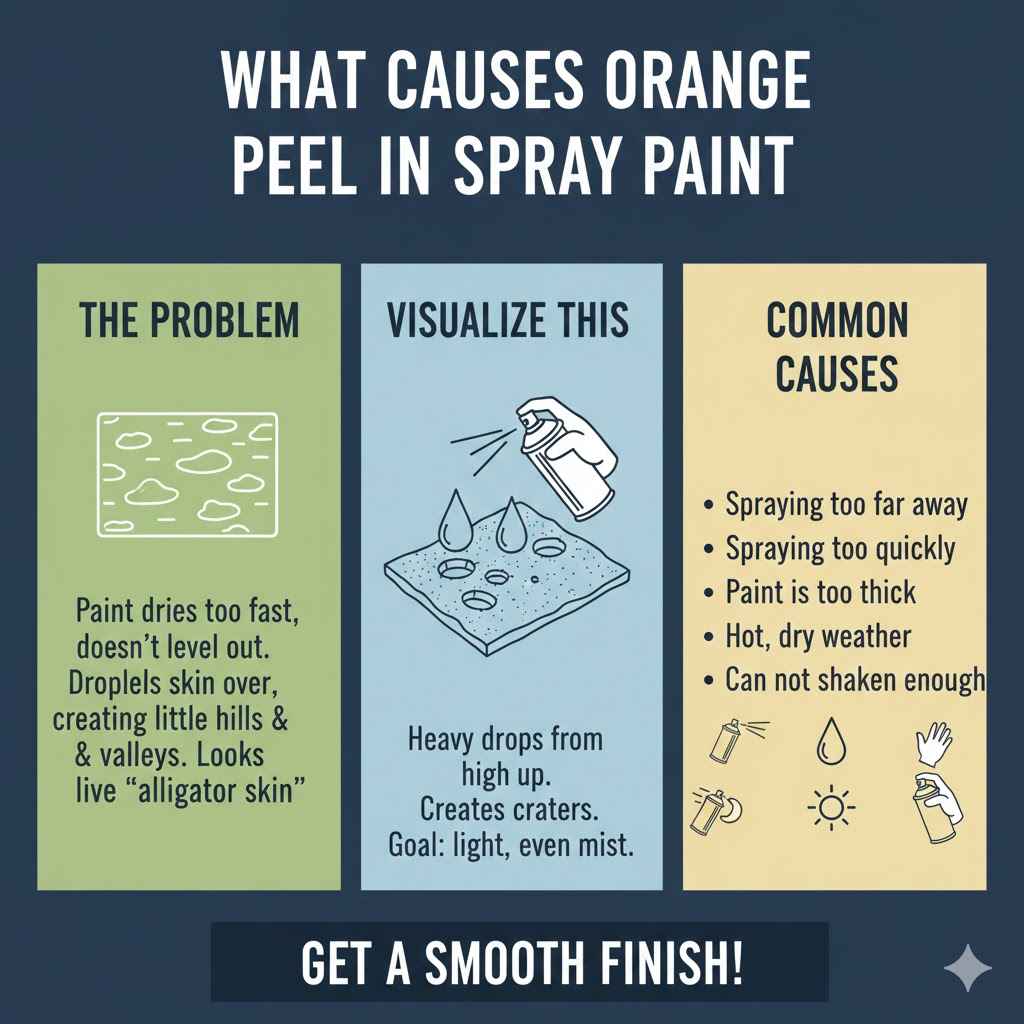
Orange peel, also called “alligator skin,” happens when the spray paint dries too fast. It doesn’t have enough time to level out into a smooth surface. Instead, the tiny paint droplets land and skin over, creating little hills and valleys.
This often happens when the paint is sprayed too far away from the surface or when the paint is too thick.
Think of it like rain falling on dry dirt. If the drops are heavy and fall from high up, they might splash and create little craters. If the drops are lighter and fall from closer, they can spread out more evenly.
Spray paint works in a similar way. The goal is to get the paint to land softly and spread out.
Several things can lead to this problem:
- Spraying too far away from the object.
- Spraying too quickly.
- Using paint that is too thick.
- Painting in hot, dry weather.
- Not shaking the spray can enough.
Key Steps on How to Prevent Orange Peel With Spray Paint
Getting a smooth finish is all about controlling how the paint lands and dries. Here are the most important things to do:
1. Prepare Your Surface Correctly
A clean and smooth surface is crucial. If there’s dirt, grease, or old paint peeling, the new paint won’t stick well. It can also create rough spots that look like orange peel.
Always start by cleaning your item thoroughly.
Use a good degreaser or soap and water. Make sure to rinse it well and let it dry completely. If you’re painting over an old finish, you might need to lightly sand it down first.
This gives the new paint something to grip onto.
After cleaning, if you plan to paint a lot, consider a primer. Primer helps the paint stick better and can create an even surface. It also helps the color show up brighter.
2. Shake the Spray Can Properly
This sounds simple, but it’s really important. Inside the spray can, there’s a ball. When you shake the can, this ball mixes the paint and propellant together.
If you don’t shake it enough, the paint might come out too thin or too thick, which can cause orange peel.
You should shake the can for at least one to two minutes. You’ll hear the ball moving around inside. Keep shaking it even after you think you’re done.
This ensures the paint is mixed just right for a smooth spray.
3. Get the Right Distance
The distance between the spray can and the surface you are painting is very important. If you hold the can too far away, the paint droplets have time to dry in the air before they hit the surface. They land already a bit dry, creating that bumpy texture.
If you hold it too close, you might put on too much paint too quickly, which can also cause problems.
A good rule of thumb is to hold the can about 8 to 12 inches away from the object. It’s better to spray light, thin coats than one thick coat. This allows each layer to dry properly before you add the next.
Experiment a bit before you spray your actual project. Try spraying on a piece of cardboard to see how the paint comes out at different distances. You’ll see which distance gives you the best spray pattern.
4. Spray in Thin, Even Coats
This is one of the most effective ways to prevent orange peel. Instead of trying to cover everything in one go, apply multiple light coats. Each coat should be just enough to wet the surface without causing runs or drips.
Move the can in a steady, sweeping motion. Start spraying before you reach the edge of your object and continue spraying past the edge after you finish. This helps avoid thick spots at the beginning and end of each stroke.
Overlap each stroke by about 50% to ensure full coverage.
Allow each coat to dry for the time recommended on the can. This usually means a few minutes. Drying time can change based on heat and humidity, so keep that in mind.
5. Control Your Spraying Speed
Moving the can too fast can lead to uneven coverage and thinner paint. Moving it too slow can lead to paint building up too much, causing runs and drips, and also contributing to orange peel. You need a steady, consistent speed.
Imagine you are drawing a straight line. Your hand should move at a pace that allows the paint to flow out smoothly and evenly. Think about covering the surface with light mist, not dumping paint on it.
A good speed is usually around 2-3 seconds per foot for a typical spray can. Again, practice on scrap material helps you find this rhythm.
6. Adjust for Temperature and Humidity
The weather can really affect how spray paint dries. Hot and dry conditions make the paint dry very quickly. This is a big reason for orange peel.
Cold or very humid conditions can make the paint dry too slowly, which can also lead to problems, though orange peel is more common in heat.
If it’s very hot and dry, you might need to spray a little closer or use slightly thinner coats. You can also try to paint in the early morning or late evening when it’s cooler. If it’s very humid, give each coat more time to dry than the can suggests.
Avoid painting in direct sunlight, as this can overheat the surface and the paint can. Also, avoid painting in windy conditions, as this can blow the paint around and cause uneven application.
7. Use the Right Type of Spray Paint
Different types of spray paints have different consistencies. Some are thicker than others. For example, some enamel paints might be thicker than latex-based paints.
If you are struggling with orange peel, consider using a spray paint designed for a smoother finish, like automotive spray paints or artist-grade spray paints.
Also, pay attention to the recommended application. Some paints are meant for faster drying times, while others are designed for a longer, smoother cure. Reading the label is a key step.
8. Don’t Overwork the Paint
Once the paint is on the surface, try not to go back over areas too many times within the same coat, especially if it’s starting to dry. This can lift the partially dried paint and create unevenness.
The best approach is to lay down each coat as evenly as possible and then move on. If you notice a small imperfection after a coat has dried, you can often fix it in a later coat or by lightly sanding and recoating. But avoid constantly reapplying to wet paint.
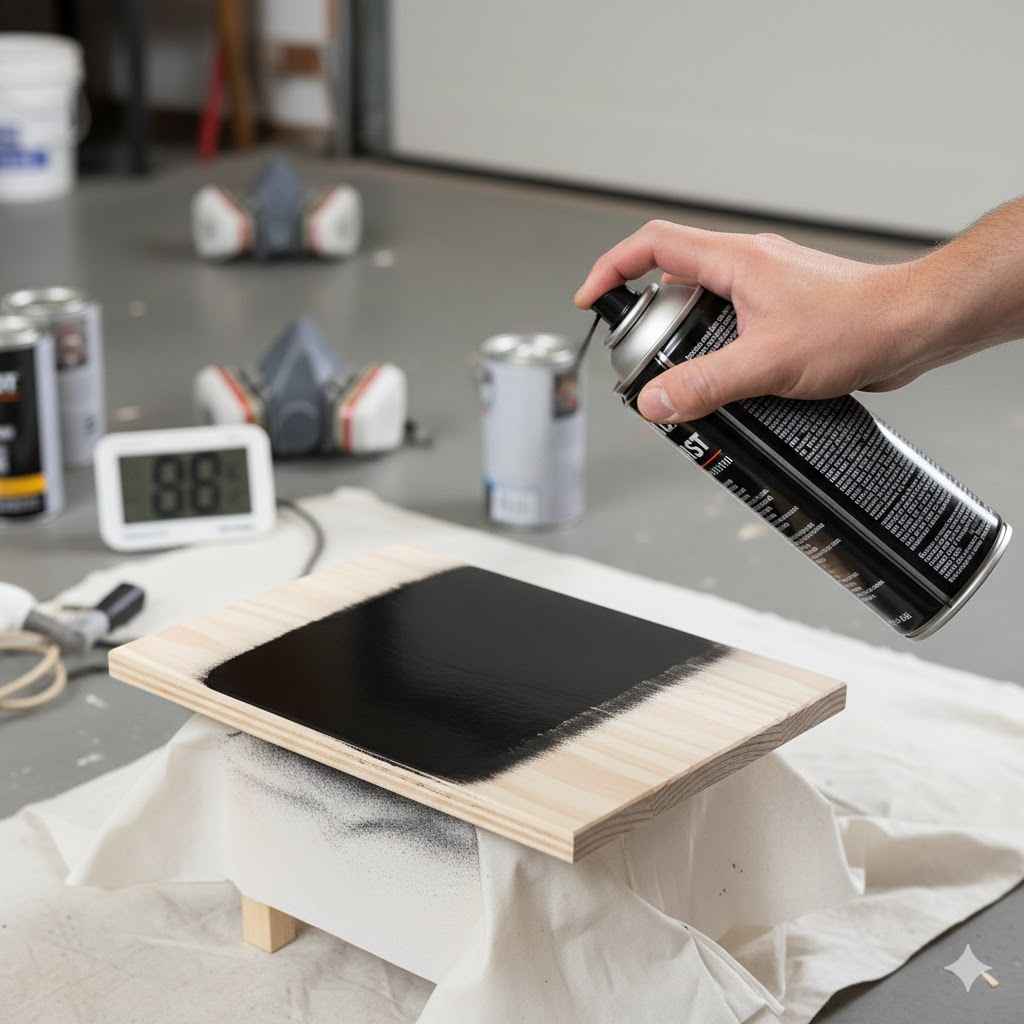
9. Test Spray Cans Before Use
Sometimes, spray cans can sit on shelves for a while, and the propellant or the paint can change. Before you spray your actual project, always do a test spray. Use a piece of cardboard or scrap material that is similar to what you are painting.
This test spray helps you check the spray pattern, the distance, and the speed you should use. It also lets you hear if the can is spraying evenly. If the spray is sputtering or uneven, the can might be clogged or faulty.
10. Consider Reducers or Thinners (Use with Caution)
For more advanced users, some types of paint can be thinned with specific reducers. However, this is usually done with a spray gun, not a can. If you are using a spray can, you generally cannot add reducers yourself.
The formula is already set.
If you are serious about getting a professional finish and often struggle with orange peel, you might want to look into using a spray gun and paint that allows for thinning. But for spray cans, sticking to the steps above is the way to go.
Fixing Orange Peel After It Happens
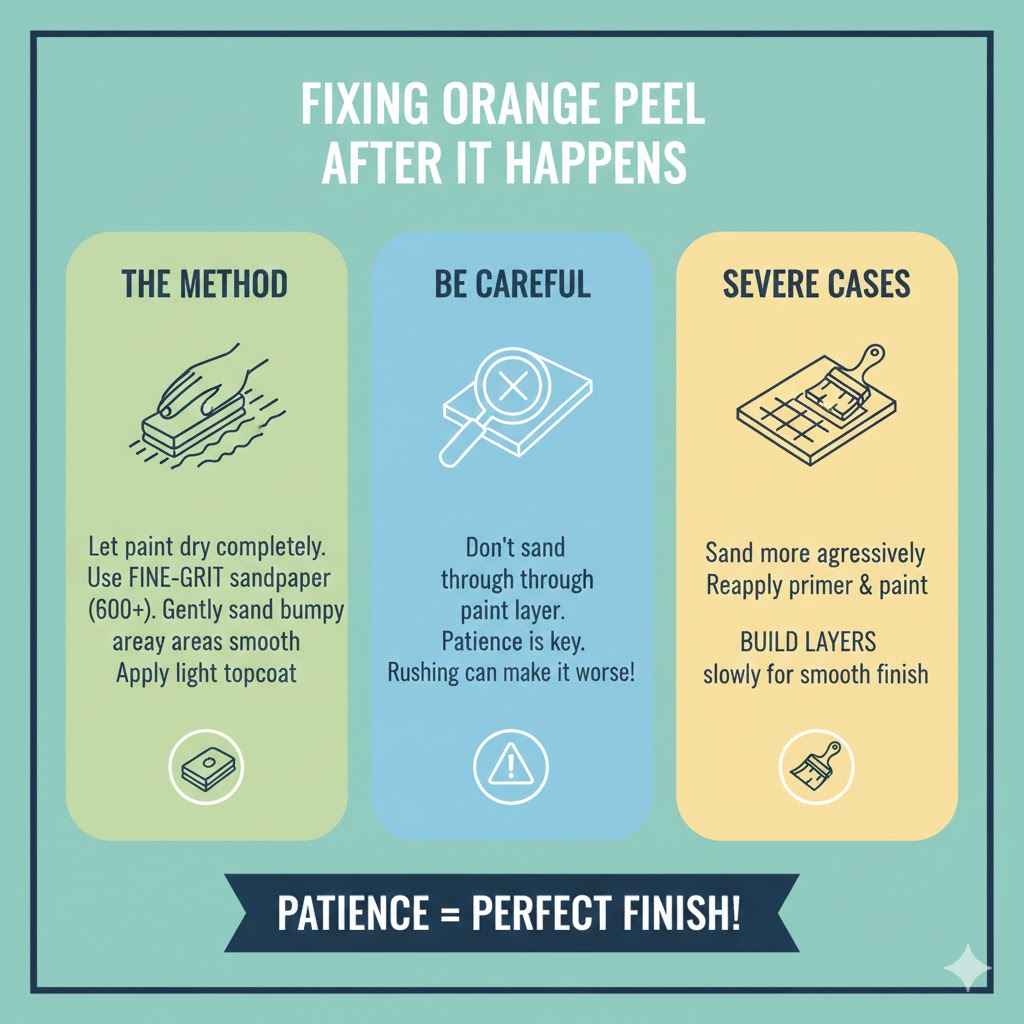
Sometimes, despite your best efforts, you might still get a bit of orange peel. Don’t despair. You can usually fix it.
The most common way is to let the paint dry completely, then sand it smooth.
Use very fine-grit sandpaper (like 600-grit or higher). Gently sand the bumpy areas until they are smooth. Be careful not to sand through the paint layer.
After sanding, wipe away the dust and apply another light coat of paint. This should help create a smooth finish.
If the orange peel is severe, you might need to sand down the area more aggressively and then reapply primer and paint. Patience is key here.
Frequently Asked Questions
Question: How can I tell if my spray paint can is working correctly?
Answer: Shake the can for at least a minute. Then, spray a test pattern on cardboard. A good can will produce a fine, even mist.
If it sputters, drips, or sprays unevenly, the can might be clogged or faulty.
Question: Should I use primer before spray painting?
Answer: Using a primer is often a good idea. It helps the paint stick better to the surface, can hide imperfections, and makes the color appear more vibrant. It can also help create a smoother base for your paint.
Question: Can I spray paint in cold weather?
Answer: It’s best to avoid spraying paint in very cold temperatures. Cold can slow down the drying process and affect how the paint cures, potentially leading to a poor finish or even orange peel. Check the paint can for its recommended temperature range.
Question: What is the best way to apply multiple coats of spray paint?
Answer: Apply thin, even coats. Move the can at a steady speed, overlapping each pass by about 50%. Allow each coat to dry for a few minutes before applying the next.
This prevents runs and builds up a smooth finish.
Question: How long should I wait between spray paint coats?
Answer: Wait for the recommended drying time on the spray can, usually between 5-15 minutes for a “tack-free” finish. This allows the surface to become slightly dry before the next layer is applied, preventing runs and promoting adhesion.
Final Thoughts
Preventing orange peel with spray paint comes down to a few simple habits. Focus on clean surfaces, proper can shaking, the right spraying distance, and applying thin, even coats at a steady speed. Adjusting for weather and testing your spray are also very helpful.
By following these steps, you’ll get the smooth, professional finish you’re aiming for.