How to Remove Bifold Closet Doors (No Track Removal Needed)
Bifold closet doors come off by releasing the spring-loaded bottom pivot pin first, then the top pin and guide wheel, without ever unscrewing the track. Forcing a stuck pin instead of lubricating it first is the top cause of bent pins and cracked brackets. This guide covers releasing pivot pins and rollers step by step, standard bifold sizes (24 to 36 inches per JELD-WEN specs), and what to do if you want the track removed too.
This post contains affiliate links. As an Amazon Associate, we earn from qualifying purchases at no extra cost to you.
Why You Might Need to Remove Bifold Closet Doors
Let’s start with why you’d want to take those doors off in the first place. I’ve done this a few times in my home, and each time had a different reason. Maybe you’re like me and want to paint the doors or the closet frame for a fresh look. Or perhaps you’re swapping out old bifold doors for new ones to match your updated decor. Sometimes, it’s about repairs—fixing a wobbly pivot bracket or replacing a broken panel. Other times, you might just want better access to the closet for a deep clean or to install new shelving. Whatever your reason, removing bifold doors is a straightforward project that can open up a world of possibilities for your space.
Tools You’ll Need to Get Started
Before we jump into the steps, let’s talk about tools. I always like to gather everything I need beforehand so I’m not running to the garage mid-project. The good news? You don’t need a fancy toolbox to remove bifold closet doors. Here’s what I typically use:
| Tool | Purpose |
|---|---|
| Screwdriver (Phillips) | To loosen screws on the track or pivot pins |
| Step stool or ladder | To reach the top track safely |
| Pliers | To grip and adjust stubborn pivot pins |
| Soft cloth or towel | To protect the floor from scratches |
| Optional: Lubricant | To loosen stuck pins or rollers |
Most of these are probably already in your home. If you don’t have pliers or a specific screwdriver, a quick trip to the hardware store will set you up. I also keep a small container nearby to hold screws—trust me, losing those tiny pieces is way too easy!
Best Bifold Door Hardware Kit
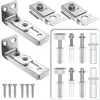
Bifold Door Hardware Repair Kit (2-Pack) – $6.78
Covers both doors in a standard bifold pair with fresh top and bottom pivots plus a guide wheel — handy if the pins you release in Step 2 and Step 3 below come out worn, bent, or cracked.
- Best for: Replacing worn pivots on both doors of a pair at once
- Why we picked it: Fits the 7/8″ to 1″ track size used on most standard closet bifold doors
- Main drawback: Universal-fit brackets may need light trimming on non-standard track widths
Compare more bifold door hardware options
 Option 1 Prime-Line Top Pivot 4-Pack – $6.90
|
 Option 2 Single-Door Repair Kit – $6.99
|
 Option 3 Silicone Lubricant Spray – $16.35
|
As an Amazon Associate we earn from qualifying purchases.
Preparing Your Workspace
I can’t stress enough how important it is to set up your space before you start. The first time I removed bifold doors, I didn’t clear the area, and I ended up tripping over a pair of shoes. Learn from my mistake! Clear out any clutter around the closet, like clothes, boxes, or random items. Lay down a soft cloth or towel on the floor to protect it from scratches when you set the doors down. If you’re working alone (like I usually do), make sure you have enough room to maneuver the doors once they’re off the track. Also, if you’re using a step stool, check that it’s sturdy—safety first!
Understanding How Bifold Doors Work
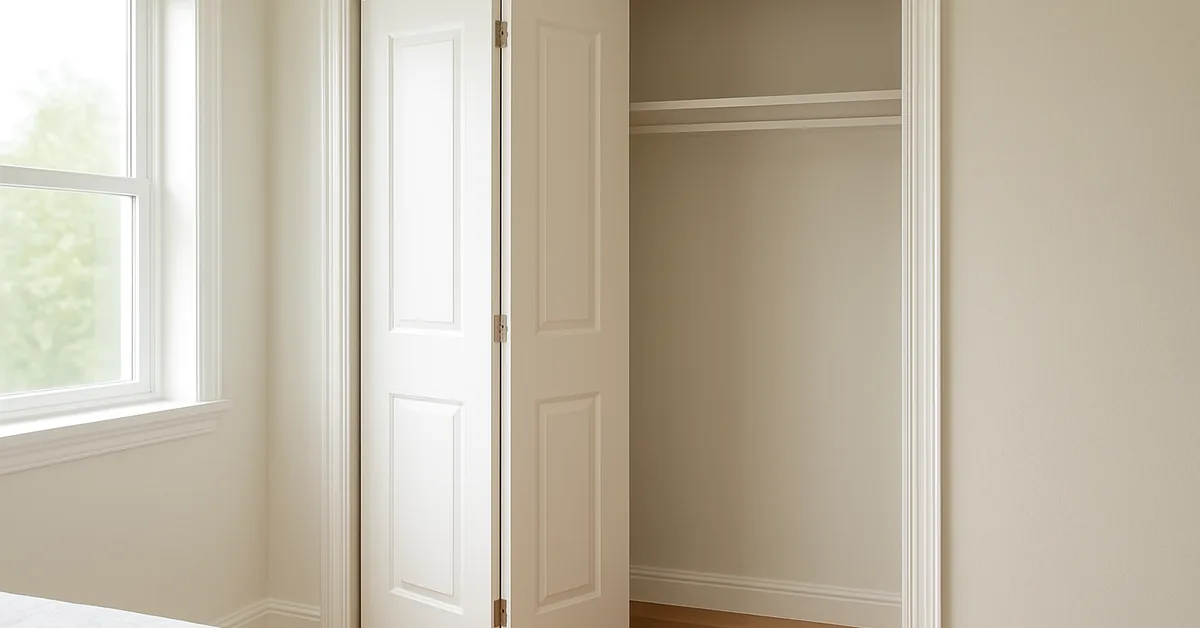
Before you start unscrewing anything, it helps to know how bifold doors are put together. When I first tackled this, I was a bit confused by the hardware, but it’s pretty simple once you get the hang of it. Bifold doors come in pairs, connected by hinges, and they slide along a track at the top of the closet. Each door has a pivot pin at the top and bottom that anchors it to the track and floor bracket. There’s also a guide pin or roller at the top that helps the doors glide smoothly. Knowing this makes the removal process less intimidating because you’ll understand exactly what you’re working with.
What Size Are Standard Bifold Closet Doors?
A bifold closet door is a hinged, folding closet door made of two panels joined at a center hinge that fold in half as they slide along an overhead track. Standard bifold closet doors are sold in 24, 30, 32, and 36-inch nominal widths for an 80-inch-tall opening, and up to 1/4 inch can be trimmed from each side to fit a slightly narrower rough opening. If you’re not sure which width fits your closet, our bifold door sizing guide walks through measuring the opening before you buy replacements.
📊 Standard bifold closet doors run 24 to 36 inches wide for an 80 to 80-7/8 inch opening, with up to 1/4 inch trimmable per side — Source: JELD-WEN Folding Doors Reference, 2026
Step-by-Step Guide to Removing Bifold Closet Doors
Now, let’s get to the fun part—actually taking those doors off! I’ve broken this down into clear steps based on what’s worked for me. Follow along, and you’ll have those doors down in no time.
Step 1: Locate the Pivot Pins and Rollers
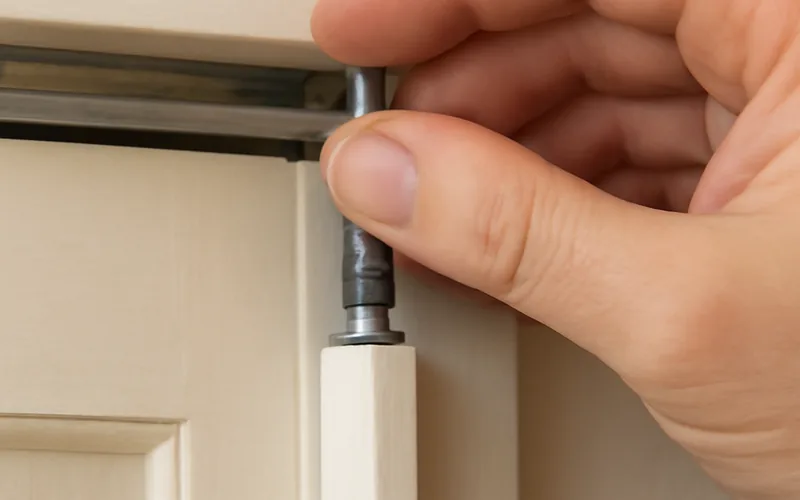
Start by looking at the top and bottom of the doors. You’ll see pivot pins (small metal rods) that hold the doors in place. The top pivot pin fits into the track, and the bottom one sits in a bracket on the floor. There’s also a guide pin or roller at the top that slides along the track. I like to give the track a quick wipe with a cloth to clear any dust—it makes things easier to see.
Step 2: Release the Bottom Pivot Pin
Head to the bottom of the door first. The bottom pivot pin is usually spring-loaded, which means it’s designed to pop out with a little pressure. Gently lift the door upward (you might need to push it slightly toward the track) to compress the spring. While holding it up, tilt the bottom of the door toward you. I’ve found that wiggling it a bit helps the pin come loose from the floor bracket. If it’s stuck, a drop of lubricant or a tap with pliers can do the trick. Be patient here—rushing can bend the pin.
Step 3: Free the Top Pivot Pin
With the bottom pin free, move to the top. The top pivot pin is usually held in place by a bracket or the track itself. Some doors have an adjustable pivot that you can loosen with a screwdriver. If yours does, turn the screw counterclockwise to release it. If there’s no screw, simply lift the door slightly and tilt it to slide the top pin out of the track. I always keep a firm grip on the door at this point—it’s heavier than you might expect!
Step 4: Remove the Guide Pin or Roller
The guide pin or roller is what keeps the door sliding smoothly along the track. To remove it, lift the door slightly and angle it so the roller pops out of the track. Some rollers have a small clip or screw holding them in place—if you see one, loosen it with your screwdriver. I’ve had rollers that were a bit sticky, so a quick spray of lubricant helped them slide out easily.
Step 5: Carefully Lift and Remove the Door
Now that the pins and rollers are free, you’re ready to take the door out. Hold the door securely with both hands and lift it out of the track at an angle. I usually tilt it toward me and lower it gently onto the cloth or towel I laid down earlier. Bifold doors aren’t super heavy, but they can be awkward, so take your time to avoid banging them against the wall or floor.
Step 6: Repeat for the Other Door
If your closet has multiple bifold doors, repeat the process for each one. I find it easier to work on one door at a time to avoid getting overwhelmed. Once all the doors are off, you’re free to start your project—whether it’s painting, cleaning, or installing new doors.
Do You Need to Remove the Track Too?
No — you only need to unscrew the track if you’re replacing the whole unit or changing the opening size. To take the track out anyway, remove the two or three screws holding each side of the top track to the door frame, then repeat for the bottom track if your closet has one. If your doors use a floor guide instead of a bottom track, see our guide to removing bifold doors with a top track only for that specific setup. Leave the track in place if you plan to reinstall the same doors or buy replacements in the same nominal width — it saves you from re-drilling screw holes and re-leveling the frame later.
Tips for a Smooth Removal Process
Over the years, I’ve picked up a few tricks that make removing bifold doors even easier. First, always check the track for debris before you start. Dust or small objects can make the pins harder to release. If the doors are old or haven’t been removed in a while, a bit of lubricant on the pins and rollers can work wonders. Also, if you’re planning to reuse the doors, label them (I use painter’s tape) so you know which one goes where when it’s time to reinstall. And if you’re working alone, consider propping the door against a wall to keep it steady while you work on the pins.
Common Challenges and How to Solve Them
No DIY project is without its hiccups, and I’ve run into a few while removing bifold doors. One common issue is stuck pivot pins. If they won’t budge, try spraying them with a lubricant like WD-40 and let it sit for a few minutes. Then, use pliers to gently twist the pin free. Another problem is doors that feel wobbly or don’t lift easily. This usually means the track is misaligned or the pins are worn out — our guide to fixing sticking or misaligned bifold doors covers those repairs in more detail. Check the track for bends and tighten any loose screws. If the pins are damaged, you might need to replace them—your local hardware store should have replacements.
“Spraying the stuck pivot pin with lubricant and waiting a couple of minutes before wiggling it loose is what saves the pin from bending — forcing it with pliers right away is the mistake I made the first time, and it left a small dent in the bracket.”
What to Do After Removing the Doors
Once the doors are off, you’ve got a blank canvas to work with! If you’re painting, sand the doors lightly and apply a primer before your topcoat for a professional finish. If you’re replacing the doors, measure the opening carefully to ensure the new ones fit perfectly, then follow our bifold closet door installation guide when they arrive. I’ve also used this opportunity to clean out the closet track and brackets—years of dust can build up there! If you’re not reinstalling the doors right away, store them flat in a dry place to prevent warping.
Reinstalling Bifold Doors
When you’re ready to put the doors back, the process is basically the reverse of removal. Start by sliding the top pivot pin into the track, then align the bottom pin with the floor bracket. Make sure the guide roller is seated properly in the track. I always test the doors by sliding them a few times to ensure they move smoothly. If they stick, check the track alignment or tighten the pivot screws — or see our guide to putting a bifold door back on track if a door pops off again after reinstalling. It’s satisfying to see everything come back together!
Why I Love This DIY Project
Removing bifold closet doors is one of those projects that feels like a big win. It’s quick, doesn’t require advanced skills, and can completely transform your space. I’ve used this trick to refresh my bedroom, update my kids’ closets, and even make room for a home office setup. Each time, I’m amazed at how such a small change can make a big difference. Plus, it’s a great way to build confidence in your DIY skills!
Frequently Asked Questions
How long does it take to remove bifold closet doors?
It usually takes about 15 to 30 minutes to remove a set of bifold doors, depending on how many there are and whether any pins are stuck. If it’s your first time, give yourself an hour to be safe.
Can I remove bifold doors by myself?
Yes, you can. Many homeowners do it solo. Just make sure you have a steady grip on the door and a clear workspace. If the doors are heavy, having a friend help can make it easier.
Do I need special tools to remove bifold doors?
Not really. A screwdriver and maybe some pliers are usually enough. A step stool helps if the track is high, and lubricant can make stubborn pins easier to remove.
What should I do if the pivot pins are stuck?
Spray them with a lubricant like WD-40 and wait a few minutes, then use pliers to gently twist them free. Be patient to avoid damaging the pins.
Can I reuse the same bifold doors after removing them?
Yes, as long as the doors and hardware are in good shape, you can reinstall them. Just store them flat and label them to make reinstallation easier.
Conclusion
There you have it—everything you need to know about removing bifold closet doors! From gathering your tools to tackling those pivot pins, I hope this guide makes the process feel approachable and even a little fun. Whether you’re giving your closet a facelift or just doing some maintenance, this is a project you can tackle in an afternoon. So grab that screwdriver, clear your workspace, and get ready to transform your space. You’ve got this!
Sponsored / affiliate links. As an Amazon Associate I earn from qualifying purchases. I may earn additional commission from eligible campaigns.