Are Digital Levels Accurate? Calibration, Limits, and Better Measuring Habits
Digital levels can be very useful for repeatable angle readings, but the number on the screen is only as trustworthy as the calibration and setup. Before relying on a decimal reading for a cabinet, slope, or machine setup, test the tool on a known reference and understand its stated accuracy.
Before making a permanent change, compare the visible symptom with the conditions around it: the material, age of the installation, recent repairs, moisture or heat exposure, and the result of a basic safe check. That context helps separate a small adjustment from a problem that needs a wider inspection. It also prevents a homeowner from spending money on a replacement, stronger product, or more invasive repair before the cause is understood.
A reliable result comes from a measured next step that can be tested, not from forcing the quickest apparent solution. Take notes before changing anything, then confirm the result under normal use. If the condition changes unexpectedly, pause rather than escalating the repair; the new symptom may identify a different cause.
What does this tool or method actually do?
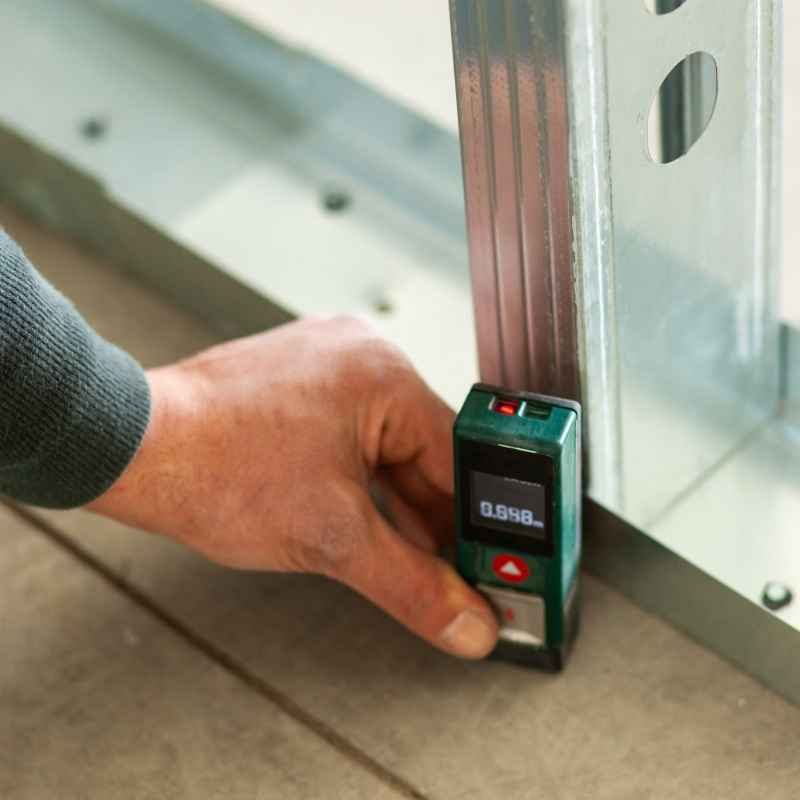
Electronic sensors detect orientation and convert it into a display. Many models offer level, plumb, degrees, percent slope, and hold functions. Dirt, a curved surface, low battery, impact damage, or an uncalibrated sensor can shift the result.
Before changing a part, buying an accessory, or repeating the same attempt, identify the surface, system, or room condition you are working with. The same visible symptom can have different causes in a newer installation, an older home, a recently repaired area, or a location exposed to moisture, heat, dirt, or frequent use. A careful first observation prevents a product-led repair from becoming unnecessary work.
When is it the right choice?
Use a digital level where a numerical angle or repeatable setting is valuable. For long spans, verify with a longer reference or laser; a short digital tool cannot describe a floor or wall beyond its contact length.
The best decision is based on the job immediately in front of you. Consider the condition of the surrounding materials, the access you have, the risk of making the problem worse, and whether the result can be tested before everything is put back together. If the method only hides a symptom while the underlying cause continues, it is not the right repair plan.
A safe first-check sequence
Start with a clean, well-lit work area. Read the manufacturer instructions for any appliance, product, or powered tool involved. Photograph the original condition if parts, settings, or fasteners may need to be returned to their original position. Work deliberately and make one change at a time so the final test shows what actually solved the problem.
- Read the manual’s calibration procedure before first use.
- Test a reading, rotate the tool 180 degrees, and compare.
- Keep the base clean and fully supported on the surface.
- Use the stated tolerance, not every displayed decimal, for critical work.
What the symptom tells you
| What you notice | What it usually means | Best next check |
|---|---|---|
| Readings differ after rotation | Tool or reference may need calibration | Perform the manual’s calibration check |
| Number jumps | Surface contact or battery may be poor | Clean base and verify stable placement |
| Long surface seems uneven | Short tool cannot represent whole span | Use a longer reference |
This table is a decision aid, not a diagnosis from a distance. If the symptom changes after a safe first check, pause and reassess rather than continuing through a generic list. That habit preserves evidence, prevents accidental damage, and makes a professional visit more efficient when one is needed.
Common mistakes that make the job harder
Do not treat a digital display as more accurate simply because it shows more digits. False precision can lead to unnecessary adjustment when the work and surface tolerance are larger than the reading difference.
Avoid using more force, more product, or more water simply because the first attempt was not immediate. Those responses often create residue, damage a finish, strip a fastener, overload a circuit, or push a small problem into a concealed area. The goal is a repeatable, testable result rather than a fast-looking fix.
How to choose the next step
Choose a digital level for angle setup, slope work, and repeatability. Use a long spirit level, laser, or measured reference when the work requires a larger-area check.
A useful homeowner decision has three parts: identify the condition, choose the least invasive safe action, and define the result that proves the action worked. If you cannot do all three, stop at observation and get the right instructions or professional help. That is not a failed DIY project; it is a risk-control decision.
Practical checks before you spend money
Write down the exact model, material, dimensions, and symptom before buying a replacement part or specialty item. Compare measurements and manufacturer documentation rather than relying on a photo or a broadly similar name. When a component is still accessible, keep the original until the new item has been verified. This reduces returns and avoids forcing an incompatible part into place.
Also consider whether the surrounding condition caused the issue. Moisture, dirt, poor airflow, loose mounting, hard water, worn seals, weak power supply, or repeated impact can make a new component fail early. Correcting the cause is usually more valuable than simply replacing the part that showed the symptom.
When to stop and call a professional
Stop DIY work when the condition involves active water intrusion, hidden electrical wiring, contaminated water, a damaged structural element, a gas connection, a seized shutoff, or a problem that affects multiple fixtures or rooms. Do not defeat safety devices, bypass instructions, or keep testing a condition that is getting worse. A qualified professional can assess system-level causes that a surface symptom cannot reveal.
Further practical checks
How the surrounding condition changes the answer
The same method can be sensible in one home and unsuitable in another. Surface age, prior repairs, room humidity, ventilation, access, local water quality, electrical capacity, and the manufacturer instructions all change the risk. Before copying a technique from a video or product label, compare those conditions with your own. That comparison is more useful than treating the first search result as a universal repair instruction.
Use this guide as a decision framework: start with the low-risk observation, preserve evidence that identifies the cause, and only move toward a repair when the material and system conditions support it. If a safe check contradicts the expected result, do not keep escalating the same method. Reassess the cause instead.
A simple way to test whether the fix worked
Define the pass-or-fail result before beginning. It may be a dry connection after normal use, a stable temperature, an even painted edge, a smooth wood surface, a clear drain path, or a floor that dries without haze or swelling. Test under the ordinary conditions that caused the problem, then inspect again after the area has had time to settle.
Keep the test limited. Change one variable, observe it, and record what happened. If several products or adjustments are made at the same time, it becomes impossible to tell which one helped and which one created a new issue. This approach avoids repeated purchases and unnecessary rework.
Material, maintenance, and cleanup considerations
After the immediate task, remove leftover debris, moisture, paint, dust, or residue according to the material involved. Store tools dry, inspect cords and moving parts, and dispose of damaged consumables rather than saving them for a later job. Small maintenance steps protect the next use and make it easier to recognize when a tool, fixture, or surface has changed condition.
Do not assume a stronger cleaner, hotter setting, larger tool, or longer runtime is automatically an upgrade. The right amount is the amount that solves the observed problem without introducing excess heat, pressure, moisture, abrasion, or chemical residue. Follow the product documentation for the exact model and material rather than a broad rule from a different situation.
What to document before buying a replacement
If the next step requires a replacement part, take clear photos, note measurements, and record model or serial information before removing the original. Include connector style, mounting position, finish, flow direction, blade width, hose size, power rating, or other compatibility details that apply to the job. A product can have a similar name and still be the wrong fit.
Use the original component as the comparison reference until the replacement has been installed and tested. This is especially important where fit affects water control, electricity, heat, alignment, or safety. If compatibility is uncertain, pause before ordering; a verified part number or manufacturer support answer is safer than forcing a nearly matching option.
A practical planning example
Imagine the job is attempted twice with two different outcomes. In the first attempt, the homeowner identifies the material, prepares the work area, follows the manufacturer limit, makes one controlled adjustment, and checks the result under normal use. In the second, the homeowner starts with a stronger product or a larger intervention without confirming the cause. The first approach may take a little more preparation, but it produces information. The second can erase the clue that would have pointed to the right repair.
That contrast matters because many home-maintenance problems are not solved by a single universal product. They are solved by matching a modest action to a verified condition. A clean edge, stable setup, correct amount of moisture, compatible part, clear airflow path, or accurate measurement is often more valuable than an aggressive shortcut. Build the plan around what you can observe and test.
How to use this guide on the job
Read the quick answer first, then compare your situation with the check list and symptom table. Choose the smallest safe action that fits the observed condition. Stop if the result points to a different cause, and use the professional-stop section when safety, access, or system complexity makes a DIY decision uncertain. This sequence keeps the guide useful without pretending that every home has the same materials, history, or risks.
When the task is complete, save the product manual, note the part or material used, and keep a short record of what changed. That record helps with future maintenance, warranty questions, and repeat problems. It also gives a contractor better information if a later inspection becomes necessary. The goal is not to turn every homeowner into a specialist; it is to make the next decision clearer and safer.

Frequently asked questions
Are digital levels more accurate than bubble levels?
They can provide useful numeric readings, but accuracy depends on calibration and stated tolerance. A good bubble level remains reliable for many tasks.
How often should I calibrate a digital level?
Follow the manufacturer guidance and recalibrate after impacts, major temperature changes, battery replacement if specified, or suspicious readings.
Can a digital level measure slope?
Many models display degrees or percent slope. Confirm the selected mode and the tool’s instructions before using the value for drainage or installation work.
The practical next step
Use the specific condition you observed to choose one safe, limited next action. Test the result under normal use, then recheck later for moisture, noise, residue, movement, or return of the original symptom. A good repair is one you can verify, not simply one that looks finished.
Sponsored / affiliate links. As an Amazon Associate I earn from qualifying purchases. I may earn additional commission from eligible campaigns.