Can You Make Normal Wood Look Like Driftwood? Yes, Here’S How
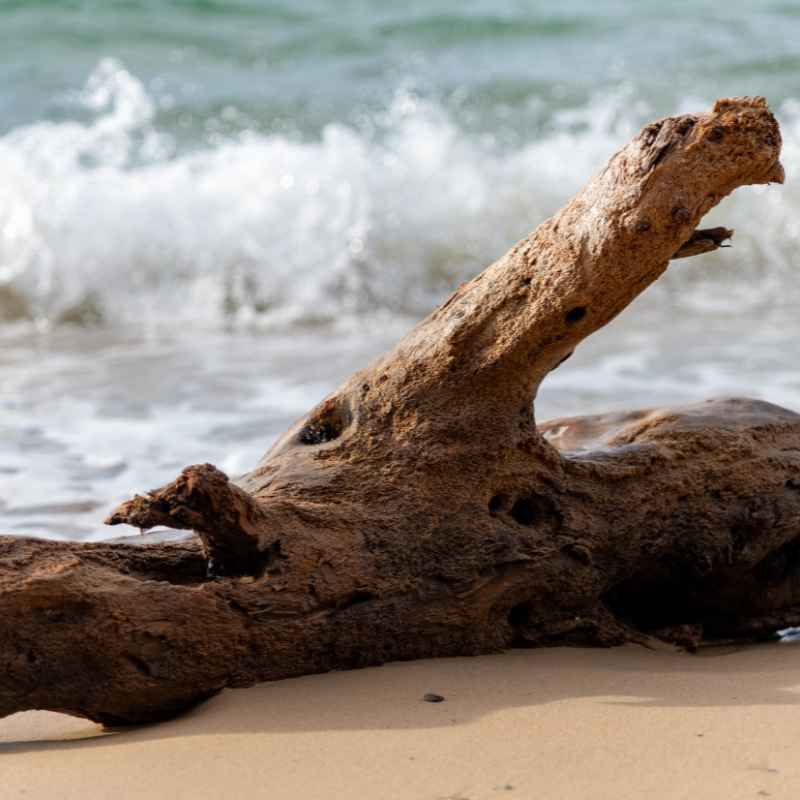
Ever see a piece of furniture or a wall accent that just screams “beach house” or “coastal chic”? Often, that look comes from wood that looks like it’s spent years being tumbled by the ocean waves. It’s called driftwood.
But what if you don’t live near the coast? Or what if the driftwood you find is too small, too rotten, or just not the right shape? The good news is, you can absolutely make regular wood look like beautiful, weathered driftwood.
It’s a fun DIY project that can totally change the feel of your home decor. We’ll walk through how to do it, step by step, using things you likely already have or can get easily.
Yes, you can make normal wood look like natural driftwood. This involves softening the wood’s texture, creating gray tones, and adding subtle imperfections. Common methods include using vinegar and steel wool, baking soda and water, or even whitewash techniques to mimic the effects of sun, salt, and water.
Understanding Driftwood’s Look
Before we start making wood look like driftwood, let’s think about what makes real driftwood look so special. It’s not just gray. It’s soft-looking.
The ocean and weather smooth out the rough edges. They also bleach the wood. This makes it a soft, silvery gray color.
There are often little cracks and grain details that pop out. Sometimes, you see marks from marine life or tiny holes. It doesn’t look perfect.
It looks natural and worn. That’s the magic we want to capture.
Think about how sun fades things. That’s one part of it. Then, think about water smoothing things down.
That’s another. The salt in the water also plays a role. It can speed up weathering.
All these things work together. They create that unique, relaxed look. It feels calm and timeless.
It brings a bit of nature’s art right into your home. We are essentially trying to copy nature’s slow work, but much faster. It’s like a shortcut to a natural finish.
You get the best of both worlds: the look you love and the wood you have.
The key is to avoid making it look painted or fake. Real driftwood has depth. It has variations in color and texture.
It has a softness that manufactured finishes often lack. We want to build up layers. We want to mimic the slow, consistent wear of the elements.
This takes a little patience, but the results are worth it. It’s about making the wood tell a story, even if it’s a story we’ve created.
The Vinegar and Steel Wool Method
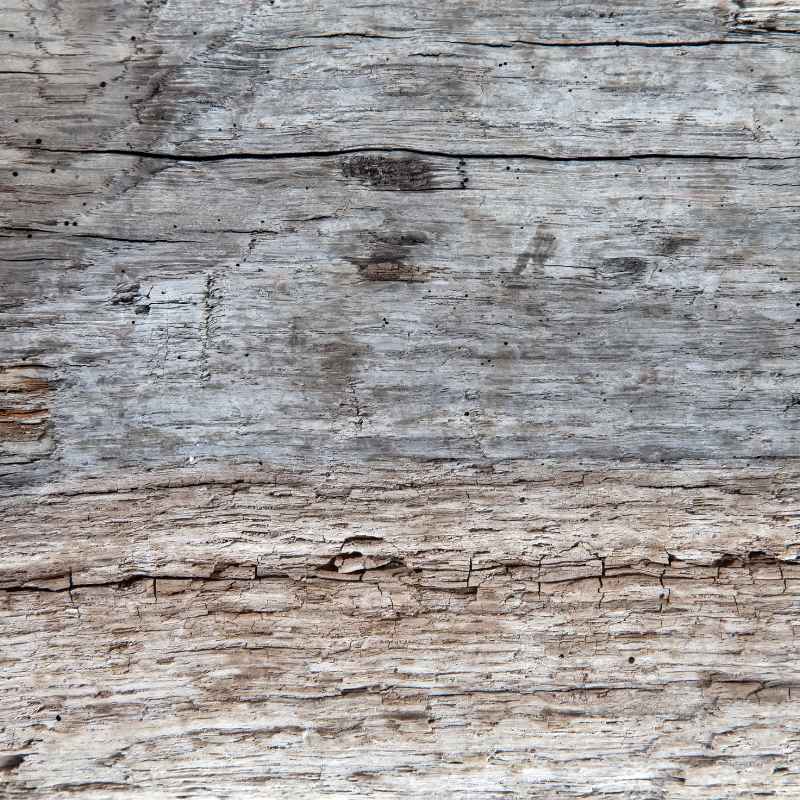
This is a really popular and easy way to get that gray driftwood look. It works because steel wool rusts when it reacts with vinegar. This rust is what gives the wood its gray color.
It’s like a chemical reaction that ages the wood instantly.
You’ll need a few things for this. Get some plain white vinegar. Also, grab a steel wool pad.
Fine-grade steel wool works best, like 0000. You’ll also need glass jars with lids. Old pickle jars or mason jars work great.
You’ll need the wood you want to treat, of course. Make sure it’s clean and dry. Sanding it first can help.
It opens up the wood pores. This lets the vinegar mixture soak in better.
Here’s how you do it. Take your steel wool and tear it into pieces. Put these pieces into your glass jar.
Pour enough white vinegar over the steel wool to cover it. Seal the jar tightly. Now, let it sit.
You need to let the steel wool rust in the vinegar. This can take anywhere from 24 hours to a few days. The longer it sits, the darker the gray will get.
You’ll see the liquid turn dark brown or black. That’s the rust forming. It’s a good sign!
Once it looks good, you can use the liquid. Strain the liquid into a new container. Throw away the soggy steel wool.
Be careful, it can be messy. Now, you can apply this mixture to your wood. Use a paintbrush or a rag.
Apply it evenly over the wood surface. The vinegar will soak into the wood. As it dries, it reacts with the natural tannins in the wood.
This reaction creates the gray color. It really does look like weathered wood. It’s quite amazing to see.
You might need a few coats. Let each coat dry completely. Then, apply another one if you want a deeper gray.
It’s important to note that this works best on woods that have tannins. Pine and fir might not get as dark. Woods like oak, cedar, or walnut will give you a richer gray.
This method is super simple. It doesn’t involve harsh chemicals, just common household items. It’s a great way to start your driftwood transformation.
Steel Wool & Vinegar: What to Expect
How it works: Steel wool (iron) rusts in the acidic vinegar. This rust particles infuse the wood. They react with wood tannins to create gray shades.
Best wood types: Woods with natural tannins like oak, walnut, and cedar. Pine might turn more of a muted brown-gray.
Drying time: Allow at least 2-4 hours between coats. Full cure can take 24 hours.
Finish: Apply a matte sealer if needed. This protects the finish and color.
After the gray color is set, you might want to smooth it a bit. Real driftwood is soft to the touch. You can gently sand the wood.
Use a very fine grit sandpaper, like 220 or higher. Just go over the surface lightly. This knocks down any raised grain.
It gives it that smooth, worn feel. Don’t sand too hard, or you’ll remove the color. The goal is to enhance the texture, not erase it.
You want to feel the grain. You want it to feel like it’s been handled a lot.
Sometimes, the vinegar and steel wool can make the grain stand up. This is actually a good thing for the driftwood look! It adds texture.
You can then lightly sand it to make it smooth but still textured. It’s a fine balance. If the gray isn’t dark enough, you can repeat the process.
Or, you can try a stronger vinegar like apple cider vinegar. It might react a bit differently. Experiment on scrap wood first to see what results you get.
The Baking Soda and Water Paste
This is another gentle method. It’s great for a lighter, more subtle gray. It’s also very safe and easy.
You mix baking soda with water to make a paste. This paste will lighten the wood. It also helps to soften the grain.
It’s a different kind of weathering effect than the vinegar method.
You’ll need baking soda and water. Mix them in a bowl until you get a thick paste. Think of it like toothpaste consistency.
You also need a brush or a rag to apply it. The wood should be clean and dry. You might want to lightly sand it first.
This helps the paste spread evenly.
Apply the baking soda paste to the wood. Cover the entire surface. Let it sit for about 30 minutes.
You’ll see it start to dry and lighten the wood. After 30 minutes, wipe off the excess paste with a damp cloth. You can use a soft brush to gently scrub away any dried bits.
Then, let the wood dry completely. You’ll notice the wood has a lighter, more muted tone. It looks a bit more sun-bleached.
This method works best on lighter woods. It’s good for creating that pale, sun-bleached look that some driftwood has. It doesn’t add any color, it just lightens what’s there.
If you want a gray color, you might need to combine this with another technique. For instance, you could use the baking soda paste first. Then, once it’s dry and lightened, you could try a light gray stain or wash over it.
This gives you control over both the lightness and the final color.
Baking Soda Paste: A Gentle Approach
Ingredients: Baking soda and water.
Consistency: Thick paste, like toothpaste.
Application: Apply evenly, let sit for 30 mins, wipe off.
Effect: Lightens wood, softens grain. Good for pale, sun-bleached looks.
Best for: Projects needing a subtle, natural aging. Can be combined with stains.
The key with baking soda is to not let it sit too long. Overdoing it can make the wood fibers swell too much. This can sometimes lead to a fuzzy texture.
If that happens, you can lightly sand it down. It’s all about gentle steps. This method is very forgiving.
You can always add more or adjust. It’s a good starting point if you’re new to wood aging techniques.
I remember trying this on a small side table I found at a flea market. It was a dark, almost orange-ish wood. I wanted a light, airy beach feel.
I mixed up the baking soda paste and applied it. It took away that strong orange tone. It made the wood a soft, pale tan.
It wasn’t gray yet, but it was a huge improvement. It felt much more natural. It was like the wood had spent a summer by the sea.
It was the perfect base for a light gray wash later.
Whitewashing for a Faded Look
Whitewashing is a classic technique. It gives wood a soft, faded appearance. It’s like the wood has been exposed to harsh sun for a long time.
It fills in the wood grain a little. It also softens the overall color. It’s different from a solid paint job.
You still see the wood underneath. This makes it look more natural and aged.
You’ll need white paint. Latex or chalk paint works well. You’ll also need water.
The ratio of paint to water is important. More water means a lighter wash. Less water means a stronger coverage.
Start with a ratio of about 1 part paint to 2 parts water. You can always add more water if it’s too opaque.
Mix the paint and water in a container. You want a thin, milky consistency. Stir it well.
Make sure there are no lumps. Then, apply the wash to your wood. Use a paintbrush.
Brush it on liberally. Let it sit for a minute or two. Then, take a clean, damp cloth and wipe off the excess paint.
Wipe with the direction of the wood grain. This is important. It helps to reveal the wood underneath.
The more you wipe, the more paint you remove. This lets more of the original wood color show through. It also highlights the grain.
You’ll get those beautiful, soft gray lines. If you want a stronger effect, apply a second coat. Let the first coat dry completely.
Then, repeat the process. You can also adjust the water-to-paint ratio for subsequent coats. For instance, if you want more opacity, use less water.
If you want it very sheer, use more water.
Whitewash Tips for Driftwood Effect
Paint: Use a good quality white latex or chalk paint.
Ratio: Start with 1 part paint to 2 parts water. Adjust as needed.
Application: Brush on, let sit briefly, wipe off with damp cloth.
Wiping: Always wipe with the wood grain. More wiping = lighter look.
Best for: Creating a soft, faded, sun-bleached effect on various woods.
Whitewashing is very forgiving. If you make a mistake, you can often wipe it off with a damp cloth before it dries. This is where the “human touch” really comes in.
You’re not just applying color; you’re revealing wood. This variation is what makes it look so natural. It’s a bit like breathing life back into old wood, but with a fresh, beachy vibe.
I once used whitewash on a large pine plank for a shelf. The pine was a bit too yellow for my liking. I mixed up a very thin wash.
I applied it and immediately started wiping. I really worked the cloth along the grain. It took a lot of the yellow out.
It left a soft, pale tone. The grain stood out beautifully. It looked exactly like I’d hoped.
It was a simple step, but it made a huge difference.
Adding Texture and Imperfections
Real driftwood isn’t smooth. It has nicks, dings, and rough patches. To make your wood look truly authentic, you need to add some of these imperfections.
This is where you can really let your creativity shine. It’s about making the wood look like it’s been through a lot.
One way to add texture is by distressing the wood. You can use a wire brush. Go over the wood surface with the brush.
This softens the edges. It also raises the grain slightly. It creates little marks that look like natural wear.
You can also use sandpaper. Use a coarser grit in some areas. Sand along the grain, but also a little against it in places.
This can create scratches that look like they were made by rocks or shells.
Another common technique is to use a hammer or a chain. Gently tap the wood in random spots. This can create small dents and cracks.
Be careful not to overdo it. You want it to look natural, not like you attacked the wood. Think about where real damage might occur.
Maybe near the edges or corners. Or along the grain lines.
Tiny holes can also add to the look. You can use a drill with a small bit. Drill a few shallow holes in random places.
Or, you can use something like an awl. Make small gouges. These can look like wormholes or marks from small sea creatures.
It adds a level of detail that makes the wood more interesting.
Creating Driftwood Imperfections
Tools: Wire brush, sandpaper (various grits), hammer, chains, awl, small drill bits.
Techniques:
- Softening Edges: Wire brush, fine sandpaper.
- Scratches: Coarser sandpaper, wire brush.
- Dents/Cracks: Gentle tapping with hammer or chain.
- Small Holes: Awl, small drill bit for shallow holes.
Placement: Random, focusing on edges, corners, and along grain.
Goal: Natural wear, not obvious damage. Less is often more.
Don’t forget the ends of the wood. Real driftwood often has broken or splintered ends. You can carefully break or saw off small pieces from the ends.
This makes them look more irregular. You can also use a rasp or a file to rough up the edges. The goal is to break any sharp, factory-made corners.
Soft, rounded edges are key to the driftwood look.
I recall working on a project where I used a knotty pine board. The knots were very pronounced. Instead of trying to hide them, I embraced them.
I used my wire brush to really rough up the wood around the knots. This made the knots look more like they were protruding. Then, I used a dark gray stain in the deeper crevices.
This made them stand out. It gave the whole piece a much more rugged, authentic feel. It was those little details that made the difference.
Creating Depth with Stains and Washes
Once you have the basic gray color and some texture, you can add depth. This is done with stains and washes. They help to bring out the grain.
They also create variations in color, like real driftwood.
You can use a dark gray stain. Apply it lightly. Then, wipe most of it off.
This will settle into the grain. It will make the grain lines pop. It adds contrast.
You can also use a slightly darker or lighter gray than your base color. Apply it in random patches. Don’t cover the whole surface.
This creates subtle color variations. It mimics how the wood might have weathered unevenly.
Consider using a brown stain or glaze. A light brown stain can add warmth. It can mimic the look of wood that hasn’t been bleached as much in certain spots.
Apply it sparingly. Wipe it off quickly. You just want hints of brown.
These hints can make the gray look more complex and natural.
A technique often used is called “glazing.” You mix a glaze medium with a paint color, usually a darker shade of your base color. Apply this glaze over the dried finish. Then, wipe most of it off.
The glaze will settle into the low spots and crevices. It adds a subtle depth and richness. It’s like adding shadows.
This makes the texture more apparent.
Adding Depth with Color
Technique 1: Dark Stain/Wash
- Purpose: To highlight wood grain.
- Application: Apply sparingly, wipe off quickly.
- Color: Darker gray or brown.
Technique 2: Glazing
- Purpose: To add shadows and subtle color variation.
- Method: Mix glaze medium with paint. Apply, then wipe off.
- Color: Slightly darker shade of the base color.
Technique 3: Layering Colors
- Purpose: To mimic uneven weathering.
- Method: Apply random patches of slightly different gray or brown tones.
- Result: More natural, complex color.
Don’t be afraid to experiment. The best driftwood finishes are not perfect. They have character.
They have layers of color and texture. You can even use a very watered-down black paint or stain. Apply it very lightly in the deepest crevices.
This can simulate the look of algae or dark water stains. Again, use this sparingly. It’s all about subtle touches.
These touches make the difference between wood that looks painted and wood that looks naturally aged.
I once tried to create a “sea glass” effect on some wood. I used layers of muted blues and greens over a gray base. Then I used a white wash over that.
The result was stunning. It looked like the wood had been in the water for years. It had those soft, sea-worn colors.
It was a bit more involved than just gray. But it showed me how many possibilities there are. You can really create a unique look.
It just takes a little patience and a willingness to try different things.
Sealing and Protecting Your Finish
Once you’ve achieved the look you want, you need to protect it. Driftwood finishes can be delicate. They can rub off if not sealed.
Sealing will lock in the color and texture. It will also make the wood more durable.
The best sealer for this look is a matte finish. A glossy or satin finish will look too new. It will take away from the natural, weathered appearance.
Look for a matte polycrylic, polyurethanes, or a clear wax. These will protect the wood without adding shine.
Apply the sealer in thin coats. Use a good quality brush or a lint-free cloth. Follow the product instructions.
Usually, you’ll apply one or two thin coats. Let each coat dry completely before applying the next. If you’re using a wax, apply it in thin layers.
Buff it to a soft sheen. Wax can give a lovely, soft feel that mimics natural wood.
Choosing the Right Sealer
Key: Matte finish is essential.
Options:
- Matte Polycrylic (water-based, easy cleanup)
- Matte Polyurethane (more durable, oil-based or water-based)
- Clear Wax (soft feel, natural look)
Application: Thin coats, allow drying time between coats.
Avoid: Glossy or satin finishes – they look too new.
When you’re sealing, pay attention to any textured areas. You want the sealer to get into the nooks and crannies. This will protect them.
If you used a wire brush or sandpaper heavily, make sure the sealer gets into those roughened areas. It will help to prevent future damage. It also makes the texture feel more solid and permanent.
I always do a test patch with my sealer. I’ll apply it to a scrap piece of wood that I’ve finished. This way, I can see exactly how the sealer affects the color and sheen.
Sometimes, a sealer can slightly darken the wood or bring out undertones. Doing a test helps me avoid surprises on my main project. It’s a small step that saves a lot of potential headaches.
Plus, it gives me peace of mind.
The right sealer can really elevate your project. It makes the finish look intentional and professional. It also ensures that your beautiful driftwood creation will last.
It’s like giving your art a protective shield. It allows you to enjoy the natural beauty you’ve created for years to come. It’s the final touch that ties everything together.
It makes your DIY project look like a store-bought treasure.
Real-World Context: Where to Use Driftwood Finishes
The beauty of the driftwood look is its versatility. It fits into so many styles and spaces. It’s not just for beach houses anymore.
It can bring a natural, relaxed vibe to almost any room.
Think about furniture. A dining table with a driftwood finish can be stunning. It can handle daily use.
It adds character to a formal or casual dining room. Side tables, coffee tables, or consoles with this finish bring a touch of the coast indoors. They can make a room feel more grounded and serene.
Imagine a rustic wooden bookshelf with a driftwood finish. It looks like it was salvaged from an old ship. It’s full of stories.
For walls, you can use driftwood-finished planks. These can create an accent wall. They bring a natural texture to a bedroom or living room.
It feels like bringing a piece of the outdoors inside. It adds a cozy, organic element. Even smaller details like picture frames or mirror borders can get this treatment.
They can tie a room together with a subtle, cohesive theme.
Driftwood Finish Ideas
Furniture:
- Dining tables
- Coffee tables
- Side tables
- Bookshelves
- Cabinets
Decor:
- Picture frames
- Mirror borders
- Shelving units
- Decorative boxes
Architectural Elements:
- Accent walls (wood planks)
- Ceiling beams
- Mantelpieces
In bathrooms, a driftwood vanity can look amazing. It evokes a spa-like feeling. It’s calming and natural.
It works well with tile and stone. In kitchens, you can use driftwood finishes on cabinets or open shelving. It adds a rustic charm.
It can soften the look of modern appliances. It makes the kitchen feel more welcoming.
Even small craft projects can benefit. Think about making coasters, trays, or even decorative wood letters. These can all be given the driftwood treatment.
It’s a great way to use up scrap wood. It also allows you to customize your home decor. You can make pieces that are truly unique.
They reflect your personal style and your love for natural textures. It’s about creating a home that feels lived-in and full of character.
The natural look of driftwood also pairs well with many colors. It’s a neutral. It complements blues, greens, and sandy beiges perfectly.
But it also looks great with bolder colors like deep teals or coral. It provides a beautiful contrast. It can anchor a room.
It can add a touch of calm to a vibrant space. It truly is a chameleon finish. It adapts to many different design aesthetics.
From modern farmhouse to coastal casual, it fits right in.
What This Means for You: When It’s Normal vs. Concerning
The goal here is to create a look. It’s about making your wood appear weathered. So, when you see your wood changing color or texture during this process, it’s usually normal.
You’re deliberately altering its appearance. The graying, the softening, the slight texture changes – these are all signs you’re on the right track.
What might be concerning is if the wood starts to rot or decay in a way you didn’t intend. This process is about visual aging, not actual structural damage. If your wood begins to crumble or develop soft, mushy spots that weren’t there before, that’s not the look we’re going for.
This can happen if the wood is exposed to too much moisture for too long, especially if it’s a type of wood that’s not very durable.
Another thing to watch for is mold or mildew. If you’re working in a humid environment and not letting the wood dry properly between steps, you might see fuzzy green or black spots appear. This is a sign of mold growth, and it’s not part of the driftwood effect.
You’ll need to address this by ensuring good ventilation and drying times. If mold does appear, you may need to scrub it off with a mild cleaner and let the wood dry thoroughly before continuing.
DIY Driftwood: Normal vs. Concerning Signs
Normal Signs (You’re doing it right!):
- Wood color changing to gray or muted tones.
- Wood texture becoming softer or slightly raised grain.
- Edges and corners rounding off.
- Minor dents or scratches appearing.
Concerning Signs (Stop and reassess):
- Wood becoming mushy or crumbly (actual rot).
- Visible mold or mildew growth (fuzzy green/black spots).
- Unpleasant, persistent musty odors.
What to do if concerning: Ensure proper drying. Clean mold with mild cleaner. For rot, consider if the wood is suitable or needs replacing.
This process is cosmetic, not structural.
Also, pay attention to the smell. The vinegar and steel wool method might have a slight metallic or vinegary smell while working, but it should dissipate as the wood dries and seals. If you notice a strong, persistent musty or rotten smell, it could indicate a deeper issue with the wood or the process.
Real driftwood might smell a little briny, but it shouldn’t smell truly unpleasant or decay-like.
The goal is to make wood look like it’s been weathered by nature. This is a cosmetic change. It’s about enhancing the wood’s appearance.
It’s not about compromising its integrity. So, if you see signs of actual decay, take a step back. Reassess your methods.
Ensure you are drying the wood properly between steps. This will help you achieve the desired look safely and effectively. It’s about working with the wood, not against it.
Quick Fixes & Tips for Your Driftwood Project
Sometimes, you just need a little nudge in the right direction. Here are a few quick tips to help your driftwood project go smoothly.
Tip 1: Test First. Always, always test your finishes on a scrap piece of the same wood. This lets you see how the colors and textures will turn out. It helps you avoid mistakes on your main project.
You can experiment with different methods and ratios on these scraps.
Tip 2: Work in a Ventilated Area. Some of the mixtures, like vinegar and steel wool, can have a strong smell. Also, paints and sealers need good airflow to dry properly. Open windows or work outside if you can.
This makes the process more pleasant and helps the wood dry faster.
Tip 3: Embrace Imperfection. Real driftwood is not perfect. Don’t strive for flawless results. Little nicks, slight color variations, and uneven textures are what make it look authentic.
Relax and let the process guide you. Sometimes, the “mistakes” are the best part.
Tip 4: Layer Your Finishes. Don’t expect to get the perfect driftwood look in one step. It often takes multiple layers of color, washing, and distressing. Build up your finish slowly.
This creates depth and complexity.
Tip 5: Clean Your Tools Immediately. Paints, stains, and glazes can dry hard on brushes and rollers. Clean them right after you finish using them. This will make your tools last longer.
It also saves you a lot of hassle later.
Essential Driftwood Project Tips
Test Patch: Always test on scrap wood first.
Ventilation: Work in a well-aired space.
Imperfection: Don’t aim for perfect; embrace natural flaws.
Layering: Build your finish with multiple thin coats.
Tool Care: Clean brushes and tools immediately after use.
Patience: Allow adequate drying time between steps.
Tip 6: Patience is Key. Wood aging techniques take time. Rushing the process can lead to poor results. Let each layer dry completely.
Let the wood cure. This ensures the finish is durable and looks its best. Enjoy the creative process.
It’s part of the fun!
These quick tips can make a big difference in the success of your project. They are based on common experiences and help avoid common pitfalls. They’re the kind of advice you’d get from someone who’s been there.
By following them, you can turn ordinary wood into something extraordinary. You’ll create pieces that look like they’ve been loved by the sea for years.
Frequently Asked Questions About Making Wood Look Like Driftwood
Can I use any type of wood to make it look like driftwood?
You can use most types of wood. However, woods with natural tannins, like oak, cedar, or walnut, will react better with methods like the vinegar and steel wool process to create a richer gray. Softer woods like pine or fir might achieve a lighter, more muted tone.
It’s always best to test on a scrap piece of your specific wood first.
How long does it take to make wood look like driftwood?
The time can vary greatly depending on the method and the desired look. Some methods, like the vinegar and steel wool, require a few days for the mixture to age. Applying the finishes and drying between coats can add several more hours or even days.
Expect to spend at least a full day on a small project, possibly spread over a few days to allow for drying.
Will the driftwood finish rub off?
If not properly sealed, yes, the finish can rub off, especially with darker washes or glazes. It’s crucial to use a matte sealer, like a matte polycrylic, polyurethane, or wax, once you are happy with the look. Apply thin coats and let them cure fully to protect the finish and lock in the color and texture.
Can I achieve different shades of gray for my driftwood finish?
Absolutely! The shade of gray depends on several factors: the type of wood, the strength and aging time of your vinegar/steel wool mixture, the ratio of paint to water in your whitewash, and the number of layers you apply. You can also experiment with adding a touch of black or brown stain to your wash for deeper tones, or using a lighter whitewash for a paler look.
Is the vinegar and steel wool method safe for indoor use?
Yes, it is generally safe for indoor use, especially if you work in a well-ventilated area. The smell of vinegar will dissipate as it dries. The key is to let the wood dry thoroughly and then seal the finish.
Ensure there is good airflow while applying and drying the mixture. Dispose of the used steel wool properly.
Can I use this technique on outdoor furniture?
For outdoor furniture, you’ll need to use exterior-grade sealers and finishes. While these DIY techniques can create a great look, the wood will still need robust protection against the elements. Choose a highly durable, weather-resistant matte sealer.
Regular maintenance will likely still be required for the finish to last outdoors.
Bringing the Beach Home: Your Driftwood Journey
Creating that coveted driftwood look on ordinary wood is totally achievable. It’s a rewarding process that lets you add natural beauty to your home. You’ve learned about different methods, from the rust-powered gray of vinegar and steel wool to the soft fade of whitewash.
You know how to add those authentic textures and imperfections. You also know how to seal your work to make it last.
Remember, the magic is in the details. It’s about layering, distressing, and embracing the imperfections. Don’t be afraid to experiment.
Your creativity is the main ingredient. You can transform simple lumber into pieces that tell a story. They bring a sense of calm and the beauty of nature into your living space.
So, grab some wood, gather your supplies, and start your driftwood adventure today. You’ll be amazed at what you can create.
Sponsored / affiliate links. As an Amazon Associate I earn from qualifying purchases. I may earn additional commission from eligible campaigns.