DIY Table Saw Extension: Enhance Your Workspace Today!
In the realm of woodworking, precision and efficiency are paramount, particularly when optimizing the workspace for intricate cuts and larger materials. The integration of a DIY table saw extension serves as a critical modification, enhancing both capacity and accuracy. By extending the operational surface of a table saw, woodworkers can achieve greater stability and support when handling longer workpieces, mitigating the risk of misalignment and enhancing overall cut quality.
Understanding the intricacies of designing and constructing a table saw extension can transform your workshop dynamics. Dive into this article to explore the essential components and techniques for creating a functional and effective extension.
Enhance Your Workspace With A DIY Table Saw Extension
A DIY table saw extension is an essential enhancement that can significantly improve the functionality and efficiency of your woodworking projects. By creating a customized extension, you expand your workspace, increase support for larger materials, and enhance accuracy during cuts. This summary highlights the benefits and practical steps involved in building your own table saw extension, providing valuable insights for both beginner and experienced woodworkers. Get ready to discover how a simple DIY project can transform your woodworking experience.
Understanding the Benefits of a Table Saw Extension
Enhances workspace efficiency. Provides additional support for larger projects. Improves cutting accuracy and stability.
Using a table saw extension can make your workspace feel like a superhero’s lair! It enhances workspace efficiency by giving you more room to maneuver your materials. This means fewer trips to the lumber pile and less chance of accidentally turning your foot into a splintered mess. Plus, it provides extra support for larger projects.
No more juggling big boards like a circus clown! With improved cutting accuracy and stability, you’ll be slicing through wood like a hot knife through butter. Just remember, measure twice, cut once—unless you’re measuring for snacks, then it’s always one time!
Materials Needed for Your DIY Table Saw Extension
List of essential materials (wood, screws, etc.). Costeffective alternatives and options. Recommended tools for assembly.
To get started on your project, gather a few essential materials. You’ll need wood for the base, and screws to hold everything together. If you’re looking to save money, consider using plywood or repurposed wood.
Don’t forget to grab some brackets for extra support—they’re like the superhero sidekicks of your table saw!
| Materials | Estimated Cost |
|---|---|
| Wood (Plywood or Hardwood) | $20 – $50 |
| Screws | $5 – $10 |
| Brackets | $5 – $15 |
You’ll also need some simple tools like a drill and a saw—don’t worry, it’s not as scary as it sounds! Just think of it as giving your wood a fancy haircut. Happy building!
Measuring and Designing Your Table Saw Extension
How to measure your table saw for a perfect fit. Key design considerations (height, width, length). Sketching your design layout.
To make a great table saw extension, start by measuring your saw. Use a tape measure to find the height, width, and length needed for a snug fit. Here are some key design tips:
- Height: Match the height of your table saw for stability.
- Width: Ensure enough space for smooth cuts.
- Length: Make it long enough for your projects, but not too long.
Next, grab a pencil and sketch your design layout. This will help you visualize the final result and plan your materials.
Step-by-Step Instructions for Building Your Extension
Preparing the workspace and materials. Assembling the base structure. Installing the extension to the table saw.
To start building your table saw extension, first, prepare your workspace. Make sure it’s clean and has enough room to work safely. Gather your materials, including wood, screws, and tools. Then, assemble the base structure by cutting the wood to the right size and securing the pieces together using screws.
- Measure and cut the wood accurately.
- Use strong screws for stability.
Finally, install the extension to the table saw.
Align it carefully and attach it securely to ensure safety during use.
Tips for Customizing Your Table Saw Extension
Adding features for enhanced functionality (storage, clamps). Decorative finishes and protective coatings. Integrating miter tracks and measuring guides.
Customizing your table saw extension can turn it from “meh” to “wow!” Start by adding storage compartments for quick access to tools. You can also attach clamps to keep your wood steady, making cuts smoother than a buttered slide. Want a fancy touch?
Apply a decorative finish or a protective coating. It’s like a spa day but for your saw! Don’t forget to integrate miter tracks and measuring guides.
With these features, you’ll be cutting like a pro in no time!
| Feature | Benefit |
|---|---|
| Storage | Quick access to tools |
| Clamps | Steady cuts |
| Decorative Finish | Enhances appearance |
| Miter Tracks | Precise measurements |
Common Mistakes to Avoid When Building a DIY Table Saw Extension
Miscalculating measurements. Skipping essential safety features. Overloading the extension.
Building a DIY table saw extension can be fun, but mistakes can happen. Here are some common ones to avoid:
- Miscalculating measurements: Always double-check your sizes before cutting. A small error can lead to a big problem.
- Skipping essential safety features: Include guards and proper supports to keep yourself safe while working.
- Overloading the extension: Don’t place too much weight on it. An overloaded extension might break or tip over.
Maintenance and Upkeep for Your Table Saw Extension
Regular inspection and adjustments. Cleaning tips to prolong the lifetime. When to consider upgrades or modifications.
To keep your table saw extension in great shape, it’s important to follow some simple routines. Regularly inspect for loose parts and make necessary adjustments. This helps prevent accidents and keeps everything running smoothly.
- Clean sawdust and debris after each use to maintain performance.
- Lubricate moving parts every few months for better operation.
- Check for signs of wear and tear periodically.
Consider upgrades if you notice difficulty in cutting or if your needs change.
Making modifications can enhance efficiency and safety.
Frequently Asked Questions About DIY Table Saw Extensions
Addressing common inquiries (installation challenges, compatibility). Expert tips for firsttime builders. Resources for further learning and troubleshooting.
Many people have questions about DIY table saw extensions. Installation can be tricky, so here are some tips to help:
- Ensure your extension is compatible with your table saw model.
- Check the alignment for smooth cuts.
- Use sturdy materials for durability.
For first-time builders, it’s helpful to watch online tutorials and follow expert blogs for guidance. If you run into problems, consider these resources:
- Online forums for community support.
- Video guides for step-by-step solutions.
With the right information and patience, building a DIY extension can be a rewarding project!
Conclusion
In conclusion, a DIY table saw extension is a valuable enhancement for any woodworking shop. It not only increases your workspace but also improves accuracy and safety when making large cuts. With just a few materials and some basic skills, you can craft a custom extension that suits your specific needs, turning your table saw into a more versatile tool for any project.
FAQs
What Materials Are Best For Building A Diy Table Saw Extension To Ensure Durability And Stability?
For building a DIY table saw extension, materials like plywood or medium-density fiberboard (MDF) are excellent choices due to their durability and stability. Use at least 3/4-inch thick plywood or MDF to provide sufficient support and minimize flex. Additionally, incorporating steel or aluminum brackets can enhance stability and robustness. Finally, ensure that all joints and connections are secure to maintain alignment and performance over time.
How Do I Accurately Measure And Align A DIY Table Saw Extension To My Existing Table Saw?
To accurately measure and align a DIY table saw extension, first ensure that your existing table saw is level and square. Then, position the extension flush against the saw’s tabletop, using shims if necessary to eliminate gaps. Use a straight edge or a long level to check that both surfaces are perfectly aligned along their length. Finally, secure the extension in place, double-checking for stability and alignment before using the saw.
What Types Of Designs Can I Use For A DIY Table Saw Extension To Accommodate Larger Workpieces?
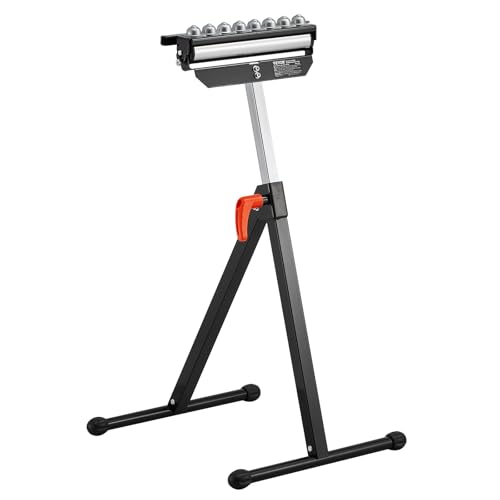
You can use a variety of designs for a DIY table saw extension, including a side wing extension that attaches to the existing table, a sliding extension that can be adjusted for different lengths, or a foldable extension that allows for easy storage when not in use. Another option is a roller support or outfeed table that provides additional support when handling larger workpieces. Incorporating a built-in stop or measuring system can enhance accuracy. Ensure that the extension is sturdy and aligns properly with the saw to maintain safety and precision.
How Can I Incorporate A Solid Fence System Into My DIY Table Saw Extension For Improved Accuracy?
To incorporate a solid fence system into your DIY table saw extension, start by attaching a robust, straight fence to your saw extension that aligns perfectly with the blade. Use a T-track system or adjustable stops for easy and accurate adjustments. Ensure the fence is securely mounted and extends parallel to the saw blade for consistent cuts. Finally, regularly check and adjust the alignment to maintain accuracy over time.
What Safety Precautions Should I Take When Using A DIY Table Saw Extension During Woodworking Projects?
When using a DIY table saw extension, always ensure it’s securely attached and level with the saw to prevent material from binding. Wear appropriate personal protective equipment, such as safety glasses and hearing protection, to guard against dust and noise. Keep hands away from the blade by using push sticks or other tools, and always maintain awareness of your body position relative to the saw. Lastly, double-check the saw’s settings and blade alignment before starting to ensure a safe and accurate cut.