Door Hinge Problems: Adjusting, Squeaks and Sagging
Quick answer: Start with the symptom you can see. If the hinge squeaks, clean the pin and knuckle first, then lubricate. If a screw loosens but still tightens, replace it and drill a proper pilot hole. If a screw spins, repair the hole before reinstalling anything. If the latch-side top corner drops, correct the top jamb hinge first, sometimes with a longer screw into solid framing if the door and hinge manufacturer permit it. If a composite or other exterior door binds but the screws are sound, check hinge adjustment, reveal, and weatherstrip compression before trimming the slab.
Match the symptom to the least invasive fix: lubricate squeaks, tighten screws, shim a rubbing hinge, and consider a longer top-jamb screw only where the door construction and manufacturer guidance allow it. Guess wrong and you can split the jamb, strip the frame, open up weatherseal gaps, or leave an entry door that still sticks and will not latch. This guide starts with diagnosis by symptom, then moves to the lasting fix for interior, exterior, and composite doors.
Editorial note: This article is written in a trade-informed, symptom-first format used in residential door repair: diagnose by reveal, rub marks, screw behavior, and hinge wear before replacing parts. It also cross-checks key claims against published hinge and lubricant guidance from door-hardware manufacturers and standards bodies, including ANSI/BHMA A156.1 for butts and hinges, hinge-maker adjustment instructions for composite-door hardware, and lubricant-maker guidance on cleaning and lubrication sequence.
| If you see this | Do this first | Do not do this yet | Decision rule |
|---|---|---|---|
| Squeak at one hinge | Clean pin and knuckle, then lubricate | Do not replace screws first | If noise returns quickly after cleaning and lubrication, inspect for a grooved pin or rusted knuckle |
| Screw backs out but still tightens | Remove and replace the screw with the correct type after drilling a pilot hole | Do not pack the hole unless the screw spins | If the leaf pulls tight and stays tight, it was a loose-fastener problem, not a stripped-hole problem |
| Screw spins freely | Repair the hole with wood filler method matched to damage size | Do not keep tightening | If the screw cannot draw the leaf tight, the hole must be repaired before any alignment check is reliable |
| Latch-side top corner rubs | Check the top jamb hinge first | Do not plane the latch edge first | If one longer screw into solid framing pulls the reveal back into line, sag was the main fault |
| Exterior or composite door closes hard, then springs back | Check compression setting, latch alignment, and weatherstrip contact | Do not assume it only needs lubricant | If the seal is crushed on one side and loose on the other, reset hinge alignment before adjusting the strike |
Related repairs: if the door still will not close cleanly after hinge work, check how to align a door, how to fix a door that won’t latch, how to replace weatherstripping on a door, and when to replace door hinges.
What you’ll need


- Screwdriver set
- Drill and pilot bits
- Hammer and nail punch
- Allen keys for adjustable composite hinges
- Wood glue
- Toothpicks
- Hardwood dowel
- Epoxy for larger voids
- Replacement hinge screws
- Hinge shims
- Lubricant for the hinge condition
- Replacement hinge or hinge pin if needed
- Door wedge or support block
Start with the symptom
Read the movement before removing screws
A squeak points to friction inside the pin and knuckle, but the cause still matters. Dust, paint, rust, and a scored pin do not call for the same repair.
A hinge screw that backs out but still tightens is different from one that spins freely. The first may only need replacement screws and proper pilot holes. The second usually needs the hole repaired before any screw will grip.
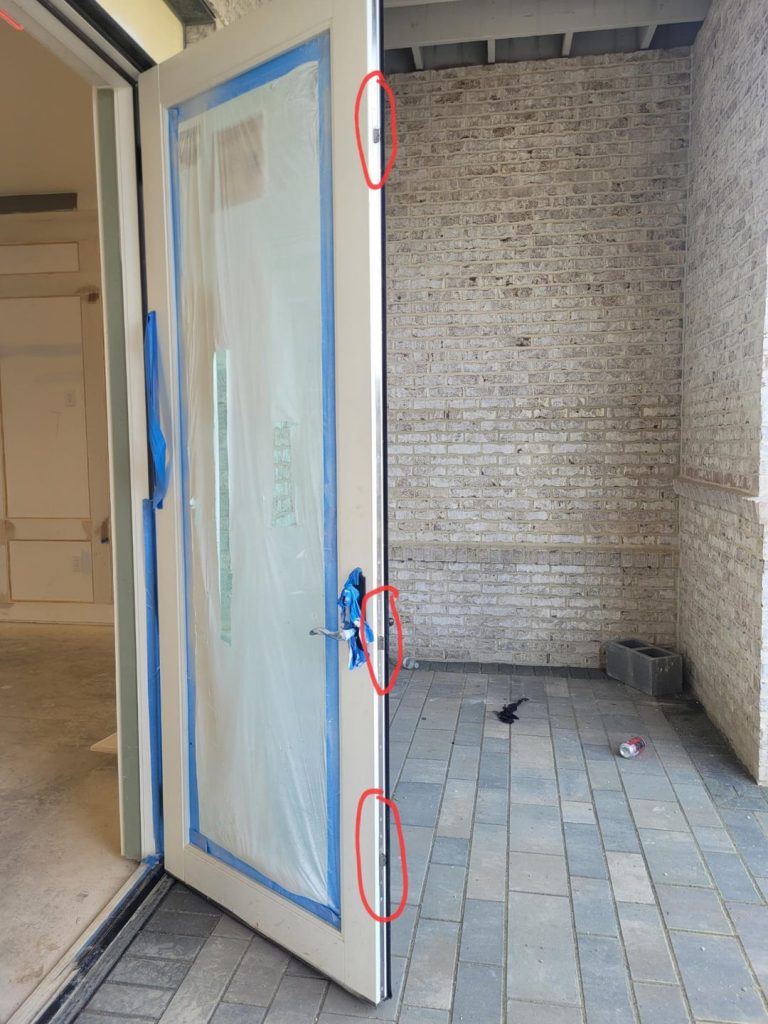
Door sag follows a pattern. If the latch-side top corner rubs the frame, start at the top hinge on the jamb side. If the gap at the hinge side changes from top to bottom, check for bad shimming, worn pins, or a frame that is out of plumb.
Drag is separate from sag. Find rub marks on the latch edge, top edge, or sweep area before you touch the hardware. Planing comes later.
In real repair triage, the most reliable diagnosis cues are visible witness marks: polished paint at one top corner, black rub streaks on the strike-side head jamb, a hinge leaf sitting proud of the mortise, or one screw head standing slightly off the leaf while the rest are flush. Those cues usually identify the fault faster than removing every hinge screw at once.
Use the reveal, rub marks, and level
Open the door halfway and study the reveal, the gap around the slab. An even reveal usually means the hinge locations are close. A tapered reveal points to hinge pullout, a shifted mortise, or frame movement.
Use a spirit level on the hinge-side jamb and along the door edge. This matters on standard butt hinges and on composite doors, where height, compression, and lateral alignment affect each other.
Say your bedroom door clears the floor but touches the strike-side head jamb only at the top corner. That pattern usually leads you to the top jamb hinge, not the bottom hinge and not the latch hardware.
Suppose an exterior door closes, then springs back unless pushed hard. That can mean too much compression at an adjustable composite hinge or a frame alignment fault, not a lubrication issue.
Common failure patterns also differ by door type. Interior painted wood doors often show loose top-jamb screws or crushed screw holes first. Exterior wood or steel doors more often show weatherseal-related drag, seasonal slab movement, or rust at exposed hinge barrels. Composite doors commonly present as uneven compression or lateral misalignment rather than classic loose-hinge sag.
Decide whether the fault is the hinge, frame, or slab
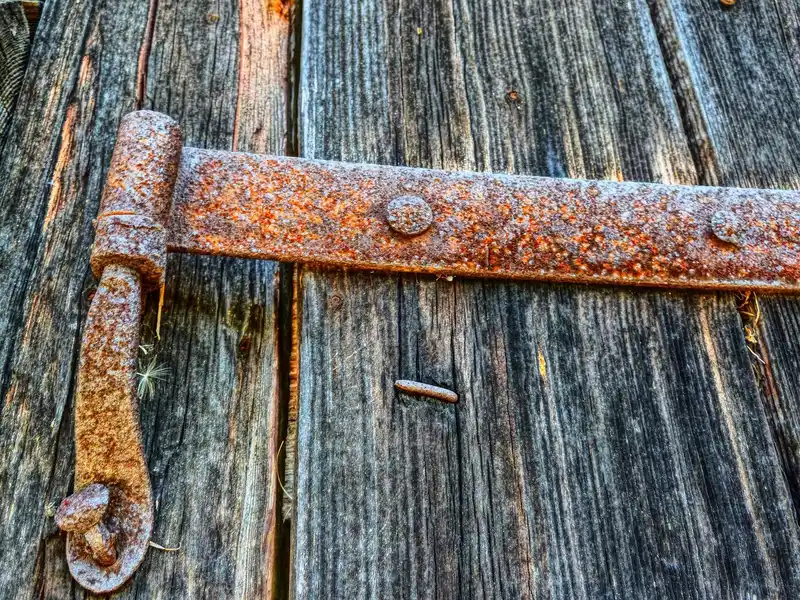
Blown-out mortises, crushed wood fibers, and repeated screw back-out point to the frame or door edge, not the hinge alone. Bent leaves, cracked knuckles, severe rust, and a pin worn with visible grooves point to the hinge.
If the slab drags only after seasonal movement, the frame may have shifted enough that shimming helps and planing does not. If an exterior hinge is rusted through or flakes when the pin comes out, replacement is usually the safer move.
One of the most common misreads is blaming the slab when the actual problem is support loss at the top jamb hinge. Another is blaming the hinge when the leaf is sound but the mortise is crushed so the hinge cannot seat flat. Treat the failed part, not just the symptom.
Hinge troubleshooting matrix
| Symptom | Likely cause | Fastest safe fix | Permanent fix | Tools needed | When to replace the hinge |
|---|---|---|---|---|---|
| Squeak | Dry pin, dust, rust, paint buildup, scored pin | Remove pin if possible, clean, then lubricate | Replace worn pin or rusted hinge after cleaning fails | Hammer, nail punch, rag, lubricant | If squeak returns quickly, pin is grooved, or knuckle is rusted or deformed |
| Loose screw | Screw backed out, short jamb screw, no pilot hole, poor bite | Tighten by hand and identify which screw will not hold | Replace the failing jamb screw with a long screw into solid framing and re-drill pilot holes | Screwdriver, drill, pilot bit, replacement screws | If leaf holes are wallowed out or hinge leaf is bent |
| Stripped hole | Wood fibers crushed, repeated overtightening, screw spun in place | Stop driving the screw and fill the hole | Use toothpicks and wood glue for minor damage; use a hardwood dowel or epoxy for larger damage, then re-drill | Glue, toothpicks, dowel or epoxy, drill | If surrounding wood is split, mortise is blown out, or repair fails again |
| Door sag | Loose top hinge screws, worn pin, settling, hinge leaf not seated | Tighten the top hinge screws by hand, then inspect the reveal at the head and latch side | Pull the top jamb hinge tight with a long screw, replace worn pin, or shim the hinge leaf | Screwdriver, drill, spirit level, shims | If knuckles are worn, leaves are bent, or screw holes will not hold after repair |
| Door drag | Misalignment, shifted frame, swollen slab, bad reveal, over-compressed weatherseal | Identify rub point and verify plumb before trimming anything | Correct hinge position with screws or shims; plane only after hinge corrections fail | Spirit level, pencil, shims, screwdriver | If hinge is bent or rusted and keeps shifting the slab |
| Composite-door misalignment | Height, lateral, or compression setting off; hinge type adjusted incorrectly | Level the door, identify hinge type, then adjust with an Allen key | Reset all adjustable hinges in sequence and replace hardware that will not hold adjustment | Spirit level, Allen keys, screwdriver | If adjustment range is exhausted or the hinge slips back after proper setting |
Source note for this matrix: ANSI/BHMA A156.1 is a product standard for butts and hinges rather than a field-repair manual, so use it only as general background on hinge types and performance. For adjustable composite-door hinges, always follow the exact hinge-maker sequence because flag, T-, and adjustable butt-hinge systems vary by brand; manufacturers such as ERA, Mila, and Door-Stop publish hinge-specific adjustment guidance. For lubrication, manufacturer guidance commonly distinguishes freeing a stuck part from leaving a lasting lubricating film.
Why does my door squeak at the hinge?

Most hinge squeaks come from friction at the pin, not from the screws. Dirt, old paint, rust, or a worn pin changes the fix. Clean first, then choose lubricant by condition: WD-40 can help free stuck parts and displace moisture, silicone spray is often preferred where a drier film is wanted, and petroleum jelly is best treated as a short-term stopgap rather than a best-practice long-term lubricant.
Steps
- Move the door slowly and isolate the noisy hinge before treating all of them.
- Inspect the knuckle and pin area for dust, rust, paint buildup, or metal scoring.
- Tap the hinge pin up with a hammer and nail punch if the hinge design allows removal. (Wikihow)
- Wipe the pin and knuckle clean before adding lubricant, because grit left inside keeps wearing the hinge.
- Use WD-40 only to free a stuck or rusty hinge, then wipe off excess; silicone spray is commonly used for a longer-lasting, low-dust film; petroleum jelly is usually only a temporary fix.
- Reinstall the pin, swing the door through a full cycle, and listen again.
If that didn’t work
Pull the pin back out and check for grooves, pitting, or rust scale. Replace the pin if the hinge body is still sound. Replace the whole hinge if the knuckle is deformed, badly rusted, or still noisy after cleaning and relubrication. Oil-heavy lubricants are usually a poor choice in dusty areas because they tend to hold grit, which can accelerate wear rather than reduce it.
Citation note: This clean-then-lubricate sequence is consistent with common manufacturer guidance: WD-40 positions its Multi-Use Product as a penetrant and water displacer rather than a dedicated long-term hinge lubricant, while silicone-lubricant manufacturers generally recommend silicone where a drier, lower-dirt film is desirable on moving metal parts.
How do you fix a loose door hinge?
Fix a loose hinge by finding out whether the screw is merely loose, backing out, or stripped. Tighten by hand first. If the top jamb hinge on a sagging door needs more holding power, replacing one short screw with a longer jamb screw into solid framing can help after drilling a pilot hole, but only where the door assembly allows it. On exterior prehung units, fire-rated doors, security doors, metal-reinforced constructions, and metal frames, do not assume a longer screw is acceptable; follow the door, frame, hinge, or listing instructions where they exist.
Steps: support the door and tighten
- Support the door and tighten each hinge screw by hand to identify which ones still bite.
- Mark any screw that backs out again or spins without pulling the leaf tight.
- On wood jambs where the manufacturer permits it, replace a short or damaged top-hinge jamb screw with a longer screw that reaches solid framing where pullout resistance matters most.
- Match replacement screws on the door side to the existing specification or the door or hinge maker’s instructions.
- Drill pilot holes before driving replacement screws so the wood does not split and the hinge leaf stays aligned.
- Target the top jamb hinge first when the latch-side top corner has dropped.
If that didn’t work: if a screw spins, stop
If a screw spins, stop. Overtightening makes the damage larger and can shift the leaf out of its mortise. Move next to hole repair. If the screw keeps backing out after correct installation, inspect for crushed mortise wood, a bent hinge leaf, or repeated movement from a sagging slab. The top hinge usually shows the problem first because it carries the greatest leverage load when the latch side drops.
Citation note: ANSI/BHMA A156.1 covers hinge performance classes, but screw length is installation-specific rather than universal. In practice, longer screws are used selectively on the jamb side when the goal is to reach solid framing, especially at the top hinge of a sagging wood-jamb door. Exterior and listed assemblies should follow the door-set manufacturer’s fastening instructions and listing requirements where applicable.
How do you repair stripped hinge screw holes?
Repair stripped holes by matching the filler to the damage size, then re-drilling a centered pilot hole after curing. Toothpicks and wood glue work for minor wear. Larger voids or repeated failures need a hardwood dowel or epoxy. Reinstalling a screw into wet filler or without a pilot hole usually fails again.
Steps: remove the failing screw
- Remove the failing screw and probe the hole to judge whether the damage is minor, enlarged, or blown out.
- Pack small stripped holes with wood glue and tight-fitting toothpicks, then trim them flush after curing.
- Use a hardwood dowel for larger damage, or epoxy where the void is irregular and the surrounding wood is still sound.
- Let the repair cure fully before cutting flush and re-marking the screw center.
- Drill a new pilot hole in the center of the repair, then reinstall the screw without forcing it off line.
- Check that the hinge leaf sits flat in the mortise before tightening fully.
If that didn’t work: if the mortise edge
If the mortise edge is crushed, split, or wallowed out so badly that the leaf no longer seats flat, the problem is beyond a simple filler repair. Re-cut the mortise, move the hinge slightly if the door and frame allow it, or replace damaged wood. Replace the hinge too if the leaf holes are elongated and no screw holds position.
Two repeat-failure patterns show up often here: the new pilot hole is drilled off center so the screw walks the hinge leaf sideways, or the repair is still green and the screw simply re-crushes the filler. A good repair leaves the leaf fully seated and the screw head centered in the countersink.
How do you stop a door from sagging or dragging?
Stop sag or drag by reading the contact pattern first. Top-latch rub usually points to the top hinge area, while a tapered hinge-side gap often points to shimming or frame movement. Correct screws, pin wear, and reveal before trimming the slab. Planing is the last step, not the first.
Steps: close the door slowly
- Close the door slowly and mark exactly where it rubs on the frame, floor, or weatherstrip.
- Check top, middle, and bottom hinge screws for movement, then verify jamb plumb and door edge alignment with a spirit level.
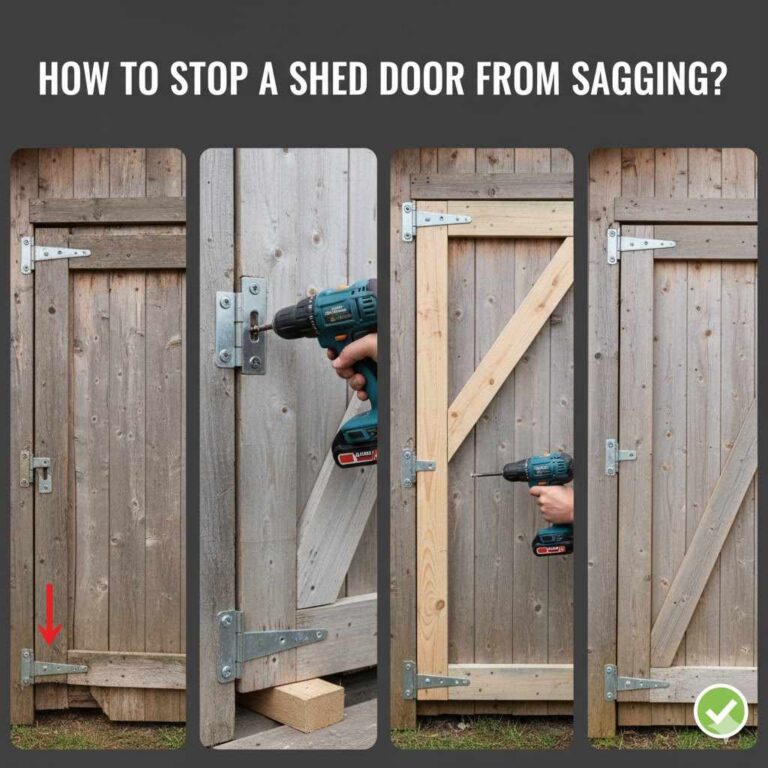
- On a wood jamb where the assembly allows it, install a longer screw at the top jamb hinge when the door has dropped and the latch-side top corner rubs.
- Place a hinge shim behind the hinge leaf when the reveal needs a slight correction and the screws already hold well.
- Replace a worn hinge pin or hinge if the door still drops even with solid screws.
- Plane only the confirmed rub area after hinge, screw, and shim corrections fail.
If that didn’t work: look for a shifted frame
Look for a shifted frame, a swollen exterior slab, or an over-tight weatherstrip. A common first-timer mistake is planing the latch edge when the real fault is a loose top jamb hinge. The door closes for a week, then the latch misses because the hinge keeps moving. Fix the support point first.
If the drag is at the sweep or threshold instead of the head or latch edge, the problem may be threshold height, bottom seal condition, or frame settlement rather than hinge sag alone. For seal-related binding, see how to replace weatherstripping on a door. For latch-side alignment problems after sag is corrected, see how to fix a door that won’t latch.
How do you adjust a composite door hinge?
Adjust a composite door by identifying the hinge type first, then changing only the needed setting: height, lateral position, or compression. Adjustable composite hinges are commonly adjusted with an Allen key, and many doors have top, middle, and bottom hinges that need to be balanced together rather than corrected at one hinge alone. Because adjustment points vary by hinge brand, always verify the maker’s sequence before turning limit screws or covers.
Steps: identify whether the door has
- Identify whether the door has flag hinges or adjustable butt hinges, because the access points and adjustment sequence differ.
- Use a spirit level and an all-around gap check to decide whether the correction is height, lateral alignment, or compression.
- Start with the top hinge if the latch-side top corner is high or low, then balance the middle and bottom hinges to match.
- Turn the Allen-key adjuster in about quarter-turn increments, then close the door and recheck the reveal after each change.
- Reduce or increase compression only enough for latch engagement and weatherstrip contact; too much compression raises closing force and can mimic misalignment.
- Lock the settings, then test the door through a full swing and latch cycle.
If that didn’t work: if the hinge reaches
If the hinge reaches its adjustment limit, slips back, or binds during travel, stop adjusting and inspect for damaged hardware or a moved frame. Do not treat a composite door hinge like a fixed interior butt hinge. If the seal is over-compressed at one side and loose at the other, reset the hinge positions with the level before chasing the latch.
Citation note: This height-lateral-compression approach reflects published guidance from major adjustable-hinge manufacturers used on composite and uPVC-style door sets. The exact access points and sequence differ by hinge family, so brand-specific instructions take priority over generic advice.
When should you replace the hinge instead of tightening it?
Replace the hinge when the metal parts are worn or distorted enough that screws and shims cannot hold alignment. Tightening does not fix a bent leaf, cracked knuckle, badly worn pin bore, severe rust, or screw holes in the hinge leaf that have stretched out. Those faults keep coming back even after careful adjustment.
Replace now
- The hinge leaf is bent and will not sit flat in the mortise.
- The knuckle is cracked, split, or visibly deformed.
- The pin shows heavy wear, grooves, or rust pitting.
- The hinge has severe exterior rust that continues after cleaning.
- The hinge leaf holes are wallowed out and screws drift loose again.
- The mortise wood and hinge both have repeated failures after a proper repair.
Final checks and prevention
Open the door fully, hold it half open, and then bring it nearly closed. Check for self-closing drift, an uneven reveal, solid latch engagement, and even weatherstrip compression on exterior and composite doors.
For prevention, recheck the top hinge screws after the first week if a sagging door needed structural correction. Early movement usually means the repair missed solid wood, the pilot hole was off center, or the hinge itself is worn.
If you are replacing parts outright, compare leaf size, corner radius, knuckle height, finish, and screw-hole pattern before buying. For that job, see when to replace door hinges.
Common mistakes
- Driving long screws into every hinge location instead of using them selectively and only where the door assembly allows it.
- Skipping pilot holes and splitting the jamb or forcing the hinge leaf out of alignment.
- Adding lubricant to a dirty hinge without cleaning out grit first.
- Treating a spinning screw like a loose screw and overtightening it until the hole is worse.
- Shimming randomly instead of using reveal changes to decide which hinge needs movement.
- Adjusting composite hinges without checking level, gaps, and weatherstrip pressure first.
- Planing the door before confirming that sag, hinge wear, or frame movement is not the real cause.
- Ignoring a blown-out mortise or repeated screw back-out, then blaming the new screw.
Frequently asked questions
What screws should I use for a loose door hinge?
Use replacement screws that match the door, frame, and hinge manufacturer’s specification. Where extra holding power is needed on a wood jamb, especially at the top hinge, a longer jamb screw may help if it is approved for that assembly. On exterior doors, metal-reinforced slabs, fire-rated openings, security doors, and other listed assemblies, follow the door, frame, hinge, or listing instructions. Drill pilot holes before installation so the screw pulls straight and does not split the wood.
What lubricant is best for a squeaky door hinge?
Silicone spray is often the better long-term choice for a squeaky hinge when you want a drier film that attracts less dust. WD-40 is more useful for freeing stuck parts, displacing moisture, and cleaning away residue first. Petroleum jelly can work as a temporary fix when nothing else is on hand, but it is usually not the best long-term answer.
When should I replace a door hinge instead of tightening it?
Replace the hinge when the metal is the problem rather than the fastener. Bent leaves, cracked knuckles, severe rust, worn pins, elongated leaf holes, or repeated failure after a correct screw-hole repair are replacement points. Tightening may quiet or steady the door briefly, but it will not correct damaged hinge geometry.
Sources: ANSI/BHMA A156.1, Butts and Hinges; published adjustment guidance from major adjustable-hinge manufacturers used on composite door sets, including ERA, Mila, and Door-Stop; WD-40 product guidance distinguishing penetrant/water-displacing use from dedicated lubricants; common door-set manufacturer installation instructions for prehung interior and exterior doors regarding hinge fastening and frame anchoring.
Sponsored / affiliate links. As an Amazon Associate I earn from qualifying purchases. I may earn additional commission from eligible campaigns.