How to Fill Scratches on Hardwood Floors Easily
Filling scratches on hardwood floors can restore their beauty and protect your investment from further damage. Minor abrasions are common in busy households, but thankfully, many effective DIY solutions can help you achieve a seamless finish without professional intervention. This guide will walk you through the most effective methods, from simple touch-ups to more involved repairs, ensuring your floors look their best again.
Simply put, filling minor scratches on hardwood floors can be achieved with color-matched crayons, wood repair markers, or putty, while deeper gouges may require wood filler and a matching stain. Always test in an inconspicuous area first and clean thoroughly before and after application for best results.
Key Takeaways
- Filling scratches on hardwood floors can be a simple DIY project using readily available materials.
- For light surface scratches, wood repair crayons or markers are excellent quick fixes.
- Deeper scratches and gouges can be effectively repaired with wood filler, which can then be stained to match your floor.
- Proper preparation, including thorough cleaning, is crucial for a successful and durable repair.
- Always test your chosen product in an inconspicuous area before applying it to visible scratches.
What is a Hardwood Floor Scratch and Why it Matters
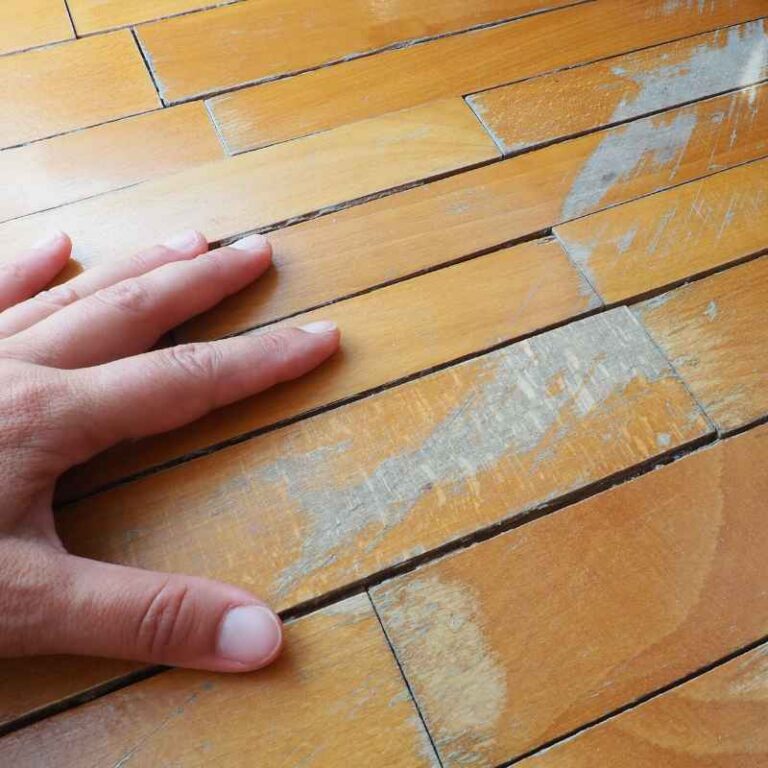
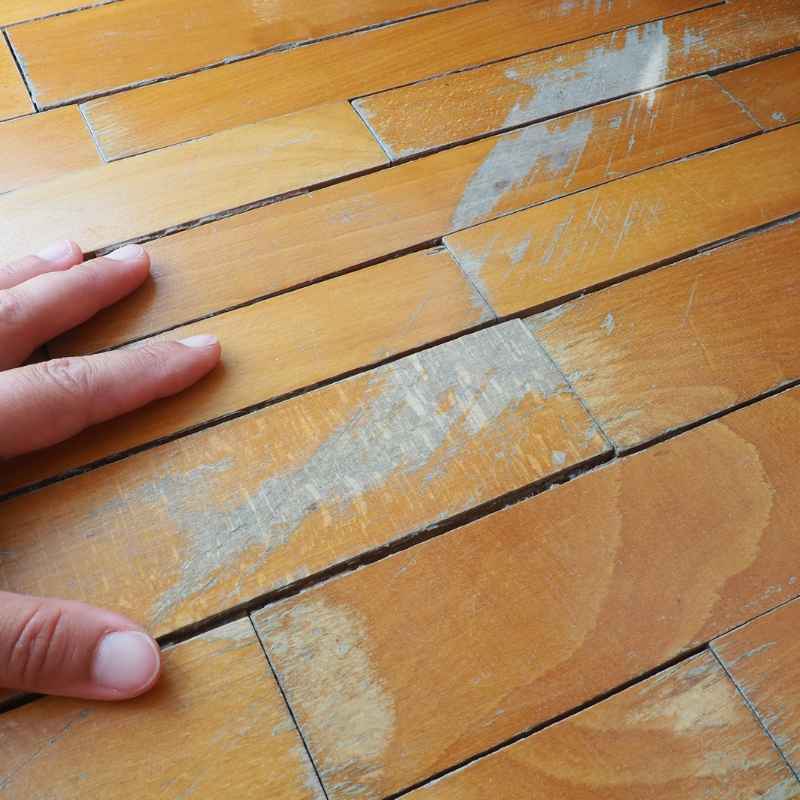
A scratch on a hardwood floor is an abrasion or marring of the surface layer, typically the finish or the wood itself. These can range from superficial marks that only affect the top protective coating to deeper gouges that penetrate into the wood grain. The frequency of scratches depends heavily on foot traffic, the presence of pets, furniture movement, and the type of finish applied to the floor.
Understanding the severity of a scratch is the first step in choosing the right repair method. Light scratches are often just in the finish, while deeper ones involve the wood. Allowing scratches to go unrepaired can lead to a dull appearance, a breeding ground for dirt and moisture, and eventually, more significant damage to the wood underneath.
This can compromise the floor’s integrity and reduce its lifespan.
Addressing scratches promptly not only maintains the aesthetic appeal of your home but also prolongs the life of your hardwood flooring. It prevents minor issues from escalating into costly repairs or full floor replacements. Regular maintenance and quick touch-ups are key to keeping your hardwood floors looking pristine for years to come.
Types of Hardwood Floor Scratches
- Surface Scratches: These are the most common and least severe. They typically only affect the top layer of the finish (polyurethane, wax, or oil). They often look like light scuff marks or dull lines and can sometimes be buffed out or easily covered.
- Minor Scratches: These penetrate slightly beyond the initial finish, potentially reaching the top layer of the wood. They are more visible than surface scratches and might show a slight color difference.
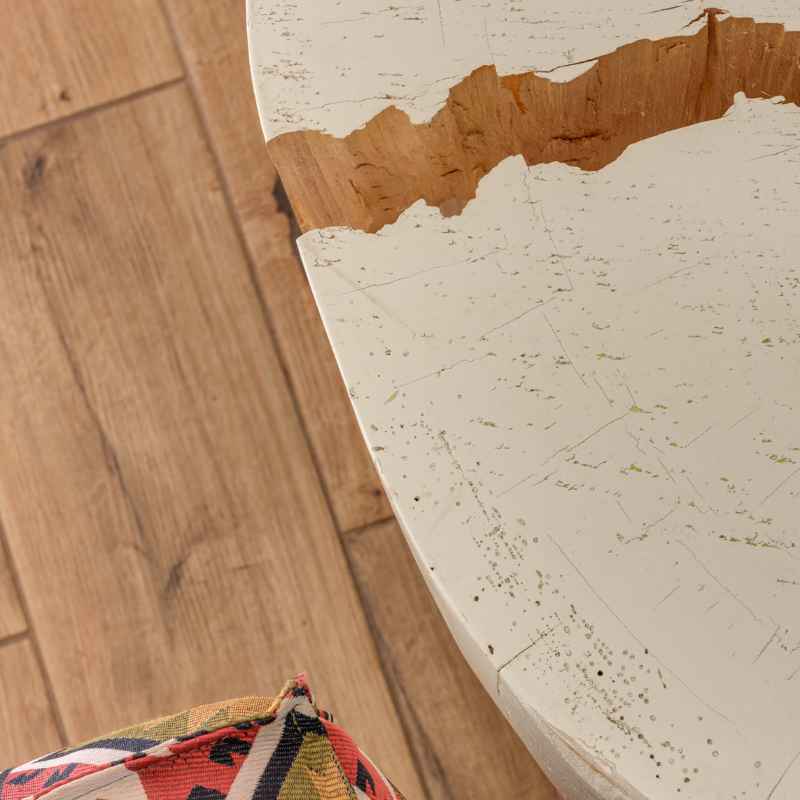
- Deeper Gouges: These are significant indentations that go deep into the wood grain, removing material. They are very noticeable and require more robust filling methods to restore the floor’s surface.
- Pet Scratches: Often characterized by multiple, fine lines caused by pet claws, these can vary in depth but are usually superficial.
- Furniture Scratches: These can be long and deep, caused by dragging heavy furniture across the floor. They often expose the raw wood beneath the finish.
Why Addressing Scratches is Crucial
- Aesthetics: Scratched floors look worn and detract from your home’s overall appearance.
- Protection: Unrepaired scratches can allow moisture and dirt to seep into the wood, causing rot and staining.
- Resale Value: Well-maintained floors significantly increase a home’s marketability and value.
- Longevity: Proper repairs extend the lifespan of your hardwood flooring, saving you money in the long run.
Assessing the Damage: Surface Scratches vs. Deep Gouges
Before you grab any repair materials, it’s vital to accurately assess the depth of the scratches. This assessment will dictate the best course of action and the products you’ll need. Gently run your fingernail across the scratch; if your nail catches, it’s likely a deeper scratch or gouge.
If your fingernail glides over it smoothly, it’s probably a surface scratch affecting only the finish.
For surface scratches, the damage is superficial, and the wood beneath remains intact. These are the easiest to repair, often requiring minimal effort and products. In contrast, deep gouges mean material has been removed from the wood itself, necessitating a filler that can add substance back to the damaged area and be shaped to match the surrounding surface.
Consider the color and type of your hardwood floor’s finish as well. Some repair products are designed for specific finishes (like polyurethane or oil-based finishes), while others are more universal. Matching the color precisely is also essential for an invisible repair.
A mismatch can make the repair more noticeable than the original scratch.
Tools for Assessment
- Fingernail Test: Gently drag your fingernail across the scratch. If it catches, it’s deeper than a surface mark.
- Magnifying Glass: Useful for examining very fine scratches and determining if only the finish is affected or if the wood itself is damaged.
- Flashlight: Shining a light at an angle across the floor can highlight the depth and visibility of scratches.
| Scratch Type | Damage Level | Typical Repair Approach |
|---|---|---|
| Surface Scratch | Only the top finish layer | Polishing, color markers, repair crayons |
| Minor Scratch | Finish and slight wood penetration | Color markers, wood putty, light filler |
| Deep Gouge | Significant wood removal | Wood filler, putty, stain, and refinishing |
This table summarizes the key differences in scratch damage and the general approach to repair.
Preparing Your Hardwood Floors for Repair
Effective repair hinges on proper preparation. This involves thoroughly cleaning the area around the scratch and the scratch itself. Dust, dirt, grease, or debris can prevent repair materials from adhering properly, leading to a less durable and noticeable fix.
Always start by sweeping or vacuuming the floor to remove loose particles.
For a deeper clean, use a wood floor cleaner recommended for your floor’s finish. Dampen a mop or cloth (never wet) and wipe down the affected area. Allow the floor to dry completely before proceeding.
If there are any old wax or polish residues, you might need a specific wax remover or degreaser, but be cautious not to damage the existing finish.
Ensure the lighting is good when you are cleaning and preparing. You need to see any remaining dust or debris. For very stubborn dirt or grime within a deep scratch, a fine-grit sandpaper (like 220-grit) used very gently might be necessary, but be extremely cautious not to enlarge the scratch.
Always wipe away any dust created by light sanding.
Cleaning Steps
- Sweep or Vacuum: Remove all loose dirt, dust, and debris from the entire floor area.
- Damp Mop: Use a wood floor cleaner suitable for your finish. Lightly dampen a mop or cloth and clean the scratched area. Avoid over-wetting the floor.
- Wipe Dry: Use a clean, dry cloth to immediately wipe away excess moisture.
- Air Dry: Allow the floor to air dry completely. This might take 30 minutes to an hour depending on humidity.
- Inspect: Check the area for any remaining dirt or debris. Use a soft brush or compressed air if needed.
Important: Never use abrasive cleaners, steam mops, or excessive water on hardwood floors. These can damage the finish and the wood itself, leading to more significant problems than a simple scratch.
Method 1: Repairing Surface Scratches with Wood Repair Crayons/Markers
For superficial scratches that only affect the protective coating, wood repair crayons or markers are excellent and easy-to-use solutions. These products are essentially colored wax or paint designed to fill in the scratch and blend with the surrounding floor color. They are ideal for minor blemishes that haven’t penetrated the wood itself.
The process is straightforward: select a crayon or marker that closely matches your floor’s color. Many kits come with multiple shades or a blending tool, allowing you to customize the color. Simply rub the crayon directly into the scratch, or use the marker to fill it in.
After application, you can often buff the area with a soft cloth to remove excess product and smooth the finish.
It’s crucial to choose the right color. If you can’t find an exact match, opt for a shade that is slightly lighter, as it’s easier to darken a repair than to lighten it. Some markers are designed to be layered, allowing you to build up color depth.
For best results, work in good lighting and take your time to ensure an even application.
Choosing the Right Color
- Bring a Sample: If possible, take a small, inconspicuous wood chip from your floor or a clear photo to a hardware store for color matching.
- Manufacturer Guides: Many brands offer color-matching guides online or in-store.
- Test Strips: Some kits include small test strips you can color and hold against your floor.
- Universal Shades: Start with basic shades like light oak, medium oak, walnut, or cherry, and blend if necessary.
- Consider Undertones: Pay attention to whether your floor has reddish, yellow, or brown undertones to achieve a better match.
Application Steps
- Clean the Scratch: Ensure the scratch and surrounding area are clean and dry.
- Select Color: Choose the wood repair crayon or marker color that best matches your floor.
- Apply Product: Rub the crayon firmly into the scratch, or apply the marker color evenly.
- Smooth Excess: Use a clean, soft cloth or a plastic putty knife to gently wipe away any excess product from the floor surface.
- Buff (Optional): For crayons, you can lightly buff the area with a clean cloth to blend and shine.
- Allow to Cure: Let the product set for the time recommended by the manufacturer, usually a few hours.
Warning: Avoid using crayons or markers on deep gouges where the wood is missing. These products are designed to fill cosmetic imperfections in the finish, not to replace wood material.
Method 2: Using Wood Putty for Minor to Moderate Scratches
Wood putty is a pliable, clay-like substance that can fill small to medium-sized scratches and dents. Unlike crayons, it adds a bit more substance to the repair, making it suitable for scratches that have slightly penetrated the wood. It’s available in a wide range of wood tones and can also be mixed to achieve a custom color match.
The application involves pressing the putty firmly into the scratch or dent with a putty knife. You’ll want to slightly overfill the area to account for shrinkage as it dries. Once dry, the excess putty can be carefully sanded down flush with the floor surface.
This method requires a bit more finesse to ensure the filled area blends seamlessly with the surrounding wood.
After sanding, the putty might look slightly different in color or sheen than the surrounding finish. You may need to use a wood stain pen or touch-up stain to match the color more closely. Finally, a clear protective finish, like a furniture polish or a small amount of polyurethane applied with a fine brush, can help blend the sheen.
Types of Wood Putty
- Water-Based Putty: Easier to clean up with water, typically dries faster, and may shrink more.
- Solvent-Based Putty: More durable, less prone to shrinkage, but requires mineral spirits for cleanup and has stronger odors.
- Pre-colored Putty: Available in various wood tones, offering a convenient option for quick fixes.
- Stainable Putty: Designed to accept wood stains, offering greater color customization.
Step-by-Step Application
- Clean the Area: Ensure the scratch is clean and dry.
- Select Putty: Choose a putty that matches your floor color or a stainable putty.
- Apply Putty: Press the putty firmly into the scratch using a putty knife, slightly overfilling.
- Remove Excess: Scrape off the majority of the excess putty with the putty knife.
- Allow to Dry: Let the putty dry completely according to the manufacturer’s instructions.
- Sand Smooth: Once dry, gently sand the filled area until it is flush with the floor surface using fine-grit sandpaper (220-grit or higher).
- Clean Dust: Wipe away all sanding dust with a tack cloth or damp cloth.
- Stain/Touch-up (if needed): Apply a matching wood stain pen or touch-up stain to blend the color.
- Seal (Optional): Apply a thin layer of clear finish to match the sheen.
Tip: For best results, aim to use a putty that is slightly firmer than the surrounding wood, especially if it’s a softer wood like pine, to avoid creating new dents.
Method 3: Using Wood Filler for Deep Scratches and Gouges
When you’re dealing with deeper scratches or gouges that have removed wood material, wood filler becomes the go-to solution. This product is more robust than putty and is designed to provide a solid, sandable surface that can be stained to match your floor. It’s a more permanent repair for significant damage.
Wood filler typically comes in a paste form and may require mixing. You’ll apply it with a putty knife, pressing it firmly into the damaged area, ensuring there are no air bubbles. Like putty, it’s best to slightly overfill to allow for sanding.
After it dries and hardens, it can be sanded smooth and then stained, painted, or clear-coated to match the surrounding floor.
The key to success with wood filler is patience and meticulous color matching. You might need to experiment with different stain colors or mixtures to get a perfect blend. Many wood fillers are stainable, but some absorb stain differently than natural wood, so it’s wise to test your stain on a scrap piece of wood first.
After staining, apply a compatible clear coat to protect the repair and match the sheen of your floor.
Choosing the Right Wood Filler
- Stainable Wood Filler: Essential if your floor is stained and you want to match the color.
- Water-Based vs. Solvent-Based: Water-based fillers are easier to clean and dry faster but may shrink more. Solvent-based fillers are more durable and shrink less but have stronger fumes.
- Pre-mixed vs. Powder: Pre-mixed is ready to use, while powder needs to be mixed with water, offering more control over consistency.
- Color-Matched Fillers: Some brands offer pre-colored fillers for common wood types.
Comprehensive Repair Process
- Clean and Prepare: Ensure the scratch and surrounding area are free of dirt, dust, and loose wood fibers.
- Mix Filler (if powder): Follow manufacturer instructions to mix the filler to a peanut-butter-like consistency.
- Apply Filler: Use a putty knife to force the filler deep into the scratch or gouge, slightly overfilling.
- Level and Smooth: Scrape off excess filler, leaving it slightly proud of the surface to allow for sanding.
- Allow to Cure: Let the filler dry completely. This can take several hours or overnight, depending on the product and depth of fill.
- Sand Smooth: Once fully hardened, sand the filled area flush with the surrounding floor using progressively finer grits of sandpaper (starting with 120-grit and moving to 220-grit).
- Clean Dust: Thoroughly remove all sanding dust with a vacuum and tack cloth.
- Stain to Match: Apply a wood stain using a stain pen or a small brush to match the surrounding floor color. You may need multiple applications or to mix colors.
- Apply Clear Coat: Once the stain is dry, apply a clear protective finish (polyurethane, lacquer, or wax, depending on your floor’s original finish) to match the sheen and protect the repair.
| Filler Type | Best For | Pros | Cons |
|---|---|---|---|
| Wood Repair Crayon/Marker | Surface scratches, scuff marks | Easy to use, quick, no drying time | Not for deep damage, can wear off |
| Wood Putty | Minor to moderate scratches, small dents | Adds substance, moldable, good for small imperfections | Can shrink, may need sanding/staining |
| Wood Filler | Deep scratches, gouges, holes | Durable, sandable, stainable, replaces wood material | Requires drying/sanding, color matching can be tricky |
This comparison table highlights the strengths and weaknesses of different repair materials for varying degrees of damage.
Using Wax Sticks or Repair Kits for Advanced Repairs
For more professional-looking repairs, especially on floors with specific finishes or intricate grain patterns, specialized wax sticks or comprehensive wood repair kits can be invaluable. These often involve heating a colored wax stick and dripping it into the scratch, then leveling and buffing it. This method creates a durable, integrated repair.
Many high-end repair kits include a variety of wax colors, a melting tool, leveling tools, and finishing compounds. They are particularly effective for damage that might otherwise require professional refinishing. The process allows for a high degree of customization in color and sheen, ensuring the repair blends seamlessly with the existing floor.
When using wax sticks, it’s essential to work quickly as the wax cools and hardens rapidly. You’ll want to slightly overfill the scratch, then use a special leveling tool to shave off the excess. This often leaves a slightly dull finish that can be buffed with a soft cloth or specialized polishing compound to match the floor’s sheen.
Always follow the kit’s instructions carefully.
Components of a Wood Repair Kit
- Colored Wax Sticks: Available in a wide array of wood tones, designed to melt and fill scratches.
- Melting Iron/Tool: A small electric tool to melt the wax sticks.
- Leveling Scrapers: Plastic or metal tools to remove excess wax and smooth the surface.
- Sanding Pads/Blocks: Fine-grit abrasives for refining the surface.
- Buffing Cloths/Polishes: For restoring sheen and blending the repair.
- Instruction Manual: Detailed steps for achieving professional results.
Key Steps for Wax Stick Repair
- Clean the Area: Ensure the scratch is completely clean and dry.
- Melt Wax: Heat the wax stick using the melting tool until it’s liquid.
- Apply Wax: Drip the melted wax into the scratch, slightly overfilling the damaged area. Work quickly.
- Level the Wax: Immediately use the leveling scraper to remove excess wax and create a flush surface.
- Allow to Cool: Let the wax harden completely.
- Refine and Buff: Lightly sand any rough edges if necessary. Then, buff the repaired area with a soft cloth to match the surrounding sheen.
- Apply Finish (if needed): Some kits may recommend a final clear coat for extra durability or sheen.
Warning: Be extremely careful when using a melting iron, as it gets very hot and can potentially damage the surrounding finish if not used with precision. Practice on scrap wood first if you are new to this method.
Dealing with White Haze and Water Marks
White haze or cloudy marks on hardwood floors are often a sign of moisture trapped within the finish, usually caused by spills that weren’t wiped up quickly. These aren’t technically scratches but can make the floor look damaged. Fortunately, they can often be repaired using household items.
For mild white haze, a simple solution is to use a dry cloth and gently rub the affected area. If that doesn’t work, try using a tennis ball (the fuzzy side can buff out the haze) or a paste made from baking soda and water. For tougher marks, a very fine steel wool (0000 grade) lightly used with petroleum jelly or mineral oil can often lift the haze without damaging the finish.
After removing the haze, always clean the area and apply a furniture polish or a wax compatible with your floor’s finish to restore its shine and protective layer. It’s a good reminder to always wipe up spills immediately to prevent these types of marks from forming in the first place.
Remedies for White Haze
- Dry Cloth Buffing: The simplest first step for very light haze.
- Tennis Ball: Rubbing the hazy area with the fuzzy side of a tennis ball can sometimes lift the cloudiness.
- Baking Soda Paste: Mix baking soda with a little water to form a paste. Apply to the haze, let sit for a few minutes, then gently wipe away.
- Toothpaste (non-gel): Similar to baking soda, a small amount of non-gel toothpaste can act as a mild abrasive.
- Steel Wool (0000 grade) with Petroleum Jelly/Mineral Oil: For stubborn haze, very lightly buff the area with the finest grade steel wool lubricated with petroleum jelly or mineral oil.
Preventing Future Scratches on Your Hardwood Floors
Prevention is always better than cure. Implementing a few simple habits can significantly reduce the frequency and severity of scratches on your hardwood floors. Protecting your floors is an ongoing process, but the effort is well worth it to maintain their beauty and longevity.
One of the most effective preventive measures is to use furniture pads on the legs of chairs, tables, sofas, and any other furniture that sits on the floor. These pads act as a buffer, preventing the hard edges of furniture from digging into the wood when moved. Regularly check these pads to ensure they are clean and intact, as dirt trapped underneath can also cause scratches.
Keep your pets’ nails trimmed and filed. If you have dogs, regular grooming can make a huge difference in preventing claw marks. Also, consider using area rugs in high-traffic zones like entryways, hallways, and living areas.
These rugs absorb impact and catch dirt and grit that can otherwise be tracked across the floor.
Preventive Measures Checklist
- Furniture Pads: Apply felt or rubber pads to all furniture legs.
- Area Rugs: Use rugs in high-traffic zones and entryways.
- Mats: Place doormats both outside and inside entryways to trap dirt and moisture.
- Pet Nail Care: Regularly trim and file pet nails.
- Remove Shoes: Implement a “no shoes indoors” policy.
- Careful Cleaning: Use appropriate cleaning tools and methods.
- Avoid Dragging: Always lift furniture when moving it, don’t drag.
Frequently Asked Questions
What is the easiest way to fill a light scratch on hardwood floors?
The easiest method for light surface scratches is using a color-matched wood repair crayon or marker. These products are simple to apply directly into the scratch and often require minimal cleanup, offering a quick cosmetic fix.
Can I repair deep scratches without refinishing my entire floor?
Yes, for deep scratches and gouges, wood filler is an effective solution. It allows you to fill the damaged area, sand it smooth, and then stain and seal it to match your existing floor without needing to refinish the entire surface.
How do I match the color of the repair material to my floor?
To match colors, choose repair products that come in a range of wood tones, or opt for stainable fillers. You can also test colors on an inconspicuous area or use manufacturer color guides. Blending multiple shades might be necessary for a perfect match.
How long does a wood floor scratch repair typically last?
The longevity of a repair depends on the method used, the depth of the scratch, and foot traffic. Surface repairs with crayons may need reapplication over time. Properly executed wood filler repairs can last for many years, blending seamlessly with the floor.
Is it better to use wood putty or wood filler for scratches?
For very minor surface imperfections and light scratches, wood putty is sufficient. For deeper scratches that have penetrated the wood, wood filler is a better choice because it provides a more durable and stable fill that can be sanded and stained.
Final Thoughts
Restoring the appearance of your hardwood floors by filling scratches is a rewarding DIY task. By accurately assessing the damage and selecting the appropriate repair method, from simple crayons to robust wood fillers, you can effectively conceal blemishes and protect your floors. Remember that thorough preparation and careful application are key to achieving professional-looking results that will help your hardwood floors maintain their beauty and value for years to come.
Sponsored / affiliate links. As an Amazon Associate I earn from qualifying purchases. I may earn additional commission from eligible campaigns.