How to Install a Shed Door: A Step-by-Step Guide for Beginners
Hey there! If you’ve got a shed in your backyard, you know it’s a fantastic spot for storing tools, gardening gear, or even turning into a cozy workshop. But let’s be honest—a shed isn’t much good without a sturdy, functional door. I’ve installed a few shed doors myself over the years, and I’m excited to share everything I’ve learned with you.
Whether you’re a DIY newbie or a seasoned handyman, installing a shed door is totally doable with the right guidance. In this article, I’ll walk you through the entire process, step by step, with tips and tricks to make your shed door installation smooth and successful. Let’s get started!
Why Installing a Shed Door Matters
A shed door is more than just an entryway. It’s the gateway to your storage space, protecting your belongings from weather, pests, and intruders. A poorly installed door can sag, stick, or let in drafts, which is the last thing you want. I remember the first time I tried installing a shed door without much planning—it wobbled and wouldn’t close properly. Trust me, taking the time to do it right saves you headaches later. A well-installed door keeps your shed secure, weatherproof, and looking sharp.
Before we dive into the how-to, let’s talk about why this project is worth your time. A good shed door boosts your property’s functionality and even its curb appeal. Plus, doing it yourself saves money compared to hiring a pro. With a few tools and some patience, you can have a door that works like a charm for years.
Tools and Materials You’ll Need
Before you start, gather your tools and materials. There’s nothing worse than being halfway through a project and realizing you’re missing something. Here’s what I use when installing a shed door:
| Item | Purpose |
|---|---|
| Pre-hung shed door | The door and frame, ready to install for easier alignment. |
| Measuring tape | To measure the door opening and ensure a proper fit. |
| Level | To check that the door frame is perfectly vertical and horizontal. |
| Shims | To adjust the door frame for a snug fit. |
| Drill and screwdriver | For securing screws and hinges. |
| Screws (3-inch) | To fasten the door frame to the shed. |
| Hinges (if not pre-hung) | Heavy-duty hinges to support the door’s weight. |
| Weatherstripping | To seal gaps and prevent drafts or water leaks. |
| Door handle and lock | For functionality and security. |
| Saw (optional) | To trim the door or frame if needed. |
| Hammer and nails | For additional securing or temporary fixes. |
| Caulk and caulk gun | To seal edges for weatherproofing. |
I always double-check my supplies before starting. If you’re buying a pre-hung door, make sure it matches your shed’s opening size. Most sheds need a door between 30 and 36 inches wide, but measure your opening to be sure. Also, grab some exterior-grade screws—they’re tougher against rust.
Measuring and Preparing the Shed Opening
The first step is making sure your shed’s door opening is ready. I learned this the hard way when I assumed my shed’s frame was perfectly square. Spoiler: it wasn’t. Grab your measuring tape and check the width and height of the opening at multiple points—top, middle, and bottom. Sheds can settle over time, so the measurements might vary slightly.
If the opening isn’t square, don’t panic. You can use shims to adjust the door frame later. Just make sure the opening is at least 1/4 inch larger than your door frame on all sides to allow for adjustments. Clear out any debris, old caulk, or loose wood from the opening. If the shed’s frame is damaged, patch it up with some wood filler or replace any rotted pieces before moving forward.
Pro tip: If you’re replacing an old door, remove it carefully. Unscrew the hinges and lift the door out. Check the frame for any wear and tear while you’re at it. A clean, solid opening makes the rest of the job so much easier.
Choosing the Right Shed Door
Picking the right door is a big deal. I’ve tried both pre-hung doors and custom-built ones, and I’ll be honest—pre-hung doors are a lifesaver for most DIYers. They come with the frame already attached, which cuts down on alignment issues. You can find them at home improvement stores or online, with options in wood, metal, or fiberglass.
Think about your shed’s purpose when choosing. If it’s just for storage, a simple, sturdy door will do. But if you’re turning your shed into a workshop or hobby space, consider a door with a window for natural light. I once installed a fiberglass door with a small window for a client’s art studio shed, and it made the space feel so much brighter.
Make sure the door’s material matches your climate. Wood looks classic but needs regular maintenance in wet areas. Metal and fiberglass are more durable and low-maintenance, especially if you live somewhere with harsh winters or humid summers.
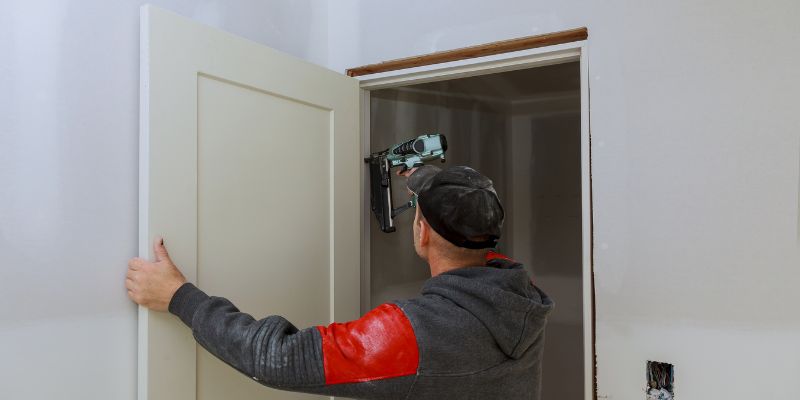
Installing the Door Frame
Now, let’s get to the fun part—installing the door! If you’re using a pre-hung door, the frame is already attached, which simplifies things. Start by placing the door frame in the opening. I like to have a friend hold it in place while I check the alignment, but you can prop it up with shims if you’re working solo.
Use your level to make sure the frame is plumb (vertically straight) and level (horizontally straight). This step is crucial—don’t skip it. If the frame’s off, the door won’t close properly. Slide shims between the frame and the shed’s opening to adjust for any gaps. I usually place shims at the top, middle, and bottom on both sides.
Once the frame is level, secure it with 3-inch screws. Start at the hinge side, driving screws through the frame and shims into the shed’s structure. Don’t overtighten—you want the frame snug but not warped. Check the level again after securing the hinge side, then move to the latch side. Test the door by opening and closing it to make sure it swings smoothly.
Attaching the Door (If Not Pre-Hung)
If you’re working with a separate door and frame, you’ll need to attach the hinges yourself. This part can feel tricky, but it’s straightforward if you take it slow. Lay the door flat on a workbench or sawhorses. Position the hinges on the door’s edge, about 6 inches from the top and bottom. Mark the screw holes with a pencil, then pre-drill them to avoid splitting the wood.
Attach the hinges to the door first, using the screws provided. Then, with a helper, hold the door in the frame and mark where the hinges will attach to the frame. Pre-drill those holes too, and screw the hinges in place. I always double-check that the door swings freely before moving on. If it sticks, you might need to adjust the hinges or sand down any tight spots.
Adding Weatherstripping and Sealing
A shed door needs to keep out rain, wind, and bugs, so weatherstripping is a must. I’ve seen too many sheds with gaps around the door that let in water or critters. Measure the door frame’s perimeter and cut weatherstripping to fit. Most weatherstripping is adhesive-backed, so just peel and stick it along the frame’s edges where the door closes.
For extra protection, apply a bead of exterior caulk around the outside of the frame where it meets the shed. This seals any tiny gaps and keeps moisture out. I like to use a silicone-based caulk for durability. Smooth it with your finger or a caulk tool for a clean look. If you’re in a rainy area like I am, this step makes a huge difference in keeping your shed’s interior dry.
Installing the Handle and Lock
Now it’s time to add the handle and lock. Most shed doors come with pre-drilled holes for a handle, but if yours doesn’t, you’ll need to measure and drill. Follow the instructions that come with your handle kit—they’re usually pretty clear. I prefer a handle with a built-in lock for simplicity, but you can also install a separate deadbolt for extra security.
Line up the handle with the holes, insert the screws, and tighten them securely. Test the lock to make sure it engages smoothly. I once installed a lock that was a bit stiff, and a quick dab of lubricant on the mechanism fixed it right up. If you’re adding a deadbolt, make sure it aligns with the strike plate on the frame. A secure lock gives you peace of mind that your tools or equipment are safe.
Painting or Finishing the Door
If your door isn’t pre-finished, now’s the time to paint or stain it. I love this part because it’s where you can add some personality to your shed. Choose an exterior-grade paint or stain that matches your shed or home’s style. For wooden doors, a primer coat is essential to protect against moisture. I usually apply two coats of paint for good coverage, sanding lightly between coats for a smooth finish.
If you’re staining, make sure to apply a clear sealant afterward to protect the wood. Metal or fiberglass doors might only need a quick wipe-down and touch-up if they’re pre-finished. Whatever you choose, make sure it’s weather-resistant—your door will face sun, rain, and maybe even snow.
Testing and Final Adjustments
Before you call it a day, test everything. Open and close the door several times to check for smooth operation. Make sure it latches securely and there are no gaps letting in light or air. If the door sticks or sags, check the hinges or shims and adjust as needed. Sometimes a quick tweak with a screwdriver fixes everything.
I also like to step back and admire the door from a distance. Does it look even? Does it blend with the shed’s style? If something feels off, trust your gut and make small adjustments. A little extra time now ensures your door works perfectly for years.

Maintenance Tips for Your Shed Door
Once your door is installed, a little maintenance goes a long way. I check my shed door every few months to make sure it’s holding up. Tighten any loose screws, lubricate the hinges with a bit of WD-40, and inspect the weatherstripping for wear. If you notice water stains or peeling paint, address them quickly to prevent damage.
In winter, clear snow or ice from around the door to avoid strain on the hinges. If you live in a humid area, keep an eye out for mold or mildew, especially on wooden doors. A quick cleaning with mild soap and water can keep your door looking fresh.
Conclusion
Installing a shed door might sound like a big project, but it’s one of those tasks that feels so rewarding when you’re done. I still smile every time I open my shed and see the door I installed myself—it’s sturdy, secure, and looks great. By following these steps, you can transform your shed into a functional, weatherproof space that’s ready for anything. Whether you’re storing lawnmowers or creating a backyard retreat, a well-installed door makes all the difference. So grab your tools, take your time, and enjoy the process. You’ve got this!
Frequently Asked Questions
What type of shed door is best for durability?
Metal and fiberglass doors are the most durable, especially in harsh weather. Wood is great for looks but needs more upkeep. I lean toward fiberglass for low maintenance and strength.
Can I install a shed door by myself?
Yes, you can! A pre-hung door makes it easier, but even a custom door is doable with basic tools. Having a friend to help hold things in place is nice, but I’ve done it solo with some patience.
How long does it take to install a shed door?
It depends on your experience, but I’d say 2-4 hours for a pre-hung door. Custom doors might take a bit longer, especially if you need to trim or adjust the frame.
Do I need to paint my shed door?
If it’s not pre-finished, yes. Painting or staining protects the door from weather. Use exterior-grade products and apply at least two coats for best results.
How do I fix a shed door that sticks?
Check the hinges and shims first. Tighten loose screws or adjust the shims to level the door. If it’s still sticking, lightly sand any tight spots or lubricate the hinges.