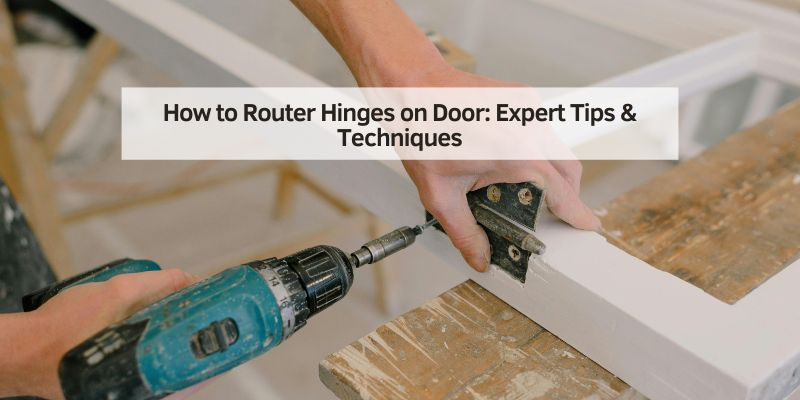
How to Router Hinges on Door: Expert Tips & Techniques
Have you ever struggled with the frustrating task of hanging a door, only to find it doesn’t quite fit right? If so, you’re not alone.
Many homeowners face this common issue, and the secret to solving it lies in perfecting the art of routing hinges. Imagine the satisfaction of a door that swings smoothly and closes snugly, enhancing your home’s functionality and aesthetic appeal. You’ll discover the simple steps to router hinges on a door, transforming your DIY skills and boosting your confidence.
By the time you finish reading, you’ll be equipped with the know-how to tackle this project with precision and ease. Ready to unlock the secrets to a flawless door installation? Let’s dive in!
Credit: www.finehomebuilding.com
Essential Tools And Materials
Choose a router that fits your hand. It should be light and easy to control. A compact router is great for small jobs. Variable speed routers are useful for different materials.
Hinge size matters. Measure the door first. Standard hinges work for most doors. Check the hinge thickness. It affects how deep you cut.
Safety goggles protect your eyes. Ear protection helps with noise. Wear a dust mask for clean air. Gloves keep your hands safe. Always have first aid nearby.
Preparing The Door And Frame
Measure the door carefully. Find the spot for the hinges. Use a pencil for marking. Check twice. Accuracy is key. Mark both the door and frame. Use a ruler for straight lines. Measure twice. Mark once.
Get help. Hold the door steady. Use clamps if needed. Safety first. Ensure it doesn’t move. Secure it well. Use a stable surface. Keep it firm. Check stability. Be careful.
Adjust the frame as needed. Check for fit. Use tools. Ensure it aligns. Make necessary changes. Test the fit. Check the hinges. Adjust to ensure smooth operation. Be precise.
Setting Up The Router
The bit is key for smooth cuts. Choose a straight bit. It fits well for hinge slots. Size matters. Match bit size to hinge size. A snug fit is best. Check the bit’s sharpness. A dull bit makes rough cuts. Avoid using a worn-out bit. New bits cut cleanly.
Depth controls cut thickness. Start shallow; increase slowly. Don’t rush. Speed affects smoothness. Start slow. Fast speeds may cause errors. Adjust speed with care. Listen to the router. A high-pitched sound means speed is too fast. Slow it down to avoid mistakes.
Testing is important. Use scrap wood first. Make trial cuts. Check for errors. Practice helps. It builds confidence. Repeat until cuts are perfect. This step saves time. Avoid mistakes on the real door. Scrap wood is cheap and easy to use.
Routing The Hinge Mortise
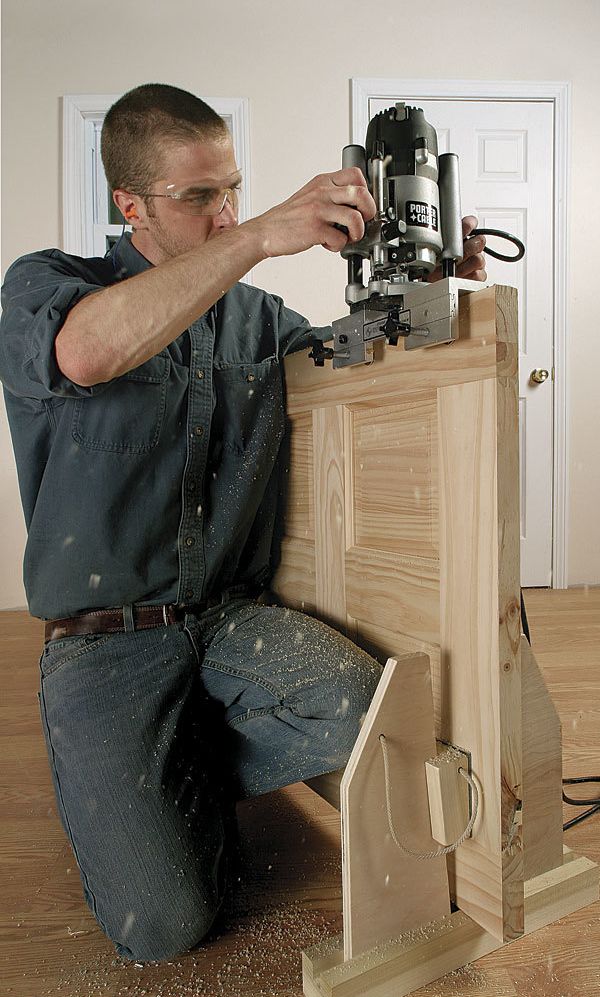
Place the router on the door edge. Make sure it is steady. Align it with the hinge line. This helps in cutting straight. Keep both hands firmly on the router. Move it slowly to avoid mistakes.
Use a guide block for accuracy. Attach it to the door with tape. This keeps the router from slipping. Check the depth setting before starting. Too deep can spoil the door. Keep a steady pace for best results.
Sharp router bits are important. They make clean cuts. Replace dull bits quickly. Clean the area after each pass. It keeps the path clear. Take your time. Rushing can cause mistakes. Patience is key for smooth edges.
Installing Hinges
Place the hinge on the door edge. Mark the position with a pencil. Use a router to cut the slot. Ensure the slot is straight and deep enough. The hinge should fit snugly. Repeat for each hinge.
Insert the screws into the hinge holes. Tighten them with a screwdriver. Ensure all screws are firmly in place. The hinge should not move. Check that the door opens and closes smoothly.
Open and close the door several times. Make sure it swings freely. Adjust the hinges if needed. Ensure there is no binding or sticking. The door should swing effortlessly.

Credit: www.youtube.com
Troubleshooting Common Issues
Misaligned hinges can make doors hard to close. First, check if the hinges are screwed tightly. Loose screws cause doors to sag. If screws are tight, look at the hinge plates. They should be flush with the door and frame. Use a screwdriver to adjust. Sometimes, you may need to remove the hinge and reposition it. Always ensure the door is straight before securing.
Splintering happens when wood breaks or cracks. Sand the area to make it smooth. Use wood filler to fill cracks. Let it dry before sanding again. Paint or stain the surface to match the door. This protects the wood. Always work slowly and carefully to avoid more damage.
Uneven hinges cause doors to stick or not close. Check if screws are tight. Tighten them if they are loose. If the door still sticks, use shims. Place them between the hinge and door frame. Shims help align the door. Check the door’s movement. Make sure it opens and closes smoothly.
Maintenance And Care Tips
Keep the router clean for smooth operation. Dust can affect performance. Use a soft brush to remove dirt. Wipe with a clean cloth regularly. Avoid water as it can damage the router. A clean router ensures precise cuts.
Lubricate hinges for easy movement. Use oil or grease. Apply small amounts. Ensure it covers all moving parts. Lubrication prevents rust and wear. Makes door opening smooth and quiet.
Check hinges and router parts often. Look for loose screws or parts. Tighten them as needed. Inspect for wear or damage. Regular checkups extend the life of your tools. Keeps everything working well.

Credit: www.amazon.com
Frequently Asked Questions
How To Router For Door Hinges?
Use a router jig to outline hinge placement. Secure the door, position the jig, and rout the hinge recess.
What Router Bit Do I Use For Door Hinges?
Use a 1/2-inch flush trim router bit for door hinges. It ensures precise cuts and clean mortises. Always check hinge size and adjust depth accordingly. Properly align the template for best results.
How To Route Door Hinges Without A Router?
Use a chisel to create hinge mortises. Mark hinge outlines, score with a utility knife, and chisel out wood. Ensure depth matches hinge thickness for a snug fit. Sand edges for smoothness. This manual method allows precise control without a router.
How To Mortise Hinges In A Door?
Mark hinge positions on the door edge. Use a chisel to remove wood, matching hinge thickness. Ensure a snug fit. Secure hinges with screws, aligning them properly. Repeat for each hinge, ensuring the door closes smoothly. Proper mortising enhances door functionality and appearance.
Conclusion
Routing door hinges requires patience and precision. Start with the right tools. Measure carefully to ensure a perfect fit. Practice makes perfect, so don’t rush. Safety is key; always wear protective gear. Follow the steps closely to avoid mistakes. Proper alignment ensures smooth door movement.
Double-check each step for accuracy. Clean up after work to maintain tools. Share tips with others and learn from experiences. Enjoy the satisfaction of a job well done. Routing hinges may seem tough, but practice helps. With time, it becomes easier and rewarding.
Keep at it for better results.