How to Fix a Storm Door Hinge: Loose, Squeaky & Stuck Pins
A storm door hinge that sags, squeaks, or won’t move almost always comes down to one of three causes: loose mounting screws, rust and dirt starving the pin of lubrication, or a bent/stuck hinge pin. Ignoring it lets the door drag on the frame, which wears the hinge knuckles further and can crack a stripped screw hole. This guide covers tightening screws, lubricating a stiff hinge, and freeing or replacing a damaged pin.
Quick Answer
Fixing a storm door hinge is usually a straightforward DIY task: tighten loose screws first, since that fixes most sagging doors. If it squeaks or feels stiff, clean and lubricate the hinge. If a pin is bent or rusted solid, remove and replace just the pin — you rarely need to replace the entire hinge.
Why Storm Door Hinges Fail and What to Look For
Storm door hinges are exposed to the elements, which means they face rust, dirt, and wear over time — see our full door hardware and lock guides for related fixes. This exposure can lead to a variety of problems:
- Loose Screws: Vibrations from the door or weather can cause screws to loosen, leading to sagging or a door that doesn’t close flush.
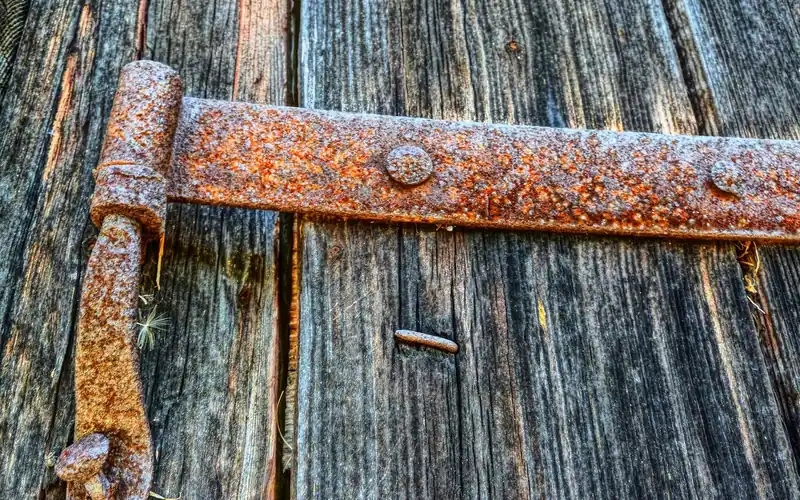
- Rust and Corrosion: Moisture is the enemy of metal. Rust can build up on the hinge pin and knuckles, making the hinge stiff or difficult to move.
- Bent or Damaged Pins: A forceful impact or excessive strain can bend or break the hinge pin, preventing smooth operation.
- Worn Out Hinges: Over many years of use, the internal parts of the hinge can wear down, causing play and a loose feel.
Before you start fixing, take a moment to examine your storm door hinge. Does it look rusty? Are the screws loose? Does the door sag on one side? Identifying the specific problem will help you choose the right solution.
Essential Tools You’ll Need
Gathering the right tools beforehand makes any DIY project smoother. For fixing storm door hinges, you likely have most of these already:
- Screwdriver set (Phillips and flathead)
- Pliers (needle-nose and standard)
- Penetrating oil (like WD-40 or a similar lubricant)
- Lightweight lubricating oil (like 3-in-1 oil)
- Rag or paper towels
- Hammer
- A block of wood (optional, for supporting the door)
- Replacement hinge pin (if needed)
- Replacement screws (if needed)
- Safety glasses
- Work gloves
Always remember to wear your safety glasses when working with tools, especially when hammering or dealing with potentially loose parts.
Best Replacement Hinge Pin Kit
K 5131 Storm Door Hinge Pin Kit (Andersen, Croft, EMCO & More) – $12.99
If the pin you remove in the steps below is bent or too rusted to reuse, this kit covers the most common storm door brands so you can replace just the pin instead of the whole hinge.
- Best for: A single bent or rusted-solid hinge pin
- Why we picked it: Fits the same major storm door brands this guide’s steps apply to
- Main drawback: Won’t help if the hinge plate itself is cracked, not just the pin
Compare more hinge repair parts
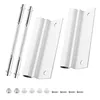 Option 1 Lower Hinge Leaf Replacement Kit – $15.99
|
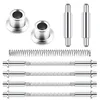 Option 2 4-Pack K 5131 Hinge Pin Kit – $9.99
|
 Option 3 3-IN-ONE Multi-Purpose Drip Oil – $7.49
|
As an Amazon Associate we earn from qualifying purchases.
How to Fix a Loose Storm Door Hinge
Loose hinges are one of the most common issues. A sagging door or one that doesn’t seal properly is often a sign that the screws holding the hinge to the door frame or the door itself have loosened. This is usually the easiest fix.
Step 1: Identify the Loose Screws
Open your storm door and carefully inspect each hinge. Look for screws that appear to be sticking out, are not flush with the hinge plate, or have stripped holes where they enter the wood or metal frame.
Step 2: Tighten the Screws
Using the appropriate screwdriver (usually a Phillips head), gently tighten any loose screws. Be careful not to overtighten, as this can strip the screw hole or even crack the wood. If a screw just keeps turning without tightening, the hole is stripped.
Step 3: Address Stripped Screw Holes
If you encounter a stripped screw hole, don’t despair. There are a few simple ways to fix this:
- Toothpick or Matchstick Method: Break off a few wooden toothpicks or matchsticks (without the sulfur tip) and insert them into the stripped hole. Then drive the screw back in. The wood fills the gap, giving the screw something to grip.
- Wood Filler or Epoxy: For a more permanent fix, use wood filler or a two-part epoxy. Fill the stripped hole, let it cure completely per the product’s instructions, then drill a new pilot hole and re-insert the screw.
- Longer or Thicker Screws: If the original screw hole is too damaged, use a slightly longer or thicker screw of the same type — long enough to reach fresh, undamaged wood in the door frame.
Tightening these screws should pull the door back into alignment and stop any sagging. Test the door’s movement to ensure it opens and closes smoothly.
How to Fix a Stiff or Squeaky Storm Door Hinge
A squeaky hinge is annoying, and a stiff one can be impossible to move. This is usually due to a lack of lubrication or rust buildup. Fortunately, this is also a simple fix.
Step 1: Clean the Hinge
Before lubricating, wipe any dirt or grime from the hinge with a dry rag. If there’s visible rust or flaking paint, use a wire brush to gently scrub it away — the same approach covered in our guide on how to remove paint off door hinges.
Step 2: Apply Penetrating Oil
For stubborn rust or stiffness, start with a penetrating oil like WD-40. Spray it generously around the hinge knuckles and pin. Let it sit for 5-10 minutes to work its way into the mechanism. You might need to reapply if the rust is severe.
Step 3: Work the Hinge
After the penetrating oil has had time to soak in, open and close the storm door several times. This helps distribute the oil and break free any rust or debris causing the stiffness.
Step 4: Apply Lubricating Oil
Once the hinge moves more freely, switch to a lighter lubricating oil (like 3-in-1 oil) for long-term smoothness. A penetrating oil like WD-40 is a solvent first and a lubricant second — it evaporates and washes away faster than a dedicated light oil, so it shouldn’t be your only long-term lubricant. Apply a few drops to the hinge pin and knuckles, then work the door back and forth to spread it evenly.
Step 5: Wipe Away Excess
Use a clean rag to wipe away any excess oil that drips down. This prevents it from attracting more dirt and grime.
How to Fix a Storm Door Hinge Pin That’s Stuck or Damaged
The hinge pin is the core component that allows the hinge knuckles to pivot. If it’s bent, rusted in place, or broken, it can cause significant problems.
Step 1: Remove the Hinge Pin
This can be the trickiest part if the pin is stuck. You’ll usually need to access the bottom of the hinge pin. Some storm door hinges have a small cap over the pin that needs to come off first. For most standard hinges, place the tip of a screwdriver or a nail set on the bottom of the pin and tap it upward with a hammer.
Important Safety Note: It’s a good idea to have someone help you support the door if you’re removing pins from multiple hinges, or if the door feels heavy. You can also use a block of wood under the door to take some of the weight off the hinges.
If the pin is rusted in place, spray it with penetrating oil and let it soak.
“Tapping gently and repeatedly is more effective than forceful blows — a stuck pin usually needs patience, not a bigger hammer.” That’s the same approach demonstrated in the hinge-repair video above: short, controlled taps work the pin loose without bending it further, which is the real risk of forcing a stuck pin in one hit.
Step 2: Inspect and Clean or Replace the Pin
Once the pin is out, inspect it for damage. If it’s bent, try to straighten it with pliers or a hammer on a hard surface. If it’s heavily rusted or broken, replace it — bring the old pin to the hardware store to match the size and type, or see our guide on installing a hinge pin door stopper if you want the door to hold open on its own. Clean the inside of the hinge knuckles with a rag (a wire brush for heavy rust), then apply a light coat of lubricating oil to the new or cleaned pin before reinserting it.
Step 3: Reinsert the Hinge Pin
Align the hinge knuckles and carefully slide the pin back down through them. You might need to tap it gently with a hammer to fully seat it. Ensure the pin is fully inserted and secure.
Step 4: Test the Door
Open and close the storm door several times to ensure the hinge is operating smoothly. If it’s still stiff, repeat the lubrication steps.
📊 Residential door hinges sold in the U.S. are manufactured to the ANSI/BHMA A156.1 hinge standard — which is why a generic replacement pin or hinge from any hardware store brand will match your storm door’s existing screw pattern and pin diameter in most cases. Source: ANSI/BHMA A156.1 (Butts and Hinges) industry standard. No stable live link was found for this specific standard during this session, so it is cited by name only rather than linked.
When to Replace an Entire Storm Door Hinge
While most hinge problems are repairable, sometimes a hinge is beyond simple fixes. You might need to replace the entire hinge if:
- The hinge knuckles are severely worn or damaged.
- The hinge plate is bent or cracked.
- The hinge has corroded to the point where it’s no longer structurally sound.
- You’ve tried all other repair methods, and the hinge still doesn’t function correctly.
Replacing an Entire Hinge: A Quick Overview
Replacing a storm door hinge is similar to fixing a loose hinge, but you’ll be swapping out the old unit for a new one.
- Support the Door: As with pin removal, ensure the door is supported.
- Remove Screws: Unscrew the old hinge from both the door and the frame.
- Position New Hinge: Place the new hinge in the exact same position as the old one.
- Secure with Screws: Screw the new hinge in place, ensuring it’s aligned correctly.
- Test: Open and close the door to check its operation.
Troubleshooting Common Storm Door Hinge Problems
Here’s a quick reference table for common issues and their solutions:
| Problem | Likely Cause | Solution |
|---|---|---|
| Door Sagging | Loose hinge screws | Tighten screws; repair stripped holes if necessary |
| Squeaking or Grinding Noise | Lack of lubrication, rust | Lubricate with penetrating oil, then light oil |
| Door is Stiff/Hard to Open | Rust, dirt buildup, lack of lubrication | Clean and lubricate hinge thoroughly |
| Hinge Pin Won’t Come Out | Rust, bent pin | Use penetrating oil, tap gently with hammer and screwdriver |
| Door Doesn’t Close Properly | Loose hinges, bent hinge, warped frame | Tighten screws, check/replace hinges, check frame |
Maintaining Your Storm Door Hinges
A little regular maintenance can go a long way in preventing future problems and extending the life of your storm door hinges. Here are some simple tips:
- Regular Cleaning: Wipe down the hinges periodically with a damp cloth to remove dirt and debris.
- Annual Lubrication: Once a year, apply a light coat of lubricating oil to the hinge pins. This is especially important in humid climates or areas prone to rust.
- Check for Loose Screws: Make it a habit to check your hinges for loose screws every few months.
- Inspect for Rust: If you notice any rust developing, address it immediately with penetrating oil and a wire brush before it becomes a major issue.
By following these simple maintenance steps, your storm door hinges can keep functioning smoothly for years, providing reliable protection and convenience.
Frequently Asked Questions (FAQ)
Q1: How often should I lubricate my storm door hinges?
It’s a good idea to lubricate your storm door hinges at least once a year. If you live in a humid or coastal area, or notice them starting to stiffen or squeak, lubricate every 6 months instead.
Q2: Can I use any type of oil to lubricate my storm door hinges?
For initial rust and stiffness, a penetrating oil like WD-40 works well. For ongoing lubrication, switch to a lighter oil like 3-in-1 oil or a silicone-based spray. Avoid heavy grease, since it attracts dirt and grime.
Q3: My storm door hinge is very rusty. What’s the best way to clean it?
Spray the rusty hinge liberally with penetrating oil and let it soak for at least 15-30 minutes, longer for severe rust. Then use a wire brush to gently scrub away the rust. Once clean, lubricate with a lighter oil. For very stubborn rust, remove the hinge pin entirely to clean it.
Q4: How do I know if I need to replace the whole hinge or just the pin?
If the hinge pin is bent, broken, or heavily rusted and won’t budge, replacing just the pin is usually enough. If the hinge itself — the metal plates or knuckles — is bent, cracked, or severely corroded, replace the entire hinge unit.
Q5: My storm door is sagging badly. What’s the first thing I should check?
The most common cause of a sagging storm door is loose hinge screws. Inspect and tighten every screw on each hinge first. If that doesn’t fix the sag, you likely have worn-out hinges or a problem with the door frame itself.
Q6: Is it safe to remove the hinge pin while the door is still on its frame?
Yes, it’s generally safe to remove a single hinge pin at a time, especially with another person supporting the door or a block of wood propped underneath. Removing all pins at once without support can cause the door to fall.
Q7: Is WD-40 safe to leave on a storm door hinge long-term?
WD-40 is a penetrating oil and light solvent, not a dedicated long-term lubricant — use it to break loose rust and dirt, then follow up with a lighter oil like 3-in-1 or a silicone spray for lasting lubrication. Relying on WD-40 alone means reapplying more often.
Conclusion
Fixing a storm door hinge doesn’t have to be a daunting task. Whether it’s tightening a few screws, lubricating a stiff joint, or replacing a worn-out pin, you now have the knowledge to tackle the job yourself. Prioritize safety, use the right tools, and perform regular maintenance to keep your storm door in top condition.
Sponsored / affiliate links. As an Amazon Associate I earn from qualifying purchases. I may earn additional commission from eligible campaigns.
 Triumph Hardware 2 Pack Hinge Pin Door Stopper,Adjustable Heavy Duty Door Stopper 2-3/8"x15/16”,Champagne Bronze,with White Rubber Bumper Tips
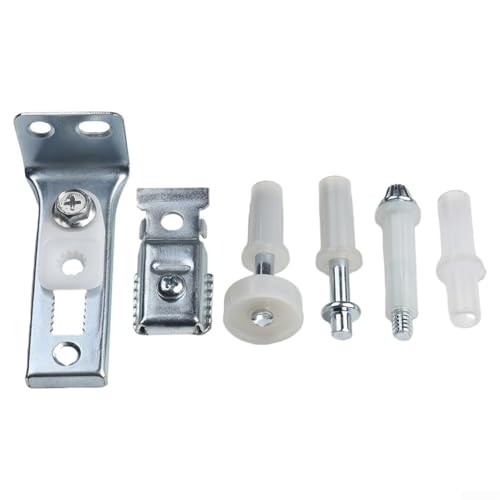 Bi-Fold Door Hardware Repair Kit, Fits 1" to 1-3/8" Thick Closet or Room Doors, Includes Top and Bottom Brackets, Pivots, Guide Wheel for Smooth Operation and Easy Installation