How to Seal a Door Threshold: A Step-by-Step Guide to a Draft-Free Home
Hey there! Have you ever felt a chilly draft sneaking in under your door or noticed water seeping through after a big rain? I sure have, and let me tell you, it’s annoying! When I first moved into my house, the front door threshold was letting in air, bugs, and even a bit of water. It drove me nuts until I learned how to seal it properly. Now, my home feels cozier, and my energy bills are lower. I’m thrilled to share everything I’ve learned about sealing a door threshold with you!
Whether you’re a DIY newbie or a seasoned fixer-upper, this guide has got you covered. I’ll walk you through practical, budget-friendly ways to seal your door threshold and keep your home comfortable. Let’s dive in and make your door airtight!
Why Sealing a Door Threshold Matters
Let’s start with why sealing your door threshold is such a big deal. I didn’t realize how much a small gap under my door was costing me until I felt the cold air rushing in during winter. Those gaps let in drafts, dust, bugs, and even water, which can damage your floors. In my case, I noticed my living room felt colder than the rest of the house, and my heating bill was higher than it should’ve been.
Sealing the threshold saves energy, keeps your home comfortable, and protects your floors from water damage. It’s also a quick fix that can make a big difference. I saved about $20 a month on my energy bill after sealing my front door, and it took less than an hour. Plus, it’s super satisfying to know you’ve made your home more efficient. Ready to get started? Let’s figure out what you’re working with.
Assessing Your Door Threshold
Before you grab any supplies, you need to check out your door threshold. I made the mistake of buying a seal without looking closely, and it didn’t fit right. Here’s what I do now to get it right:
- Inspect the gap: Close the door and look at the space between the door and the threshold. I used a flashlight to see how big the gap was—mine was about ¼ inch.
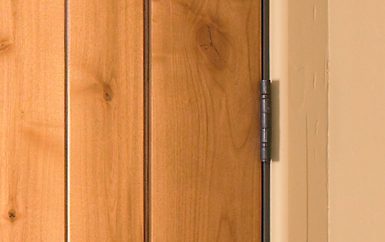
- Check the threshold type: Is it wood, metal, or vinyl? Mine was aluminum, which is common in newer homes. Some older homes have wooden thresholds that might need extra care.
- Look for damage: See if the threshold is worn, cracked, or loose. My threshold was in good shape, but I’ve seen some that needed replacing first.
- Test for drafts: Hold a lit candle near the threshold on a windy day. If the flame flickers, you’ve got a draft. I found a big draft near the corners of my door.
Knowing your threshold’s condition helps you choose the best sealing method. It’s like sizing up your opponent before a match—once you know what you’re dealing with, you can plan your attack!
Gathering the Right Tools and Materials
Having the right supplies makes this project a breeze. I learned to double-check my toolbox before heading to the hardware store. Here’s what I used to seal my door threshold:
- Weatherstripping or door sweep: I bought a rubber door sweep for $10, but adhesive weatherstripping works too. Choose one that fits your gap size.
- Caulk and caulk gun: Silicone caulk is great for exterior thresholds. I got a tube for $5.
- Screwdriver: A Phillips or flathead screwdriver is needed to secure some door sweeps. I already had one.
- Utility knife or scissors: These are for cutting weatherstripping to size. I used a $3 utility knife.
- Measuring tape: This ensures you cut the right length. My threshold was 36 inches wide.
- Cleaning supplies: Rubbing alcohol, a rag, and soap clean the threshold before sealing. I had these at home.
- Optional: Replacement threshold: If your threshold is damaged, a new one costs $20-$50.
Most of these are cheap or already in your home. My total cost was about $15 since I only needed a door sweep and caulk. Check your threshold’s width and gap size before buying.

Method 1: Installing a Door Sweep
This is my favorite method because it’s so easy and effective. A door sweep attaches to the bottom of the door and seals the gap when it closes. I used this on my front door, and it stopped drafts instantly. Here’s how I did it:
- Measure the door: Measure the width of your door. Mine was 36 inches, so I bought a sweep to match.
- Clean the door bottom: Wipe the bottom of the door with rubbing alcohol to remove dirt. I used a rag and let it dry for a minute.
- Cut the sweep: If the sweep is too long, trim it with a utility knife or scissors. I had to cut an inch off mine to fit perfectly.
- Attach the sweep: Some sweeps are adhesive; others screw on. I used a screw-on rubber sweep and secured it with a screwdriver. Line it up so it just touches the threshold when the door closes.
- Test the seal: Close the door and check for gaps. I slid a piece of paper under the door to make sure it was snug but not too tight.
This took me about 20 minutes, and the difference was amazing. No more cold air sneaking in, and it looked clean and professional.
Method 2: Applying Weatherstripping to the Threshold
If your threshold is in good shape but has small gaps, adhesive weatherstripping is a great fix. I used this on my back door, which had a tiny gap letting in dust. Here’s how it works:
- Choose the right weatherstripping: I picked a ¼-inch thick rubber strip for my ¼-inch gap. Foam strips work too, but wear out faster.
- Clean the threshold: Use soap and water, then rubbing alcohol, to clean the threshold. I made sure it was dry before starting.
- Measure and cut: Measure the length of the threshold and cut the weatherstripping to fit. My threshold was 34 inches, so I cut the strip to match.
- Apply the strip: Peel off the adhesive backing and press the strip onto the threshold. I started at one end and worked my way across to avoid bubbles.
- Check the fit: Close the door to ensure it seals without sticking. I had to trim a bit more to make it perfect.
This method is super quick—about 15 minutes—and costs less than $10. It’s great for small gaps and renters who want a removable fix.
Method 3: Using Caulk for Exterior Thresholds
For exterior doors exposed to rain, caulk is a lifesaver. I used this on my garage door threshold, which was letting in water during storms. Here’s how I did it:
- Clean the area: Scrub the threshold and door frame with soap and water, then dry it. I used a rag and rubbing alcohol for a spotless surface.
- Choose silicone caulk: Silicone is waterproof and flexible. I bought a clear tube for $5.
- Apply the caulk: Cut the caulk tube’s tip at a 45-degree angle and load it into a caulk gun. I ran a thin bead along the edges of the threshold where it meets the floor.
- Smooth the caulk: Dip your finger in soapy water and smooth the caulk for a neat look. I used a damp rag to clean up the excess.
- Let it dry: Wait 24 hours for the caulk to set. I kept the door open for a few hours to avoid sticking.
This method took about 30 minutes and stopped water from seeping in. It’s perfect for exterior doors but not ideal for renters since it’s permanent.
Method 4: Replacing a Damaged Threshold
If your threshold is cracked or worn out, replacing it might be the best option. I had to do this on an old side door that was letting in air and bugs. Here’s how I tackled it:
- Remove the old threshold: Unscrew or pry off the old threshold. Mine was held by screws, so I used a screwdriver to remove it.
- Clean the area: Sweep away debris and clean the floor with rubbing alcohol. I made sure it was smooth for the new threshold.
- Measure and cut: Measure the doorway width and cut a new threshold to fit. I bought a $25 aluminum threshold and used a hacksaw to trim it.
- Install the new threshold: Place it in the doorway and screw it down. I used the old screw holes for easy alignment.
- Seal the edges: Apply silicone caulk around the edges to prevent leaks. I smoothed it with a damp finger for a clean finish.
This took about an hour but gave me a brand-new, airtight threshold. It’s a bit more work but worth it for damaged thresholds.
Comparing Sealing Methods
To help you pick the best method, here’s a table based on my experiences:
| Method | Best For | Cost | Time Needed | Tools Needed | Difficulty |
|---|---|---|---|---|---|
| Door Sweep | Drafts, easy install | $8-$15 | 20 min | Screwdriver, utility knife | Easy |
| Weatherstripping | Small gaps, renters | $5-$10 | 15 min | Scissors, cleaning supplies | Easy |
| Caulk | Exterior doors, water leaks | $5-$10 | 30 min | Caulk gun, rag | Medium |
| Threshold Replacement | Damaged thresholds | $20-$50 | 1 hour | Screwdriver, hacksaw, caulk gun | Medium |
I love the door sweep for its simplicity, but caulk is my go-to for exterior doors. Choose based on your gap size and door type.
Testing and Troubleshooting
After sealing, you need to make sure it works. I had a few issues at first, but here’s how I test and fix them:
- Check for drafts: Hold a candle near the threshold. If the flame moves, you missed a spot. I found a small gap and added more weatherstripping.
- Test the door: Open and close the door to ensure it moves smoothly. My door sweep was too tight at first, so I adjusted it lower.
- Look for water leaks: If it’s an exterior door, spray it with a hose to mimic rain. I did this and found a spot that needed more caulk.
- Inspect over time: Check the seal after a few weeks. My caulk shrank slightly, so I added another thin layer.
Testing takes a few minutes but ensures your seal is solid. It’s worth the extra effort.
Maintaining Your Sealed Threshold
Keeping your seal in good shape is easy and saves you from future fixes. Here’s what I do:
- Clean regularly: Wipe the threshold with a damp rag to remove dirt. I do this monthly to keep it looking good.
- Check for wear: Inspect weatherstripping or sweeps every 6 months. I replaced a worn foam strip after a year.
- Reapply caulk as needed: Silicone caulk lasts for years, but I check it annually for cracks.
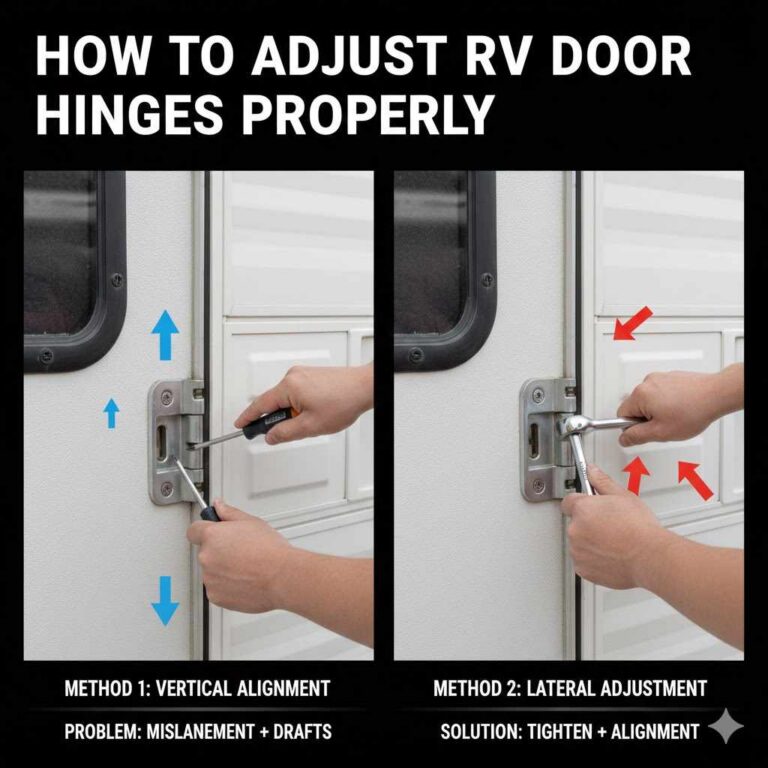
- Lubricate hinges: If the door sticks, a little WD-40 on the hinges helps. I did this when my door felt tight.
These steps keep your threshold sealed and your home comfy.

Adding Style to Your Threshold
Sealing doesn’t have to be boring! I added some flair to my thresholds to match my home:
- Paint the threshold: I painted my wooden threshold to match my floor for a seamless look.
- Choose a sleek sweep: I picked a brushed aluminum sweep for a modern vibe on my front door.
- Add a welcome mat: A mat outside the door hides the threshold and adds charm. I got a fun one for $10.
These touches make your door look polished while keeping it functional.
Why I Love This Project
Sealing a door threshold is one of those small projects with a big payoff. Every time I walk past my front door and feel no draft, I smile. It’s not just about saving money on energy bills—though that’s awesome—it’s about making my home feel like a cozy sanctuary. I’ve done this on multiple doors now, and each time, I’m amazed at how simple it is. Whether you’re stopping drafts or keeping out water, this is a project anyone can tackle with a little know-how.
Conclusion
There you have it—a complete guide to sealing your door threshold! I’ve poured my heart into this project, and I’m so excited to share these tips with you. From door sweeps to caulk, there’s a method for every door and skill level. You don’t need to be a pro—just grab a few supplies and take it step by step. Your home will feel warmer, your floors will stay dry, and you’ll love the satisfaction of a job well done. So, go check that threshold, pick your method, and make your home cozier today. Happy sealing!
Frequently Asked Questions
Can I seal any type of door threshold?
Yes, most thresholds can be sealed! Wood, metal, or vinyl thresholds work with sweeps, weatherstripping, or caulk. Just check the gap size and condition first.
How long does it take to seal a threshold?
It depends on the method. A door sweep takes about 20 minutes, weatherstripping 15 minutes, caulk 30 minutes, and replacing a threshold about an hour. I did my front door in under half an hour.
Will sealing my threshold save energy?
Absolutely! I noticed my heating bill dropped by about $20 a month after sealing my front door. It stops drafts and keeps your home efficient.
Is caulk safe for indoor thresholds?
Caulk is great for exterior thresholds, but can be used indoors too. I used silicone caulk on my garage door, but for indoor doors, I prefer sweeps for easier removal.
What if my door sticks after sealing?
If the door is hard to close, the sweep or weatherstripping might be too thick. I adjusted mine by trimming it slightly or lowering the sweep to fix the issue.